

I am here for the FOOD....judge me for my recipes if you will. But I had no idea that photography was going to be such a HUGE portion of it.
In my first couple of months of being a newbie food blogger I have become aware of the multiple facets to the FOOD BLOGGER:
- Some of us are here just for the fun.
- Some want to help inform, educate and/or share.
- Some take pictures, some don't.
- Some take step by step pictures, some show only a final product shot.
- Some bloggers shoot AWESOME pictures, some take dark, fuzzy pictures.
- Some food photogs ensure a 'blank' background to showcase their food, others include their 'counter stuff', house window or backyard as their background.
- Many bloggers take pictures to submit to food porn sites to increase traffic to their site and take their rejections personally.
- Some food bloggers have Kick Azz cameras (costing over $500), most bloggers have your average a tiny $200 camera.
- Some food bloggers don't care about their pix (love my pix or not, eh) and some would like to learn tips and tricks to improve their photography.
I am going to speak about the LAST point. Trying to improve your pictures. I have picked up tips and tricks from the blogs of food stylists and photogs who try to help us amateurs:
How to lighten the dark pix, how to edit the fuzzy, creating interest, making creative shots, etc. One of the 'tricks' I found was how to make your own light box. Made from a cardboard box, white tissue paper, desk lamps.....blah blah blah....I made one. Ok....it improved my pix a little light-wise. But when you store it on your dining table....it's hard to store it away and very delicate with tissue paper sides. This was a 'homemade' version to help those who couldn't afford to buy those professional photo light box, lights, reflective screens, etc. Then I found an alternative....
From a catalog I received among millions was Fresh Finds. I spied on a tabletop photo studio that has everything you need (not camera of course) and it folds up and packs away neatly. About 60 bucks, if you don't find that too pricey- to me, this price beat the professional photo prices BUT the convenience of it FOLDING won me over.
Here's what it looks like set up:

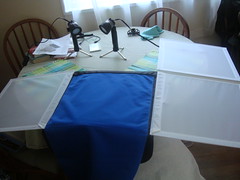
Here is my set up in the dining room, nice big window behind and lighting from above (only on if taking pix at night)
Comes with tripod, two lamps, blue or gray backgrounds, pockets for all the equipment.
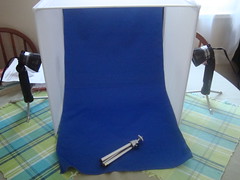
It has BLUE background but I think is white best, so I just put in some butcher paper (pictured above).
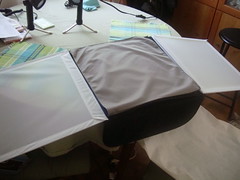
The other side of the blue background is a gray one if you so desire.
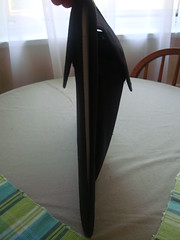
Here it is all unattached and open, ready to fold up....

The sides velcro together and a black cover folds over it like a wallet

Here are both lights. One open and standing, the other with the legs put away. You gather the legs together at the bottom and they PUSH up into the base of the light. See? Easy storage, so far.
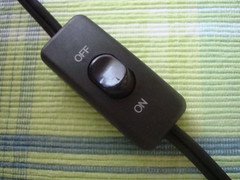
Nice professional switches. They are conveniently just below my table's edge when I need to turn them off/on.
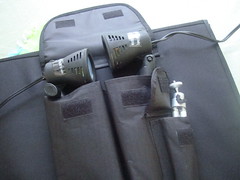
Three pockets for your tools. Nice and roomy for your folded cords (even though I don't have them tucked in at this moment).
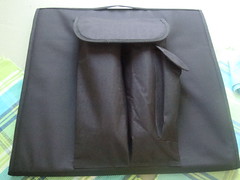
Ok, now all cords are folded away and the pocket tops are nicely velcro-ed on (in case for some reason you pick this upside down).
Here's how flat it is when you are all done packing it up. Not shown is the available handle on top, no biggie.
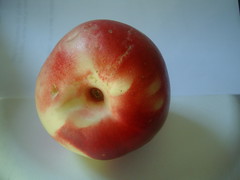
Here is my normal 'daylight picture in the kitchen. I open the back door for optimal light, object on a white plate plate and I am holding some white paper behind the object. The shadow is being created from my arm blocking so of the light from the left as I hold my camera with my right hand.
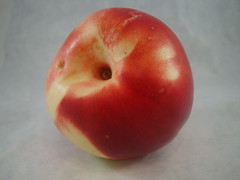
Here is the same object in the lightbox. The tripod is GREAT to have so you don't have to keep holding the camera while you move around your object. If you have one of the OLDER cameras that are large....it may be too heavy for the tripod. I have a little slim Sony cybershot, even when I tilt the camera on the tripod it tends to get a bit 'top heavy'.
Just so YOU know....I have gone from knowing virtually nothing about food photography and now am doing THIS to improve my pix. I am still very much an amateur for I haven't even scratched the surface using technical photo editing software (just the free tweaks I get from "Picnik" provided by Flickr).
So if you are an amateur like me and want to spend this bit of money for a cute and convenient light box to BUMP up your photo game....order it like I did. I am sure FG and TS will still not like my 'unflattering composition' but at least DARK won't be an issue anymore!
Lastly, if you are bummed over the constant rejections from your photos you have some very appreciative and LOVING food porn sites who won't turn you away:
FoodPhotoBlog
TasteStopping
Have fun!


4 comments:
I have been wondering how to build one of these! Thanks so much for sharing this! :0)
Ahhh yes..unflattering composition..I get that one ALL the time, but I dont take it personally. I am just happy when they actually accept one of my photos!
This is very cool! I've been toying with the idea of building a light box, but aside from laziness, I always feel like I won't have the room to store it when I'm not using it...so this is pretty cool! I may start saving :)
Thanks for the great tips and the mention! While I wish you much success in your photography, I will admit to being honored each time you submit a photo for TasteStopping to publish. Here's to making room for everyone! :D
Best,
Casey
www.tastestopping.wordpress.com
Post a Comment