Wednesday, March 31, 2010

No ordinary buns for this pork BBQ!!!

Pepper Jack Rolls Baby!

I've been a fan of the Artisan Bread in 5 minutes book and have made my own bread a few times. Yummy! I used the Vermont Cheddar Bread recipe (page 106) as my springboard idea.

Pepper Jack Rolls
adapted from Artisan Bread in Five Minutes a Day

3 cups lukewarm water
1 1/2 Tbsp. granulated yeast
1 1/2 Tbsp. salt
1 1/2 Tbsp. sugar
6 1/2 cups flour
1/2 cup white cheddar powdered cheese
1 cup grated pepper jack cheese
1 tsp. red pepper flakes
1 egg, beaten

1. Mix the yeast, salt and sugar with the water in a 5 quart bowl (I used my lidded non air tight food container that I store my dough in).

2. Mix in the dry ingredients, grated cheese, powdered cheese and pepper flakes without kneading, using a spoon. You can use a 14 cup food processor with a dough attachment but mixing this dough directly in the container was just fine.

3. Cover (not airtight) and allow to rest at room temperature until the dough rises and collapses (or flattens on top), approximately 2 hours.

4. The dough can be used immediately after the initial use, though it is easier to handle when cold. Refrigerate in lidded (not airtight) container and use over the next 7 days.

5. When baking rolls, dust the surface of the refrigerated dough with flour and cut off dough pieces roughly equal portions (about the size of a plum) Shape each one into a smooth ball. Allow them to rest and rise on a cornmeal-covered pizza peel for 40 minutes (or just 20 minutes if using fresh unrefrigerated dough).

6. Twenty minutes before baking time, preheat the oven to 450 degrees with a baking stone placed on the middle rack Place an empty broiler tray on any other shelf that won't interfere with the rising bread.

7. Just before baking, coat with beaten egg and stick a few jalapenos on top.

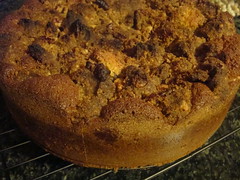
8. Slide the rolls directly onto hot stone. Pour 1 cup of hot tap water into the broiler tray and quickly close the oven door. Bake for 20-25 minutes, or until deeply browned and firm.


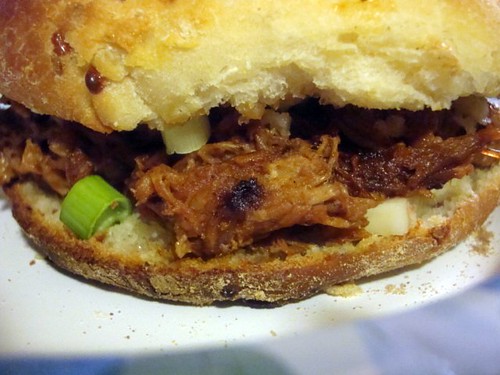
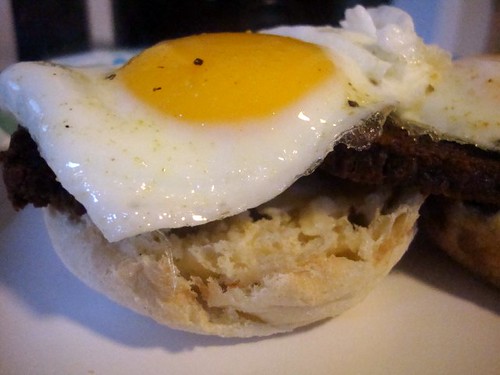
Here is one of the final rolls in relation to the place size. Ginormous! Honestly too much bread for me. I think I overestimated my size of plums. LOL. Although K-man was ecstatic about his man sized pork BBQ sandwich!


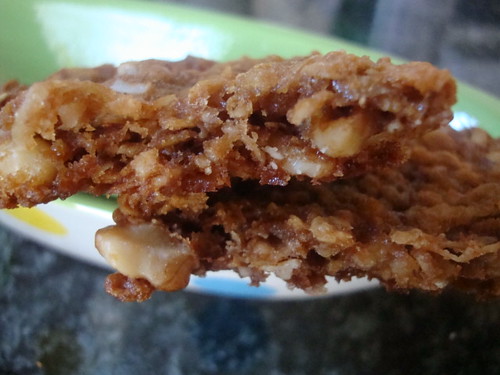
I could have probably put more pepper flakes in the dough as you can BARELY see the pepper. The bread wasn't a cheesy as I thought it would be. Although bread was fluffy and tender. The crust held up GREAT to the smooshy BBQ inside.


AWESOME!

But when you still have BBQ left and a bit of dough what do you do to restyle your dinner?
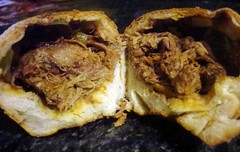
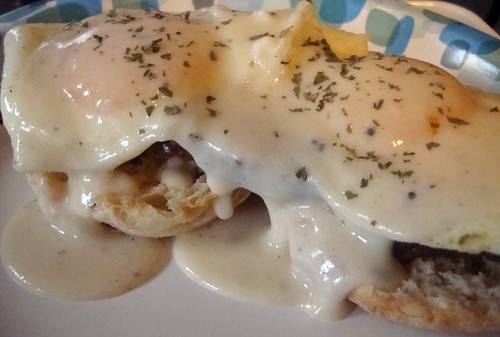
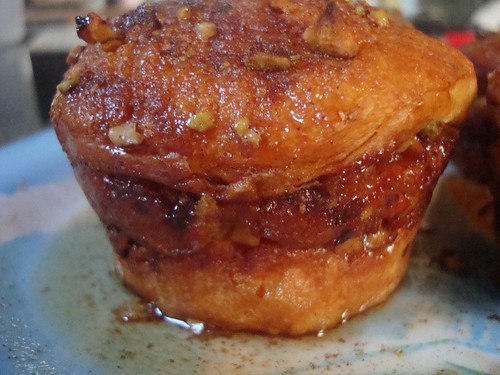
BBQ Pork Rolls!

The dough that remained after making 6 ginormous sandwich rolls was just enough to cut into 6 small circles. Using my greased TEXAS sized muffin tin....

Place a handful of green onions on the dough about 1/4 cup BBQ on the onions. Pull up dough around the filling and place in greased muffin tin dough edges down.

Throw a few slices of jalapenos around the dough in the muffin tins. Preheat oven to 450 degrees and put tin on the stove to let dough rise enough to fill up the muffin cups.

Bake for 20 minutes until brown. Serve with chilly coleslaw...sprinkle a bit of chili powder on top of it to compliment your BBQ rolls. Pickles, some extra BBQ sauce on the side for dipping and PERFECTION!

BTW, making your own Pork BBQ is very easy too!

Bake a Pork Butt according to package directions. Rubbed with favorite dry BBQ dry rub (mine was 6 lbs and it took about 4 hours). Stick a fork in the roast until when twisted is falling apart. Remove from pan and put on plate and let cool until able to tear apart with a fork. Add your favorite bottle of BBQ sauce to pork shreds. DELICIOUS!

Made enough for 4 HUGE sandwiches, 6 pork rolls and package of BBQ for two more average sandwiches for the freezer for a quick dinner another night!

Oink!

Tuesday, March 30, 2010

German Devil's Food Cake?

Or should it be Devil's Food German Cake?

Regardless, it was K-man's birthday and it was time to make some YUMMY chocolate cake. (BTW, I love having a workplace with 4 kitchens and TONS of space where I can make stuff during my planning time and then take it home after work.)


So made in usual JennyMac style, I could not follow any traditional recipe and had to tweak and create my own.

German Chocolate Cake has a lighter, gentler chocolate flavored cake with the trademark coconut and pecan frosting.

Devil's Food, dark, rich and moist cake with fudgy frosting.

Let's PUT the TWO together!!!!

Devil's Food German Chocolate Cake
an original by JennyMac

CAKE:
one box devils food cake
one package instant coconut pudding (you can substitute instant chocolate pudding if you like)
eggs, oil and water (as directed by the package)
1 cup chocolate chips

FILLING:
1/2 stick butter, melted
1/3 cup brown sugar
1/2 cup coconut, toasted
1/2 cup pecans, toasted and chopped
1/2 tsp. vanilla
1/4 cup milk

GANACHE FROSTING:
2 cups heavy cream
1/2 cup powdered sugar
1/8 tsp. salt
1 lb. bittersweet chocolate, roughly chopped

Preheat your oven to the temperature as directed on the box. Place cake mix in your bowl and add pudding mix. Add eggs, oil and water as directed on the box. Fold in chocolate chips. Pour mixture in two 8 inch greased and floured pans. Bake 35 minutes or until toothpick comes out clean. Cool on wire racks.

In a large saucepan, bring cream, sugar and salt to a boil. Remove from heat; add chocolate and let stand, without stirring for 1 minute. Whisk just until combined. Refrigerate, stirring occasionally, until spreadable, about 1 hour.

Combine all the ingredients from the filling list. Mix well.

Plate your bottom layer of cake on the desired serving plate, rounded top up. Be sure to use a knife or cake leveler to even out to the top of the cake. Put coconut filling on bottom layer. Level out top layer and turn upside down so that the bottom of the cake is the top surface. Frost the top and sides of the cake with the prepared chocolate ganache.

Top with any leftover toasted coconut if desired.

This was so moist with little fudgy bit of chocolate. The coconut pudding in the cake was not overpowering in the least. The coconut and pecan filling is a nice surprise when cut. The ganache frosting I could not keep my fingers out of to lick off. Scrumptious!!!

K-man loved this cake so much that he ate TWO pieces for dessert!

Enjoy!

Monday, March 29, 2010

It's that time of the year...

When my after school program Cookie Club comes to a close! Our big event at school is called Celebrate Gunston and this year it was scheduled earlier than it's usual late April date.

Normally we make the traditional fare of cookies like Chocolate Chip, brownies, snickerdoodles, etc. Since we had an international theme going on it seemed only appropriate to research the country origins of some of the cookies we bake or look up countries and learn what cookies are indigenous there. Do you know how difficult this was? We wanted to make EVERYTHING! 'Oh that looks good....mmm, that sounds like a good one.'

Here's our list of cookies and their origin, following by their pictures and recipes.

Nanaimo Bars (Canada)
Brownie Nut Biscotti (Italy)
Russian Tea Cakes, Mexican Wedding Cakes, Kourambiethes (Greece) (nutty, butter cookie coated with powdered sugar)
Scottish Oat Cakes (did you guess Scotland?)
Rosettes (Scandinavian regions)


Nanaimo Bars
from allrecipes.com

CRUST:
1/2 cup butter, softened
1/4 cup white sugar
5 tablespoons unsweetened cocoa powder
1 egg, beaten
1 3/4 cups graham cracker crumbs
1 cup flaked coconut
1/2 cup finely chopped almonds (optional)
FILLING:
1/2 cup butter, softened
3 tablespoons heavy cream
2 tablespoons custard powder
2 cups confectioners' sugar

TOPPING:
4 (1 ounce) squares semisweet baking chocolate
2 teaspoons butter
  1. In the top of a double boiler, combine 1/2 cup butter, white sugar and cocoa powder. Stir occasionally until melted and smooth. Beat in the egg, stirring until thick, 2 to 3 minutes. Remove from heat and mix in the graham cracker crumbs, coconut and almonds (if you like). Press into the bottom of an ungreased 8x8 inch pan.
  2. For the middle layer, cream together 1/2 cup butter, heavy cream and custard powder until light and fluffy. Mix in the confectioners' sugar until smooth. Spread over the bottom layer in the pan. Chill to set.
  3. While the second layer is chilling, melt the semisweet chocolate and 2 teaspoons butter together in the microwave or over low heat. Spread over the chilled bars. Let the chocolate set before cutting into squares.
Cook's Notes:
Extremely rich, cut into small bars for sure. K-man's favorite of the bunch. We opted to drizzle the chocolate on top after we cut them. I know that chocolate has a tendency to 'crack' when on top of a bar cookie. We like the results this way.


Brownie Nut Biscotti
from allrecipes.com
1/3 cup butter, softened
2/3 cup white sugar
2 eggs
1 teaspoon vanilla extract
1 3/4 cups all-purpose flour
1/3 cup unsweetened cocoa powder
2 teaspoons baking powder
1/2 cup miniature semisweet chocolate chips
1/4 cup chopped walnuts
1 egg yolk, beaten
1 tablespoon water
  1. Preheat oven to 375 degrees F (190 degrees C). Grease baking sheets, or line with parchment paper.
  2. In a large bowl, cream together the butter and sugar until smooth. Beat in the eggs one at a time, then stir in the vanilla. Combine the flour, cocoa and baking powder; stir into the creamed mixture until well blended. Dough will be stiff, so mix in the last bit by hand. Mix in the chocolate chips and walnuts.
  3. Divide dough into two equal parts. Shape into 9x2x1 inch loaves. Place onto baking sheet 4 inches apart. Brush with mixture of water and yolk.
  4. Bake for 20 to 25 minutes in the preheated oven, or until firm. Cool on baking sheet for 30 minutes.
  5. Using a serrated knife, slice the loaves diagonally into 1 inch slices. Return the slices to the baking sheet, placing them on their sides. Bake for 10 to 15 minutes on each side, or until dry. Cool completely and store in an airtight container.
Cook's Notes:
Using a white chocolate drizzle would have been a better 'eye-popper' but we were using up what we had. Good flavor, very chocolatey.


Russian Tea Cakes, Mexican Wedding Cakes and Kourambiethes (Greece)
-the same cookie but from different countries -allrecipes.com

1 cup butter
1 teaspoon vanilla extract
6 tablespoons confectioners' sugar
2 cups all-purpose flour
1 cup chopped walnuts
1/3 cup confectioners' sugar for decoration
  1. Preheat oven to 350 degrees F (175 degrees C).
  2. In a medium bowl, cream butter and vanilla until smooth. Combine the 6 tablespoons confectioners' sugar and flour; stir into the butter mixture until just blended. Mix in the chopped walnuts. Roll dough into 1 inch balls, and place them 2 inches apart on an ungreased cookie sheet.
  3. Bake for 12 minutes in the preheated oven. When cool, roll in remaining confectioners' sugar. I also like to roll mine in the sugar a second time.
Cook's Notes:
I have seen these using pecans, walnuts and almonds. Just pick whichever nut appeals to you. I prefer them with almonds. Be sure to always TOAST your nuts before putting them in your recipe.

Scottish Oat Cakes
from Cooks.com

1 1/2 c. flour
1 1/2 c. rolled oats
1 c. sugar
1 tsp.
1/2 tsp.
1 c. Crisco
1/4 c. cold water

Mix dry ingredients by hand. Mix in Crisco until well mixed. Add cold water to form sticky dough. Roll out fairly thin on well floured board. Cut into 1 1/2 inch squares. (I use a pizza cutter). Bake on ungreased cookie sheet, 2 inches apart, for 15-18 minutes at 350 degrees. Remove to rack immediately.


Cook's Notes:
I really was pleasantly surprised by these. Simple easy...low in sugar. Not complicated with several different flavors competing with each other (like the Nanaimo bars) K-man said you should NOT eat these after eating a Nanaimo bar. Those were so rich and sweet that these were almost tasteless in comparison. I guess I just enjoy a simple, hearty, grainy, less sweet cookie every so often. So these were my favorite.

Rosettes
recipe from Allrecipes.com

2 eggs
1 tablespoon white sugar
1 cup sifted all-purpose flour
1 cup milk
1 teaspoon vanilla extract
1/4 teaspoon salt

  1. Combine eggs, sugar and salt; beat well. Add remaining ingredients and beat until smooth.
  2. Heat a rosette iron in deep, hot oil (375 degrees) for 2 minutes.
  3. Drain excess oil from iron. Dip in batter to 1/4 inch from the top of the iron, then dip iron immediately into hot oil (375 degrees).
  4. Fry rosette until golden, about 30 seconds. Lift out; tip upside down to drain. With fork, push rosette off iron onto a rack placed over paper towels.
  5. Reheat iron 1 minute; make next rosette.
  6. Sprinkle rosettes with confectioners' sugar.
    Norpro Rosette Timbale Maker


Cook's Notes:
Shown above are the IRONS you need to make these. Not too expensive to have in your cooking tools for a fun treat for the kids every so often. BUT.....These were the overall winner of our customers. Despite our signs in front of the cookie trays (with descriptions!!) the customers would come to the table and ask for 'funnel cakes'. LOL Everything was pre-made except for the rosettes, which I was making at the table. They smelled exactly like funnel cakes (oh please....just a hot oil smell) and they resembled funnel cakes except for they were smaller and not at ALL cakey. Very light, airy, crispy and guaranteed to leave you with a dusting of powdered sugar on your chest! Great way to make money for nobody had a problem paying 3 for 1.00 (if they only knew that this stuff was PENNIES to make!)

Next year, I think we are nixing the making so many different cookies. FUNNEL CAKES are the way to go. Put on your calendar: Funnel Cake Sale, spring 2011- 1 small for a 1.00 - 1 large for 5.00....place your order now!


That's the way the cookies did not crumble....

Thursday, March 18, 2010

Meat and Veggies Rolled into one....

Literally! Here you have spinach and ground turkey all in rolled into a moist meatball!


I made this recipe a few years ago when I first got Rachael Ray's 365: No Repeats. On a side note, how does this woman churn out so many cookbooks, be on her own talk show, travel for shows for the Food Network and still have a life with her husband? I swear she has a clone...or maybe time machine....


Anyway, back to the recipe. I really liked these meatballs and have made them many times. The original recipe is made with a Alfredo-like sauce but I wanted them a little on the lighter side. If you are a big fan of meatballs, she has many meatball recipes in this book: Chipotle Chicken Rolls, Turkey and Sage Rolls, Lamb and Feta Rolls Wingless Buffalo Chicken Rolls, Mexican Meatballs and the one I will highlight today are the Florentine Meatballs.

Florentine Meatballs
adapted from Rachael Ray's 365: No repeats

10 oz box frozen spinach, thawed, squeezed dry
1.3 lb ground turkey
3 Tbsp. onion, finely chopped
1 garlic clove, minced
1 large egg
1/4 cup milk
3 handfuls of crushed potato chips (I used Baked Lay's Barbecue)
1/4 cup grated Parmesan
1 tsp. kosher salt
1 tsp. freshly ground pepper
Olive oil for drizzling

Preheat oven to 400 degrees. Place meatballs on cookie sheet, drizzle with olive oil and bake for 20 minutes. Makes 24 golf ball-sized meatballs

Cook your favorite noodle....prepare your favorite sauce and serve how you see fit.

Here is a simple presentation of the meatballs with noodles and sauce.


Here is a casserole style way to make your meatballs. Sauce mixed with meatballs. Bake for 20 minutes until hot. Cover with shredded cheese. Garnish with French's onions.

Very moist and flavorful meatball!


These could also be made smaller and served as appetizers too!

Enjoy!

Wednesday, March 17, 2010

It's crummy, I know....

It all started when I was watching Cake Boss. He showed how he made (roughly-no recipe is provided by TLC) his crumb cake. A special order was sold by accident and he had to 'whip' one up. How he made those crumbs on his cake HUGE.....they looked so good....so I've stalking the internet for crumb cake recipes. Buddy from Cake Boss said his dad got his 'secret crumb cake' when he first bought the bakery. How lucky is that....no only buying a bakery space but getting their recipes too? Apparently New York Crumb Cake is famous...here is my first attempt with a crumb cake. I found on Vanilla Sugar. She made it with Raspberry with lemon crumbles. I made it with Blackberries and I did not like the lemon crumbles. I don't know why....but I normally LOVE lemon.

I made it again with Blueberries with no lemon....much better.

Berry Buttermilk Crumb Cake
adapted from vanilla sugar

cake:
2 cups all purpose flour
1 ts baking powder
1 ts baking soda
½ tsp salt
1 stick unsalted butter, softened
1- ¼ cup granulated sugar
2 Tbsp. orange or lemon zest
1 large egg & 1 egg yolk
1 cup buttermilk
1 cup fresh raspberries, blueberries, strawberries or blackberries

crumb topping:

1 cup all purpose flour
1 cup packed light brown sugar
½ tsp. salt
1 stick unsalted butter, melted & cooled

Preheat oven to 350°F
Make crumb topping by melting the butter, letting it cool. In a bowl mix the flour, brown sugar, salt and add the cooled butter to it and stir well. Set aside till ready. Butter and flour a 10" round springform pan.

In small bowl, sift together the flour, baking powder, baking soda, and salt. Set aside.
Cream (with mixer or by hand) the butter, sugar until pale yellow and fluffy; add the zest, eggs, and beat well for an additional 2-3 minutes.
In batches, add the flour, alternating with the buttermilk until all is combined.

Pour 1/2 the batter into the baking pan and use a spatula to smooth. Top batter with 1/2 the berries. Top with remaining batter and rest of berries. Push the berries only half way into batter.

Using your hands, grab and squeeze crumb mixture putting large chunks on top of batter. Make smaller clumps of crumb mixture and filling between the large clumps. Sprinkle the remaining crumb mixture evenly into between the large and medium 'crumbs'.

Bake for approximately 30 - 35 minutes, or until a cake tester inserted into the middle comes out clean and the top is golden brown. (I suggest using foil to cover your crumb cake to keep it from over browning like my first attempt did.)


Remove from oven and let cool in pan for 10-15 minutes, before releasing the sides of the spring form and sliding off bottom to transfer to a cooling rack (with the berry/sugar side up).
Let cool completely before serving.


These crumbs were great. I've had some crummy crumb cake where the crumb topping just melted all over the top. These crumbs were big and they kept their shape.


I have another crumb cake recipe that I found and I will do a compare and contrast soon. Perhaps no berries, just plain this time.

Got milk?

Tuesday, March 16, 2010

Somethin' from the North gone South


Hmmm....kinda looks like Eggs Benedict.....I see some sauce....not Hollandaise....and I see the egg.....but what is under it?


It's SCRAPPLE baby!....Crunchy outside....soft smooshy inside....topped with egg and black pepper gravy! YEEHAW!

I grew up eating scrapple, thank god I never knew what was in it....perhaps I would not be eating it today. But now that I know.....I just think about flowers and fuzzy kittens when I am buying my scrapple. See how easy that is?

Eggs Benedict Southern Style
Lipsmack Creation for two

Rapa Brand Scrapple, cut into slices, cooked until crispy
2 english muffins, split, toasted and buttered
4 eggs, sunny side up
2 Tbsp. butter
2 Tbsp. flour
1/2 cup milk or cream
salt to taste
LOTS of freshly ground pepper

Slice scrapple about 1/4 inch and fry in pan lightly coated with vegetable oil. Once slices start to cook they get VERY soft....so wait patiently for the side to crisp up before you turn them over.

In a small sauce pan, make white sauce. Melt butter, add flour, cook for a minute until smells 'nutty'....add milk or cream. Whisk smooth. Add salt to taste. Grind fresh pepper in sauce until very speckled. Keep warm.

Cook 4 eggs sunny side up and toast the english muffins.

Put buttered muffins on plate

Lay three scrapple slices over the two muffins.


Top with two sunny side up eggs (centers soft and/or runny)


Pour on pepper gravy. Garnish with more pepper or parsley.


South in your Mouth!

Monday, March 15, 2010

Baklava for Breakfast?


SURE! Why not?

Breakfast Baklava Muffins
adapted by Simply Delicious Recipe Swap on FaceBook

SYRUP:
1/4 cup granulated Sugar
1/2 cup honey
1/3 cup water
1 tsp. lemon juice
1/8 teaspoon ground cinnamon
Dash salt
3 whole cloves

NUT FILLING:
1/2 cup pistachios, chopped
1/4 cup walnut, chopped
1 tablespoon granulated Sugar
1/2 teaspoon ground cinnamon
Dash salt, if desired


BISCUITS:
1 can (16.3 oz) Pillsbury Grands! Flaky Layers Butter Tastin' refrigerated biscuits (8 biscuits)


Directions:

Heat oven to 350°F. Generously spray 8 (2 3/4 x 1 1/4-inch) nonstick muffin cups with Cooking Spray.

In 1-quart saucepan, mix syrup ingredients; heat to boiling. Remove from heat; cool 10 minutes. Discard whole cloves.

Meanwhile, in food processor bowl with metal blade, place filling ingredients. Cover; process with on-and-off pulses until finely chopped. Set aside.

Separate dough into 8 biscuits. Separate each biscuit into 3 layers. Place 1 biscuit layer in bottom of 1 muffin cup. Brush dough with syrup; top with 1 1/2 teaspoons nut filling and drizzle with 1 1/2 teaspoons syrup. Place second biscuit layer on top; press edge of second biscuit into side of bottom biscuit. Brush with syrup; top with 1 1/2 teaspoons nut filling and drizzle with 1 1/2 teaspoons syrup. Top with third biscuit layer. Brush with syrup; sprinkle with 1 teaspoon nut filling. Repeat with remaining biscuits. Reserve remaining syrup (about 1/2 cup).

Bake 18 to 22 minutes or until deep golden brown. Cool 1 minute. Remove from pan. Serve warm with remaining syrup.

This was so nice to NOT have to wrangle with phyllo dough!!!... Make these for breakfast or for dessert. I preferred these hot to warm....cold, the biscuits were too firm. Foods that are warm always have better flavor!

Give these a try...they are fun to make and delicious. I don't think you will be disappointed.

Yassou!

Sunday, March 14, 2010

KCCC

Krispie Chocolate Chip Cookies and Krispy Peanut Butter Cup Cookies
found on Thespicedlife.com and adapted from Lauren Chattman, Mom's Big Book of Cookies

1 -1/4 cups all purpose flour
1/2 tsp. baking soda
1/2 tsp. salt
1 stick melted butter, cooled slightly
1/2 cup firmly packed light brown sugar
1/2 cup granulated sugar
1 large egg
1 tsp. vanilla
3/4 cup chocolate chips (semisweet)
1/2 cup mini peanut butter cups (from Trader Joe's)
1/4 cup peanut butter chips
2 cups Rice Krispies cereal

Preheat the oven to 350 F. Line 2 baking sheets with parchment paper or silicone baking mats. Set aside.

Whisk together the flour, baking soda and salt in a medium size mixing bowl. Set aside.

Cream the cooled butter and sugars together (by hand or with a mixer). Add the egg and vanilla and beat until smooth. Stir in the flour mixture until the flour is mostly incorporated.

This is where I split the dough, half Chocolate Chip Cookies and Peanut Butter Cup Cookies....

In one additional bowl put half of the prepared cookie dough. Add one cup of Krispies to each bowl. Add the chocolate chips to one and the peanut butter chips and mini peanut butter cups with the other dough.

Switching to stirring by hand, stir and fold until the Krispies and chips until they are evenly distributed, taking care not to break the rice puffs.

Cover the dough with plastic wrap and place in the fridge for anywhere from 10 minutes to 6 hours (overnight is fine too).

Drop the dough by ice cream scoop on baking sheets, leaving about 3 inches between cookies. ( I put a row of 2, then 1 then a row of 2, then 1 and lastly another row of 2- or 8 per sheet)

Bake the cookies until they are golden around the edges but still soft and slightly under-done in the middle, 10-12 minutes . Let the cookies cool an additional 5 minutes on the sheets, then transfer them to a cooling rack. If you bake both sheets at once be sure to rotate them top to bottom and front to back halfway through.

Approx. 24 cookies

Peanut Butter Cups on Left + Large Ghiradeli Chips on the right = YUMMMMM!!

Crispy and Chewy,

Saturday, March 13, 2010

It's been over 6 months now....

The Homemade Vanilla Extract! She is ready!

Well..... she's been ready since last month, I've just been neglecting to take her picture.

I've seen many a post on making your own vanilla extract. It makes sense to do so:

1. It's insanely easy.
2. We bloggers use buckets of vanilla extract.
3. It's SOOOOOOOO incredibly cheap.

When I took the time to do the math, I added the cost of good vodka and the vanilla beans. Then I calculated the number of little vanilla extract bottles (4 oz?) that would be equivalent to one liter (approximately) Divide the total number of the little extract bottles into your total cost....Your cost of homemade vanilla versus store bottle. My results?

Store Bottle = between $14-15 per bottle
Homemade = $1.25 per bottle

Are you STUNNED? I was. I started my bottle during the summer now it's perfect.

How's how easy it is.....You don't even need to print the recipe out...or write it down.

HOMEMADE VANILLA EXTRACT


Buy a package of 10 vanilla beans.

I got mine from Amazon.com

For my first try I used Madagascar. After reading around, it is suggested to use a mix of Madagascar, Mexican and Tahitian for more complex flavor....will do on next bottle.

These were wonderfully soft and fresh!


Purchase some vodka. I did some reading around and the consensus was to NOT buy the cheap rot gut on sale. Get the good stuff. Absolut was my compromise for trying this experiment. Next time I will use the Grey Goose.

You may need to pour out a bit of vodka to fit all your beans in....make yourself a cocktail while you prepare this....


Run a knife down each vanilla bean and insert it into the bottle. YES, ALL 10!!!!


Date the top of your bottle and store in dark cabinet. Shake every two weeks or so. Should be ready in about 6 months!


Don't laugh. I store my whole absolute/vanilla bottle in the cabinet with all my other spices, extracts and baking ingredients. LOL. I am proud of my wonderful stuff.


Tips For Making Homemade Vanilla
found on Tipnut.com

• Stronger Extract: Use a high proof of alcohol and scrape the seeds from the bean.
• Weaker Extract: Use a lesser proof of alcohol and soak beans intact.
• To strain and bottle for storage: Use a very fine strainer, coffee filter, or paper towel to strain.
• Vodka usually gives the highest alcohol content. Brandy adds additional flavor which some folks may or may not prefer.
• Corn syrup or sugar helps extract and develop the flavor from the vanilla pods (corn syrup dissolves more easily).
• Using a variety of vanilla pods (Madagascar, Indonesia, Tahitian, Mexican) will produce a vanilla extract with a much more complex flavor and aroma. Try using Madagascar pods as a base, adding Tahitian and Mexican pods for additional flavor/fragrance notes.
• Shake vanilla bottle before each use. Small flecks of the vanilla pods will be in the vanilla extract – they provide additional flavor. They also appear as dark flecks in light-colored food, don’t shake the bottle if you don’t want the flecks to appear.
• Occasionally spoon out some of the mass of vanilla pods that settle to the bottom of the jar for when you want a very intense vanilla flavor (such as homemade vanilla ice cream or butter/vanilla pretzel cookies).
• Have a brew bottle always on the go and every summer make sure it’s topped up so you’ll have enough vanilla extract on hand for holiday baking.

Storing Vanilla
• Keep vanilla extract in a cool, dark place, with the bottle tightly closed, to prevent evaporation and loss of flavor. Vanilla extract has an indefinite shelf life.
Starter brew bottles make great gifts for friends who bake. Include the basic instructions and a few extra vanilla pods in case they want to make an even stronger extract or wish to make some vanilla sugar on the side.

Tune in tomorrow for what I made with some of my homemade vanilla extract!

Enjoy,

Saturday, March 6, 2010

What? No egg?


Habits are funny. Do you do this? You are making cookies....set out the butter to soften, take out the eggs to come to room temperature and all the other ingredients on the counter to make in about 2 hours or so.....SCREECH!!!!....What? Where are the eggs in the recipe here? Is this an error? I know recipes online aren't perfect (I just got wind of Rob's Radical CCC HUGE sugar error a few days ago). I had to stop everything and read over the recipe to see what exactly was the deal. When I saw the sugar, syrup, corn syrup; I knew we were in for a chewy cookie....

It was odd to me ALSO that the sugar and butter were not creamed into together first as a common cookie recipe does. This was going to be a different cookie...very skeptical I was...

Maple Walnut Oatmeal Cookie
from Martha Stewart.com

1 1/2 cups old-fashioned oatmeal
3/4 cup unsweetened shredded desiccated coconut
1 1/3 cups all-purpose flour
1/2 teaspoon table salt
1 cup packed light-brown sugar (I used dark brown)
1/4 pound (1 stick) plus 1 tablespoon unsalted butter
3 tablespoons pure maple syrup
2 tablespoons golden syrup (regular Karo worked just fine)
1 teaspoon baking soda
2 tablespoons boiling water
1 teaspoon pure maple extract
2 3/4 ounces (1 cup) walnuts, toasted and coarsely chopped
  1. Preheat oven to 300 degrees. Have ready 2 baking sheets lined with parchment. In a medium bowl, whisk the oatmeal, coconut, flour, salt, and sugar. Set aside.
  2. In a small saucepan over medium heat, combine the butter, maple syrup, and golden syrup. Heat until the butter is melted. Remove from heat, and set aside. In a small bowl, combine the baking soda with the boiling water. Immediately stir this mixture into the melted butter until combined. Add the maple extract; stir into the oat mixture. Fold in walnuts.
  3. Form balls, using 3 tablespoons of dough, and place about 3 inches apart on prepared cookie sheets, 6 to a sheet. Flatten each of the balls slightly.
  4. Bake until golden brown and set, about 20 minutes, rotating halfway through. Transfer to wire rack to cool. Store in an airtight container up to 1 week.
WOW! These cookies were awesome. Crispy at the edges, chewy everywhere else, not overly coconutty. The maple and walnut totally compliment each other. DELICIOUS! The recipe says it makes 12 but I got 16 and they were pretty large cookies. Please try these cookies they won't disappoint! K-man said these were like a really good granola bar.

Enjoy!