Showing posts with label gadgets. Show all posts

Monday, March 17, 2014

New Toy

I have a new toy and a confession....

My name is Jenny Saunders and I am addict.  

I am addicted to utensils, gadgets, gizmos and other fun unique appliances. Other than your usual electric mixer, blender and food processor....I own immersion blender, 2 crock pots, mini chopper, 2 waffle makers, George Forman 5 in 1, toaster oven, air popper, Chop Wizard, 12 pc. Genius Nicer Dicer, tortilla maker, Jack LeLann's Juiceman, Cotton Candy Maker, Sno-cone maker, S'more maker (so many more I can't remember what is in the drawer) and my latest acquisition....


Hamilton Beach Breakfast Sandwich Maker.  Found it on Amazon.com for only 16.99.  Don't know why they are $19-$33 now.  It came in a plain brown box not like the ones you see all pretty with their product on the outside.  Perhaps that is why.  It was sent in this box from HB for Amazon.  I guess the pretty pictured box cost $4-$16 depending on who you get it from.  I do make a lot of breakfast sandwiches for K-man.  Since I have received it last week I have made 5 sandwiches.  4 for K-man, one for me.  It's very petite and I really like it!!!


When you heat up the maker, you get out your needed items, english muffin, meat/sausage/bacon, cheese slice, egg/egg beaters, toothpick and non-stick spray.

When the green light come on you spray the surfaces with Pam.
1.  Place the bottom muffin on the lower area and on top of the muffin your meat of choice and cheese. 
2.  Lower the upper section and place your whole egg (pierce the egg yolk with toothpick), scrambled egg or egg beater product. Season as you like, top with remaining muffin and close maker. 
3.  In 4-5 minutes it's done.  Slide the hinged middle plate out to the for the egg to drop below to the bottom layer.
4.  Lift bottom ring to reveal your stacked Breakfast sandwich, remove with a non-metal turner.

The above pictured is our "snow day breakfast" of bacon with provolone and whole egg.  Last weekend, since I am doing Nutri System currently I made for lunch with Arnold Sandwich Thins (100 cal), Morningstar Farms Sausage (64 cal), slice FF cheese (31 cal), 1/4c egg beaters (30 cal) and Mrs. Dash.  Not too bad for 225 cal when most NS products are 250 cal.  You do have to trim away some of the bread since these "thins" are wider to get it to fit.  It was pretty good for a lower fat/calorie sandwich. 
You can also make these with deli meats and the cooked egg for a sandwich for lunch.
This little product does help in some areas when it comes to dishes.  No toaster or oven, no bowl or whisk (using the egg product), we always have cooked bacon that I bake on weekends to use during the week for K-man (you can use the pre-cooked bacon from the grocery or deli meat).  The rings totally lift out for easy cleaning, wipe off the cooking surfaces on the maker and ZING....all done.  My new addition to the family will fit nicely in my cabinet between the air popper and blender. 

HEY! Be proud that I did not purchase the breakfast sandwich maker cookbook that Amazon suggested I buy with this maker.  That is another addiction that I am trying to wean off of.....

This was not an assignment from any program or website, no company sent me this for free to endorse.  It was just me, JennyMac who found something new and fun and wanted to share it with you!

PLEASE! Feel free to comment and tell me the gadgets and gizmos you have like this or JUST ask me what other products I didn't list that I have or kicked to the curb.....I have no shame....


Sammich Anyone?

Friday, December 4, 2009

Don't hate me if you can't find these...

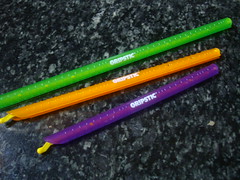
You are rolling through the grocery aisles and your eye catches on something. You walk to it, pick it up, look it over, say "COOL!" and you throw it in your cart. Then many months later, your friends see it and they want to know where you go it and you tell them what store and they say they can't find it.

JennyMac: "Oh, it was just hanging off one of those hooks in one of the aisles."
Friend: Well, which aisle was it?
JennyMac: Sheesh, I don't remember....maybe the snack, chip aisle?
Friend: But I was in THAT aisle, I didn't see it.
JennyMac: Maybe, they sold out of them.
Friend: (frowning) Sigh.
JennyMac: Here have one of mine (handing the orange one over since I like the purple and green one better).
Friend: (beaming) YAYYYYYYY!!!!!!


Well, if you can't find these at your stores....Amazon has them.

Take your bag in question....snacks, chips, lettuce mix, frozen veggies, broken ziploc-ed bag and SLIDE IT ON BABY!


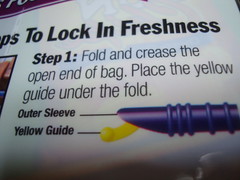
Here's the first step on the package, it's really all you need....the other steps...BAH


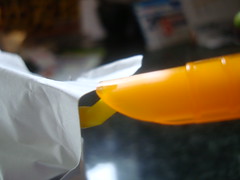
Fold the opened end, put the guiding 'thingy' under the crease and ZING!


Nice tight seal. Give your clips a rest. These are cool. Love the tutti frutti colors too!


I use so many 'food closure' gadgets. Just when I think I have a million....there are some days I am rummaging through my drawer...."what? I only have two clips here?" A few weeks later I can't close the drawer cuz a clip got in the way. *Shaking head*

Clip it-clip it good!

Friday, July 10, 2009

Let's Talk About....

ACCESSORIES!

If you remember one of my posts around my birthday; I received a Kitchen Aid Mixer from K-man. YAY! I am so glad to finally have one of my own (I have 4 in my classroom).

Speaking of having KA mixers at school, when they were purchased, my supervisor suggested getting one set of some of the attachment sets. Hey, I wasn't having to foot the bill....."sure!" I said.

We selected: the first attachment set, it had a food grinder (haven't used yet) and a food slicer/shredder (I do not suggest this, food processor is so much quicker), a pasta roller/cutter attachment set and the pasta maker plates set (you need food grinder to use this!)

So I bought the pasta sets home for the summer to do some experimenting. It took awhile for me to get up the energy, because I've made homemade pasta before and I KNEW this was going to be an undertaking....

What I didn't realize until the very moment I started this project.....is that I needed the food grinder attachment in order to use the pasta maker plates. Grrrr....this is packed away in my school and that would be a task to go retrieve (sign out my keys, unlock the chains, dig for the attachment, chain cabinet back up, sign back IN my keys....ugh) SO, that attachment post will be another day, K?

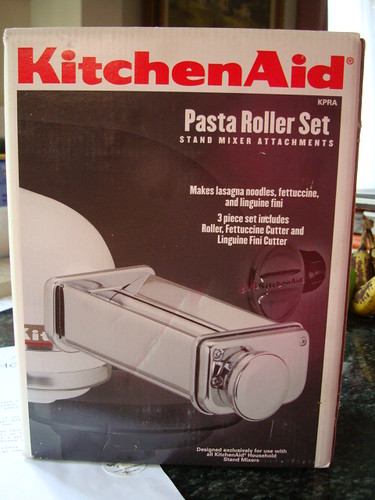
Today I am showing you my the use of the pasta roller attachment. Here are the players:

This is the roller knob. Look above at the picture on the box for the full view of it. Man, these numbers were hard to see without my reading glasses. "Floury" hands don't make it easy to turn these knobs either.


This is the Fettuccine cutter attachment. No fuss, no muss. After you got your dough flattened from the roller on setting 5 you just switch out and slide the dough on in.


They call this attachment for the "linguine fini". Who are we kidding here? This is for angel hair pasta. LOL. I guess I have to use the 'pasta plates' to make linguine.


In the instruction booklet this was their recipe for making the pasta dough:

Basic Egg Pasta

4 large eggs
1 Tbsp. water
3 -1/2 cups sifted all purpose flour
1/2 tsp. salt

Place eggs, water, flour and salt in mixer bowl. Attach bowl and flat beater. Turn to speed 2 and mix 30 seconds. Exchange flat beater for dough hook. Turn to speed 2 and knead for 2 minutes. Remove dough from bowl and hand knead for 1-2 minutes. Divide dough into eight pieces before processing with pasta roller attachment.

Flatten each piece of dough to approx. 3/8 inch thick. Set roller at 1 by pulling knob and turning to setting 1. Turn mixer on speed 2 or 4. Feed flattened piece of dough into rollers to knead. Fold dough in half and roll again. Repeat folding and kneading dough until smooth and pliable. Make sure you are always lightly dusting pasta with flour while rolling. Continue the 'kneading and flattening' with remaining pieces.

Move adjustment knob to setting 2. Feed dough through rollers to further flatten. Change setting to 3 and feed dough through rollers again. Continue to increase until desired setting (about 5).

HERE WE GO.....

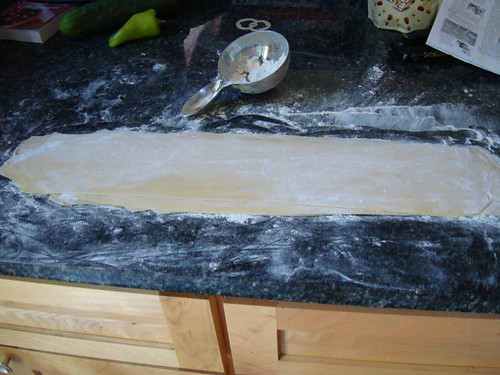
This is (believe it or not) 8 layers of pasta, floured, flattened and ready to go. I actually cut this in half before I went to the cutter. I didn't need my pasta THAT long!


I started with the fettuccine cutter attachment....

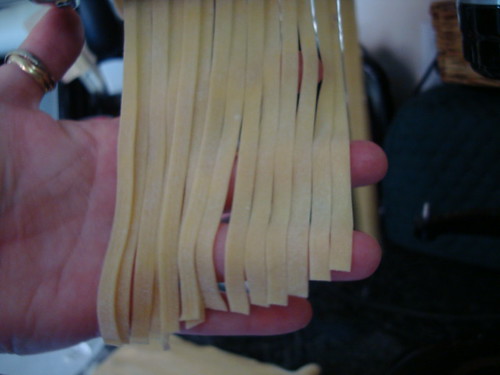
WHEEEEEE....how happy I was! My own noodles! I cut half of my pasta in fettuccine and the other half as angel hair....

Clearly I have to now have to master the drying part....


Here is what the booklet said....that in my excitement I ignored:

"Pastas can be either dried or frozen for future use. To dry, lay stands of pasta in a single layer on a towel or drying rack to completely air dry (meaning don't do what I did up above, LOL).
Store dried pasta in an airtight container. To freeze, let pasta air dry for one hour before freezing in an airtight container. It is not necessary to separate strands of pasta before freezing just dust with flour and form into nests."

I suggest laying your towel on a tray and when they come out of the cutter just run the tray along as the pasta comes out. Too bad I did all my pasta on top of each other. But now I know for the next time!

Tune in Tomorrow to see what I made with my first batch of homemade pasta!!!

Basic Egg Pasta on Foodista

Thursday, April 16, 2009

I could survive on THESE fruits and nuts!

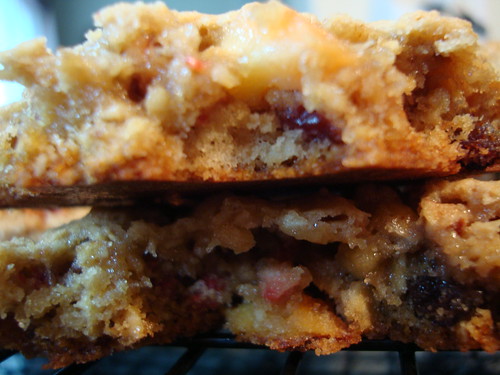
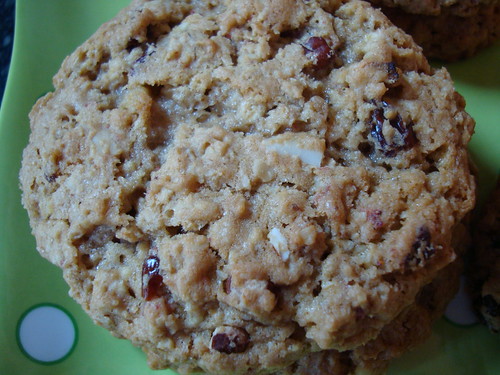
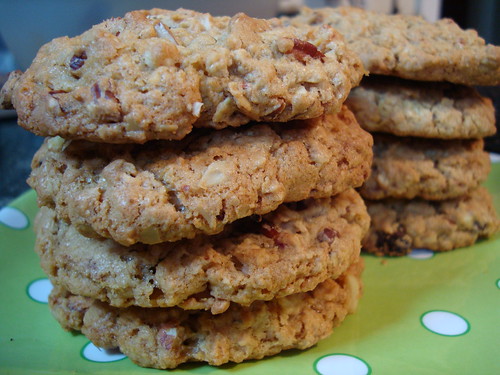
I pretty much am a chocolate cookie fan but I may have a new favorite that has no chocolate whatsoever....THUD....yes, I know hard to believe it myself! But if you make these, you fellow chocoholics...you too might be amazed how good these cookies are as well.


I've done two things here in this post. I am using the new 'beater blade' for the Kitchen Aid Mixer and incorporating my dried fruits from yesterdays post.

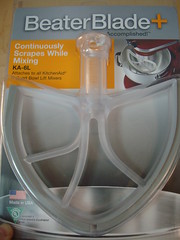
If you are a baker and are already using your KA mixer like a fiend....get the beater blade. I read about it.... was tired of the scraping too.....so I ordered mine as soon as I got my mixer for my b-day. Make sure you know your size of your mixer bowl in order to get the right one. BTW, they also make these beater blades for those who have a standing mixer that is NOT a Kitchen Aid.

My thoughts? Awesome....you can't tell on the package until you open it but the blade is slightly curved to constantly fold the mixture back onto itself. I made the cookies today with this and I didn't scrape the bowl ONCE! Totally clean.....people, if you have a 6QT mixer, click here NOW. I am buying some for school to use with Cookie Club!


Now, onto the recipe I used....

This was an oatmeal raisin recipe I found but I wanted to use those dried fruits and add some nuts while I was at it...

Fruit and Nut Cookies
adapted from Homesteading Housewife Oatmeal Raisin Cookie

1 cup butter, melted (I used one stick butter and the other 50/50 smart balance)
1 cup sugar
1 cup light brown sugar (you can use dark brown
2 large eggs
2 tsp. vanilla
2 cups flour
1 tsp. baking soda
1 tsp. baking powder
1 tsp. kosher salt
3 cups rolled oats (the rolled has more whole grain and dough doesn't get slimey)
1/2 cup dried peaches, chopped
1/4 cup raisins
1/4 cup dried tart cherries, chopped
1/4 cup freeze dried strawberries
1/2 cup toasted walnuts, chopped
1/2 cup toasted pecans, chopped
1/2 cup slivered almonds

Preheat oven to 375 degrees*

Combine the melted butter with sugars until combined. Add eggs and vanilla and beat until creamy and mixture looks lighter. While beating the 'wet' stuff. Toss flour, baking soda, baking powder and salt in a small bowl and whisk out any lumps, incorporating air in it.
Add your flour to the wet mixture and stir with mixer just enough to get the flour mixed. Add your rolled oats on top of dough....get your fruits and nuts prepared and add them on top of the oatmeal. Stir to combine until fruits, nuts and oatmeal are well distributed (this took me a minute with my beater blade)...don't over work the dough.


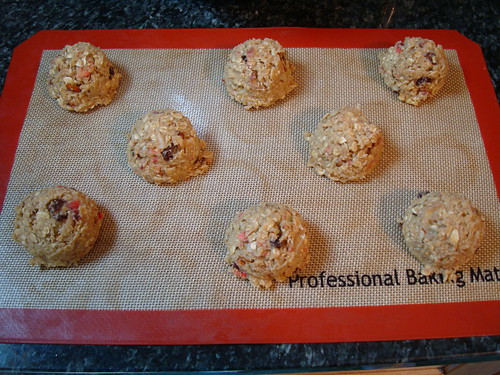
Drop approximately 2 Tbsp. of dough (I used the standard ice cream scoop) onto a cookie sheet with parchment paper or a silpat. I don't recommend you put anymore than 9 per sheet. 2 cookies then 1 then 2 then 1 then 2 (4 columns alternating 2 cookies and one cookie). These cookies will spread.
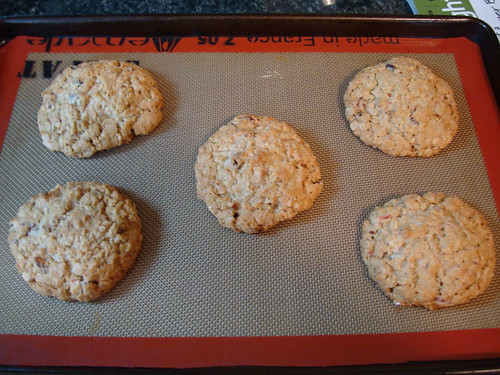
Bake 11-13 minutes on the center rack (Always!) until golden. They will still look wet and moist in the center.....that's ok...Let them remain on the cookie sheet so they will 'carry over' cook on for another 2 minutes.

Remove to wire rack to cool completely.


Make about 24 large, thick, chewy OMG cookies!


*(Dana used a 350 degreed oven. I have a oven thermometer and my oven runs 25 degrees hotter and using her baking time and doneness...I think 375 works better, but I highly suggest you play with your oven temp and cooking times like I did...you just don't want to overcook the dough! Try both temps!)
Thanks Dana....awesome cookie dough! A keeper in my files!

K-man can't wait to take a few of these with him on his bike rides....great energy cookie for him!

Sunday, March 22, 2009

Juicer Review


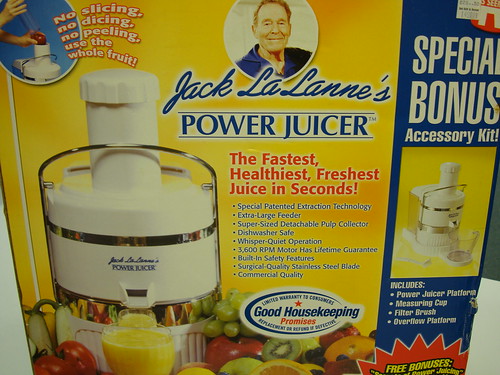
I saw on Cathy's Noble Pig site that she was asking for some suggestions for a juicer. I gave her my suggestion of Jack LaLanne's Power Juicer. After I read more AFTER my post... I realized that she was talking more about a juicer for a juicing things for recipes not for drinking....oh well. I demonstrated this appliance to my students and they had fun choosing the combos they wanted and tasted them.

I am going to show you how easy it is to use and some points to ponder...

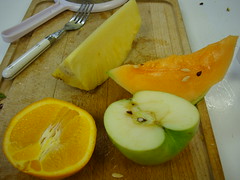
Here is a pineapple wedge, canteloupe wedge, green apple half and orange half.

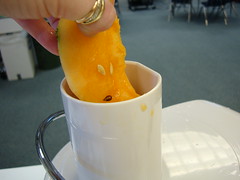
The directions say to remove all stems and any of those huge PITS....seeds are okay. Even though you can put that crazy outside of the pinapple in the juice and the tough outside of the canteloupe....I found it wasn't THAT difficult to slice of most of the rinds. Just most of it. The reason...it was easier to push into the juicer and I didn't have more pulp shot out the 'other end' of the juicer that I had to clean up.

As for the citrus fruits...I suggest cutting off most of the peel for the pith as you know is bitter and it will make your juice bitter as well. Just a rough removal of the peel is good!


In goes the canteloupe....OMG, this smelled amazing! So fresh and springy!


This was the pineapple...I cut most of the outside off and totally left the core in it! Went in like BUTTAH!


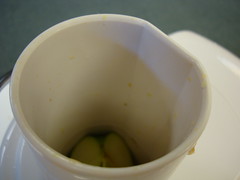
Here is the poor little apple with skins and seeds...waiting timidly for his juicing fate from the 'pusher'...(enter in the Mr. Bill voice..'OH, NOOOO!!! as I do it).


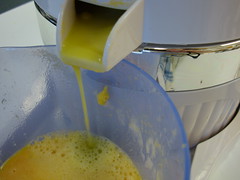
Out comes the juice! Mmmm.

When you make your concoctions. You must drink them right away. The juice also has some 'viscosity' from the pulp and it will start to turn brown. Also some settling will occur in just the first few minutes!


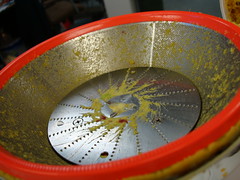
Here is the sharp sucker that grinds all those fruits up. The blade is actually the round disk on the bottom and the curved walls are a fine metal mesh strainer for separating the pulp from the juice.


Now for the nasty reality after you make your juice....


The clean up....The round center is the 'pusher' with a bit of an orange stuck to it. The chute is on the right which literally shoots out the fiberous remains. I use the word shoot purposefully. Some of my students got a more exciting demonstrations that they bargained for, it you KNOW what I mean...LOL


Of course the pulp stuff is great for your garden, your pigs if you have a farm. The cookbook even has suggestions how you can incorporate that pulp into more healthy and fiberous muffins! Clearly you'd have to be more selective about your skins and remove all the seeds....I don't think I'd want THAT type of FIBER!

Points to Ponder:
  • I bought this like 5 years ago @ 149.99 and I used my 20% off coupon from Bed Bath and Beyond to help with the cost. I am sure (not sure) the price has come down (or not).
  • It is pretty easy to assemble and disassemble. Once you put it together...it's been a while since I used it last....and putting it back together and it's use of it....was like riding a bike.
  • Cleaning....I rinsed off all the pulp and put most in the dishwasher! I used the brush they provided to clean the blade and the mesh strainer and those were the only ones that did not go in the DW.
  • It's very quiet. "Hummmmmm" is what is said.
  • The electrical base it heavy and if you make a lot of juice and want this to be accessible and want it on your counter....it will take up as much space as your KitchenAid mixer. I wish I had a storage room/pantry like Pioneer Woman to keep all my appliances for easy reach. So jealous!
Anyway, that is my 1/2 cent on the subject....(I know it supposed to be TWO cents...but we are in a recession and that was the value of my juice review....LOL.

Get Juicy y'all!

Oh BTW, don't think I haven't noticed that I've been remiss! I've been negligent on my Food Holidays! Sorry, I hope that I haven't ruined any of your past food planning! LOL

March 23, 2009 National Chip and Dip
AND Melba Toast Day
March 24, 2009 National Chocolate Covered Raisins Day
March 25, 2009 National Lobster Newburg AND Pecan Day
March 26, 2009 National Nougat AND
Waffle Day
March 27, 2009 National Spanish Paella Day
March 28, 2009 National Black Forest Cake AND
Something on a Stick Day


Friday, January 30, 2009

Do you use these?


After I finished my blog about my favorite things....I had thought about my Debbie Meyer's Green Bags (afterward, of course). And since I liked them I got the deli meat ones AND the bread ones. Then I remember how The Homesteading Housewife was telling us about her appearance on Wife Swap....and I thought 'I should share my TV appearance with everyone too'.

My step mom Pam sent me a new sclip from the internet and they gave it two thumbs down. I didn't really agree with their findings and I searched our Consumer Reporter on NBC4's archive for her input on the product. She didn't have one. I emailed her...and the rest is history.

My students, my school and my program got some great publicity.

View more news videos at: http://www.nbcwashington.com/video.


It was a great experiment. The kids did great. Overall, I think the use of those bags extend your product for a few extra days...but never expect miracles!!

Sunday, January 25, 2009

Kitchen Fun!!!

with KITCHEN TOYS!!!

Today I thought I'd share with you some of my favorite cooking gadgets!!! They make our lives a little easier and make our cooking even more fun!!!

Starting on the left going clockwise:

(Red) Tab Grabbit- On the days I have a freshly manicured hand and don't want to ruin my nails, this magneted tool is on my fridge for when I get my Diet Coke...it's there for me to POP open the tab of my can for me. It also has circle underneath for when you have to twist off those nasty beer bottle cap that seem to want to rip off your skin!!!
Where'd JennyMac get it?-
grocery store hanging in aisle designed for impulse buy.

(Purple) Top Popper- Everyone has those stubborn jars that are so vaccuumed sealed that you are literally grunting as you try to open it. (that is if your man isn't around to open it for you....such ego boosters for them...LOL) This popper you put on your lid (just like you were going to pop it open like a bottle opener. You will break the seal and hear a little "whoosh" and BING....jar opens without a fuss. Love this little guy!!!
Where'd JennyMac get it?- grocery store hanging in aisle designed for impulse buy but found a link for you here @ Walter Drake.

Dry Measuring Cups: These aren't your squared bottom types. Lord knows I've gone through many different styles and end up taking them to my school kitchens for I can't stand them. These are nice for scooping right out of your bins. For an added bonus each handle is a measuring spoon too!!!
Where'd JennyMac get it?-Amazon.com

Measuring Spoons: Okay, now I am talking LOTS of sets of these I've purchased. Looking for the set that works for me most. But these recent ones were obtained SOLELY for getting into those spice jars when your normal measuring spoon wouldn't fit. Those days are gone. LOVE THESE!!
Where'd JennyMac get it?-Amazon.com

Lemon Juicer: This little guy is just too cute. You press the serrated bottom onto your lemon end while twisted and pushing. He goes into the lemon where you can squeeze your lemon juice out (with no seeds) onto your measuring spoon just like those little fake plastic lemons that carry juice in the grocery store!!! You can keep it in the lemon it if you don't use it up and put it in the fridge (in a ziploc of course)
Where'd JennyMac get it?- I believe it was found at BedBath and Beyond with all the other kitchen gadgets, but I've had it for a long time, I searched there online and didn't see it...but that doesn't mean you can't find it in the store.

My favorite Super Sharp Knife: It's non-stick, super sharp (yeah it's gotten me a few times) and I love it cuz it never fails me when I need something sharp.
Where'd JennyMac get it? -I've seen them all over online but for some reason today I could only find it for you on Cooking.com where I did not get it nor at that price.

Meat Thermometer: K-man's parents gave this to us for Christmas when they heard about our constant grilling during the year (just not winter - too dang cold). Put the probe in your meat, connect it to the transmitter(black). The receiver (silver) is where you tell it what type of meat you are cooking how you want it cooked or the temperature. Beeps when done. Fabulous new toy!!!
Where'd JennyMac get it? -They purchased it at Linen's and Things since they were closing and everything was on sale. I found it for you here @ Amazon

Meat Tenderizer: Some days you just want to beat something up!!! I love this to help get those marinades into your meat. I especially like this one for the sharp points are covered so when you are rummaging through your gadget drawer it won't stab you.
Where'd JennyMac get it? - I can't remember but since I was already searching on Amazon...

Mini Grater: Just in the pic, cuz it's just too cute....I don't really use it anymore. Maybe for fresh nutmeg but I don't have any right now. But what I do use for my grating needs....

Microplane: I LOVE this tool.... Garlic, hard cheeses, zesting oranges, lemons, chocolate shavings, so many things...just not my doors that stick!!!
Where'd JennyMac get it? -Hmm, not sure I've had it so long...but it's here @ Amazon

Reynolds Handi-Vac: Total impulse buy at the store....'wonder if this works?' It was on-sale and it had some starter bags in it....why not? Glad I did it... OMG....love it!! I've had it since last summer ('07) and still on the first battery it came with. I buy all the different bags they sell and it's competitors bags work with them too (theirs you have to use a hand pump vacuum...hahahaha). The machine sucks out all the air and you pop it in the freezer and keep out the ice and freezer burn! Run out and get one NOW!!!
Where'd JennyMac get it? - Come on now, you haven't seen these at your grocery yet?
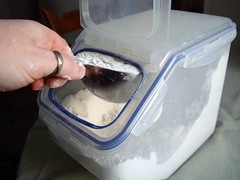
My Flour Bin: This I've spent some time looking for the right container but I didn't know ALL that I wanted for one until I found it by accident....it was on one of those endcaps of the aisle where they are highlighting some dishes, cookware, etc. That particular month it was all these storage containers. I walked by it for weeks. Never paid any attention to it until it was almost bare...so empty, this bin jumped out at me.....there it was staring at me all by its lonesome.

I wanted a bin that I didn't need two hands to get my flour ( meaning: grab the lid and put it down, scoop the flour and level off). The opening had to be big enough for my measuring cups AND I wanted an opening that had a level edge so I wouldn't have to use my finger, spatula or knife to level off. I also didn't want to get flour all over the place while I got my flour...FOR THE ADDED BONUS!!! ...the whole lid can be unsnapped so you can dump your whole bag of flour into it!!! Then you snap all the sides back down and use the opening to get your flour....see me? I am leveling off my flour with ONE hand!!! Love it.
Where'd JennyMac get it? - My grocery store Harris Teeter, brand Name: Lock and Lock....I found the link on Amazon...but they are out of stock....and I didn't want you all to get any ideas....

Ok, just so you know. I am NOT being paid by Amazon, LOL. I've been shopping there for years online. I check there first....search in other sites and I seem to always come back to it. Depending on the amount of stuff I buy...I don't have to pay shipping. I think their prices are pretty good, sometimes I've found it cheaper elsewhere. But to be fair...since they AREN'T paying me....some of the other online places I do shop for fun stuff...

The Home Marketplace
Kitchen and Much More
Harriet Carter and Walter Drake (pretty inexpensive and have lots of clearances)
Brylane Home and Kitchen

I know that there are millions more places....these are just a few of my favorites and the prices are pretty good. If you know of better....for godsake....tell me!!!! LOL.

There you have it....these are a few of my favorite things....(humming tune in head now) raindrops on roses and whiskers on kittens....

___________________
I noticed that many of you post something on the day that celebrates these foods. Many of you don't realize it until that day and SHUCKS, if I only knew, I could have made something.....from cdkitchen....Coming this week are:

Monday- January 26, 2009 National Pistachio Day
Tuesday- January 27, 2009 Chocolate Cake Day
Wednesday- January 28, 2009 National Blueberry Pancake Day
Thursday- January 29, 2009 National Cornchip Day
Friday- January 30, 2009 National Croissant Day
Saturday- January 31, 2009 National Popcorn Day
Sunday- February 1, 2009 National Baked Alaska Day

All days are linked to their recipe suggestions for making some of these treats!!! Have fun!