Showing posts with label mushroom. Show all posts

Tuesday, December 30, 2014

Gluten Free Elbows with Mixed Mushrooms and Italian Sausage Soup

Nothing helps a cold feel like it's getting better than some soup.  Homemade soup.  This is my second recipe for Barilla this month with Allrecipes Allstars Ambassadors.  So many people may think of just classic Italian recipes when using pasta...something tomatoey or lasagna layered or even a casserole.  I think people forget to round out a soup with some pasta to make it more a complete meal especially when the soup may be mostly protein and veggies...throw in some pasta!

Keep reading to view the recipe but also how it made it mine....

Gluten-Free Elbows with Mixed Mushrooms and Italian Sausage Soup
from Allrecipes.com, sponsored and recipe by Barilla

1 (12 ounce) box Barilla® Gluten Free Elbows
3 quarts chicken stock
3 cloves garlic, minced
4 tablespoons extra-virgin olive oil
1 sprig rosemary
4 (6 ounce) packages mixed mushrooms
1 pound Italian sausage, boiled for 10 minutes and cut into 1/3 inch slices
1 (15 ounce) can cannellini beans, drained
1 pint cherry tomatoes, halved
Salt and black pepper to taste
1 tablespoon parsley, chopped


1. In a large soup pot, bring the chicken stock to a simmer.
2. Meanwhile, in a skillet, saute garlic with olive oil and rosemary for one minute or until slightly yellow. Add mushrooms and saute until lightly browned. Add sausage and saute for 2 minutes.
3. Add mushrooms and sausage into broth; stir in beans, tomatoes and Barilla® Gluten Free Elbows. Cook for half the recommended time on the box.
4. Let the soup rest for ten minutes before serving. Season with salt and pepper. Garnish with parsley and olive oil drizzled on top.

Cook's Notes:

1. I like using Gluten Free products, even though I have fallen off my Paleo wagon and have no gluten allergies, I find the GF products don't give me any stomach distress.
2.  Although it is nice to receive some coupons to assist in the cost of the recipe making, I didn't feel the need to get 4 different packages of mushrooms.  The slice baby bellas looked good so they won.
3.  We always have hot Italian sausage in the freezer so I baked 5 links off.  Always looking for Zip! Cutting into 1/3 inch?  Come on now...
4. I just used a handful of grape tomatoes that I had left,  you could use a 15 oz canned whole tomatoes if you wanted but I felt this soup had plenty already.
5. Skipped the parsley because I had fresh basil I needed to get rid of....
6.  Look at the amount of elbows in the picture.  I used only HALF a box.  If I has used the whole box, this wouldn't be a soup anymore but turn into a casserole.  Unless you are feeding an army, you will need to increase the amount of stock if you use the whole box.

This was a tasty soup AND very hearty.  After I made this I got wild whim to whip up some cornbread to eat with it.  Delish!

#AllstarsBarilla

Slurp!

Wednesday, February 23, 2011

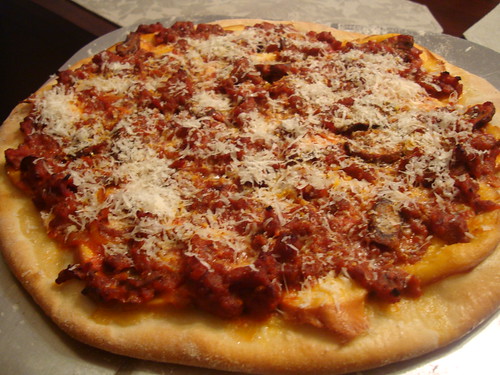
Smoked Mozzarella Sausage Pizza

I don't know about you but finding smoked cheeses has been hit or miss around here lately. Sometimes I can find the smoked gouda or cheddar and smoked mozzarella is always around. I guess I need to venture farther than my local Harris Teeter? lol

S, M and SM Pizza

I am ALL about making our own pizza. Sorry I won't do frozen pizza from a box anymore OR calling any local pizza chain either. If we are going to splurge on pizza I am going to make it. Fresh meats, homemade sauce and fresh veggies. The only cheat.....frozen pizza dough. Yup. I am not TOTALLY out of my mind here....gotta have some compromise, right?

I love fresh mozzarella. A very different affect on your pizza if you use fresh over the block stuff and two steps above if you use the 'already shredded' stuff (sorry, I gave up the preshredded stuff too when I found out they add stuff to it to keep it from sticking....I grate my own now too).
I wanted to try the 'smokey stuff' with our sausage to mix it up in our pizza makings....I was great and easy too.

Smoked Mozzarella Sausage Pizza
Lipsmack creation

1 Frozen Pizza Dough (New York Pizza Deli brand puts two in a box, they also make Whole Wheat)
Your favorite sauce (I just used a can of 29 oz store brand plain tomato sauce with 2 T of Italian seasons and some garlic)
1 lb hot italian sausage, browned
1 pint of mushrooms, cooked
1 onion, chopped and cooked
1 lb. smoked fresh mozzarella (found usually in your gourmet cheese section of grocery), sliced
fresh parmesan

Preheat oven to 450 degrees.
Brown your sausage. Remove from pan. In sausage drippings, saute the mushrooms and onions. Add sauce and sausage. Add fresh garlic if you like. Simmer.

While sauce is cooking, roll out dough on parchment paper. If you do not have a pizza stone, turn over a cookie sheet and that will work (WHY haven't you gotten a pizza stone yet? Just keep in in the oven 24/7 like I do....it's too heavy to take in and out....just leave it be. Actually I take it out only for T-day feast cooking). Rectangle or circle, roll out that dough. Place in oven to parbake (I sometimes have to keep a skewer handy to POP the bubbles). Just cook about 8-10 minutes to cook it through. Remove from oven.

Place sliced mozzarella on baked crust (yes you heard me right, cheese first, don't argue with me!). Place sausage/veggie sauce on cheese. Slide dough back into oven until crust is browned, cheese is melted and bubbly.

Cut into 8 slices and add fresh parmesan on top before serving.

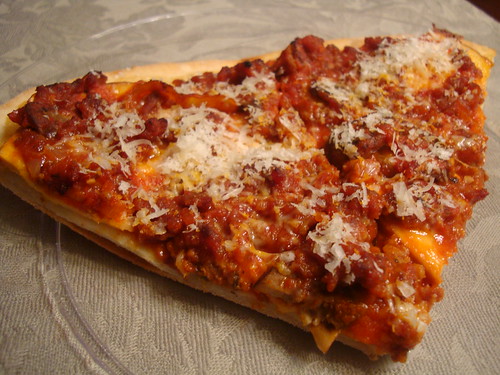
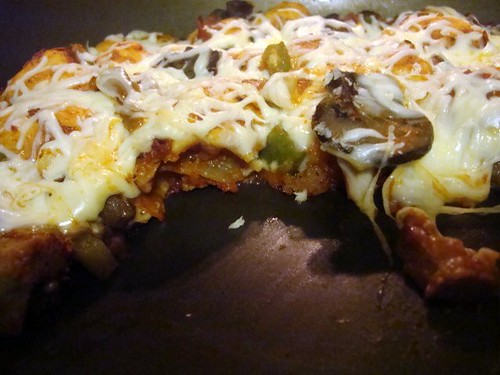
Sausage, Mushroom & Smoked Mozzarella Pizza

Look at that thing of beauty. You couldn't get a tastier pizza from any box or restaurant, trust me. Homemade pizza rocks. The little extra effort is soooooooooooooo WORTH it!

Commanding you to make more homemade pizza,

Saturday, November 13, 2010

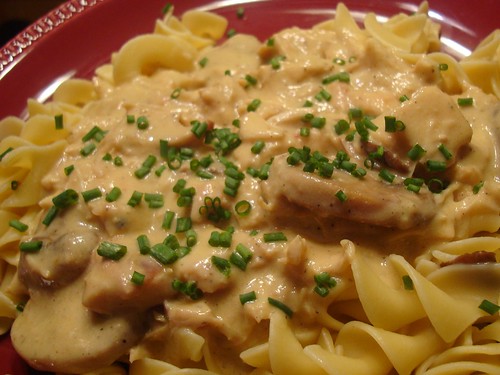
Easy Crock Chicken

Do you like Beef Stroganoff? Well let me introduce it's distant poultry cousin....It's quite yummy and easy to put together.

DSC02027

Easy Crock Chicken
JennyMac Lipsmack creation

6 skinless, boneless chicken breasts or use a combo of breasts and thighs
1 can cream of chicken soup
1 can cream of mushroom soup
1 can condensed cheddar cheese soup
2 pints sliced mushrooms, sauteed
8oz. sour cream
salt and pepper
1 tsp. garlic powder

Pat dry chicken (either leave whole or cut into cubes....you decide how you like them). Sprinkle with salt and pepper and garlic powder. Place in crock pot. Mix together undiluted soups. Pour over chicken. Add mushrooms that have been already sauteed/cooked. Cook on low 6 to 8 hours. When ready to serve, stir in sour cream. Serve over rice or broad noodles.

Garnish with chopped chives or K-man's suggestion is to add French's Onion Rings on top.
Delish!


Enjoy!

Friday, October 29, 2010

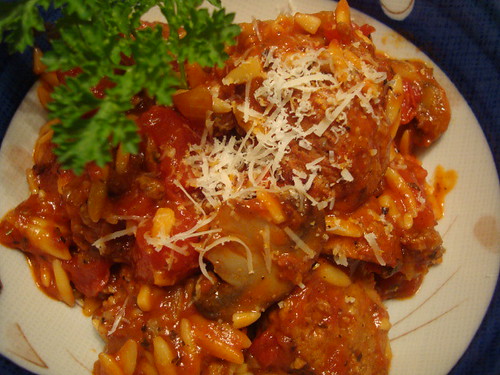
Meaty Orzo Pasta Dish

Meaty Orzo
I absolutely despise jarred sauces. They are full of sugar and other 'stuff'. I am aware of the addiction children get to the sugar in these jars when after my 8th graders made some lasagna with a sauce from scratch a student came up to me and asked if she could have some sugar to put on her lasagna....I about fell on the floor. Absolutely NOT! was my answer to her request. See? You don't think something like jarred spaghetti sauces could feed an addiction to sugar and that was your proof. I had a similar request when I my first year of teaching when a High-Schooler asked to put sugar on the chili they made. THUD.

Here is a fun, meaty pasta dish with sauce from scratch and it's not difficult or lengthy to make.

Meaty Orzo Pasta Dish
by JennyMac Lipsmack

1 lb bulk Italian Sausage
10 large meatballs, cut in half (leftover or from frozen convenience bag)
1 pint sliced mushrooms
1 medium onion, chopped
2 Tbsp. olive oil
2 cloves garlic, minced
1- 29 oz canned diced tomatoes
1- 6oz can tomato paste
1 cup chicken or beef broth or water (more may be needed)
2 Tbsp. Italian Seasoning (or any combo of basil, oregano, thyme, rosemary and parsley)
salt and pepper to taste
1/2 cup orzo
fresh Parmesan

In a large skillet or pot. Brown the sausage, halved meatballs with the onion and mushrooms in the oil. Add the minced garlic and seasonings. Pour the canned diced tomatoes over the meat mixture. Add the tomato paste and meat broth. Stir carefully to incorporate the paste into the broth. Salt and pepper to taste. Let meaty sauce cook for 10 minutes. Mixture should still look watery. Add orzo (it will need a watery sauce to absorb). Cook for 10-12 minutes, stirring every so often to move the orzo around. Keep an eye on the sauce if it's looking dry add 1/2 cup more of broth at a time as needed. This dish/pot can also be baked if desired. Serves 4.

Serve in bowls with freshly grated parmesan (you can put shredded mozzarella on it if you baked the dish). Great with crusty garlic bread!

The effort to put this sauce together was minimal and much better than a jarred sauce. Less chemicals in a can of tomatoes than a jar of sauce too!

Buon Appetito!

Wednesday, May 5, 2010

Supreme Pizza Bubble Bread

When you have all the makings for a nice supreme pizza...it really bites when your only 'bread' is some canned biscuits. I said to myself...."I REFUSE to press them out to make mini pizzas! Nor am I going to press them all together to FAKE pizza dough!"

Supreme Pizza Bubble Bread1

So here is what I did to make my pizza 'outside' the box....

Supreme Pizza Bubble Bread
JennyMac Lipsmack Creation

2 cans of refrigerated biscuits (10 count each)
1 cup of chunky tomato sauce (mine is just canned whole tomatoes mooshed with my hands with Italian seasoning, garlic powder and parmesan cheese added to taste)
1/2 cup onions, chopped.
1/2 green pepper, chopped
1 pint mushrooms (raw or sauteed)
1/2 cup pepperoni, chopped in half
1/2 cup Italian sausage, (however styled, mine was leftover from a hot sausage sub night, chopped)
4 mozzarella cheese sticks, chopped
1-2 cups mozzarella cheese, shredded.
Freshly grated parmesan

Preheat oven to 400 degrees.

In a large bowl, mix the sauce, onions, peppers, mushrooms, pepperoni, sausage and chopped mozzarella sticks. Cut each biscuit into quarters and mix into the 'supreme' mixture.

Put supreme mixture on lightly oiled pizza pan (not the ones with holes). Spread it out about 1 inch from edge. Bake for 20 minutes. Top with shredded mozzarella cheese and bake for additional 5 minutes or until cheese is melted. Top with freshly grated Parmesan. Pizza can be served as a slice and eaten with fingers or just serve from pan in center of table and everyone just pull and eat!

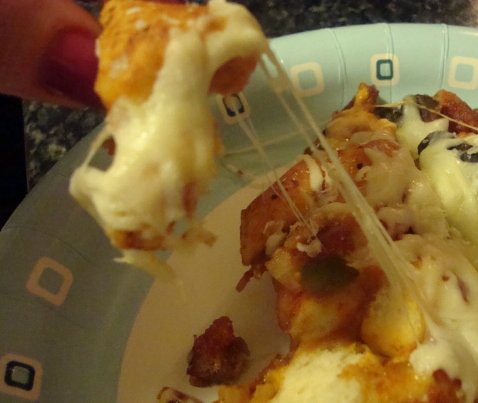
Here have a bite!

Supreme Pizza Bubble Bread2

Fun pull apart type of dinner that is kid friendly and chocked full of veggies! Also, this was NOT a supremely EVIL pizza if that is what you are thinking, I used turkey pepperoni and sausage, the mozzarella was reduced fat. So there.

Supreme Lipsmacking,

Thursday, April 1, 2010

Stuffed Peppers as a sidedish


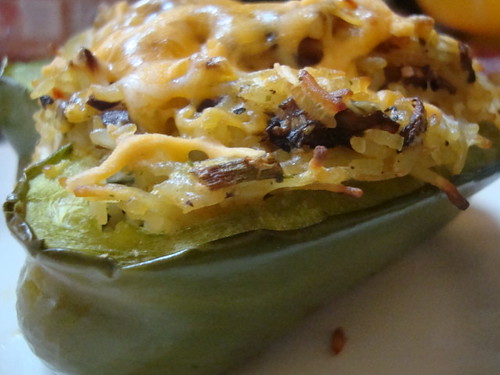
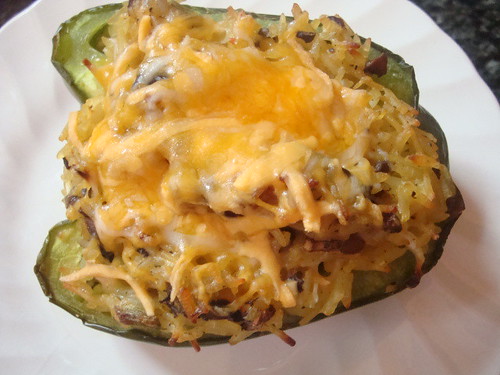
Mushroom and Rice Stuffed Peppers
created by JennyMac

2 green peppers
1 package of favorite flavored rice (I used Uncle Ben's Chicken Rice)
1/2 cup cooked mushrooms, chopped
1/4 cup green onions, chopped
1 cup cheddar cheese, grated (divided 3/4 cup and 1/4 cup)
1 tsp. freshly ground pepper

Preheat oven to 350 degrees.

Slice peppers in half, core, seed and de-vein. Prepare rice according to package directions. Under cook rice by five minutes since you will be baking this in the peppers later. Rice will seem a bit wet, this is okay.

Mix mushrooms, green onion with 3/4 cup cheddar cheese and pepper. Mix in cooked rice and scoop into pepper halves and press gently. Bake for half hour or until peppers are soft or tender crisp. Top with last 1/4 cup of cheese and let melt while you prep the rest of your dinner.

Your double dose of veggies, your starch and some dairy to round out your protein for dinner. This went great with our baked chicken!

Enjoy!

Sunday, November 29, 2009

It's not the holidays without....

Green Bean Casserole of course!

Some people find this yucky. Some people are tired of it. I never tire of it for I only have it during the holidays. So I look forward to it.

I wanted to have this for dinner, yet cut back some of the fat....yes I know green beans are vegetables and not normally have fat.....but this is another one of those evil side dishes with FAT and sodium.

Our family used cream or half and half and a can or two of the campbells mushroom soup....but the only fat in this beauty is those French's onion rings on top. I didn't bother looking at the content on the can. Somethings are better left alone and besides I wasn't eating the whole casserole, just a spoonful. Maybe next time I will try the recipes original version with sauteed onions and bread crumbs!

Lean Green Bean Casserole
adapted by Low Cal Diner

1 Package (16 OZ) Frozen Green Beans
1 Onion, chopped
1 Garlic Clove, minced
1 Teaspoon Margarine (I used smart balance)
½ Pound Fresh Mushrooms, chopped
1 Can (12 OZ) Fat Free Evaporated Milk
3T Flour
½ can of water (in milk can to thin out white if too thick)
¼ Teaspoon Poultry Seasoning
1/8 Teaspoon Pepper
1/2 tsp. salt

Topping: French's Onions Place beans in a microwavable bowl. Cover and cook on high for 7-9 minutes. Drain. In a skillet add the onions, garlic and margarine. Sauté until tender, 4 minutes. Add the mushrooms and cook until tender. Reduce heat to low, add in and stir until combined. Mix the milk and flour and add to the mushroom mixture. Add the remaining ingredients and cook for 2 minutes or until it thickens. Transfer to a 2-quart baking dish. Stir in the beans. Bake uncovered at 375° for 15 minutes. Add French’s onion rings and sprinkle over the casserole and bake for another 10 minutes.

Enjoy!

Wednesday, November 11, 2009

Kickin' Chicken


I love chicken and how there is a million ways to prepare them. Here is number 609. Or #608 or #610. Whichever. LOL

Spicy Sun Dried Tomato Chicken

1/2 cup of sun dried tomatoes (dried not the ones in oil if you want a FF version), softened in hot water
1/4 cup Chili pepper vinegar
salt and pepper to taste
one portobello mushroom, sliced thinly
1-2 Tbsp finely chopped onion
1 clove of garlic, minced
4 boneless chicken breasts
1 cup low sodium chicken stock

Grind up tomatoes, onions, garlic and vinegar in a food chopper.

Spray oven proof pan with non stick spray and on medium high heat, cook salted and peppered chicken on both sides until browned. When chicken is browned in pan pour tomato mixture onto chicken and all around. Use chicken broth in chopper container to 'swirl' out the mixture that is stuck inside....so you don't have to use a scraper!

Bake @ 350 degrees for 20 minutes or until chicken is 160 degrees or juiced run clear.

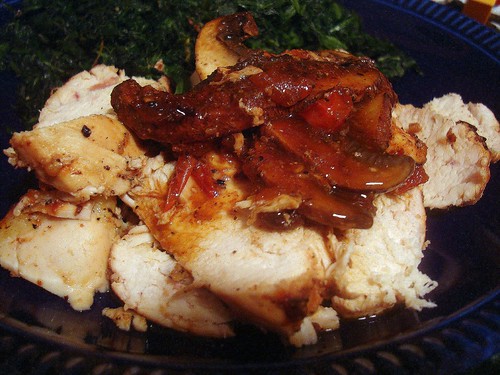
Slice chicken and top with mushrooms from pan, drizzle with sauce on top.

Post Script: Well the good news is that the 'plan' that I've chosen is clearly a good one for I lost 10 lbs last week. Very happy. (yes, yes people, I know that you should only lose 2lbs a week, no lectures plz) LOL. What is most important is that I am not hungry at all during the day (which is frustrating while dieting) and I am really looking forward to my meal at dinner by this time.

I will try to 'pepper' my posts with some things we are making at school amidst these 'healthy' posts. Stay tuned for my new dessert creation I made for the 8th grade this week.


Enjoy!

Monday, April 20, 2009

Two Classics merged into one!

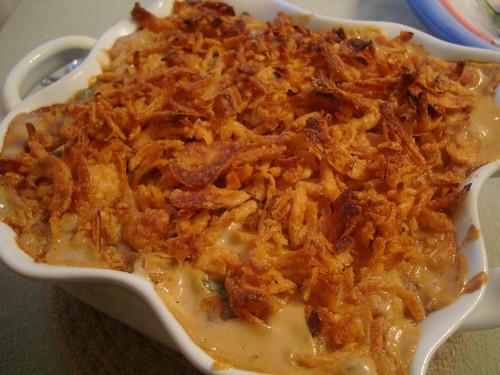
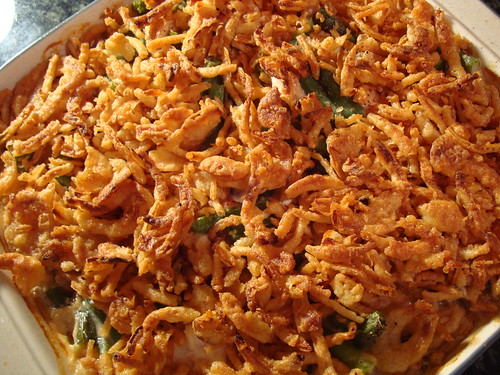
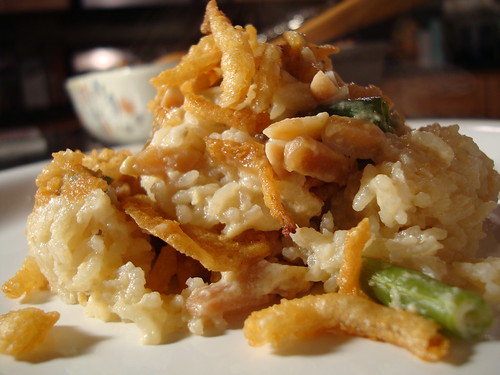
So can you tell what classic casserole this is?

Figured it out yet?

Looks like your typical green bean casserole right? Well, you are close....

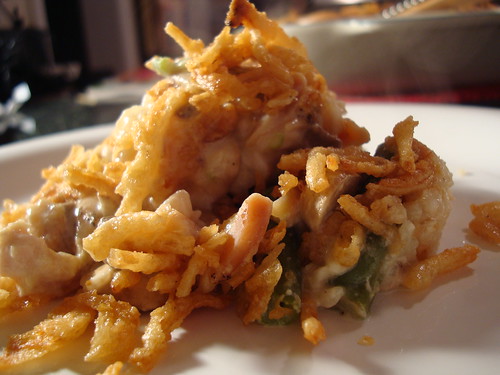
I won't torture you anymore....Yes, parts of this casserole is the classic green bean and mushroom soup casserole. You probably eat this at least once a year at Thanksgiving time. Me too. Another casserole I grew up eating that my mom made was chicken and rice with mushroom soup on top...So I began to think "One casserole is missing vegetables and the other casserole is missing some protein, why can't I combine these two favorites of mine?"

And I did....

Twisted Chicken Mushroom and Green Bean Casserole*

3/4 cup rice
8oz/1 cup sliced mushrooms
1 can cream of mushroom soup
1/2 cup slivered almonds, toasted
1 cup evaporated milk
1 cup chicken broth
2 boneless chicken breasts
salt and pepper to taste
8 oz/1 cup FROZEN green beans, regardless of style -bite size pieces
1 can French's Onion Rings

Preheat your oven to 375 degrees. Grease a 9 inch glass casserole dish. Sprinkle half of the rice into the casserole dish. Place the sliced mushrooms on the rice and sprinkle the remaining rice onto the sliced mushrooms. When the mushrooms cook, they will render water which will be needed to cook the rice. In a large bowl put the can of mushroom soup and mix in evaporated milk, chicken broth, cut green beans and almonds. Cut chicken into bite sized pieces and season with salt and pepper. Add the chicken to the soup mixture and stir until combined. Put chicken and soup mixture on the rice/mushroom layer. Bake for 40 minutes (or until you test the rice to be cooked to your liking). Slide out oven rack and put on the onion rings on top. Press slightly and bake for another 5 minutes or until onion rings are browned.

*This is typically a family sized type of dinner, you can double this and put it in a 9X13 casserole. But K-man and I don't want to be eating this for over a week....


Crunchy, crispy, creamy, tender chicken and mushroomy goodness!

Friday, March 27, 2009

Melt in your Mouth Chicken

If I only had a dollar for all the different ways I've prepared chicken....


I've grilled, baked, marinated, fried, stir-fried, made chicken strips, and put it in sooooo many casseroles. But there is one technique that I've been trying over and over again because I just can't believe how it makes my chicken....and I think it's proved worthy....

Soaking in buttermilk. That's it. So simple, yet amazing. Whether you put your thawed or frozen wings, boneless chicken breasts in a ziploc bag with enough buttermilk (regular or fat-free) and any of your favorite seasonings. You will be truly amazed how tender it makes it. I've marinated tons of chicken thinking it's the combo of oils, vinegar and seasonings that tenderize it. It may have a nice flavor but often they could easily get dried out. But no matter if I cooked my chicken a little too long after it was in buttermilk....it was always moist and tender. Even something like chicken wings just fell off the bone (even the day after when it was reheated). It's got to be something with the active cultures in buttermilk that breaks down the chicken I am convinced!

Tonight I made smothered chicken....here's what I did:

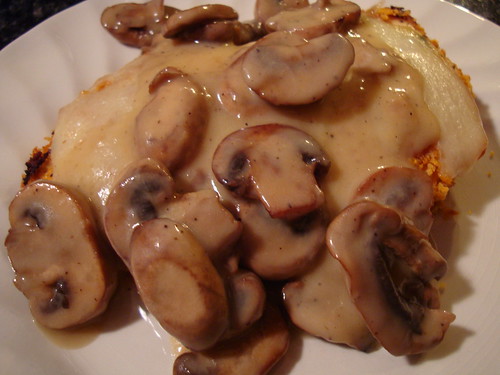
Mushroom and Swiss Smothered Chicken

4 boneless chicken breasts
2 cups of buttermilk (regular or fat-free)
Seasonings of your choice (I used a herb packet from World Market called 'Chimichurri')
2 cups crushed cornflakes
salt to taste
1 pint sliced mushrooms
4 sliced reduced fat swiss cheese
2 Tablespoons smart balance
3-4 Tablespoons flour
2 cups chicken broth

Place your chicken in a ziploc bag with seasonings and buttermilk the night before or the morning before you leave for work.

Preheat oven to 350 degrees. Take chicken out of fridge. Crush cornflakes with rolling pin or grind in food chopper. Place crushed cornflakes into shallow dish. Line cookie sheet with parchment paper or nonstick foil. Spray with non cooking spray. Take chicken out of bag and salt to taste. Keeping the chicken pretty wet from buttermilk, dredge into cornflakes, pat them firmly to pack cornflakes onto chicken. Place onto prepared cookie sheet. Repeat with remaining chicken breasts. Bake in oven 20 minutes or until meat is no longer pink.


While chicken is cooking, saute mushrooms in saute pan. I used just a little olive oil and some salt to draw out the mushrooms moisture. When mushrooms are cooked, push mushrooms to one side of pan. Melt smart balance (you can use whatever oil of your choice), add flour and mix until you smell the flour's nutty fragrance. Put mushrooms into the roux and mix. Slowly add your chicken broth, keep stirring until you get the right thickness to your gravy.


When chicken is done cooking, turn off heat from oven. Take out chicken and cover with 2 slices of cheese and put back in oven to melt cheese. Remove chicken from cookie sheet and cover with mushroom gravy.


A nice green salad or yesterday's post of lemon asparagus would go great with this. BTW, the two leftover breasts we had the next night were reheated in the oven and were STILL moist.


I tell ya...I am sold on buttermilk marinade for all my chicken from now on!

Friday, January 9, 2009

Continued Biscuit Fun...

So today's recipe is NOT from the book I mentioned before. When I purchased 101 Things to do with Canned Biscuits (by the way....they have many other selections...I also have the tortilla one) I got it for use in the classroom. PLEASE be aware that I am far from the convenience food junkie. (I am not addict...just a recreational user!!! hahahahaha) Due to the time limitations in my classroom, cookbooks like that are nice for it shaves time of the student's lab experience. Anything I can do to get those kids cooking experience or being creative in the kitchen is GREAT to me.

Now, on the 8th grade level I am more into showing the differences between convenience foods and homemade and how they taste...and the important of shaving time of food preparation by using some convenience foods but not to the point of losing the 'from scratch' taste. For example....making a pie. Using an already made pie crust but taking all the credit for what you put together on the inside. You get what I am saying now?


When I decided to showcase this book (only really because it happened to be by me at the computer...LOL) and I picked a few out, it occurred to me that I had some other recipes that I could do. I think the next book I won't get so overachieving and pick ONE recipe from the book to highlight and perhaps suggest others that sound good. K-man doesn't mind being my 'quality control taster' but I know he likes some of our regular things (like our homemade pizza) and I don't want him feeling deprived now do I??


This next recipe shocks me, from that whole year in Home Economics and the things we prepared in class...why is THIS the only recipe I can remember? Granted I was young, in 7th grade, I was probably hormonal from puberty, HECK, it was freakin' 1978!!! I do remember my teacher Ms Lindberg was on her last year, ready to retire....she was always cranky. I remember her yelling at me for not cracking my eggs separately. But everything else I may have cooked is a blank. (I kept my dress that I sewed!)

I get emails from my former students telling me how they remember making French Toast, pizza, brownies, or other requesting Minestrone Soup recipes they made in High School....Yet I can't remember anything I made that year (clearly no spark was set during those years to be a FACS teacher) But that following summer, I remember spending a week with my Me-mom and I asked her to purchase these ingredients so I could make it for her.

I can't even remember the name of this recipe so I had to make one up.

Mushroom and Chicken Dumplings
(The only memory of my cooking in Middle School)


Can of biscuits (10 count)
Package of sliced mushrooms
2 cans of mushroom soup
2 cups whole milk or cream (depending on how rich you want this)
Garlic powder
Salt and pepper to taste
My suggestion is to hit the salad bar for the following items:
Cooked chicken (1 cup)
1/3 of a Bell pepper (what ever color you prefer)
1/2 of small onion finely chopped

Place cans of soup and milk or cream in 3 qt. pan. Stir and heat through soup while prepping the dumplings.

Finely chop the peppers, onion and cube the chicken. Place in bowl, salt and pepper to taste, sprinkle with a bit of garlic powder. Chop all the mushrooms into small chunks and divide into half. Place one half in soup mixture and the other into the bowl with the chicken, peppers and onions. Mix chicken and veggies. Open biscuits and use rolling pin to flatten biscuits (I used a tortilla press). After all biscuits are flattened, take spoon and portion out all the chix/veggie mixture among them. Pinch each biscuit closed sealing the chicken mixture inside dumpling. After all dumplings are sealed, turn up soup to a simmer. Put in ONE dumpling. Gently stir to get dumpling totally covered with soup. Add remaining dumplings, stirring gently between each addition. Simmer dumplings for 15 minutes or until dumpling is cooked through. Ladle into bowls with 3 dumplings and some soup. Serve with hot crusty bread. Serves 3-4.
I added a pile of spinach on our for added color and more veggies. Just a serving suggestion here!!

Thursday, January 1, 2009

Musings of a Rookie Food Blogger

Hmmmm, so many food blogs....what will be my modus operandi? How will I be different? It wouldn't be fun to be a cookie cutter of another foodie blogger. Right?

Well after much thought about it all...I do enjoy cooking personally as well as professionally. I am one of the few people who can experiment with new recipes at work. My students are often willing 'guinea pigs'. Actually they love it. They could care less if I am wanting to try out something new as long as they get to sample it. LOL.

So what will make my blog somewhat different is that when I am doing recipes in my classroom I will not only share the recipe itself but I am never short of funny stories of the PROCESS of which the recipe is made.

Oh the stories I've told to my co-workers, friends and family of what happens in the food lab. Sometimes I don't even want to know what happens when I turn my head to assist another group. Oh if I only had a dollar for every time I see a kid scratch their face, fix their hair, lick their fingers and then take that same hand and grate a block of cheese (for example).

Kids often think I am being selfless when they offer their 'extra' to me and I wave my hand and say "Oh no, save it for later and share with your friends....please keep it for yourself...ENJOY!" Knowing all the while I am not truly certain what they've touched when I wasn't looking. Trust me it's hard enough to watch them to make sure they are measuring correctly or just putting in a TEASPOON and not a TABLESPOON of salt. Do you know how many times I've stopped a child from using a full 1 cup dry measuring cup thinking that was 1 teaspoon? Oh, I'd been a rich woman if I had a dollar for THOSE moments in my 19 years teaching!!!

AND please, YES. I train these kids about measuring cups. The liquid and dry. The differences. Why you don't use a dry for liquid and etc. How to read them, etc. But kids are kids. They are excited to be cooking....they are nervous for their teacher is hovering over them and going to be grading them.....so mistakes happen A LOT!!!

So this will be my grainline....the trials and tribulations of our food labs....and when school is not in session or I am being somewhat creative at home....I will write about that as well. Of course I cannot be anywhere near like Pioneer Woman (you rock BTW!!) and take a picture of EVERY addition in a recipe. That would be craziness for me....(Gosh PW, do you have cams every where and have a foot button to take pix when you are chopping? I wouldn't think Marlboro Man is your cameraman for all your culinary whimsies!!! LOL)

Of course I will be 'borrowing' (ok stealing really, kidding) many of your recipes my fellow foodies!! I will be absolutely sure to give 'props' to my mentors. Often times I am always changing and substituting things anyway to make it that works for us.

Speaking of mentors....I am currently a mentor for two people right now. One new teacher (an absolute doll from Romania) and a student named Danny (a girl). I wanted to take the time to recognize her here. Take a moment and look at my new heading picture for my blog. Yes, that is a corner is my kitchen. Food styling is not my forte...LOL... But please look at the apron hanging on the right. That was my Christmas present from her. She handmade me a 'Queen of the Kitchen' apron. I was so touched. Nothing beats a handmade present. Cookies get quickly eaten but aprons last forever!!! LOL I instantly made Danny sign the inside of it and date it. Laughingly I told her she needed to do that for when I am 90 and in the nursing home going over all my teacher memorabilia ....I needed to be reminded WHO made it. So Danny, I love it and it's now being showcased forever on my blog for the world to see.

Lastly, the other thing I will be adding pictures of my adorable yet stubbon 17 year old BW cat named Tricksy. She is living out her golden years so she deserves some special treatment. Of course she could care less she is pictured on the web. She only cares if she gets her 'treats'.

Tonights Menu: Ham and Mushroom Soup (No picture for it was a last minute 'throw together' meal, I will get better at this over time)

1. Saute in pot: Half of an onion, half package of sliced mushrooms (chopped) and some cubed leftover ham until soft and warmed through.
Caution here: If you saute this mixture on too high of heat...all will brown hence making your soup a light brown. If you want your cream soup to be whiter, cook the mixture on a lower heat.
2. I used a Cream of Mushroom soup base (popular in many Amish grocery stores). The container's direction says to use a 1/2 c. of soup base with 2-1/2 cups milk or water. Mix base and cold chosen liquid (I had no milk so I used half and half and water) in separate bowl.
3. Add cold soup base mixture to saute mixture in pot. Heat until thickened.
4. Made two large soup mugs. Served with steamed green beans.

We had ham for dinner last night, ham and egg waffles for breakfast and ham sandwiches for lunch. And now this soup? We are HAMMED out.

Here is some info for you all to use that I copied from Recipe Goldmine on how to use leftover ham:

Ham
— Use diced in Denver omelets.
— Ham kebabs. Thread large ham chunks onto skewers, alternating with fresh pineapple chunks and squares of sweet red or green bell pepper. Brush kebabs with butter and grill until browned. Serve with rice and fresh asparagus.
— Julienne and use in a chef's salad.
— Use in scalloped potatoes.
— Use odd-size pieces of the fattier ham parts as a seasoning. Drop a chunk or two into the water when cooking green beans or cabbage for real down-home flavor.
— Pie: Dice ham. Combine in greased casserole with canned or frozen peas and a can of undiluted cream of mushroom soup. Top with mounds of cooked, mashed and seasoned sweet potatoes.
— Scallop: Arrange alternate layers of mashed potatoes, sliced onion and sliced ham in greased casserole; add hot milk to cover. Cover and bake at 350 degrees F until potatoes are done.
— Turnover: Put ham, onion and apple through food chopper; roll pie dough and cut into squares. Place generous spoonful of mixture on each square; fold into triangle and press edges together. Bake and serve hot or cold.
— Casserole: Cut ham in slivers; mix with cooked macaroni and white sauce. Turn into greased casserole; sprinkle with plenty of sharp cheese and buttered bread crumbs. Bake at 400 degrees F for 20 minutes.
— Scottish: Mix together ground ham, cold seasoned mashed potatoes and seasoning. Shape into oval cakes and roll in flour. Saute in hot fat until brown on all sides.
— Scramble: Brown the last bits of cooked ham in a small amount of butter or margarine in skillet. Pour in scrambled egg mixture. Scramble as usual over low heat.
— Savory: Saute slivers of cooked ham with a little sliced onion, green pepper and celery until golden. Add canned baked beans. Heat through.
— Pudding: Mix chopped ham, a can of cream-style corn, 2 beaten eggs and bread crumbs. Pour into a greased casserole and bake like a custard. Serve hot with corn muffins.
— Goober: Dice ham, celery, green pepper and apple. Combine with a generous quantity of salted peanuts. Serve as a salad with lettuce and mayonnaise.
— Rabbit: Combine 1 can of tomato soup, 1/2 cup grated cheese and 1/2 cup evaporated milk; stir until smooth. Stir in chopped ham, 2 beaten eggs; cook in double boiler until creamy. Serve between slices of toast.
— Strata: Grease a small casserole and arrange with thin slices of bread, thin slices of cheese, slivered ham in layers. Pour over 1 cup milk, 1 egg and seasonings, beaten together. Bake in moderate 350 degree F oven until puffed and brown.
— Jellied: Dice ham, apple and celery. Prepare lemon-flavored gelatin as directed on package. Chill gelatin until thick; fold in ham mixture. Pour into molds and chill until set. Turn out on lettuce leaves and garnish with walnut halves and mayonnaise.
JennyMac adds - SOUP!!!

BTW:
THANKS Mommy I'm Hungry! You were my first welcome in the food blogger world. Thanks for making me feel loved and accepted. Wheeeeeee!!!!


Hand over those treats Daddy!