Sunday, January 31, 2010

Give them a choice!

Usually on Friday or Saturday I make a little sweet for us or K-man to enjoy for the upcoming week. Sometimes I ask K-man beforehand what 'sweet' he'd be in the mood for. He requested orange sugar cookies and since I had been to store already, I replied: "Sorry hunny, no oranges in the house today....but I have lemons" His forced second choice was Lemon Bundt Cake.

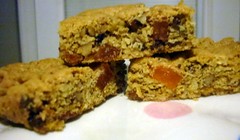
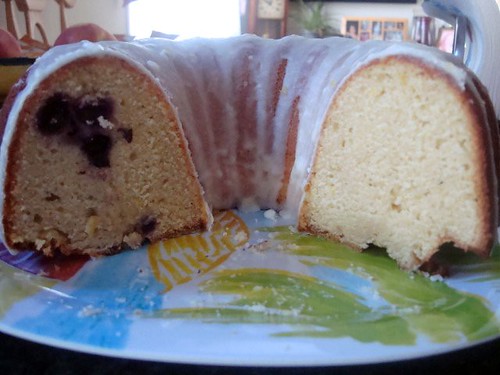
Just after I poured the batter in the pan, I realized I had some frozen blueberries. I thought it would be nice to offer a choice if you wanted just plain lemon cake or blueberry lemon. So I pushed down some blueberries in only half of the cake with a fork before I baked it. Turned out great!

Lemon Lover's Pound Cake
adapted from allrecipes.com

1 cup butter (no substitutes), softened
3 cups sugar (I used 1/2 cup splenda for 1 cup of sugar to help reduce some calories)
6 eggs
5 tablespoons lemon juice
1 tablespoon grated lemon peel
1 teaspoon lemon extract
3 cups all-purpose flour
1/2 teaspoon baking soda
1/4 teaspoon salt
1 1/4 cups sour cream (reduced fat worked nicely)
1 cup frozen blueberries (optional)

ICING:
1/4 cup sour cream
2 tablespoons butter, softened
2 1/2 cups confectioners' sugar
3 tablespoons lemon juice
2 teaspoons grated lemon peel

Directions
  1. In a large mixing bowl, cream butter and sugar until light and fluffy, about 5 minutes. Add eggs, one at a time, beating well after each addition. Stir in lemon juice, peel and extract. Combine the flour, baking soda and salt; add to the creamed mixture alternately with sour cream. Beat just until combined.
  2. Grease and flour a 10-in. fluted tube pan. If you are going to add blueberries. Pour 1/3 batter in the greased pan and add some blueberries, push slightly with a fork. Do not mix them in the batter unless you want purple batter. Pour the next 1/3 and layer blueberries, don't push the blueberries to hard! Pour last layer of batter. This batter is dense enough that your berries won't sink!
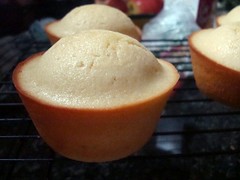
  3. Bake at 350 degrees F for 55-60 minutes or until a toothpick inserted near the center comes out clean. Cool for 10 minutes before removing from pan to a wire rack to cool completely.
  4. For icing, in a small mixing bowl, beat the sour cream and butter until blended. Gradually add confectioners' sugar. Beat in lemon juice and peel. Drizzle over the cake. Store in the refrigerator.

Cook's Notes:

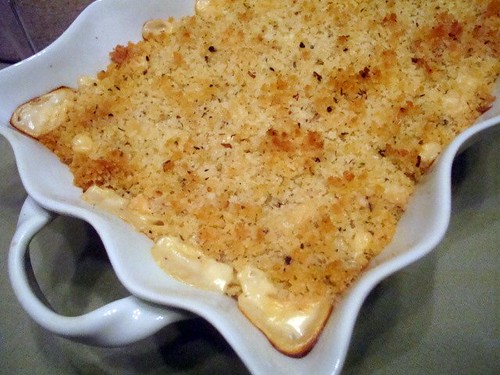
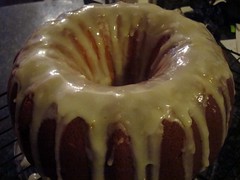
I realized that I didn't have enough of the powdered sugar when the cake was already in the oven. I had already had the other wet stuff measured out. As you see here it was thin.

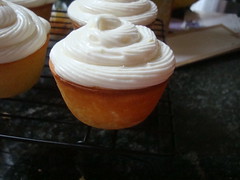
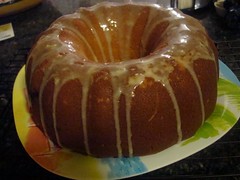
If this happens to you don't let it discourage you. Put on your first drizzle (over a cooling rack), let it dry for a bit and drizzle on some more. Keep drizzling on the glaze until it's thick to your liking on top like this:


See? I wasn't going to let my thin glaze win! I kept drizzling and drizzling (drying in between) until it was thick enough for me!

I love the tartness of this glaze....yummy!


Now, you must make your choice....plain or with blueberries? I am waiting...


Enjoy,

Wednesday, January 27, 2010

No way it's sugar free!

I bought some of the Hershey's sugar free chocolate chips and blogged about how I used them on my marshmallow treats....I had a handful left in the bag and they weren't enough to bake with so I popped the few in my mouth to throw the package away....then my eyes spied the recipe on the back of the chips bag....

Wow, a sugar free chocolate chip cookie recipe! Cool, and they have a site from hershey's kitchen with many other healthier, sugar free, lower fat goodies too. Score!

Lowered Fat AND Sugar Free Chocolate Chip Cookies
adapted from Hershey's Kitchens

1 cup flour
1 cup almond meal/flour
1 teaspoon baking soda
1/2 teaspoon salt
1 cup (2 sticks) butter, softened (I used one butter and one smart balance)
1/3 cup Splenda granulated sugar blend
1/3 cup Splenda -brown sugar blend
2 teaspoons vanilla extract
2 eggs (I used 1/4 cup plus 1 Tbsp. egg substitute)
1-1/3 cups (8-oz. pkg.) HERSHEY'S Sugar Free Chocolate Chips
1 cup chopped nuts (optional)

1. Heat oven to 375°F.

2. Stir together flours, baking soda and salt. Beat butter, granulated sugar blend, brown sugar blend and vanilla in large bowl until creamy. Add eggs; beat well. Gradually add flour mixture, beating well. Stir in chocolate chips and nuts, if desired. Drop by rounded teaspoons onto ungreased cookie sheet.

3. Bake 7 to 9 minutes or until edges are lightly browned. Cool slightly; remove from cookie sheet to wire rack. Cool completely. About 4-1/2 dozen cookies.

Nutritional Information per serving (2 cookies: Recipe makes 54 cookies):

Calories: 100, Total Fat: 4.5g, Saturated Fat: 2.5g, Trans Fat: 0g, Cholesterol: 25mg, Sodium: 150mg, Total Carbohydrates: 13g, Dietary Fiber: =0, Sugars: 6g, Protein: 1g, Vitamin A: 6%DV*, Vitamin C: 0%DV*, Calcium 0%DV*, Iron: 4%DV*
*DV = % Daily Values are calculated based on a 2000 calorie diet


My cookie's Nutrition is different:

1. Using Almond Meal/ flour instead of regular AP flour.
2. I used egg substitute (no fat) and 1/2 smart balance instead of all butter.
3. You can place a few nuts on top of each cookie instead of incorporating a whole cup in the batter.

The substitution of one cup of almond meal made the cookie very nutty tasting.

Make these and see if you family even notices that it's sugar free!


Enjoy!

Tuesday, January 26, 2010

Crustless What?


Gather all your family around the computer screen....Is this a crustless pizza or crustless quiche?

Honestly, I don't care really but it's really good! I found this on Lynn's Kitchen Adventures. She often makes two of some of her recipes, one as she has/found it and she then makes another to be gluten free. She made two versions one with a pie crust and one crustless. I am not going to even attempt the one with the crust for it was just delicious without one. She made it this way to be gluten free....I used the crustless recipe to have lower fat.

Here's what I did:

Crustless Pepperoni Pizza
adapted from Lynn's Kitchen Adventures

8 ounces of shredded cheese (I used 1/2 Fat Free Cheddar and 1/2 Reduced Fat Mozzarella)
2 ounces of sliced turkey pepperoni
1 (12 ounce can) Carnation Fat Free evaporated milk
1 egg, beaten
1/2 cup egg substitute
2 tablespoons flour
1 teaspoon Italian seasoning
1/8 teaspoon garlic powder
marinara sauce for topping or for dipping

Preheat oven to 350 degrees. Spray bottom and sides of 9X9 baking dish or pie pan. Sprinkle 1 cup of cheese and half of the pepperoni onto your selected baking pan. Whisk together the milk, eggs, flour, basil, and garlic powder. Pour onto cheese and pepperoni. Sprinkle remaining cheese over top and carefully lay pepperoni on top of cheese. Bake for 40-45 minutes or until done.

The first night of eating this was really good. When we ate the leftovers, to mix things up I added some marinara sauce and it was EVEN better. So whether you want it neat as is or want to live a little dangerously with potential drips from marinara....go for it!

Lynn was right in her post saying that the Evaporated milk made it seem much richer than using just milk. I was surprised that even with the FF evaporated milk....the eggs had a silkier feel like a quiche does than something like scrambled eggs. Good call Lynn! Delish!

Try it with crust or no crust. Pepperoni or sausage. I added a little chopped onion. Add peppers for more color...just try it!

Enjoy

Monday, January 25, 2010

Gearing up for Game Day!


How cute is this !?! Can you envision this at your Super Bowl party? We've been watching football for the past few weekends...gearing up to see who is going to get to the SB...perfect way for me to practice my preparations for the big event!

I found this on Pillsbury.com and as usual I played around with some of the fat content and it came out AWESOME. I think my presentation is even better than theirs!

Spinach Pull Apart
adapted from Pillsbury.com

3 Tbsp butter, melted
2 Tbsp garlic canola oil
1/2 tsp. garlic powder
4 oz. Fat Free cream cheese
3 Laughing Cow Light Swiss cheese wedges
3 Tbsp. fat free mayonnaise
1/4 cup parmesan cheese
1/2 cup reduced fat mozzarella cheese
1 box (9oz) frozen chopped spinach, thawed and squeezed dry
1/2 tsp. Italian seasoning
1/2 tsp. pepper
2 cans reduced fat Crescent Rolls
1 cup marinara sauce.

1. Heat oven to 350 degrees. Spray bundt pan with non stick spray. In a small bowl, mix butter, garlic powder and garlic oil (I just make some by heating up some canola oil with a few cloves of garlic, store in clean bottle with garlic cloves).


2. In a medium bowl, mix cream cheeses, mayo, spinach and seasonings. Stir until blended and set aside.


3. Unroll crescent doughs, separate into triangles. Cut each triangle in half lengthwise to make a total of 32 triangles. Stretch or press 1 triangle slightly, being careful not to tear it.


4. Spoon 1 Tbsp. spinach mixture onto center of triangle; pull doug around nixture into a ball. Press edges to seal. Repeat with remaining triangles.


5. Roll each ball in butter mixture; layer in pan. Bake 35-40 minutes or until golden brown. Cool 5 minutes. Place heatproof serving plate upside down over pan; turn plate and pan over. Remove pan. Cool 10 minutes longer. Serve warm with marinara sauce.


After I inverted my pull-apart I sprinkled more cheese on top. Found a dish the right size for the center (pictured at beginning of post). Here I pulled one apart and not one oozed or exploded. I had to open one up for the picture so you could see the cheesy spinach inside.

Not Monkey Bread more like Bunny Bread since it is full of spinach. Your Super Bowl party-goers will love it!


Enjoy!

Sunday, January 24, 2010

Nature's Pride Tastemaker

I have some thank you's to catch up on. To whom you ask? I've been behind on my thank you's to FOODBUZZ. SO, since things happen in 3's....I thought I better get crackin'.....

Foodbuzz always has Tastemaker giveaways. Sometimes I don't open my email fast enough and the foods available are already spoken for. So I've learned my lesson, don't let ANY Foodbuzz email wait to open.... They are a real giving foodie community.

My First Tastemaker participation was from Nature's Pride. I've gotten their bread many times in my own store. Very hearty and yummy. I often find myself holding up several of their loaves wanting the one with the most fiber.

I'd seen a few other Tastemaker posts. One was toast with cinnamon and sugar. Another was a sandwich. Are you kidding me? That's all they could come up with. Seeing those posts I was a bit intimidated. If I thought those posts were a bit....um....uncreative. I certainly didn't want anyone to think the same of ME.

So I came up with a interesting idea based on my use of it lately. Panko. Yes, it's easy to make like those other posts but I think it has more creative uses.


Homemade Multi-Grain Panko

1 loaf Nature's Pride Multi Grain Bread


Directions:

1. Tear up into pieces in your food processor. Seeing all the sesame and flax seeds on top made me happy!
2. Pulse into coarse crumbs.
3. Place on cookie sheets. I found this had to be spread on two cookie sheets otherwise I think the crumb layer would be too thick in order to dry out.
4. Place in 300 degree oven.
5. Bake for 6-8 minutes.
6. Use pasta server (the claw like server in your utensil drawer you don't use!) to move crumbs around.
7. You want to dry out crumbs not toast them so after moving crumbs around place back into oven for another 6-8 minutes.
8. Move around crumbs again and turn off oven and place crumbs back inside with oven door ajar to finish drying.

I've been trying to reduce the amounts of fat, sugar in our diet but also to bump up the fiber. Since I've been using more bread crumbs lately why not make them have more fiber too?

Here are my suggestions for the Multi-Grain Panko (hopefully you will find a new one):

1. Covering your chicken nuggets or chicken strips to bake in oven. The wheat in this panko will render a much nicer browned coating. Be sure to season your crumbs well.
2. Meatloaf will have a healthier binder instead of white bread slices. I know some of you make already use oatmeal which is a whole grain but now you can save it for breakfast.
3. Speaking of breakfast, this multi-grain panko has a sweet nuttiness that would be awesome sprinkled on top of your oatmeal in the morning or on top of your fruit and yogurt.
4. Run out of graham crackers for your pie? This panko would be perfect! Slightly sweet and nutty, you may never use graham crackers again.
5. Topping for your mac and cheese....add some butter, garlic and your favorite herb....perfection!
6. Add to your cookie recipe to add fiber and some nutty goodness. This way you don't have to add real nuts and increase your fat content to your cookies. I have s'more cookie recipe I am going to try soon using my panko instead of graham crackers.


Please be sure to add your comments here for any other suggestions you may have that I can add to the list!

My last thank you to Foodbuzz is for my Foodie Blogroll totebag. It took awhile to get here since I won it over the holidays. Made of canvas, very handsome and sturdy. It's now in my collection of grocery bags (much bigger than them as well!) so I am not using all those plastic ones the store provides. What a difference bringing home so much less plastic!

Stay tuned for my next Tastemaker post when I review what I made from Eggland's Best Eggs.

If you aren't a member of Foodbuzz give it a whirl being a featured publisher and you too can have more opportunities to PLAY WITH FOOD!

Enjoy!

Saturday, January 23, 2010

Cookie Club No Bake Goodies and 2 winners!

My after school group called Cookie Club was busy this week. We planned to do some no bake goodies with a candy bar theme. After you check out my posting today be sure to scroll down below to see who my CHEESY winners were! We made Baby Ruth Bars, Twix Bars, Mounds and had a 'happy accident' which we are calling Pay Day Bars.


Babe Ruth Bars
Makes 18 bars

" These taste like the candy bar. "

1-cup peanut butter
1 cup corn syrup
1/2 cup packed brown sugar
1/2 cup white sugar
6 cups cornflakes cereal
1-cup semisweet chocolate chips
1-cup peanuts

1. In a large saucepan over medium heat, combine the peanut butter, corn syrup, brown sugar and white sugar. Cook stirring occasionally until smooth. Remove from heat and quickly mix in the cornflakes, chocolate chips and peanuts until evenly coated.

2. Press the entire mixture gently into a buttered 9x13 inch-baking dish. Allow to cool completely before cutting into bars.


Twix Bars

35 unwrapped Kraft caramels
1/4 cup water
1 box Nabisco Lorna Doone shortbread cookies -- (40)
2 bags milk-chocolate chips -- (12 ounce)

Combine the caramels with the water in a small pan and melt over low heat.

Place the shortbread cookies side by side on an ungreased cookie sheet.
Spoon a dab of caramel onto each cookie. Then place all the cookies in the refrigerator until the caramel firms up. In the meantime, in a double boiler over low heat, melt the chocolate chips.
You may also use the microwave for melting the chocolate. Just heat the chips for 1 minute on high, stir, then heat for another minute. Remove the cookies from the refrigerator. Rest each one on a fork and dip it into the chocolate. Tap the fork on the side of the pan or bowl to knock off any excess chocolate. Then place each one on a sheet of waxed paper and let them cool at room temperature (65-70F). This could take several hours, but the bars will set best this way. If you want to speed up the process, put the candy in the refrigerator for 30 minutes.

Makes 40 bars.


Mounds Bars

7 oz sweetened condensed milk (1/2 can)
1 tsp vanilla
2 cup powdered sugar
14 oz flaked coconut
1 24 oz bag of semisweet chips


Blend the milk and the vanilla. Add the sugar a little at a time till smooth. Stir in the coconut. The mixture should be firm. Pat firmly into a 9x13 pan and chill till firm. Cut into bars and dip into melted chocolate and let cool on waxed paper for several hours.


The following was our 'happy accident' no bake treat. We had a whole bunch ingredients leftover from our making the three from above, the kids were hungry and we had some time left. The kids said:
"What would happen if we threw all these leftovers together?"
I said.
"Well, whatever we do, we need to pay attention to the amounts for if it's a hit....we will want to know what and how much we put in so we can do it again!"

After trying them out, the kids thought it tasted great. The used the 'word' "caramelly." Due to the peanutty taste to it I thought more "nougatty" Whatever, it WAS good.


Pay Day Bars

1/2 smooth peanut butter
1/2 cup corn syrup (we used dark)
1/2 cup sugar
1/2 cup brown sugar
7 oz. sweetened condensed milk
1- cup lightly salted peanuts (divided into 2>1/2 cup)

1. In a large saucepan over medium heat, combine the peanut butter, corn syrup, brown sugar, white sugar and sweetened condensed milk. Cook stirring occasionally until smooth. Remove from heat and stir in 1/2 cup peanuts.

2. Pour in lightly greased 8X8 pan. Press remaining 1/2 cup peanuts on top. Chill in fridge until firm. Cut into squares. Makes 20-25 bars.

OK Drumroll please! My two Cheesy winners are.....

Rachelle and Topher! I hope the PO doesn't xray the packages and wonder what this white powder is!!! I will be emailing my winners for their addresses! I can't wait to see what you guys come up with....of course just plain mac and cheese will do as well! Congrats Rachelle and Topher!


Have Fun!

Friday, January 22, 2010

Invite me to your Super Bowl Party...

Look how cute I am? Wouldn't I just fit right in at your Super Bowl Party and be adored by all?

Nod and say 'yes' for heaven sakes....don't hurt the little cutie's feelings...sheesh!

Simple, easy and tasty. When I made it for the little birthday party dinner I threw for my mom, the 5 of us gobbled up all 30. I am sure if the recipe had made more, eating them would have been no problem....even though they knew dinner was oncoming.

Spinach Crisps

1 box chopped spinach, thawed and squeezed dry in towel
1 can chiles, drained
1/3 cup mayonnaise (I used half fat free and regular to cut the fat a bit)
1/2 tsp salt
1/4 tsp. pepper
1 cup Monterey Jack and Cheddar Shredded Cheese Mix (it's finely shredded)
1 package won-ton wrappers

Preheat oven to 350 degrees. Place wonton wrapper in a ungreased muffin tin, gently press down dough to the bottom of muffin cup. Bake for 5-7 minutes until corner tips start to brown. Remove and put on cooling rack and start another batch. Repeat until you get 30. Wonton wrapper package will have more than you need and this is okay; for a few of them may 'fall' or get a puffed up bottom. I made a few extra until I got the perfect 30 I needed.

In a small bowl, put spinach that has been squeezed dry, can of drained chiles, mayo and salt and pepper. Measure out 3/4 of cheese and mix in. Cover and set in fridge until you need it. Let the baked wrappers remain on cooling rack until party time.

When ready to serve, preheat your oven again to 350. Line up all your baked wrappers on a tray or the cooling rack and fill each with roughly a teaspoon of filling. Then sprinkle the remaining 1/4 cup cheese and sprinkle on top. Place the needed amount on a cookie sheet and bake for 5-7 minutes the corner tips will turn a darker brown and the cheese will melt. When you have just a few left on your serving plate....time to bake the second batch.

These were crunchy, cheesy a lil zippy from the chiles. They weren't wet or drippy, stringy or gooey. Just perfect. An easy one or two-biter depending on how hungry or big your mouth is. LOL

Definitely a keeper - K-man was sad to see that there were no leftovers but to appease him I said, I certainly can make these again for Super Bowl, where K-man immediately chirped, "NOW WE'RE TALKIN'!!!"

Enjoy,

Thursday, January 21, 2010

Give your measuring spoons a rest!

I was in the spice section of my grocery store and I saw....

Hmmmm, looks like McCormick's been busy making something new. What is THIS about?

It's pretty cool if you ask me.

You see the spices pre-divided in the bubble card. When you pull off the perforated recipe card on the back, you will have access to the spices (which are MARKED in case you are 'spice recognition deficient')

On the recipe card, it tells you the other things you need and the directions. So what is the gist here? Think of the millions of premade spice mixtures in a bottle....that you are supposed to sprinkle on your foods. Most people would use them to marinate or grill things and that's it. There is no real recipe to use those bottles of spices unless you are creative or visit their sites to look for suggestions.

The added bonus here is that IF you like the dish made, you get to keep the recipe card from the back and do it again with your own spices. Who doesn't have paprika, garlic, thyme, red pepper and black pepper? Great to send with your college student who perhaps doesn't have all those spices in jars but a kitchen to cook in!

Here's how the recipe went:

Spanish Chicken Skillet

2 tsp. paprika
1/2 tsp. pepper
1 tsp. thyme
1 tsp. granulated garlic
red pepper flakes (add to your taste)
1/4 cup flour
1 tsp. salt
2 tsp. olive oil
1-1/2 lbs boneless chicken breasts (I used tenderloins)
1 red or green pepper (I used a whole bag of frozen pepper in red, green and yellow)
1 whole onion, chopped
14 oz can diced tomatoes
1/2 cup chicken broth

Mix seasoning in small bowl with flour and salt. Heat up skillet with olive oil. Sprinkle seasoning on chicken. You are not using it all up as I thought....

Cook chicken on each side for 3 minutes and set aside on a plate. Saute your onions and peppers until the start to soften, add your tomatoes and chicken broth, bring to a boil. Place chicken back in skillet with pepper mixture and simmer for 10 minutes.

You can serve over rice, with pasta or load up a tortilla and eat fajita style. This was pretty easy and perfectly seasoned. They have about 5 different flavors available (that I've seen so far) and I have one more to try. If it passes muster like this one did...perhaps you will see Quesadilla Casserole as a future post.

Look for it in your grocery and give it a try if you want to give your measuring spoons a much needed vacation!

Enjoy!

Wednesday, January 20, 2010

I would have never THUNK it.

Both K-man and my dad ADORE those orange slice candies. It's not a birthday or Christmas without each of them getting a bag of them for the holidays. I can eat probably like three and then I am over it. I usually just suck off the sugar and let the jell melt in my mouth for a bit until I chew it up. That is probably why only 3 do it for me. In my travels I found a cookie recipe using orange slices and I found it very hard to believe for I would think they would just melt into oblivion all over the cookie sheet....Heading off that mess....I decided to tweak the recipe...


Notice the gram weights on the side. I used my digital scale and weighed those things that said grams instead of cups only for I am beginning to be a believer is weighing is better that using measuring cups when it comes to baking....

Orange Slice Cookies

1 cup butter flavored shortening (192 grams)

1/2 cup Splenda brown sugar blend (105 grams)

1 cup white sugar (192 grams)

1 teaspoon vanilla extract

2 cups all purpose flour – (260 grams)

1 teaspoon baking powder – 5ml

1 teaspoon baking soda – 5ml

2 large eggs

1/2 cup mini chocolate chips
1 cup orange slices, chopped

2 cups rolled oats

1 cup pecans, toasted and chopped

Preheat oven to 350 degree F.

1. Cream shortening and both sugars with an electric mixer. Beat in vanilla. Add eggs and beat just until mixed (about 30 seconds).

2. Thoroughly stir flour, baking powder and baking soda together and add to sugar mixture. Stir until incorporated, then stir in chips, orange slices, oats and nuts.

3. Line a 10X17 cookie sheet (the smaller one) with non stick foil. Press down mixture onto sheet. Making sure you don't see 'pockets' of too much orange slices clustered.

4. Bake for 20 minutes or until they appear set. Cool in pan until warm and cut into desired bar sizes.

We loved the fact that these were like oatmeal bars, very hearty with the rolled oats and toasted nuts but not overly sweet from the candy and mini chips. And guess what? The orange slice chunks stayed intact and did not melt as I thought!

You could definitely drizzle more chocolate on these or a powdered sugar with orange juice glaze if you like. But we thought they were great the way just they way the came out of the oven!

For a fun alternative to your standard oatmeal bar...give these a try!

Enjoy!

Tuesday, January 19, 2010

Something seriously looks funny with this meatloaf!!

Yes, I know my meatloaf looks as though it's in the need for a serious TAN but there is nothing wrong with it. Just the choice of meat. Ground Chicken!

Always looking for something to do with ground chicken and turkey that doesn't involve a dried out burger or hidden in chili/spaghetti sauce.

If you have ever done any cooking with ground poultry, you are already aware of how DRY it can get due to its low fat content. So you have to add some 'moisture insurance' aka VEGGIES!

Chicken Meatloaf

1 lb package ground chicken
1 onion, chopped
1 tsp. salt
1/2 tsp. black pepper
2 cloves garlic, minced
2 small zucchini, shredded
1/2 cup BAKED potato chips, finely ground


In a bowl, put your ground chicken and salt and pepper. Chop onion and mince garlic and saute in frying pan until soft. With a food processor, using the shredding disk, shred up your zucchini. Do not worry about squeezing out water. We want this moisture. Add shredded zucchini to chicken and cooled onions and garlic. Place a few handfuls of baked potato chips in a small ziploc bag and use your hands to crush finely (this bit of fat free potatoes will help balance the moisture for it to be absorbed rather than cook out). Mix well and press into loaf pan. Cook at 350 degrees for 30-40 minutes or until loaf is firm.

Notice how plain the meatloaf is....since I knew this was going to be more than one meal for us I kept it "clean" for each night afterward it had a different sauce.
Night One: Chunky tomatoes (14 oz) italian style cooked until thick and spooned on top of slices.
Night Two: Simple butter, flour and chicken broth made into a chicken gravy on top.
Night Three: Fresh Salsa (not the jarred stuff) on top with a dollop of reduced fat sour cream.

Alfredo sauce, buffalo wing sauce or even barbecue sauce would work as well. Hence why I didn't why I didn't put herbs to further flavor the meatloaf so I could restyle the leftovers with any flavor we wanted.

Nice way to mix things up and keeping it simple so you can jazz it up the way you want with the topping and it's super moist! Added bonus that it's very lean, very little fat was rendered. Give it a try for your next 'meatloaf' dinner! It was delicious!

Enjoy!

Monday, January 18, 2010

OMG! I have to HAVE this recipe!

Ever said that when you ate something from a restaurant? Yeah well, good luck getting the recipe from the chef. Most of us have to resort to sneaking around for a copycat somewhere on the internet.

We ooh'ed and ahh'ed over a Lemoncello Dessert from the Cheesecake Factory. I've been trying many different recipes to try and replicate it....it's not hitting the mark but it's fun trying.


Limoncello Cupcakes


Yield: 1 dozen or 6 Texas Sized

For the cupcakes:
1½ cups all-purpose flour
1 teaspoon baking powder
½ teaspoon salt
2 ounces (½ stick) unsalted butter, at room temperature
2 ounces cream cheese, at room temperature
1 cup granulated sugar
3 large eggs
2 tablespoons limoncello
½ cup buttermilk
¼ cup lemon juice
Zest of one lemon
jar of Lemon curd or

Make your own homemade:
For the lemon curd:
Zest of 2 lemons
½ cup lemon juice
¼ cup granulated sugar
1 egg + 1 egg yolk

For the cream cheese limoncello frosting:

2 ounces (½ stick) unsalted butter, at room temperature
4 ounces cream cheese, at room temperature
1 tablespoon limoncello
zest of one lemon
2 cups powdered sugar, sifted

1. Prepare the cupcakes. Preheat the oven to 350 degrees F and position a rack in the center. In a medium bowl, combine the flour, baking powder and salt; set aside. In the bowl of an electric mixer fitted with a paddle attachment, beat the butter, cream cheese and sugar on medium speed until light and creamy, 2-3 minutes. Add the eggs, one at a time, beating well after each addition. Add the limoncello and beat an additional minute. On low speed, add flour mixture and buttermilk alternatively, beginning and ending with the flour mixture. Add the lemon juice and zest and mix on low speed just until incorporated. Divide the batter between 12 muffin tins (I used one Texas Size Muffin tin). Bake for 20 minutes or until a toothpick inserted near the middle comes out clean. Let cool completely.


2. Prepare the lemon curd. In a heavy medium saucepan, stir together the lemon zest, juice and sugar and bring to a simmer over medium heat. In a small bowl, whisk together the egg and egg yolk. Whisk the lemon mixture into the eggs to temper them. Scrape the mixture back into the saucepan and place over medium heat, whisking constantly until it thickens, about 5 minutes. Remove from the heat, and let cool completely.

3. Prepare the cream cheese limoncello frosting. In the bowl of an electric mixer fitted with the paddle attachment, beat the butter and cream cheese on medium speed until light and creamy, about 2-3 minutes. Add the limoncello and beat for an additional minute. Reduce the speed to low and gradually add the sifted powdered sugar and beat until fully incorporated and smooth.

4. Assemble the cupcakes. Cut a hole into each cupcake with the large end of a melon baller or the back end of a large pastry tip. Fill each cavity with the lemon curd. Fill a pastry bag with a star tip (I used Wilton 1M) with the cream cheese limoncello frosting and pipe onto each cupcake. Decorate with lemon and berries, if desired.


Cook's Notes:

  • I feel I am getting close. This cake was too dense for me. My first recipe used a Japanese Soft Lemon Cheesecake recipe and it was still soft and spongy despite being refrigerated. This cake became too firm.
  • The jarred Lemon curd was okay but I've made homemade lemon curd for pies before and it's definitely better and more tart....jarred stuff is not tart enough and overly sweet.
  • This frosting was lovely, spot on.
  • So the next time you see my post on this again, I will have used the Japanese Soft Lemon Cheesecake recipe in a springform pan split into two layers. Homemade lemon curd as filling, and this frosting lightened up with whipped cream. Oh, and some strawberries of course. I am definitely in the process of cracking this case...perhaps I need to go to the Cheesecake Factory and try it just onnnnnneeeeeeeee moreeeeeeeeee time! You know, for research!
And if you are FEELING CHEESY, scroll down to my last post and enter my giveaway. Try your hand with cheese powder and see what you come up with! I wrote a post note about how I used the fresh powder I am giving away....please go and read!

Enjoy!

Sunday, January 17, 2010

JennyMac being Cheesy....again and a Giveaway.


Although I like many types of macaroni and cheese, I don't have it so easy. K-man runs very hot and cold about it. My stats run 1-4 on him liking the M&C recipes I've made. He says he can't explain it why Mac and Cheese is just something that he doesn't HATE but just isn't fond of. WHAT? ARE YOU NUTS? Sometimes he likes it, sometimes not. Once I find the recipe he likes I am DONE. No more trying new M&C recipes.

I found a new recipe on Baker's Banter (King Arthur's Flour) for Garlic-Herb Mac and Cheese and wanted to give it a try. They use a powdered white cheese powder which I already had. But I was a little apprehensive since the powder was now a BLOCK.....I had to run a hunk through food pro to measure out a 1/2 cup. Doesn't look promising. I made it and thought I am really not using this perhaps I should just toss it out after this recipe....Stay tuned for what happens after I made this.....

Garlic-Herb Mac and Cheese
adapted from "The Big Cheese-y" by King Arthur's Flour

8 ounces (about 2 cups) uncooked tube-type pasta (you gotta have something to hold the sauce!)
1/4 cup cake flour (they used on of their special mixes, they said you could sub flour)
2 -3/4 cups milk
1/2 cup Vermont cheese powder (see above-you can substitute a packet from any white cheddar mac and cheese box)
2 cups shredded cheddar cheese (I used Cabot's 70% reduced fat white cheddar)
1/2 teaspoon ground black pepper
1/2 teaspoon ground mustard powder
1/4 to 1/2 teaspoon salt, to taste

Topping

4 tablespoons butter
2 teaspoons garlic oil, optional
2 teaspoons Pizza Seasoning or rosemary and thyme
1 -1/2 cups Japanese panko (coarse bread crumbs)

Directions

1) Preheat the oven to 350°F. Grease a 2-quart baking dish.

2) Cook the pasta in boiling salted water until al dente (slightly firmer than you would normally eat it). Drain and rinse with cool water. Set aside.

3) In a large saucepan set over medium heat, whisk together the flour, milk, and cheese powder. Bring to a boil.

4) Remove from the heat and stir in the cheese and seasonings. Stir occasionally, until cheese is completely melted.

5) Stir the pasta into the cheese sauce. Spoon it into the baking dish.

6) Melt the butter and garlic oil together, then stir in the pizza seasoning and panko bread crumbs. Sprinkle a thick layer over the pasta and cheese.

7) Bake the casserole for 25 to 35 minutes, until bubbly and browned. Remove from the oven, and serve hot.

Yield: 5 1/2 cups, about 4 servings.

Notes:
The crumb topping was delicious and crunchy. But, as for the cheesy noodles, I am not sure if my powder had something to do with it, but something about this was off. It was creamy not gritty but I think the powder was past it's prime. I will want to make this again. WHY, you ask?

Because my mom walked in the door for dinner with a bag of 3 NEW bags of white cheese powder. Oh lord. I had a hard enough time using up ONE bag, now I have 3 new ones? GEEZ.

The Giveaway:
So, I will keep one and I want to giveaway the TWO others for those who would like to try out this white cheese powder for themselves. You certainly can just can use it just like your standard mac and cheese directions with 1/4 cup butter and 1/2 cup milk with probably 2-3 Tbsp of the powder with their cooked macaroni OR use it to follow this recipe.

SO, if you have never used cheese powder and want to play around with it or use it to try and make your own copycat cheese nips like I did, drop a comment and I will determine a winner in the next few days.


Post Script NOTE: So I used one of the new bags of Cheese using the same cheese sauce recipe for some broccoli and it ROCKED. Yum! Therefore, I am concluding that the M&C I made and said it was 'off' I was right. It WAS the cheese powder...past it's prime. Those of you hesitant to enter thinking this cheese powder isn't good. Not true!

Cheese and

Sunday, January 10, 2010

It's only appropriate....

As I am about to post about the recipe I made today, I ask K-man to pick out number and give him the range so I can announce my Blogversary giveaway winner....the winner picked Pioneer Woman Cook's new cookbook and I was just about to post one of her recipes! Destiny I tell ya!

My blogversary cookbook giveaway winner is:

noraolsen said...

Thanks for the list of great books! I'm always up for a cozy mystery and as a Seattle-ite, I should get myself to Molly's restaurant, but I've become a huge fan of PW, so I'd have to go with her book. Happy New Year!

Ok 'noraolsen' now you email me your address and I will send off your book! Congrats!

As for the PW recipe, it's not from her cookbook but from her blog as well as her site Tasty Kitchen.

I made her wonderful Simple, Hearty, White Chili. It's been freezing cold here so I really wanted something to warm our bones and something that wasn't going to have a lot of fat floating around in it either.

It was pretty easy....I used a deli-roasted chicken from the grocery store (on sale every sunday for 4.99!) Boned it and shredded it while the onions and garlic was cooking. Added some chiles and jalapeno (it mellows out later, don't worry)...some chicken broth. Season it up with cumin, salt and pepper. Cooked the great northern/cannelini beans for a bit then added the chicken. Thickened with some masa. Roughly 3 hours later....white chili!

Top it with cilantro, pepper jack cheese, guacamole or pico de gallo. Heck throw it ALL on! Add your favorite bread like a tortilla, biscuit, crusty white, english muffin. We were in heaven!

I didn't type out the recipe for PW has a great recipe site all set up for you to print from there. So why re-invent the wheel?

If you really would like an alternative to eating traditional chili, especially those who don't eat beef or want to cut the fat...then this recipe is for you!

Cook's Notes:
1. You cool boil your chicken parts to get your cooked chicken but I didn't want the added fat from the skin rendering.
2. I used Skim milk instead of whole to make the masa flour paste. We didn't miss the fat when the milk is used really to make the masa into a paste so it wouldn't lump up in your pot.
3. And yes, you have to get masa flour, I wouldn't suggest using cornmeal for it's too grainy. You are making a very smooth thick broth. You can't skimp on leaving this out for the corn flavor in this chili from the masa is essential!
4. You can really control the salt content of this recipe by using a lower sodium chicken broth.
5. I topped our chili with Cabot's 50% lower fat pepper jack cheese and using the low fat sour cream.

Yummmmmmmmm....