Showing posts with label main dish. Show all posts

Tuesday, December 30, 2014

Gluten Free Elbows with Mixed Mushrooms and Italian Sausage Soup

Nothing helps a cold feel like it's getting better than some soup.  Homemade soup.  This is my second recipe for Barilla this month with Allrecipes Allstars Ambassadors.  So many people may think of just classic Italian recipes when using pasta...something tomatoey or lasagna layered or even a casserole.  I think people forget to round out a soup with some pasta to make it more a complete meal especially when the soup may be mostly protein and veggies...throw in some pasta!

Keep reading to view the recipe but also how it made it mine....

Gluten-Free Elbows with Mixed Mushrooms and Italian Sausage Soup
from Allrecipes.com, sponsored and recipe by Barilla

1 (12 ounce) box Barilla® Gluten Free Elbows
3 quarts chicken stock
3 cloves garlic, minced
4 tablespoons extra-virgin olive oil
1 sprig rosemary
4 (6 ounce) packages mixed mushrooms
1 pound Italian sausage, boiled for 10 minutes and cut into 1/3 inch slices
1 (15 ounce) can cannellini beans, drained
1 pint cherry tomatoes, halved
Salt and black pepper to taste
1 tablespoon parsley, chopped


1. In a large soup pot, bring the chicken stock to a simmer.
2. Meanwhile, in a skillet, saute garlic with olive oil and rosemary for one minute or until slightly yellow. Add mushrooms and saute until lightly browned. Add sausage and saute for 2 minutes.
3. Add mushrooms and sausage into broth; stir in beans, tomatoes and Barilla® Gluten Free Elbows. Cook for half the recommended time on the box.
4. Let the soup rest for ten minutes before serving. Season with salt and pepper. Garnish with parsley and olive oil drizzled on top.

Cook's Notes:

1. I like using Gluten Free products, even though I have fallen off my Paleo wagon and have no gluten allergies, I find the GF products don't give me any stomach distress.
2.  Although it is nice to receive some coupons to assist in the cost of the recipe making, I didn't feel the need to get 4 different packages of mushrooms.  The slice baby bellas looked good so they won.
3.  We always have hot Italian sausage in the freezer so I baked 5 links off.  Always looking for Zip! Cutting into 1/3 inch?  Come on now...
4. I just used a handful of grape tomatoes that I had left,  you could use a 15 oz canned whole tomatoes if you wanted but I felt this soup had plenty already.
5. Skipped the parsley because I had fresh basil I needed to get rid of....
6.  Look at the amount of elbows in the picture.  I used only HALF a box.  If I has used the whole box, this wouldn't be a soup anymore but turn into a casserole.  Unless you are feeding an army, you will need to increase the amount of stock if you use the whole box.

This was a tasty soup AND very hearty.  After I made this I got wild whim to whip up some cornbread to eat with it.  Delish!

#AllstarsBarilla

Slurp!

Saturday, November 22, 2014

Homemade Spinach Pizza Roll

If I asked what is the ONE dinner that you eat at least once a week, regardless of work night, school night or weekend....what would your answer be?

Fast Food? (please don't say McDonald's) Soup? Sandwiches? Spaghetti? Pizza? PB and J? Cereal?

Ours is PIZZA! First of all, we rarely call out for pizza if we do I am, knocked out, dragged out too tired from work to even walk into the kitchen and we have this little hole in the wall pizza place we call, no Domino's or Pizza hut (yuck) However, when I want an easy night to make dinner, it's Pizza Night! We like a thin crust, no sauce, one meat and lots of veggies!

For November, the Allrecipes.com Allstar Ambassadors could choose Reynolds this month to cook, blog and share about. I jumped on that!  I am a huge fan and use the Reynold's Non-stick Foil practically everyday. I have a roll in the drawer and always a spare in the cabinet for when you finish the "roll in the drawer." Nothing is more infuriating than to pull out the foil to cover a long pan and BOOP!- you get a 3 inch strip and naked cardboard roll! Dammit, you say because you have no more.  Not me.  As soon as I open the new roll, I am shopping for the back up roll next week.  So yeah I am THAT devoted and it really is totally different that regular foil.  I especially love using it when I bake my bacon.  I do not fry it on the stove anymore.  350º for 20 minutes on the non stick foil....so much easier. 

Ok, back to pizza.  One of the recipes I choose was the Homemade Spinach Pizza Roll.  I love variations on a popular favorite!  Some people would call this a stromboli but whatever, my mouth and stomach don't care what it's called.  It was delish! Take a look at some of my notes after the recipe.

Homemade Spinach Pizza Roll
from Allrecipes.com, recipe by

1 tablespoon cornmeal
8 ounces bulk Italian sausage
1 (13.8 ounce) package refrigerated pizza dough
1 cup shredded mozzarella cheese, divided
1 cup fresh baby spinach
1/4 cup grated Parmesan cheese
1 egg, lightly beaten
1 (8 ounce) can pizza sauce, warmed

1. Preheat oven to 375 degrees F. Line a large baking sheet with Reynolds Wrap(R) Non-Stick Aluminum Foil; sprinkle with cornmeal. Set aside.
2. Brown sausage in large skillet on medium-high heat. Drain and set aside.
3. Unroll pizza dough onto prepared baking sheet. Carefully stretch or roll dough into a 13x10-inch rectangle. Arrange sausage on dough to within 1/2 inch of the edges. Sprinkle with 1/2 cup of the mozzarella. Layer spinach on cheese. Top with the remaining 1/2 cup mozzarella and the Parmesan. Starting from a long side, roll up dough to make a 13-inch-long loaf. Pinch seam and ends to seal.
4. Place loaf, seam side down, on the prepared baking sheet. Brush with egg. Using a sharp knife, cut four 2-inch slits in top for steam to escape.
5. Bake 20 to 25 minutes or until golden brown. If necessary, cover the last 5 minutes of baking to prevent over browning. Remove from oven and slice into rounds to serve with pizza sauce.
#AllstarsReynolds 
#MealMagic
Cook's Notes:
1. Don't ask why my photos were taken at an angle.  I viewed them now and in the cropping process I was like WTH, was I thinking?  Stupid but oh well. I am NOT one of those photogs that take too many pictures.  I click for what is needed and CHOW DOWN, no time to mess around.
2.  This was actually my second attempt, the sausage went in that version.  It stuffed it too much and although it was ok....the internal picture wasn't as nice. So when I made TAKE 2.  I had only meatballs on hand.  Chopped up and sauteed olive oil.  They worked just fine.
3.  My first attempt was using a store brand canned pizza dough, I also rolled it out too thin, don't do that.  The second one I used Pillsbury and didn't push my luck on the thinness, I stretched it out just about 2 inches more than it's original size.  You can see the breading around holds the ingredients well. 
4.  i REALLY liked the spinach on this.  I hate how you can pile on tons of fresh spinach and it reduces down to nothing.
5.  Even though the Non-Stick foil really sticks less, the cornmeal really helps make this virtually non sitck.  I use cornmeal on my fresh pizza dough nights too.
6.  What I adore mostly about making pizza or pizza rolls/strombolis is that they are so versatile.  Whatever ingredients you have on hand will work and you will never get tired of Pizza Night each week.


Bite it!

Tuesday, March 11, 2014

Kick'N Chicken with Mango Salsa

Ooooohhhh, you're gonna like today's post.

Our second recipe to make this month for Allrecipes.com Allstars was Sweet and Spicy Salmon with Grapefruit Salsa. Unfortunately since that recipe was not possible I opted for another recipe from Mazola® Corn Oil.  Aside from chicken being one of our favorite proteins but I really enjoy the "sweet and savory" combination.  This recipe rings some bells.

This recipe came at a good time.  Remember the big rain Los Angeles was having before the Oscars?  That same Monster storm swept across the US and pounded our eastern area with SNOW.  One the day it was supposed to hit...it started to drizzle and I cranked up the grill before the snow developed from the rain.  Best snow day ever GRILLIN'!

Kick'N Chicken with Mango Salsa 
from Allrecipes and Mazola®

4 (4 ounce) boneless, skinless chicken breasts
2 tablespoons chicken seasoning
1/4 cup Mazola® Corn Oil
3 tablespoons fresh lemon or lime juice
Mango Pepper Salsa:

2 cups diced fresh mango
1 cup diced red bell pepper
3 tablespoons minced red onion
1 tablespoon fresh lemon or lime juice
2 tablespoons minced fresh cilantro
Salt and pepper to taste

1. Preheat grill to medium heat, or between 350 degrees to 450 degrees F.
2. Trim excess fat from chicken, rinse and pat dry. If necessary, pound chicken to 1/2-inch thickness. Place chicken into a 1-gallon size resealable plastic bag. Add seasoning, oil and lemon juice to the bag. Seal bag and turn to thoroughly coat chicken.
3. Grill chicken over direct high heat for 6 to 8 minutes. Turn chicken and continue to cook for 6 to 8 minutes until cooked through. Transfer to a serving plate.
4. Combine salsa ingredients in a bowl; stir and season to taste with salt and pepper. (Can be made up to 8 hours ahead and refrigerated until ready to serve.)
5. Top grilled chicken with mango salsa and serve immediately.


Cook's Notes:
1. I bought two regular organic breasts.  They were almost about 8 oz. apiece.  I sliced them in half horizontally. If you buy the breasts that are already sliced thinly keep in mind...they will cook QUICKLY.
2.  My husband prefers thighs and I cooked four breasts and several thighs.  I didn't follow the amount of the chicken seasoning because I spread out all the chicken and just seasoned away my favorite Mrs. Dash Southwest Chipotle Seasoning.
3.  I used 3 mangoes, half red pepper and two thick slices of red onion, chopped.  I don't chop and measure things like fruit and veggies.  I don't want a 1/4 cup of anything leftover until I have a use for it.  This salsa provided enough for two dinners for two.

I am an Allrecipes Allstar brand ambassador (a voluntary position) and I'm not compensated for my work with Allrecipes.com.  Products received from the advertiser are only used for experienced-based reviews on Jenny Mac's LipSmack.  The reviews, content, and opinions expressed in this blog are purely the sole opinions of JennyMac.  To learn more about the Allrecipes Allstars program visit, Allrecipes Allstars.

#AllstarsMazola®

LipSmack this,

Saturday, March 8, 2014

Pork Carnitas with Cilantro Tomatillo Sauce

Tasty Time! 
Plus-  New Season of Fun with recipe exploration as a AllRecipes.com Ambassadors AllStar.
This month's Sponsor is with Mazola® Corn Oil 

I have never made carnitas before.  Eaten them plenty.  When I saw the recipe said "pork shoulder" I remember seeing it in the store but I recall making barbecue with either ribs or butt portions.  Our store did not have any out.  I asked for a pound and they were happy to oblige.  The cost of it was rather inexpensive too!
My husband and I are taking a new outlook on eating.  I am currently doing NutriSystem to get my health back on track and my husband (who is a very athletic cyclist) is enjoying eating more vegetables because there are more now in the house instead of breads and cookies and cakes.  Lucky for me my cholesterol level is under the radar but cooking more veggies with heart-healthy Mazola® Corn Oil can help.  Click here for more recipes using Mazola!

Pork Carnitas with Cilantro Tomatillo Sauce 
from Allrecipes

1 pound pork shoulder
2 tablespoons Mazola® Corn Oil
1/4 cup chopped onions
1/2 teaspoon Spice Islands® Garlic Powder
1 tablespoon Spice Islands® Chili Powder
1/4 teaspoon Spice Islands® Chipotle Chile Powder
2 tomatillos, finely chopped
1/2 cup finely chopped tomatoes
1/4 cup coarsely chopped fresh cilantro
4 corn tortillas
1.  Cut pork into 1 inch cubes; season with salt and pepper. Heat oil in large skillet or Dutch oven. Add pork, onions, garlic powder, chili powder and chipotle chile powder; saute 3 to 5 minutes to brown the meat.
2.  Add enough water to barely cover pork. Bring to a boil; cover, reduce heat and simmer 30 minutes. Remove lid and continue to simmer an additional 45 minutes or until liquid has evaporated.
3.  Combine chopped tomatillos, tomatoes and cilantro in a small bowl.
4. Place an equal amount of pork on each tortilla. Top with tomatillo salsa.


Cook's Notes:
1.  I found the pork shoulder was marbled with plenty of fat.  I think in the future I would  cut off some of the fat to reduce the fat rendering.  It was swimming in fat when it was done.
2.  I find a lot of people do not like the flavor of cilantro.  I admit, it took me a long time to appreciate it.  I suggest chopping the leaves finely and add a little bit to develop it's taste.  Making this without cilantro really would be a crime.  Cilantro adds a lot of flavor....ease your way into it.
3.  I personally added more onions and green peppers to AMP up the veggies content to make this more heart healthy.

I am an Allrecipes Allstar brand ambassador (a voluntary position) and I'm not compensated for my work with Allrecipes.com.  Products received from the advertiser are only used for experienced-based reviews on Jenny Mac's LipSmack.  The reviews, content, and opinions expressed in this blog are purely the sole opinions of JennyMac.  To learn more about the Allrecipes Allstars program visit, Allrecipes Allstars.
#AllstarsMazola

LipSmack this,


Monday, August 26, 2013

Beef Empanadas

 Here is my 3rd and last Goya recipe for this month of August.  We were also supposed to do a beef recipe from "Beef, It's what for dinner" council.  August is a really busy month with me going back to the classroom so I did a beef recipe with my Goya product.  Knocking out two and one.  So this last one, I really wanted to see if I could find the Goya "Discos" or the puff pastry circles to make Empanadas.  Luckily at my second attempt at a Safeway that seemed to have lots of Goya on their shelves...I tried my luck in the freezer to look for the dough and SCORE!!! I scooped up two.  I stay away from recipes most times that have you make your own doughs.  I just don't have the time or patience for it anymore.  When I saw that Goya made its own dough for Empanadas I had to see if I could find it and so happy I did.
Allrecipes had only one empanada recipe from Goya and in true JennyMac fashion I tweaked it:

-I did not use all their prepared seasonings and such.  I was fearful of it being too salty,
-None of the seasonings (Sazon Goya and Goya Soffrito) were included in my box of goodies so I wasn't going to go out and buy them.
-I added a non-traditional food in it, (K-man doesn't like olives) sweet potato.
-I did NOT FRY them.

Beef and Sweet Potato Empanadas
by JennyMac Lipsmack on Allrecipes.com

1/2 pound ground beef
1/2 medium yellow onion, finely chopped
1 medium sweet potato, peeled and cubed
1/4 cup Goya Tomato Sauce
1 Tbsp. Adobo seasoning
1 teaspoon Minced Garlic
1/2 teaspoon Dried Oregano
Ground Black Pepper, to taste
1 (14 ounce) package Goya Discos (yellow or white), thawed
About 1/4 c. Oil, for cooking and brushing
Preheat oven to 400 degrees.  Heat about 1 tbsp. oil in a large skillet over medium heat. Add ground beef and cook until browned, breaking up meat with a wooden spoon, about 10 minutes. Remove and put to side.  Put another tbsp of oil and onions and sweet potato in the already heated pan. Cook until soft, about 10 minutes. Stir in tomato sauce, adobo, garlic, oregano and black pepper and add the ground beef back into the pan mixture. Taste for seasoning
On a lightly floured work surface, using a rolling pin, roll out discos until 1/2-inch larger in diameter. Spoon about 1 tbsp. meat mixture into middle, fold in half to form a half moon; moisten edges with water and pinch to seal closed, or seal with a fork.
Line cookie sheet with either a silpat or parchment.  Brush with oil.  Place 12 empanadas on sheet and brush with oil.  Place in preheated oven and bake for 15 minutes.  Turn empanadas over and bake for another 5 minutes or until both sides are golden brown.

This is the second time I took a classically FRIED recipe and baked it (I also bake egg rolls now instead of deep frying them) and the dough comes out just as crispy as though it was fried and so little oil is being absorbed by doing this.  
I AM GOING TO GO BACK AND BUY MORE OF THESE DOUGH DISKS....SO CONVENIENT AND THEY WERE AWESOME!!!

All in all, the Goya products were top notch and I used them before, so it was a no-brainer to me about using them.  Also we like to eat beef here so a double  assignment of making a beef recipes wasn't to difficult since we eat it at least twice a week.  It was fun taking a beef recipe and creating a new filling and using a new Goya product.  This was a good month for food from Allrecipes Allstars.

Enjoy!

Sunday, August 25, 2013

Cheesy Chicken and Yellow Rice

Time for my second Goya Recipe review.  I find that I really have to play with rice when it comes to K-man.  He is not a fan of plain rice at all and any flavored rice has to be really good for him to finish what is on his plate. 

My tweak on this recipe was adding a little cream of chicken soup.  That made this a winner to K-man.  Clean plate. 

I also didn't want to mix all the veggies and chicken in with the rice because K-man likes to have his food somewhat separate.  Although, personally I don't care K-man perhaps thinks he gets more of a variety through eating a bite of the chicken and pepper then the rice.  Not rice coated chicken and peppers.  It's not like he is OCD and the chicken can't touch the vegetables and the rice can't touch them either.  He's not THAT bad! 

All in all, I felt this was a pretty good recipe and would do it again.

Cheesy Chicken and Yellow Rice
by Goya on Allrecipes.com

1 (8 ounce) box GOYA® Yellow Rice
2 medium tomatoes, cored, seeded, and finely chopped
2 tablespoons GOYA® Extra Virgin Olive Oil, divided
1 pound boneless, skinless chicken breasts, cut in 3/4-inch pieces
GOYA® Adobo All-Purpose Seasoning with Pepper, to
taste
1 medium green bell pepper, chopped
1/2 medium onion, chopped
1/2 cup shredded Cheddar cheese
 
In small saucepan over medium heat, bring 2 cups water to boil. Add contents of yellow rice mix, tomatoes and 1 tbsp. oil; return water to boil. Reduce heat to low. Cook, covered, until water is absorbed and rice is tender, about 25 minutes.
Meanwhile, heat remaining oil in medium skillet over medium-high heat. Season chicken with Adobo. Cook chicken until golden brown, about 5 minutes. Add bell peppers and onions to skillet. Cook, stirring, until vegetables are soft and chicken is cooked through, about 10 minutes more; remove from heat.
In skillet with cooked chicken, stir in cooked rice until combined. Mix in cheese, stirring until melted. Serve warm. (I did not stir in my rice with chicken as shown above but you can do what pleases you most)

Cook's notes:  I added 1/2 cup cream of chicken soup in with the step with the cheese and it made the rice so much creamier!

Friday, March 15, 2013

Beefaroni/Sausaroni

One of my assignments as an Allrecipes.com Brand Ambassador was to take a ground beef recipe and change it using Johnsonville Sausage.  All righty!! Don't need to ask me twice!
I know the picture is not stupendous but it was nighttime, it was dinnertime and we were hungry- nuff said.

This recipe was for Beefaroni.  Ground beef, tomato sauce, cheese and pasta. Being JennyMac who is notorious for playing with food.  I did some tweaks.  Those ingredients was just TOO boring.  I had to add some onions.  Double onions.  Raw onions in the mix and French's Onions on top.  It was great!  Of course if you are a fan of Johnsonville and have a FB page, try Johnsonville Kitchens- its another source of recipes plus this way you get a more open forum of things people are doing/sharing.

Now since this is a tweak, I will put the original recipe and provide the link to Allrecipes - following it I put my notes.  Here is a link to my customized Sausaroni recipe.

Beefaroni
from Allrecipes.com

1 pound ground beef
2 cups shredded Cheddar cheese
2 (15 ounce) cans tomato sauce
2 tablespoons butter
1 (16 ounce) package uncooked elbow macaroni
salt and pepper to taste

1. Preheat the oven to 350 degrees F (175 degrees C).
2. Crumble the ground beef into a large skillet over medium-high heat. Cook, stirring frequently, until evenly browned. Drain.
3. While the ground beef is cooking, bring a large pot of lightly salted water to a boil. Add macaroni, and cook until tender, about 8 minutes. Drain, and stir in butter. Transfer to a large casserole dish, and mix in the ground beef, tomato sauce, and Cheddar cheese. Sprinkle a little salt and pepper over the top.
4. Bake uncovered for 30 minutes in the preheated oven, or until heated through and bubbly.

Cook's Notes:
1.  Substitute one package of Johnsonville Sausage, I used HOT Italian.
2.  I added half chopped RAW onion to step 3.  We wanted the onion with a little bit more bite....not faded and mooshy.
3.  I added salt and pepper and 1 tsp. garlic powder to the whole mix not just on top.
4.  I sprinkled half a container (about 1 cup) of French's Fried Onion on top for the last 5 minutes of cooking.
5.  Next time I will do this half tomato sauce and half diced tomatoes!
6.  Added BONUS!  Did you know that they make CORN ELBOW pasta for those who are GLUTEN FREE?

I am sure your KIDS would love this.  Using the mild or sweet sausage I am sure would be good,  not sure hot your kids can take it.  I am so used to HEAT that my tongue may be OFF.  lol  Serve with a salad and garlic bread. 

YUM!

Tuesday, February 1, 2011

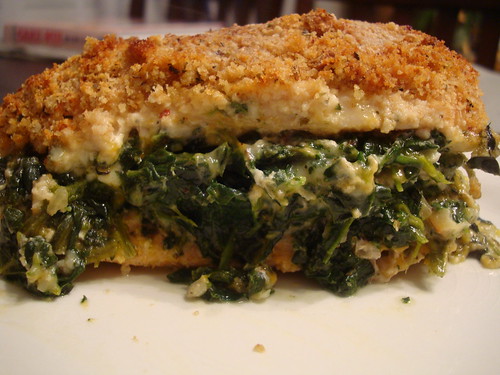
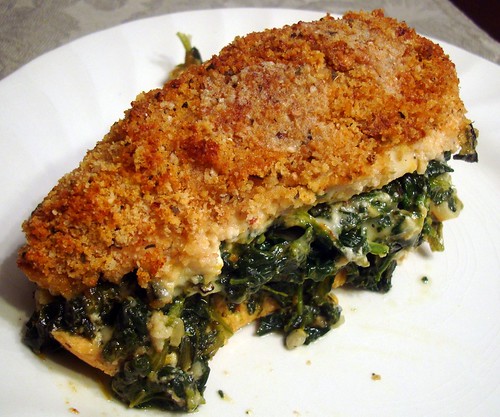
Spinach Stuffed Chicken

I love when I can get my protein and veggies in one dish. One stop cooking is ideal some days. The versatility of this recipe is that you can change up the cheese or seasoning to tailor the dish to your tastes.

Spinach Stuffed Chicken

Spinach Stuffed Chicken
by JennyMac Lipsmack

olive oil
1/2 medium onion, chopped or 1/2 cup green onion, chopped
3 garlic cloves, minced (make two piles: 2/3 and 1/3)
10 ounces boxed spinach, thawed
1/2 cup cheese (feta, monterry jack, cheddar, swiss -your preference)
salt and pepper to taste
3 Tbsp. butter
1 cup breadcrumbs (italian, plain, panko, cracker- whatever you have on hand)
1 tsp. oregano (basil, rosemary, sage- whatever floats your boat)
4 boneless, skinless chicken breast (split in half lengthwise)

Preheat oven to 425 degrees. Heat 1 Tbsp olive oil in small pan on medium heat. Add the onion and 2/3 of the reserved garlic, cook until softened 3-4 minutes. Place cooled onions in bowl with thawed spinach, cheese and season with salt and pepper. Melt butter in pan used for onions, turn off heat and add crumbs, herbs and remaining garlic. Toss around to mix herbs, crumb and butter.

Drizzle a baking dish with another 1 Tbsp of olive oil. Split each chicken breast lengthwise but not all the way (like a book). Stuff with spinach and cheese mixture, letting the stuffing overflow at the edges. Place the chicken pieces in the baking dish and top with breadcrumbs. Bake until juices run clear or internal temperature is 165 degrees or about 20 minutes.

Serves 4.

Spinach Stuffed Chicken1

Serve with a some bread and a leafy salad and you are good. This was delicious. I can't wait for the leftovers tomorrow!

Go stuff yourself!

Tuesday, October 26, 2010

Sage and Garlic Chicken

A roasted chicken cooking in our house just makes me want to float in the air instead of walking...come to think of it...so does bacon, cookies, fresh bread, tomato sauce. Ok get a hold of yourself Jenny, clearly you love food smells.

Sure I like the ease of boneless chicken parts to cook with mostly but on the weekend I can appreciate the slow roasted chicken when I have more time to spend on preparing it and cooking it.

Sage and Garlic Roasted Chicken
by JennyMac Lipsmack

1 whole chicken roaster
handful of fresh sage, finely chopped (my last from the garden)
2-3 garlic cloves
2-3 Tbsp olive oil
2-3 Tbsp vinegar
1 onion quartered
8-10 whole carrots, washed and peeled

Wash and peel your carrots and line your roasting pan with them. Your chicken will cook on top of them. Unpackage your chicken and be sure to read the directions how long per pound. Don't totally rely on those pop up timers! I've have them not POP before. Be sure to remove the 'chicken stuff' on the inside of you chicken. Dry off chicken and thoroughly salt and pepper it all over inside and out.

Grind up your sage, garlic and olive oil and vinegar in a blend, food processor or mini food chopper (just perfect). Rub mixture under skin, over skin and inside chicken. Place quarter onions inside chicken. Bake in a preheated oven @ 350 degrees.

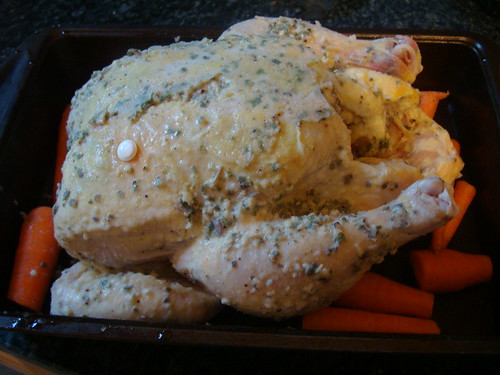
BEFORE:
Sage and Garlic Roasted Chicken
*I know this picture does not depict how the carrots were instructed to be used in the recipe but after a few attempts, the recipe above rendered more tender and tasty carrots. This picture was attempt number one....I preferred attempt #2's carrots.

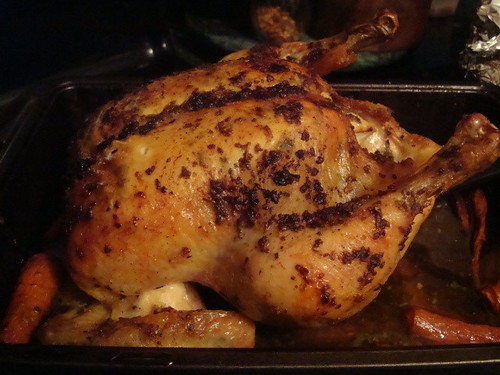
AFTER:
Sage and Garlic Roasted Chicken1

I know I should have trussed or tied my chick's legs together, but oh well I figured she'd endured enough animal cruelty! LOL. I made this one afternoon for dinner and something came up and didn't get home in time to cook it. It was great to pop into the oven the next day, already to go. The garlic really was infused throughout the chicken....so juicy too. Don't forget to let your chicken sit for about 10 before carving to let the juices redistribute!

Great lazy Sunday dinner choice!

Friday, April 23, 2010

Mexican Combination Dinner?

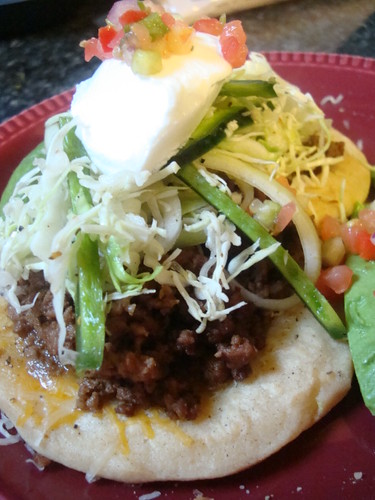
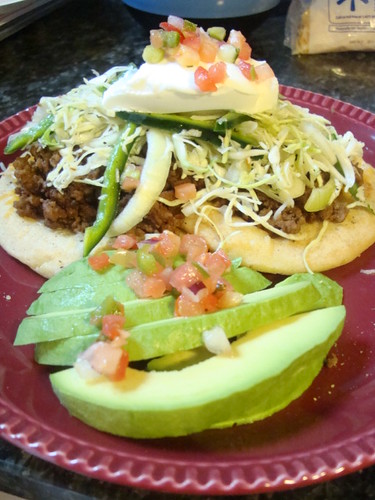
I haven't tried making my own pupusas yet. I will I promise. I have the recipe I am gonna try but until then...this is how we eat them.

What?

You don't know what a pupusa is?

It is like a cheese or bean filled tortilla.

Yes, FILLED.

They are popular here due to our Salvadoran residents who have immigrated here.

I can bang out tortillas easy....but making a pupusa takes a bit more skill.

We like to JAZZ up our pupusas.

If you have taco meat leftover in the freezer (I always do, so we don't get sick of eating Tacos for too many nights in a row). Instead of using a tostada shell...put it on a PUPUSA. Hopefully you have a latino section of your grocery to get these. If not you will have to come back another day when I finally make a pupusa from SCRATCH!


Taco Topped Pupusas
JennyMac's Lipsmack

4 pupusas (premade from grocery store in refrigerated Hispanic section)
1 cup taco meat (leftover or premade from Taco Bell/El Paso in meat section)
1 ½ cup shredded cabbage (bagged in produce section)
2 tsp. cider vinegar
1 tsp. sugar
½ tsp. salt
½ tsp. pepper
¼ cup pepper (green or poblano) julienned or chopped
1/4 onion sliced
sour cream and salsa for garnish

Bake pupusas in 350 degree oven to heat while you prepare the toppings.

In medium bowl, place cabbage, vinegar, sugar, salt, pepper, onion and pepper. You may want to taste so the seasoning or balance of sweet and sour balance is good for you!

Heat up taco meat in microwave.

Plate your pupusas, top with taco meat, top with cabbage mixture, top with sour cream and a bit of salsa.

Of course, we always try to have fresh avocado whenever we can!!

I'd like to see THIS for a menu selection in our favorite Mexican Restaurant.

Here Mexico meets El Salvador by a gringa's hands!

Delicioso!

Monday, February 15, 2010

Deja vu Dinner?

Maybe, but with bigger and better enchilada details! K-man always gets a childlike face of excitement over enchiladas. And Valentine's Day is all about making favorites for our HUNNY!

I thought I'd make this post more of a tutorial with more photos on how to make some EASIER enchiladas that will make the process easier to understand.

Normally, you have to make a filling for your enchiladas. Then make an enchilada sauce. Then you have to fry the corn tortillas to soften them (sorry, nuking them in the microwave doesn't work for me, they always split on me). Then you have to lay each oily circle in the enchilada sauce, fill the tortilla, roll them and carefully line your baking pan with your enchiladas, pour on your sauce and bake them until the sauce is soaked up and melt your cheese last. And I didn't even mention anything about the how messy your fingers/hands get!

Now I am exhausted just writing/thinking about it! LOL

I have some shortcuts to tell you about to make this hearty dish kinda Sandra Lee's Semi Homemade way but I think better and no one I think could tell the difference if you didn't tell them!
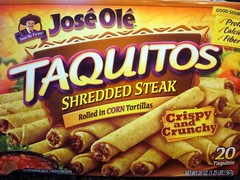

Find some taquitos in the freezer section of your grocery. The corn tortilla'ed ones not the flour ones. Pick your favorite meat filling.


I know El Paso brand makes a perfectly good enchilada sauce in two sized cans. But but when I found the the seasoning came like this....I could use the seasoning with.....
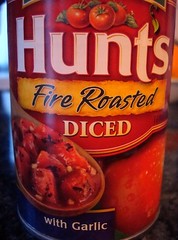


some rockin' CHARRED tomatoes!

I don't know if you've tried FIRE ROASTED tomatoes yet....but they are AMAZING. It really adds more to a dish. The have many different versions and many companies make them....but I find they are SLOW coming into the regular grocery stores. Hope you have them!


Here is the envelope of sauce, with the can of tomatoes and 1 full and half cans of water poured in. Cook for 5 minutes. Taste to make sure it is how you like it. If you want more cumin or chili powder, cayenne or just salt and pepper; now is the time to do it.


Put your taquitos in a greased baking dish. This is an 11X7 glass dish. You can use a 13X9 if that is the only size you have. Notice I am not cramming any extra on the side.

Also I always have some extra ground beef in my freezer. Cooked with just salt, pepper and garlic powder. On hand for emergencies or creative genius moments!
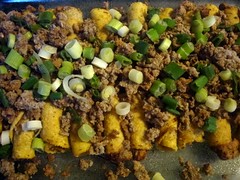


I know these taquitos are already beef...but lets be for real. It's not going to be enough.

Throw in some green onions or regular ones (I had plenty of the green to use) You certainly can add peppers, or jalapenos, corn, beans, whatever you want to add to JAZZ them up.
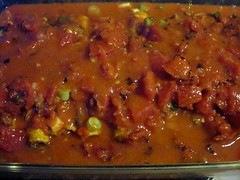


Very carefully pour your sauce on top. You don't want all your beef and onions falling to the sides! I know it looks like a lot of extra liquid but that is OKAY. You want the taquitos to soak up all the liquid. Cover with foil.

Can I just say? LOOK at all those charred bits of tomato! I love it.
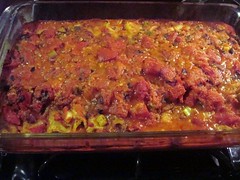


Bake at 350 degrees for 45 minutes to an hour or until the house smells wonderful and most of the liquid is soaked up.


Remove the foil and sprinkle on cheese and green onions and a few minced jalapenos if you'd like. Replace foil lightly while you set up your plates, etc.


and VOILA!

OMG, the smell, my mouth watering...I can't scoop them out fast enough! Top with sour cream and or guacamole....I made some Fiesta Rice to go with this....also very easy!


Shortcut Enchiladas
no fuss recipe by JennyMac

Frozen taquitos (whatever filling, make sure with corn tortillas, not flour)
14 oz canned FIRE ROASTED tomatoes + 1 1/2 cans water
1 envelope McCormick's enchilada sauce
1-2 cup(s) precooked meat (cooked ground beef or shredded chicken)
1 cup green onions
1 cup shredded cheese
1/2 jalapeno, minced (optional)
sour cream for garnish

Preheat oven to 350 degrees and grease 11X7 baking pan.

In a saucepan put tomatoes, enchilada seasoning and 1 and 1/2 cans (from tomatoes) into pan and heat to boiling. After boiling, reduce to simmer for 5 minutes or until thickens slightly. Be sure to taste that the seasoning is to your liking.

Lay out taquitos into greased pan. I fit 14 in the pan. Throw the rest in a baggie and back into the freezer for a snack another time. Put your cooked beef or chicken on top. Add chopped 1/2 cup onions or any other veggies or beans you want to add.

Pour your sauce on top and cover with foil. Bake for 45 minutes to one hour or until all juice is soaked up by taquitos.

Remove from oven and sprinkle with all the cheese and the remaining 1/2 cup green onions. I threw in some chopped up jalapenos in there too. Loosely cover with foil to retain heat and to melt cheese. Garnish with dollop of sour cream and/or guacamole.

Serves 4 hungry people


Tuesday, January 26, 2010

Crustless What?


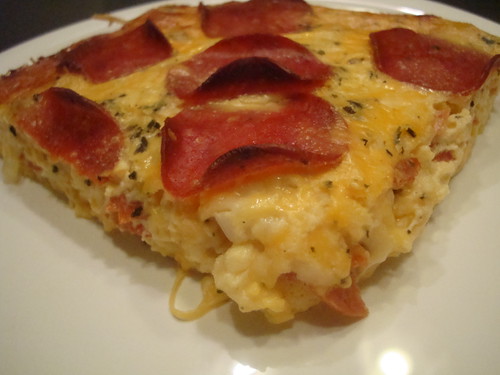
Gather all your family around the computer screen....Is this a crustless pizza or crustless quiche?

Honestly, I don't care really but it's really good! I found this on Lynn's Kitchen Adventures. She often makes two of some of her recipes, one as she has/found it and she then makes another to be gluten free. She made two versions one with a pie crust and one crustless. I am not going to even attempt the one with the crust for it was just delicious without one. She made it this way to be gluten free....I used the crustless recipe to have lower fat.

Here's what I did:

Crustless Pepperoni Pizza
adapted from Lynn's Kitchen Adventures

8 ounces of shredded cheese (I used 1/2 Fat Free Cheddar and 1/2 Reduced Fat Mozzarella)
2 ounces of sliced turkey pepperoni
1 (12 ounce can) Carnation Fat Free evaporated milk
1 egg, beaten
1/2 cup egg substitute
2 tablespoons flour
1 teaspoon Italian seasoning
1/8 teaspoon garlic powder
marinara sauce for topping or for dipping

Preheat oven to 350 degrees. Spray bottom and sides of 9X9 baking dish or pie pan. Sprinkle 1 cup of cheese and half of the pepperoni onto your selected baking pan. Whisk together the milk, eggs, flour, basil, and garlic powder. Pour onto cheese and pepperoni. Sprinkle remaining cheese over top and carefully lay pepperoni on top of cheese. Bake for 40-45 minutes or until done.

The first night of eating this was really good. When we ate the leftovers, to mix things up I added some marinara sauce and it was EVEN better. So whether you want it neat as is or want to live a little dangerously with potential drips from marinara....go for it!

Lynn was right in her post saying that the Evaporated milk made it seem much richer than using just milk. I was surprised that even with the FF evaporated milk....the eggs had a silkier feel like a quiche does than something like scrambled eggs. Good call Lynn! Delish!

Try it with crust or no crust. Pepperoni or sausage. I added a little chopped onion. Add peppers for more color...just try it!

Enjoy

Tuesday, January 19, 2010

Something seriously looks funny with this meatloaf!!

Yes, I know my meatloaf looks as though it's in the need for a serious TAN but there is nothing wrong with it. Just the choice of meat. Ground Chicken!

Always looking for something to do with ground chicken and turkey that doesn't involve a dried out burger or hidden in chili/spaghetti sauce.

If you have ever done any cooking with ground poultry, you are already aware of how DRY it can get due to its low fat content. So you have to add some 'moisture insurance' aka VEGGIES!

Chicken Meatloaf

1 lb package ground chicken
1 onion, chopped
1 tsp. salt
1/2 tsp. black pepper
2 cloves garlic, minced
2 small zucchini, shredded
1/2 cup BAKED potato chips, finely ground


In a bowl, put your ground chicken and salt and pepper. Chop onion and mince garlic and saute in frying pan until soft. With a food processor, using the shredding disk, shred up your zucchini. Do not worry about squeezing out water. We want this moisture. Add shredded zucchini to chicken and cooled onions and garlic. Place a few handfuls of baked potato chips in a small ziploc bag and use your hands to crush finely (this bit of fat free potatoes will help balance the moisture for it to be absorbed rather than cook out). Mix well and press into loaf pan. Cook at 350 degrees for 30-40 minutes or until loaf is firm.

Notice how plain the meatloaf is....since I knew this was going to be more than one meal for us I kept it "clean" for each night afterward it had a different sauce.
Night One: Chunky tomatoes (14 oz) italian style cooked until thick and spooned on top of slices.
Night Two: Simple butter, flour and chicken broth made into a chicken gravy on top.
Night Three: Fresh Salsa (not the jarred stuff) on top with a dollop of reduced fat sour cream.

Alfredo sauce, buffalo wing sauce or even barbecue sauce would work as well. Hence why I didn't why I didn't put herbs to further flavor the meatloaf so I could restyle the leftovers with any flavor we wanted.

Nice way to mix things up and keeping it simple so you can jazz it up the way you want with the topping and it's super moist! Added bonus that it's very lean, very little fat was rendered. Give it a try for your next 'meatloaf' dinner! It was delicious!

Enjoy!

Tuesday, November 17, 2009

Guilt Free Meatballs

Who doesn't love a meatball? I know I certainly do! Here's what I did to keep out the fat of my meatballs and yet add flavor and keep the moisture!

Guilt Free Chicken Meatballs

1 serving of Fat Free Bagel Chips (look to your package what that is)
Fat Free PLAIN coffee creamer
2 slices of cooked turkey bacon, finely chopped
3 green onions, finely chopped
2 garlic cloves, pressed through garlic press
1 tsp. freshly ground pepper
salt to taste
1/4 cup egg substitute
1 lb ground chicken
2 Tbsp tomato paste, divided
1 Tbsp calorie free, sugar free ketchup (Walden Farms makes this)
1 Tbsp Italian Seasoning

Preheat oven to 400 degrees. Crumble up bagel chips and cover with creamer in bowl. Stir and coat and break up with spoon until softened.

Chop up turkey bacon finely and green onions and put in bowl with softened bagel chips. Press garlic and add. Mix. Add salt, pepper, tomato paste, egg substitute and mix again. Add ground chicken.

Mix until incorporated with fork. Use small scooper (the one I use for cookies) to make meatballs onto nonstick foiled cookie sheet. Bake for 10 minutes. In a small custard cup, mix ketchup, tomato paste and Italian Seasoning.

After ten minutes, brush ketchup mixture onto meatballs and bake for another ten minutes.

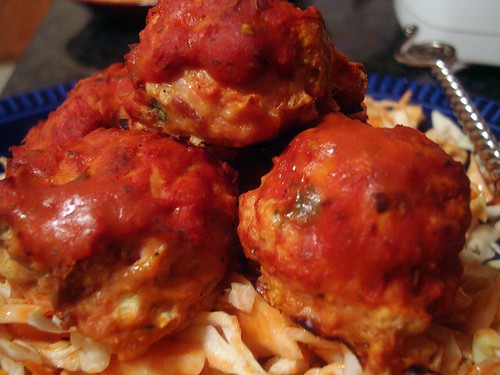
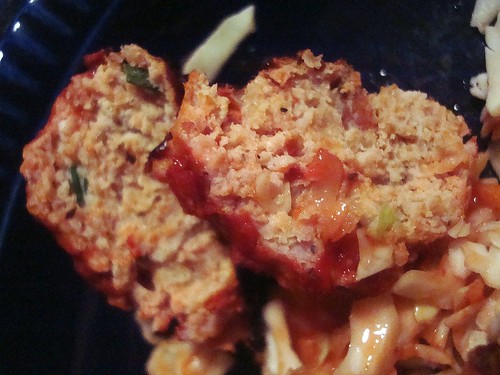
Absolutely moist and very tasty! Great on spaghetti squash!

Enjoy!

Sunday, October 18, 2009

Nothing squeaked in the making of this recipe!

"Bubble and Squeak" now there is a fun name for a recipe.


A name kids could really get into as well. I've seen many recipes for B.A.S., none were the same so I never tried it since I didn't know what the original is really supposed to be short of taking a trip to Great Britain to do so.
So when I made corned beef I was debating the usual....carrots and potatoes? mashed only? So when the beef was was done I decided to make my own version of Bubble and Squeak.

B.A.S. typically uses brussell sprouts (aka mini cabbages) and it's considered a leftover dish of potatoes (either chunk or mashed), onions, beef, ham or bacon being used. I wasn't in the mood for a pile of mush but since we'd been having a COLD rain for the past 3 days....I was in the mood for something like a stew or soup and following the ingredients somewhat.

Lipsmacking Bubble and Squeak Stew

1 corned beef in store package with seasonings
Half package of baby carrots
1/2 cup onions chopped
2 cups of brussel sprouts
1 cup barley (uncooked)
Chicken broth (if you need to thin out your stew)

Cover your corned beef with water and the included seasoning packet in your crock pot. About 3 hours on high or boiling in a pot on your stove.

Remove corned beef and with a fine screen mesh strainer remove the 'seeds' from the seasonings or just use an immersion blender to break them up. Keep the corned beef water in crock pot and put your 1 cup of barley in the water. Cook on high about 30 minutes or until soft.

Use a slotted spoon and remove about half of the barley (about 1 -1/2 cups) and put aside in a small bowl. Use an immersion blender to blend up the barley until smooth. Mixture will be thick. Put in your carrots and brussell sprouts. Cook until vegetables are soft. Put the cooked barley in small bowl back into the crock pot and stir. My stew was very thick and could use a little thinning so I used some chicken broth (I used about 1 cup)

You can decide if you want to cut up your corned beef into the Bubble and Squeak stew or just slices on top of your stew.

This was absolutely delicious and was exactly what we needed after three freezing cold rainy days. I served some crusty buttered bread with this. K-man ate TWO big bowls!

Enjoy!