Showing posts with label cheese. Show all posts

Sunday, November 6, 2011

Big Game Food

The Skins have a big game today. They have lost the past 3 games, and they have been playing kinda 'eh' these days but just because your team is being 'eh' doesn't mean your "game food" has to be 'eh' too.

We love nachos but none with the canned cheese like they serve typically at stadiums. Yuck. Nachos are fun because you can tweak them so many different ways.

Super Deluxe Nachos

1 lb. SHAVED beef (this is the good quality super thin sliced beef your butcher does, similar to 'steak-um beef' but don't use that unless you are desperate.)
1 envelope Taco Seasoning
1 cup frozen corn
1 can black beans (drained and rinsed)
shredded cheese
Your favorite tortilla chips
Fresh salsa (I usually make my own but the summer tomatoes are gone)
Chopped Jalapenos (I used three, seeded and deveined)
Sour cream

Preheat oven to 350 degrees. Cook your beef with Taco seasoning. Add corn so it will thaw. When beef is cooked add beans. Cover baking sheet with non stick foil. Layer chips on foil and hearty handfuls of cheese. Add layer of hot beef and corn mixture. Add more cheese on top of beef. Place in oven just long enough to melt cheese. About 10 minutes.
Sprinkle on fresh salsa, scoops of sour cream and jalapenos (don't forget all dairy is the ANTIDOTE for the jalapeno evils).

YUM! Have plenty of napkins, your favorite beverage of choice and you will have a happy tummy regardless of how your team plays!

Enjoy!

Friday, March 18, 2011

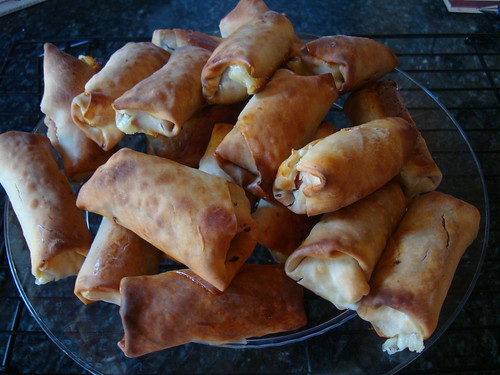
BAKED Salami and Mozzarella Egg Rolls

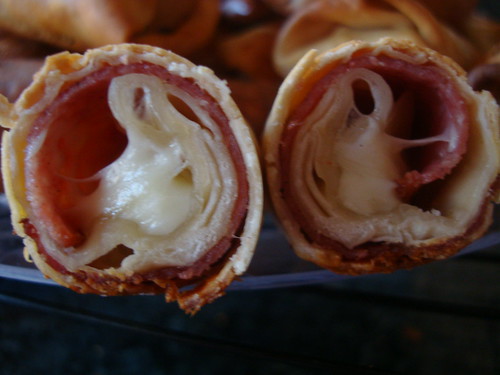
Baked Salami Mozzarella Egg Rolls
Did you know that you don't have to FRY an egg roll? I saw these beauties on Kaitlin in the Kitchen blog and she saw it on Guy's Big Bite. Fun twist on egg rolls, great appetizer....until I remember...you don't have to deep fat fry egg rolls I discovered last year. Very crunchy and doesn't get SOGGY! Here's how it works....

Baked Salami and Mozzarella Egg Rolls

2 Eggs
12 oz. jalapeno mozzarella cheese sticks (12 in a bag)
24 Slices Thin Salami
24 Egg Roll Wrappers
oil for coating

Preheat your oven to 350 degrees.

In a small bowl beat your eggs until combined. Unwrap your string cheese and cut each one in half. Lay a egg roll wrapper down on a flat surface and brush each side with the egg wash using a pastry brush. Place a piece of salami in the middle of the wrapper, and then 1 piece of the string cheese at the bottom of the piece of salami. Roll the wrapper up from the bottom until piece of cheese is covered, then stop and fold in each side, then continue rolling it and make sure it's sealed well. Repeat until you are done or run out of an ingredient (I had leftover salami but no extra cheese or wrappers- I think I may have eaten one stick?). Place each egg rolls on a baking sheet brush with vegetable oil. Bake for 20 minutes or until golden.

Baked Salami Mozzarella Egg Roll

Cook's Notes:
1. Don't overbake, they will start to bust open and ooze cheese. But I didn't mind the oozy cheese for those crusty puddles are an appetizer in itself!
2. These will be so crunchy that refrigerating the leftovers will NOT make them soggy, great for reheating the next day!
3. Suggested dipping sauce- marinara!
4. Did NOT miss the greasiness or calories!
5. Gonna try another version with ham or roast beef.....

Enjoy!

Thursday, July 22, 2010

Zucchini Pepper Jack Mac

My summer bounty, I average one every other day sometimes two.....


Searching under those large leaves each day is like an Easter Egg Hunt. Constantly I am heard saying "OMG!" Mother Nature amazes me yet I saw this yesterday....

WHUT? Methinks this little zucchini is confused. He thinks that if he poses as a CROOKNECK squash that I won't eat him? Sowwy, little guy...I eat all squash, all colors, all shapes, I do not discriminate! Here is what I made from large zucchini....and so easy.

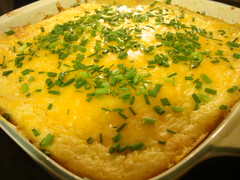
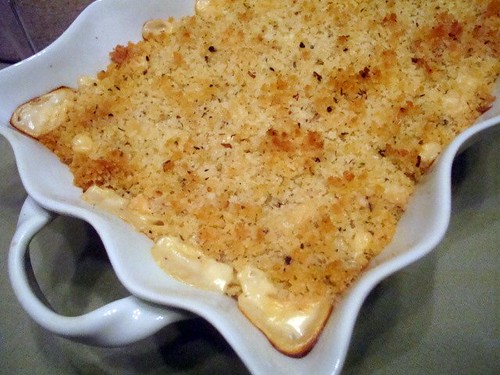
Zucchini Pepper Jack Mac
created by JennyMac Lipsmack

1 large zucchini, shredded
1/4 onion, grated
2 Tbsp. butter
2 Tbsp. flour
1 cup milk, cream, or even FF evaporated milk if you like
1-1/2 to 2 cups Pepper Jack cheese, shredded (from a block, don't use the bagged stuff)
2 cups cooked pasta (macaroni, egg noodles, penne or whatever you have on hand)
1 cup plain bread crumbs, panko, crushed ritz crackers or potato chips
2 Tbsp. butter, melted

1. Preheat oven to 350 degrees. Mix your crumbs of choice with melted butter, set aside.

2. Shred your cheese, set aside your pile. Shred your zucchini and place in large bowl. Shred the onion and mix into the zucchini.

3. Cook your pasta according to the directions. Drain and mix into zucchini and onion mixture.

4. In the used pot from the pasta, start your white sauce. Melt butter, add flour and cook flour until it smells nutty. About one minute. Slowly whisk in your milk. (It's ok if it's thick for the water from the zucchini, onion and pasta will help thin it out.) Add shredded cheese and mix over low heat until no lumps remain.

5. Add pepper jack cheese sauce to zucchini/pasta mixture. If you think the mixture is not 'loose' enough you can mix a little more milk if so desired.

6. Place cheesy pasta mixture in a greased glass baking dish/casserole, approx 2 quart size. Top with butter and crumb mixture.

7. Bake for 20-30 minutes or until mixture is hot and bubbly and crumbs are light brown.


Great sidedish with your favorite grilled steak or chicken. Nice brunch item as well... creamy, yummy and the shredded zucchini cooks up in a flash this way.

Enjoy!

Thursday, July 15, 2010

Most Yummy Jalapeno Cheesey Bread and a Winner

Years ago at one of those wholesale clubs I always got their jalapeno cheese bread. Loved it!

Either they don't make it anymore or I don't go that club anymore but I don't see it anymore (I only go to BJ's now and not very frequently) Sometimes I see a smaller version in the grocery but they just don't seem to have much flavor either.

Inspired by a cinnamon roll boule style bread I saw this is what I came up with....


Jalapeno Cheesy Bread

JennyMac Lipsmack Creation

2 thawed bread dough loaves (found in your freezer section) or the 1/2 recipe for no knead bread dough
1/2 stick melted butter
6-8 sliced jalapenos (don't use those pickled ones!)
1 lb. shredded mild cheddar or colby cheese (don't use the stuff in the bag!)

1. Shred your mild cheddar cheese (the sharp stuff just doesn't taste right with the zingy jalapeno). I really have stopped using those bagged cheese not only to save money on buying blocks but the flavor is SOOOOOO much better. The cornstarch/flour they put on the pre-shredded stuff really mutes the cheese flavor I feel.

2. Slice your jalapenos. Remember the seeds and the veins inside hold the heat. If you want your bread zingy....slice with abandon. I take a few of the peppers and dig out the seeds and veins to help balance out the heat. Some bites are zingy so not AS zingy. Every bite is a surprise! If you do half seeded and half not....mix up your pile so they distribute well through the bread.

3. Set aside your peppers, cheese and melted butter.

Sorry I don't have step by step pictures of this....It's a pain to keep wiping off doughy hands to snap a pix. I need an assistant....

4. On a floured surface, roll out your dough. Don't worry so much about the size. Just as big as you can get without it the dough getting too thin. Spread on the melted butter. Sprinkle on half of the cheese and half of the jalapenos. Roll up from the longest edge and pinch edges.(kinda like making cinnamon rolls!)

5. Hopefully your roll with be nice and thick from the pepper and cheese. Very gently with both hands roll back and forth (like you did with play dough as a kid) to 'snake' it out longer. Just aim for double in length. Mine was about 2-1/2-3 feet at first and it slowly shrinks as you work with it more.

6. Take one end and start to curl it into itself making one big spiral. Be sure to grab a bunch of cheese and jalapenos as you roll along. Roll, stuff with cheese and peppers. Roll and stuff with cheese and peppers, etc.


7. Top with remaining cheese and space out the peppers. Generously grease a 10 inch springform pan. Cover with towel and let rise in warm place until double or filled the pan.

Preheat oven to 400 degrees.

8. Bake for 45 minutes. You can cover the top of the bread with foil if you feel it's overbrowning after 30 minutes. You can also remove the bread from the springform ring and bake on parchment for the final 15 minutes to get the rest of the bread 'crusty'.

9. Let cool on cooling rack until room temperature. Do not try to cut this bread while hot. You will flatten it and the cheese will ooze out.


OH GAWD, the smell.....


The GOOEY cheese....


Someone get me some butter..... Heaven!

I've also got so distracted by this bread that I failed to announce my Good Earth Giveaway Winner....Cheryl from The Lucky Lady Bug she journals and has a separate blog where to lists who is having giveaways. You should check her out. Congrats Cheryl....dinner is on MyBlogSpark and the wonderful people at Good Earth!

Jalapeno Cheese Bread on Foodista

Enjoy!

Friday, July 2, 2010

Kraft Homestyle Product Review

Who hasn't eaten Kraft's mac and cheese out of the blue box? Either I ate too much of it in college or my palate has changed over the years. I gave it up...way too ORANGE to be good.
Then I found out that that orange powder has no cheese in it whatsoever! ACK!

I've made my own mac and cheese for years. It's a labor of love for sure. But don't get me started on my battle with K-man liking and not liking my versions of mac and cheese!!!

I received some free coupons for some new products from Kraft's First Taste program this was one of them. They offer the classic orange cheese version and/or a Parmesan. I took the Parmesan for I didn't think the 'orange cheese' version was going to really change my feeling about it. But free was free and on a busy night....what the heck?

Do you want two hefty meals or four small side out of this? I was impressed! It was pretty good. I like my mac and cheese to be a bit more saucy and creamy but the flavor was good. Even the tiny crumbs for the topping had great crunch.

All I had to provide was 2 Tbsp of butter and some milk. Kraft provided the pasta, cheese, seasoning and crumb topping. Cost? About $3.29. I am sure the 'cheese content' in this product is no different than it's orange cousin!

But if you want good flavor and have put convenience ahead of nutrition give it a try...tell me if you liked or how the 'orange cheese' compared to the traditional box type.

I will still be making my own mac and cheese in the future for I feel better knowing what exactly I am eating. I have plans for a mac and pepper jack coming soon! Stay tuned.

DON'T FORGET TO ENTER MY GOOD EARTH GIVEAWAY!
Enjoy!
Wednesday, April 28, 2010

Easy Corn Pudding

I was in the mood for making some corn pudding with dinner. Holy cow, I didn't realize that I had so many corn pudding recipes....

Some with corn kernels, some not. Some with creamed corn only or some with regular corn AND creamed corn.
Some with cornmeal or some with corn muffin mix.
Some with buttermilk or some with sour cream.
ACK!!!!


And the winning corn pudding recipe choice? From She's Becoming Doughmesstic. Susan has such a myriad of recipes....she's fancy one day, down home the next, decorating cakes or catering. Emulating Julia Child....living on 100 bucks for food for the month (with a family of 3) Yep, she's a regular box of chocolates, I tell ya!

I love some recipes on occasion when you open the can/box, mix and bake. Done!

Corn Casserole
found on She's Becoming Doughmesstic....

1 (14 oz) can cream style corn
1 can whole kernel corn (I just filled the 'creamed' corn can with some frozen)
1 (8oz) package Jiffy Corn muffin mix
1 cup sour cream
1 stick butter, melted
1 egg, beaten
1-1 1/2 cups shredded Cheddar

Preheat oven to 350 degrees. In a large bowl, stir together both corns, muffin mix, egg, sour cream and melted butter. Pour into greased 8X8 dish/pan. Bake for 45 minutes, or until golden brown. Remove from oven and top with cheese. Return to oven for 5-10 minute or until cheese is melted. Let stand for at least 5 minutes and then serve warm.


Cooks Notes:
  • I've had many versions and some are on the sweet side and some more savory. Although, this was tasty and moist, I was conflicted since the cornbread part was sweet and the cheese on top was not. I normally enjoy a sweet and salty combo. Since I enjoyed the EASE and how moist and corny this was, I'd just adjust the sweetness by substituting the creamed corn with another whole corn whirred in the food processor. That should cut down on some of the sugar. Texture-wise, LOVED this recipe.
  • OR I can nix the cheese and just enjoy it's sweetness.
  • I emailed Susan from Doughmesstic for her link to the recipe and she TRIED to credit Paula Deen....so I trotted over to the 'butter queen bible' and NOPE Paula didn't use egg or cheese in my cookbook. So, good try Susan....it's a DOUGHMESSTIC recipe....unless Paula is losing her mind and makes 10 different versions....well no WONDER....

Enjoy!
Monday, April 19, 2010

Mac and Cheese?

Is it or isn't it?

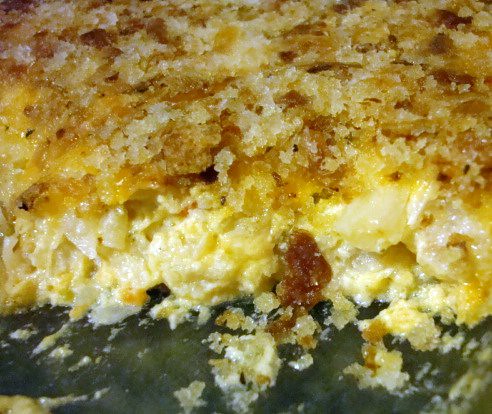
Looks are deceiving for sure. This is my FAUX Mac and Cheese made with cauliflower!

Faux Mac and Cheese
JennyMac's Lipsmack

1 bag (14 oz) frozen cauliflower
2 cups cheese, shredded (I used half sharp and half 2%)
½ c. egg substitute
1/4 cup milk/cream or Fat Free evaporated milk
1/2 tsp. salt
1/2 tsp. white pepper

TOPPING:
1 c. bread crumbs
1/2c. French’s onion rings, crushed
½ tsp. garlic powder
½ tsp. salt
½ tsp. pepper
1 Tbsp. butter

Preheat oven to 350 degrees.

Place bag of cauliflower in microwave and cook at 1 minute intervals until hot (rotating and turning over with each-took me about 4 intervals) Drain in colander and cool slightly.

In medium mixing bowl, add cheese(s) egg substitute, milk and seasoning. Mix well.

In a small bowl, mix ingredients for topping. Mix well.

Chop cauliflower into pieces that would resemble the size of elbow macaroni (I used a pair of kitchen shears in bowl). Add to egg cheese mixture and mix well.

Place cauliflower mixture into greased 1 quart casserole and top with bread crumb mixture.

Bake for 30 minutes until firm and bread crumbs are browned.

Lipsmacking Notes:
  • Very yummy! If you are going for the lower carbs, omit the crumbs. K-man loved it and he's the picky one about his Mac and Cheese!
Enjoy!
Thursday, April 1, 2010

Stuffed Peppers as a sidedish


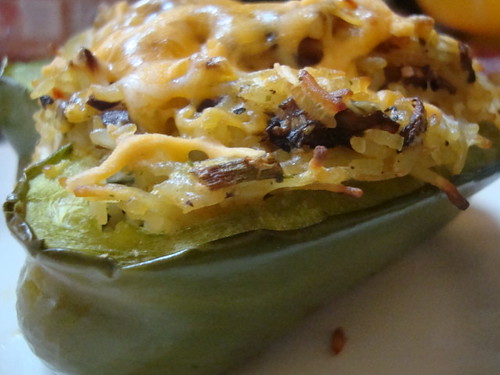
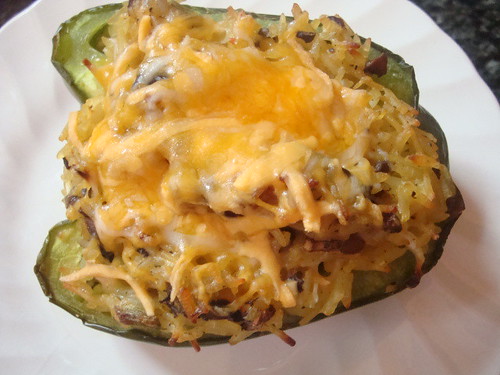
Mushroom and Rice Stuffed Peppers
created by JennyMac

2 green peppers
1 package of favorite flavored rice (I used Uncle Ben's Chicken Rice)
1/2 cup cooked mushrooms, chopped
1/4 cup green onions, chopped
1 cup cheddar cheese, grated (divided 3/4 cup and 1/4 cup)
1 tsp. freshly ground pepper

Preheat oven to 350 degrees.

Slice peppers in half, core, seed and de-vein. Prepare rice according to package directions. Under cook rice by five minutes since you will be baking this in the peppers later. Rice will seem a bit wet, this is okay.

Mix mushrooms, green onion with 3/4 cup cheddar cheese and pepper. Mix in cooked rice and scoop into pepper halves and press gently. Bake for half hour or until peppers are soft or tender crisp. Top with last 1/4 cup of cheese and let melt while you prep the rest of your dinner.

Your double dose of veggies, your starch and some dairy to round out your protein for dinner. This went great with our baked chicken!

Enjoy!
Sunday, February 21, 2010

ITs or Nips?

Whatever ! Mmmmmm, Cheesy!

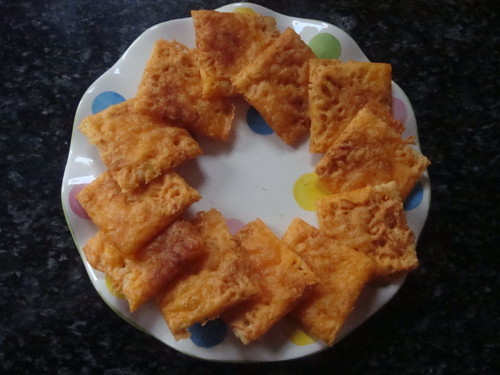
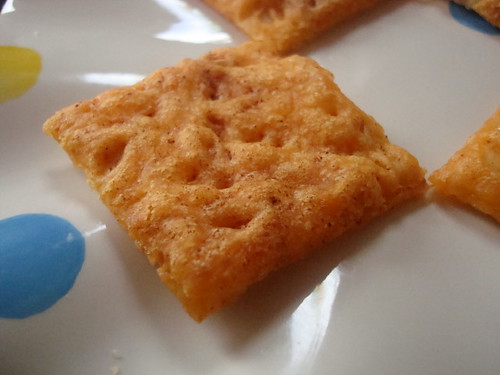
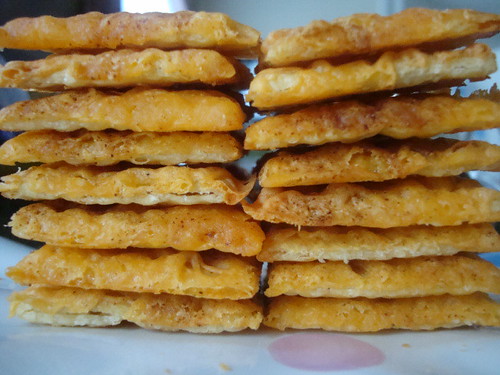
If you remember last year I had made my own cheese it/nips from scratch? That was fun (not) but these were REAL easy! I saw these on Rocquie's blog Sage Trifle. I thought they were real cute.


I did a some tweaking, you know for fun....and for another reason....read on....

Cheese Crackers

adapted from Sage Trifle

2 sleeves saltine crackers
1/4 c. melted butter
8 oz. shredded cheddar cheese
Cayenne pepper
Onion powder or garlic powder

Preheat oven to 350 degrees.

Place the crackers, salted side up, in single layers on baking sheets. Brush with melted butter (I didn't use all the melted butter, I wasn't being heavy handed), then spread the cheese evenly over the tops. Sprinkle with cayenne pepper, to taste (one third had cayenne, one third had onion powder and one third garlic powder, trying for variety).

Bake for 10 minutes and shut off oven. Keep in oven for half an hour more, until crispy and light.

Sage Trifle version: Place under the broiler until the cheese is bubbly, but not brown. Remove the trays and turn the oven to 180 degrees. Bake the crackers for 2 hours until very crispy and light. I have a gas oven. I had a problem with using 2 hours of gas for a snack like thing. Wanting to be a bit more resourceful in this economy I baked it higher (checking that they weren't over browning) and just let them dry out in the oven.


Are they the same as Rocquie's? I wouldn't know but they were light and crispy to me...and they tasted very cheesy like the nips/its! Thanks Rocquie, yummy! And K-man raved when I served these to him with some homemade Minstrone Soup!

Enjoy!

Wednesday, February 3, 2010

More Munchies for Game Day

Oh yum, this dip is a goodie to make for a game or just a lazy day on the weekend. I tried this out and K-man said I could make this for dinner everyday and he wouldn't mind. HAhahahha!


Hot Taco Dip

1 pound lean ground beef
1 small onion, chopped
1 clove of garlic, minced
1 package reduced fat cream cheese
1 package Taco Seasoning
4 ounces Kraft Fat Free shredded cheddar cheese (divided into 2 portions)
4 ounces Cabot's 40% reduced fat Pepper Jack cheese, shredded (divided into 2 portions)
1 jalapeno, seeded and chopped
halved or chopped cherry/grape tomatoes
chopped green onion for garnish

Preheat to 400 degrees. Spray a 9 inch pie plate with cooking spray and set aside.

Brown ground beef over medium heat. Drain and return beef to pan. Add the onion and garlic, cook for 5 minutes until onions translucent. Remove from heat to cool.

In a bowl, combine the cream cheese, taco seasoning. Add the beef and one portion each of the cheeses. Mix to combine. Spoon the mixture into pie plate and sprinkle with remaining portions of cheeses. Top with chopped jalapenos (don't seed or devein, if you want it hotter) and chopped tomatoes.

Bake for 15-20 minutes or until the cheese is golden and bubbly. Sprinkle with chopped green onion on top and serve with tortilla chips (pictured was the BLUE corn ones) or Stacy's baked pita chips.

K-man had no idea that I was using the lower fat versions of many things in order to cut the fat and calories. All he cared is that it was scrumptious!

Enjoy

Tuesday, February 2, 2010

More Game Day suggestions...

We needed some goodies for watching the Pro Bowl which is a perfect excuse to try out some more food that I can suggest you make for the upcoming Super Bowl on Feb 7.

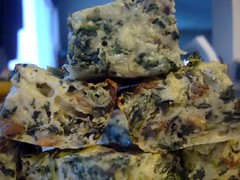
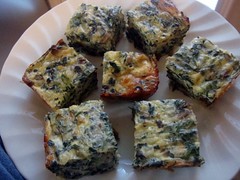
Some finger food resembling a crustless spinach and mushroom quiche....

Spinach, Mushroom and Cheese Squares
I cut some FAT corners on here to help make your party food so evil but if you don't tell your guests I am sure they won't notice!

2 Tbsp butter
1 cup chopped mushrooms, sauteed
3 eggs
1 cup flour
1 cup Fat Free evaporated milk
1 tsp. baking powder
t tsp. black pepper
2 packages of Cabot 70% reduced fat white cheddar, shredded
2 (10 ounce) packages frozen chopped spinach, thawed and squeezed dry
1 Tbsp minced onion.

Preheat oven to 350 degrees. Saute chopped mushrooms in butter until browned. Set aside to cool. Spray 9X13 baking dish with non stick cooking spray. In large mixing bowl, beat eggs well. Mix in flour, evaporated milk, pepper and baking powder. Add cheese, spinach, mushrooms and onion. Spoon mixture into greased baking dish. Bake for 35 minutes. Let cool for 30-40 minutes or until room temperature. Cut into bite sized squares.


Come by tomorrow to try the tasty Taco Dip I made...

Enjoy!
Monday, January 25, 2010

Gearing up for Game Day!

How cute is this !?! Can you envision this at your Super Bowl party? We've been watching football for the past few weekends...gearing up to see who is going to get to the SB...perfect way for me to practice my preparations for the big event!

I found this on Pillsbury.com and as usual I played around with some of the fat content and it came out AWESOME. I think my presentation is even better than theirs!

Spinach Pull Apart
adapted from Pillsbury.com

3 Tbsp butter, melted
2 Tbsp garlic canola oil
1/2 tsp. garlic powder
4 oz. Fat Free cream cheese
3 Laughing Cow Light Swiss cheese wedges
3 Tbsp. fat free mayonnaise
1/4 cup parmesan cheese
1/2 cup reduced fat mozzarella cheese
1 box (9oz) frozen chopped spinach, thawed and squeezed dry
1/2 tsp. Italian seasoning
1/2 tsp. pepper
2 cans reduced fat Crescent Rolls
1 cup marinara sauce.

1. Heat oven to 350 degrees. Spray bundt pan with non stick spray. In a small bowl, mix butter, garlic powder and garlic oil (I just make some by heating up some canola oil with a few cloves of garlic, store in clean bottle with garlic cloves).


2. In a medium bowl, mix cream cheeses, mayo, spinach and seasonings. Stir until blended and set aside.


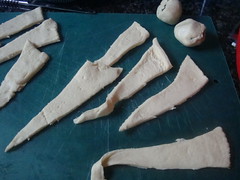
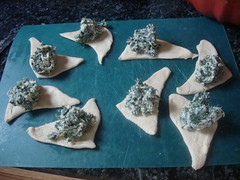
3. Unroll crescent doughs, separate into triangles. Cut each triangle in half lengthwise to make a total of 32 triangles. Stretch or press 1 triangle slightly, being careful not to tear it.


4. Spoon 1 Tbsp. spinach mixture onto center of triangle; pull doug around nixture into a ball. Press edges to seal. Repeat with remaining triangles.


5. Roll each ball in butter mixture; layer in pan. Bake 35-40 minutes or until golden brown. Cool 5 minutes. Place heatproof serving plate upside down over pan; turn plate and pan over. Remove pan. Cool 10 minutes longer. Serve warm with marinara sauce.


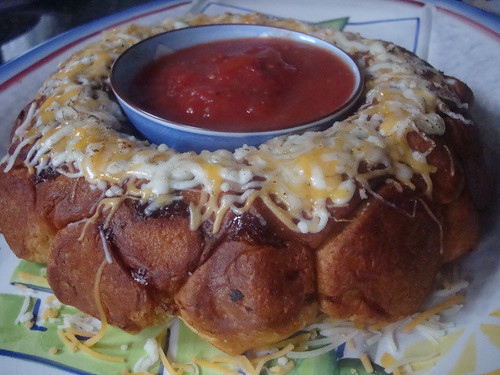
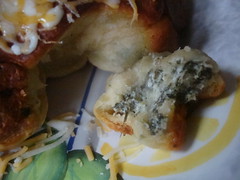
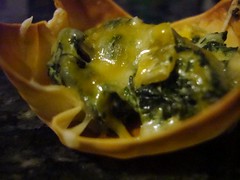
After I inverted my pull-apart I sprinkled more cheese on top. Found a dish the right size for the center (pictured at beginning of post). Here I pulled one apart and not one oozed or exploded. I had to open one up for the picture so you could see the cheesy spinach inside.

Not Monkey Bread more like Bunny Bread since it is full of spinach. Your Super Bowl party-goers will love it!


Enjoy!

Friday, January 22, 2010

Invite me to your Super Bowl Party...

Look how cute I am? Wouldn't I just fit right in at your Super Bowl Party and be adored by all?

Nod and say 'yes' for heaven sakes....don't hurt the little cutie's feelings...sheesh!

Simple, easy and tasty. When I made it for the little birthday party dinner I threw for my mom, the 5 of us gobbled up all 30. I am sure if the recipe had made more, eating them would have been no problem....even though they knew dinner was oncoming.

Spinach Crisps

1 box chopped spinach, thawed and squeezed dry in towel
1 can chiles, drained
1/3 cup mayonnaise (I used half fat free and regular to cut the fat a bit)
1/2 tsp salt
1/4 tsp. pepper
1 cup Monterey Jack and Cheddar Shredded Cheese Mix (it's finely shredded)
1 package won-ton wrappers

Preheat oven to 350 degrees. Place wonton wrapper in a ungreased muffin tin, gently press down dough to the bottom of muffin cup. Bake for 5-7 minutes until corner tips start to brown. Remove and put on cooling rack and start another batch. Repeat until you get 30. Wonton wrapper package will have more than you need and this is okay; for a few of them may 'fall' or get a puffed up bottom. I made a few extra until I got the perfect 30 I needed.

In a small bowl, put spinach that has been squeezed dry, can of drained chiles, mayo and salt and pepper. Measure out 3/4 of cheese and mix in. Cover and set in fridge until you need it. Let the baked wrappers remain on cooling rack until party time.

When ready to serve, preheat your oven again to 350. Line up all your baked wrappers on a tray or the cooling rack and fill each with roughly a teaspoon of filling. Then sprinkle the remaining 1/4 cup cheese and sprinkle on top. Place the needed amount on a cookie sheet and bake for 5-7 minutes the corner tips will turn a darker brown and the cheese will melt. When you have just a few left on your serving plate....time to bake the second batch.

These were crunchy, cheesy a lil zippy from the chiles. They weren't wet or drippy, stringy or gooey. Just perfect. An easy one or two-biter depending on how hungry or big your mouth is. LOL

Definitely a keeper - K-man was sad to see that there were no leftovers but to appease him I said, I certainly can make these again for Super Bowl, where K-man immediately chirped, "NOW WE'RE TALKIN'!!!"

Enjoy,

Sunday, January 17, 2010

JennyMac being Cheesy....again and a Giveaway.


Although I like many types of macaroni and cheese, I don't have it so easy. K-man runs very hot and cold about it. My stats run 1-4 on him liking the M&C recipes I've made. He says he can't explain it why Mac and Cheese is just something that he doesn't HATE but just isn't fond of. WHAT? ARE YOU NUTS? Sometimes he likes it, sometimes not. Once I find the recipe he likes I am DONE. No more trying new M&C recipes.

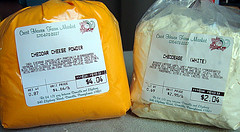
I found a new recipe on Baker's Banter (King Arthur's Flour) for Garlic-Herb Mac and Cheese and wanted to give it a try. They use a powdered white cheese powder which I already had. But I was a little apprehensive since the powder was now a BLOCK.....I had to run a hunk through food pro to measure out a 1/2 cup. Doesn't look promising. I made it and thought I am really not using this perhaps I should just toss it out after this recipe....Stay tuned for what happens after I made this.....

Garlic-Herb Mac and Cheese
adapted from "The Big Cheese-y" by King Arthur's Flour

8 ounces (about 2 cups) uncooked tube-type pasta (you gotta have something to hold the sauce!)
1/4 cup cake flour (they used on of their special mixes, they said you could sub flour)
2 -3/4 cups milk
1/2 cup Vermont cheese powder (see above-you can substitute a packet from any white cheddar mac and cheese box)
2 cups shredded cheddar cheese (I used Cabot's 70% reduced fat white cheddar)
1/2 teaspoon ground black pepper
1/2 teaspoon ground mustard powder
1/4 to 1/2 teaspoon salt, to taste

Topping

4 tablespoons butter
2 teaspoons garlic oil, optional
2 teaspoons Pizza Seasoning or rosemary and thyme
1 -1/2 cups Japanese panko (coarse bread crumbs)

Directions

1) Preheat the oven to 350°F. Grease a 2-quart baking dish.

2) Cook the pasta in boiling salted water until al dente (slightly firmer than you would normally eat it). Drain and rinse with cool water. Set aside.

3) In a large saucepan set over medium heat, whisk together the flour, milk, and cheese powder. Bring to a boil.

4) Remove from the heat and stir in the cheese and seasonings. Stir occasionally, until cheese is completely melted.

5) Stir the pasta into the cheese sauce. Spoon it into the baking dish.

6) Melt the butter and garlic oil together, then stir in the pizza seasoning and panko bread crumbs. Sprinkle a thick layer over the pasta and cheese.

7) Bake the casserole for 25 to 35 minutes, until bubbly and browned. Remove from the oven, and serve hot.

Yield: 5 1/2 cups, about 4 servings.

Notes:
The crumb topping was delicious and crunchy. But, as for the cheesy noodles, I am not sure if my powder had something to do with it, but something about this was off. It was creamy not gritty but I think the powder was past it's prime. I will want to make this again. WHY, you ask?

Because my mom walked in the door for dinner with a bag of 3 NEW bags of white cheese powder. Oh lord. I had a hard enough time using up ONE bag, now I have 3 new ones? GEEZ.

The Giveaway:
So, I will keep one and I want to giveaway the TWO others for those who would like to try out this white cheese powder for themselves. You certainly can just can use it just like your standard mac and cheese directions with 1/4 cup butter and 1/2 cup milk with probably 2-3 Tbsp of the powder with their cooked macaroni OR use it to follow this recipe.

SO, if you have never used cheese powder and want to play around with it or use it to try and make your own copycat cheese nips like I did, drop a comment and I will determine a winner in the next few days.


Post Script NOTE: So I used one of the new bags of Cheese using the same cheese sauce recipe for some broccoli and it ROCKED. Yum! Therefore, I am concluding that the M&C I made and said it was 'off' I was right. It WAS the cheese powder...past it's prime. Those of you hesitant to enter thinking this cheese powder isn't good. Not true!

Cheese and