Monday, August 31, 2009

And the WINNER is...


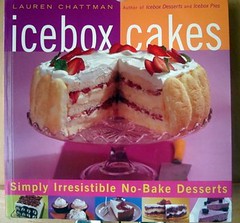
First things first! I know many people use the 'random integer' selector for their giveaways. I decided to let K-man be my random number selector. He choose #17 so that means....the proud winner of their own copy of the Ice Box cakes cookbook is.....

Jessica of Little Birdie Secrets!

Photobucket

She hails from Washington State where she and two friends have a blog that you should check out. They are 'jackies of all trades' with crafts ideas, sewing stuff as well as recipes! I am already checking out her link on how to make your own 'scratch-off' ticket with soap and paint! So cool, I am already thinking how to use those in my classes as incentives!

Thank you all for entering. The comments you made about the book and your intent, indicated to me that I picked a good one. I will be sure to look out for treasures for my next giveaway!

Just a short post tonight for I have some bad news.....the summer is over for me and this teacher goes back to work today. Waaaaaaaaaahhhhhhhhhh!!! Somebody hug me. sniff sniff.

It was so nice to post away and/or sit back with my coffee and read all your posts from my reader. It certainly was more fun than reading the news paper! So for kicks and giggles (?) Have a glimpse into my week ahead....


Those of you who are not teachers let me give you a realistic view of my first week back:

Future Reminders:

Staff Meeting with Superintendent: Monday, September 21 (an extra meeting after school we have to meet our new super)
Back to School Night: Wednesday, Sept. 30 (you know, the night the parents come and meet the teachers from 6-9pm, many teachers don't go home- meaning a 14 hour day)

First day for Staff:
Monday, August 31, 2009
8:00-8:30 a.m. – Breakfast- (bagels, fruit, etc) , PTA (speech), Distribution of Keys
8:30-9:15 a.m. – Introductions (Alert- the below mentioned WILL NOT take 45 minutes-BET!) Opening Remarks—Focus for the year: Rigor, Relationships, Relevance
Changes in TA (changes? uh oh- what does THIS mean?)
Testing Results (zzzzzzzzz)
Blackboard Changes,
Training and Expectations
Professional Development Opportunities,
Ideas (we are expected to decorate our doors this year with our college paraphernalia to encourage thoughts in students of going to college- I don't have anything left from my college years except for one ratty 21 year old sweatshirt- sigh),
Expectations,
GT Resources

9:15 a.m. Distribution of index cards—What does rigor mean to you? What does it or will it look like in your classroom? Please think, perhaps discuss with others and write a sentence or two. These cards due tomorrow, 9/1/09. (teachers get homework too!)

9:15-9:30 a.m. -- Break (when we are allowed to go to the bathroom)
9:30-11:00 a.m. -- Leadership Council to meet in Library (Continued Discussion of Next Steps Related to Rigor, Relationships, and Relevance) (this is all the leaders of each team, meeting to share stuff but it's really more of the principal talking)
9:30-11:30 a.m. -- The rest of staff will go to classrooms to begin to set up, etc. (my first two hours to start to unpack my room. Yes, unpack....I have to pack EVERYTHING in drawers, closets and store rooms...why....so it won't be stolen over the summer- if a custodian leaves your door open from cleaning shampooing the carpets, your stuff is unprotected) I only have tables, chairs and my 'locked' desk in my room at the present. All the appliances, equipment, decorations, are all stowed away- it took me a week to pack it up....now I have to unpack it as well as plan for my first week)
11:30 a.m.-1:30 p.m.—Lunch on your own. Teams are encouraged to eat together. (so any new staff can get acquainted with the old staff- they will be overwhelmed!)
1:30 p.m.-?— (notice no time...no guarantees how long you get) All staff continue work in classrooms.
1:30 –2:30 p.m. -- New copier training: All administrative assistants, paraprofessionals 2:30—3:00 p.m. -- New copier training: Teaching Staff (we have to sign up for when we break away)
3:00—3:30 p.m. -- New copier training: Teaching Staff
3:30-4:00 p.m. -- New copier training: Teaching Staff (don't think for a minute our day ends @ 4, many of us stay much longer to get a jump start on our rooms. I usually stay until 7 or 8 only because all through the day other teachers keep popping their head in and interrupting your progress)

Tuesday, September 1, 2009
8:30—9:30 -- All staff meeting in Theater I. All staff to discuss specific ideas for next steps related to Rigor, Relationships, and Relevance
9:30--?-- Staff to work in classrooms, attend county meetings. (I go to another building across the county @ 12 to listen to my supervisor ramble and hand out a ream of paper until 4 pm- I usually am so exhausted from all these people speaking AT me....that I am BEAT- home to take a nap)

Wednesday, September 4 --
Attend county meetings (from 12-4 speaker, after speaker, powerpoints, workshops, box lunch...boring, boring, boring);
Work in Classrooms (from 8-11:45- if I have any energy left...I will go back to my classroom until 6 or 7)

Thursday, September 3 --
Attend county meetings;
Work in Classrooms 9-11:00 a.m. -- Sara Melendez, our Technology Support Specialist, will be here to help to set up grade books, Easy Grade Pro & eSchoolPlus, etc.
6 p.m. – 7:00 p.m. -- Ice Cream Social in the Cafeteria It is a great opportunity to meet parents and students. We welcome any help with serving ice cream! Your families are also invited to come. Please join the fun! (by now, I am dirty, grubby, needing a shower, tired....I still need time for my room and they let the kids roam the building, so I have to lock and cover the window in my door or students (mostly over the embarassment of my kids seeing me this way with no make up) or they will visiting off and on for over 2 hours!- sad)

Friday, September 4--
Work in classrooms 8:30-9:30 a.m.-- EGP Set-UP (Drop-In) Help Session (It is by the end of today that will determine if I have to come in again on Saturday.)

But what exactly does a teacher have to do to prep their my room?


Brace yourself.....

1. Reconnect my computer (yes all the wires). We have to constantly check out email for the week. People are too lazy to see you or call....so most email. We normally do not get our class lists until Thursday, counselors are still working on them the week before school. What were they doing all summer? We have to import all those lists in our grading systems. We also have to set the calendars and categories for grading, etc.

2. We may get our homeroom list of kids by Mon. most likely Tues for we have to call each homeroom kid to welcome them. I have 8th graders, most all know me and how to get to my room....but I have to do this anyway!

3. I have 4 bulletin boards I need to cover and decorate. Two of them are 3ftX5ft and the other two are 3ftX7ft. I also have a showcase outside my room I have to fill.

4. In between those Bulletin Boards I have white barren walls that I need to cover with posters with varying messages about values, behavior, rules, etc. God forbid I use the same posters from last year....

5. I also have an adjoining 4 kitchen lab room that I will need to decorate as well. I will keep my sanity about putting the equipment back there with my students help later in Sept. They like seeing all the stuff and putting it where it goes, thank goodness.

6. Set up folders for 5 classes. Count, color coordinate and label.

7. Plan "get to know you activities" for the first days....we can't even start on my curriculum until next week (maybe) reason being, kids are pulled out and moved into my classes for about two weeks. "She does't want Art she asked for FACS....oh he can't have FACS because his parents wanted him to start Spanish this year.....We have to pull out him to be put in remedial reading instead....The PE classes are overcrowded we need to shift these 7 kids to your other class."

8. Unpack my desk and set out the things I need to function, stapler, hole punch, sharpener, printer, scissors, tape, clips, bands, post -its (no pencils or pens can be visible at any time for they are stolen from my desk- and I am NOT kidding) I swear kids must eat them for snacks!

9. Also I am a new teacher mentor: so it is up to ME to talk to this new teacher about the ropes (teaching and our school ways of doing things). Where to get posterboard paper, supplies, where the bathroom is, make sure they go to trainings, FYI about being an elective teacher, then I have to give advice for the rest of the year about classroom management. Did you know that when you work toward getting your teaching degree, colleges have NO COURSE regarding how to manage discipline? You have to figure that all out yourself. Most new teachers don't know the difference between being permissive vs nice; firm vs. mean; cool vs pushover.....kids are master manipulators. I have 20 years of 'attempted manipulation' under my belt let's not forget the 18 years of MY OWN tricks of deception as a student....oh the stories I can tell how kids have 'tried' to push the blame onto others or won't accept responsibility.

Whadda think? Are you tired? I am and it's only the first day back....

Sigh,

Sunday, August 30, 2009

Appetizers for lunch...

Since I have the summer off, (I am a teacher in case you forgot) I don't eat on a schedule like I do when teaching during the school year (predominately leftovers from dinner). But in summer, I have the freedom to make anything I want. Like having nachos for lunch....

Healthy Chicken Nachos2

Healthy Chicken Nachos
(for one or two)

Unsalted Blue Corn Chips
Leftover Grilled Chicken, chopped, shredded
Chopped Tomato, onion and pepper (homemade salsa)
70% fat free White Cheddar Cheese (Cabot), shredded
50% fat free Pepper Jack cheese (Cabot), shredded


Spread half the amount you want to eat/share. Sprinkle half of the cheese over the chips. Top cheese with rest of your chips. Top with chopped/shredded chicken. Spread salsa over chicken. Top with remaining shredded cheese. Microwave or broil until cheese is melted.*

*You can prepare these either in the microwave or in the oven. I find nachos get 'toastier' in the oven yet the 'hot spots' in the microwave don't always melt the cheese evenly. I opted for the microwave because I didn't want to heat up the house with the oven.

Healthy Chicken Nachos

Why don't I eat these more for lunch? It's perfectly balanced. Protein, dairy, vegetables, lower in fat. Who made the rules and said nachos has to be an appetizer or a snack. This was a meal and lower in salt and not all greasy from the fat from the cheese. Try nachos for lunch if you can ! (If you have a microwave at work....you can do this)

Don't forget to enter my FIRST giveaway, just a quick comment gets you in the running! Tonight is your last chance....9pm EST the giveaway will close...

Enjoy!

Saturday, August 29, 2009

This was NOT supposed to be an investigation...

Over a Sugar Donut Muffin?

Sugar Donut Muffin

I don't know how many times I have seen these cuties being made on your blogs. It's been driving me crazy. Clearly it drove me to finally make them.

Before I start the recipe. I wanted to share something I found curious. I noticed when making it that it said 'baking power.' Being my obsessive-investigative-self, I went to my school site and checked if I already had this recipe. Yup, I did. But it was a little different.

Then I did a food blog search on google using "sugar donut muffins"

Sugar Donut Muffins

TONS of pages of blogs who made these. The cross referencing was all over the place. Mostly Baking Bites was credited for this recipe. Other people were citing their first blog where they found it as a source and THAT blog cited Baking Bites as their source. So very confusing.

Then there were the ingredient differences. Some used milk, some used yogurt and some buttermilk. Some of the muffin pix were perfectly rounded on top...seemingly fluffy inside. Other had a flat top with a crusty edge (obviously too much sugar in the recipe).

My recipe on my school site had a few things a bit different:

1 cup of sugar instead of 3/4 cup
2 cups of flour instead of 1-1/2 cups
1/4 cup + 1 Tbsp of oil instead of 1/4 cup
3/4 cup + 2 Tbsp buttermilk instead of 3/4 cup MILK

My computer/filed copy used only sugar for a coating, my printed version used cinnamon/sugar yet Baking Bites used only sugar. Yet MY recipe had used buttermilk as opposed to the printed one had milk. Funny I was going use buttermilk anyway. BUT it had the SAME spelling error of 'baking power'.

Time to investigate again. Out of the patience I had I viewed about 20 different sites who had the Sugar Donut Muffin recipe. Baking Bites had the spelling error 'baking power' and six other sites did too. Seven other sites who used BB as their source CORRECTED the spelling error. Finally I found where I got my 'different' recipe. Vanilla Sugar was exactly the recipe I had WITH the same 'baking power' SPELLING ERROR, yet she cited no source.

OH, the craziness I made out for myself! HAHA. But it was fun pretending to be a FBI. Food Blog Investigator. LOL

So I am going to give two versions of this fabulous donut muffin. Both had pictures of beautiful rounded tops.

Sugar Donut Muffins
found on Vanilla Sugar

1 cup sugar
1 large egg
2 cups all purpose flour
1 ½ tsp baking power (I didn't correct this)
¼ tsp salt
½ tsp ground nutmeg
¼ cup plus 1 Tbsp vegetable oil
¾ cup plus 2 Tbsp buttermilk
1 tsp vanilla extract

For topping:
4 TB butter, melted
½ cup sugar, for rolling

Preheat oven to 350F. Lightly grease a muffin tin with cooking spray or vegetable oil.
In a large bowl, beat together sugar and egg until light in color. Add in all the vegetable oil, all the buttermilk, vanilla extract and mix well.

In a small bowl, whisk together flour, baking powder, salt and nutmeg; add this to the wet mixture.

Divide batter evenly into 12 muffin cups, filling each about 3/4 full.

Bake for 15-18 minutes, until a tester inserted into the center comes out clean.

While muffins are baking, melt butter in one bowl and in another bowl pour in the ½ cup sugar.

When muffins are done, take muffin one by one and dip top of muffin into melted butter then dip into sugar. If, you’re feeling even more creative you can dip all sides of the muffin. I also used cinnamon on half of the muffins. After I was done doing 6 muffins with the plain sugar I added some cinnamon to the remaining sugar and dipped accordingly. Cool on a wire rack.

Sugar Donut Muffins

found on Baking Bites (the recipe I used today)

3/4 cup sugar
1 large egg
1 1/2 cups all purpose flour
2 tsp baking power
1/4 tsp salt
1/4 tsp ground nutmeg
1/4 cup vegetable oil
3/4 cup milk (low fat is fine)
1 tsp vanilla extract

2 tbsp butter, melted
1/2 cup sugar, for rolling

Preheat oven to 350F. Lightly grease a muffin tin with cooking spray or vegetable oil.
In a large bowl, beat together sugar and egg until light in color.
In a small bowl, whisk together flour, baking powder, salt and nutmeg. Pour into egg mixture and stir to combine. Pour in vegetable oil, milk and vanilla extract.
Divide batter evenly into 10 muffin cups, filling each about 3/4 full.
Bake for 15-18 minutes, until a tester inserted into the center comes out clean.

While muffins are baking, melt butter and pour remaining sugar into a small bowl.
When muffins are done, lightly brush the top of each with some melted butter, remove from the pan and roll in sugar. Cool on a wire rack.

Sugar Donut Muffins1

When I feel the craving for this muffin again, I am going to try vanilla sugar's version to see the difference. Of course, the pan you use, your oven heat calibration could also impact your outcome. Regardless....DELICIOUS!

Don't forget to enter my FIRST giveaway, just a quick comment gets you in the running! Last day to enter Tomorrow, Sunday August 30...

Enjoy!

Friday, August 28, 2009

These little FAT ONES surprised me...

GORDITAS!

I saw these on Girlichef's site, they looked fun and interesting. I love Mexican food, and challenging myself in making tamales a few weeks ago was new to me; so I wanted to try yet another facet of Mexican Cooking.

As I was making the Gorditas I was a little skeptical....I became more fearful when I was cutting the masa patties open....I could totally see them falling apart and making a mess while eating. I had an extensive spread of foods to stuff in the little Gorditas....'I can see this becoming a salad here cuz those Gorditas won't cut it'....I was feeling very pessimistic. "I don't know..."

Gordita Pockets

We opened them....over stuffed their limits....an Oh Mah GAH! They HELD! The taste INCREDIBLE! The corn flavor with the salsa and smooth avocado cooling the spicy beef....I was shaking my head in praise for Girlichef! It worked! She rocks!

Here's what I did:

This was my food set up in the divided serving tray~

Gordita Bar


The Gordita stuffing choices were:

Fresh Salsa-
Homemade Salsa


Taco Seasoned Shrimp-
Taco Shrimp

Fried Queso Blanco-
Fried Cheese
BTW- if you have never tried this...YOU GOTTA. Here's my past post how to do it.

Leftover Grill Steak-
Leftover Steak

Sliced Avocado-
Avocado Slices

Here's how you make them:

Gorditas
found on Girlichef but from Mexico One Plate at a Time by Rick Bayless

1 3/4 c. powdered masa harina
1 c. plus 2 Tbsp. warm water
1/3 c. flour
Scant tsp. baking powder
3/4 tsp. salt

Begin by mixing up your masa ingredients in a large bowl...use your hands so that you can feel the consistency. It should be about the consistency of a soft cookie dough. Knead it a few times so that it is pliable. Grab a small ball of dough (~1 3/4"-2") in your hands and form it into a disk that is just larger than 1/4" thick.

Heat a comal (or large, heavy skillet or cast iron pan- I used a Electric Griddle) over low to medium-low heat. Once it is very hot, add the masa disks and let them toast up and get brown spots on one side. Flip and repeat. Remove them to a plate until they are all done.

TA-DA!

Gorditas

Sorry I didn't have a picture of these 'superheros' stuffed. They held up with every bite. Just be sure you cut them all the way down so you can utilize the WHOLE pocket it makes.

Kneeling and bowing down to Girlichef~ MWAH!

Don't forget to enter my FIRST giveaway, just a quick comment gets you in the running! Last day to enter Sunday August 30...

Enjoy!

Thursday, August 27, 2009

Perfection vs. Hockey Pucks


I think many of us have different 'gauges' on the grill for when things are done. I know I tend to take things of the grill earlier to check it and I know about the 'carry over cooking' thing. Not many men can cook things to perfection on the grill everytime. Sometimes K-man hands me the grilled stuff thinking it's perfect but after it sits in the kitchen when I am prepping the plates....the carry over cooking killed the pink that WAS in the steak/burger earlier. It happens every so often. I was reminded of my Cooks Illustrated Foolproof Burger recipe when we caught a America's Test Kitchen TV episode on it. I had totally forgotten about this recipe!

The concept here is to add moisture/flavor to the burger so IF you happened to ACCIDENTLY over cook your burger to well done, it will still be flavorful and JUICY.

So I dug it out and made some.

Here's how you do it:


Make a slurry of bread and milk.


Add your seasonings and steak sauce. Mix well.


Add your ground beef to your seasoned slurry. (I try to use a fork instead of my hands. The heat of your hands can melt the fat in the burger that can make a burger tough.) Mix well.


Form into patties. If I am going to the effort of making this, I like to buy a couple of pounds and make several burgers to keep in the freezer for a quick meal.


Put your individually wrapped burgers in a ziploc bag for the freezer. Put aside your fresh ones for dinner tonight!


Here's the recipe:

Foolproof Burgers
from Cook's Illustrated Magazine also known as America's Test Kitchen from TV

1 large slice white bread, crusts cut off, broken into pieces
2 Tbsp. whole milk
3/4 tsp. salt
3/4 tsp. black pepper
1 medium garlic clove, pressed through garlic press
2 tsp. A-1 sauce
1-1/2 pounds of 80% ground beef

In a large bowl, mix your bread pieces with milk. Mix with fork until it's a pasty slurry. Add your seasonings and A-1. Mix. Add your ground beef and mix with a fork to keep your warms hands from melting the fat. If you are a 'hands-on' kinda person...go ahead. Form into patties.
Keeping in mind that pound of beef will give you 4- 1/2# burgers. I can't see forming patties with anything less. They'd either be too thin or too small for the bun.

Don't forget one important point....when you are ready to put the burgers on the grill make sure you put a 'dent' in the center of each patty. If you noticed how the burgers swell in the middle as they shrink in the cooking process....this 'dent' will make your burgers form a flat surface rather a humped middle.


Suggested Extras as seen above/below:
Crusty kaiser rolls
Bacon
Queso Blanco
Ketchup
Sliced Onion
Tomato Slices
Lettuce
Mayo

Sorry, the pix bites here, but it was one of those last minute. Let's eat, oh god I need to take a blog pic...cut burger in one hand (mouth drooling) and snapping with other hand, turn off camera quickly and CHOMP! I squeezed a bit here so you could see that it was still juicy despite the pink pretty much gone. Great flavor too!

Cook's notes: I had some of these great big crusty kaiser rolls for these....when the burgers cooked they were so small compared to the bun, about an inch short all around. I should have snapped THAT pic. LOL If I had used the regular hamburger buns from the grocery the burgers would have fit fine....but these were super kaiser bakery ones....and they dwarfed the poor burger....it was so funny. Oh well, it tasted great and once you close those buns together with all those toppings who could tell my burger was a bit on the small side?

Don't forget to enter my FIRST giveaway, just a quick comment gets you in the running! Last day to enter Sunday August 30...

Enjoy!

Wednesday, August 26, 2009

Pizza, that's how I roll...

Mmmmm Pizza....

I don't know about you but we have one night a week when we have pizza for dinner. I am not talking about the delivery stuff or the frozen stuff.

We enjoy a homemade pizza. My only cheat is that I use a variety of pre-pared dough to save on time . We prefer the Mama Mary's thin crust. I've also used tortillas and when I am feeling industrious I will make homemade dough. I know the Boboli crusts are popular but even their thin crust is still too thick for us.

I had remembered seeing on Lynn's Kitchen Adventure her post for Pepperoni Rolls and coincidentally our store had the Pillsbury Pizza crust in a can 'buy one get one free' so I couldn't resist. I had used these when I was younger still living at home and when they were new on the market. They were okay. Them being on sale, I decided to give them a try to see if they were the same, hopefully not.

Right away I noticed that the shape of the dough was bigger, the can was longer too. I also remember wrestling with the dough years ago for no matter how much you stretched it, it always would shrink back. This dough was holding it's shape pretty well and didn't seem to want to stick or tear.

Pizza Rolls
adapted from Lynn's Kitchen Adventures

1 can Pillsbury Pizza Crust
1 package pepperoni (we use the turkey, so NOT greasy)
1 cup cheddar cheese (I use Fat Free to cut down on the puddles of grease)
1 cup mozzarella cheese
1/4 cup parmesan cheese
Italian Seasoning
Preheat oven to 375 degrees.

Roll out the dough into a rectangle. Place pepperoni all over the dough. Sprinkle your cheeses. Sprinkle a bit of the Italian Seasoning over cheese. Roll dough from it's longest side into a log.

Prepare your cookie sheet with either a silpat or parchment paper. Take your log and slice with a serrated knife. Saw the dough don't press. Each slice should be 3/4-1 inch thick. Place each slice swirl side up and sprinkle with more Italian Seasoning. These will not spread or puff out much when cooking, only about 1 inch between each slice should be fine.

Bake for 10-15 minutes or until lightly brown or cheese is melted and bread is cooked.

The pizza rolls can be eaten alone or dipped in some warmed spaghetti sauce on the side.


This was a great variation to your traditional pizza. K-man loved it the next day to pop a bunch in a ziploc bag and put them in his back shirt pocket when he when cycling the next day for a snack!


Don't forget to enter my FIRST giveaway, just a quick comment gets you in the running! Last day to enter Sunday August 30...

Enjoy!

Tuesday, August 25, 2009

5 minute Sticky buns and my first GIVEAWAY!


Well, kinda...

I am having my first giveaway....but the sticky buns aren't EXACTLY made in 5 minutes...

I used my Artisan Bread in 5 minutes dough to make them. As you know, cinnamon rolls, sticky buns -whatever are a bit laborious BUT these are totally worth it. I've made a few different recipes of sticky buns....this is my NEW - 'when you want sticky bun- make these' recipe! Get ready to bookmark this.

From Artisan Bread in Five Minutes a day:

Use your basic master recipe for Boule (Artisan Free Form Loaf) found on page 26 of the book. Here is the link from when I baked my first loaf.

I made the full recipe this time....I've been making only half recipe and my container was barely big enough!

Sticky Caramel Bacon Rolls
ADAPTED from page 187 of Artisan Bread in Five minutes a day

Makes 6-8 large caramel rolls

The book suggested using any of the refrigerated pre-mixed doughs: Challah (page 180), Brioche (page 189), or Boule (page 26). I used the Boule and it was perfect!

1 - 1/2 pounds of dough (use a scale rather trying to judge what canteloupe sized is)

The Caramel Topping:

6 T. unsalted butter, softened
1/2 tsp. salt
1/2 cup brown sugar (I used light)
30 pecan halves (I had only chopped and I just 'eyed' the covering the sauce in the pan)

The Filling:

4 T. salted butter, melted
1/4 cup sugar
1 tsp. cinnamon
1/4 tsp. nutmeg
1/2 cup chopped and toasted pecans
pinch of black pepper
MY ADDITIONS:
1/2 cup raisins (I put this on ONE half of the dough for K-man)
1/2 cup chopped BACON (we love bacon with sweet sticky stuff)

1. On baking day, mix together the butter, salt and brown sugar. Spread evenly over the bottom of of a 9 inch cake pan (FAT DADDIO works GREAT). Scatter the pecans over the butter sugar mixture and set aside.

2. Dust the surface of the refrigerated dough with flour and cut off a 1-1/2 pound piece. Dust the piece with flour and shape into a ball. This dough will be sticky, try to not work into too much flour.

3. With a rolling pin, roll out the dough to a 1/2 inch thick rectangle. As you roll out the dough, use enough flour to prevent it from sticking to the work surface. Again careful on the amount for too much will make dough dry.

4. Melt the butter and spread with basting brush onto dough rectangle. Sprinkle mixed sugar and spices onto the melted butter. Sprinkle with nuts, raisins, and/or bacon. Starting with the long side, roll the dough into a log. If the dough is too soft to cut let it chill for 20 to firm up. (It was too soft yes, but I just dealt with it....an extra 20 minutes was NOT in my plan!) You may need a metal bench/counter scraper to help you roll for this dough will be sticky in places.

5. With a very sharp serrated knife, cut the log into 8 equal pieces (BAH- I used dental floss - it doesn't smoosh the dough! and I cut it into 6 pieces. No way I could see 8 pieces fitting into that pan!) and arrange over the pecans in the pan with the 'swirled' edge facing upward. Cover loosely with plastic wrap (spray it with non-stick spray) and allow it to rest and rise 1 hour.

6. Twenty minutes before baking time, preheat the oven to 350 degrees. If you're not using a stone in the oven, 5 minutes is adequate. Be sure to have a piece of foil, silpat or baking sheet under your 'buns'....the sugar may boil up and over (mine did)

7. Bake about 40 minutes or until golden brown and well set in center. While still hot, run a knife around the inside of the pan to release the caramel rolls (I sprayed the pan and the hot goo underneath it kept it from sticking) and invert immediately onto a serving dish. If you let them set to long they will stick to the pan and be difficult to turn out. (YES! The sugar was sticky by the time I put it on the plate and brought them to breakfast)

Freshly inverted and I can see the sugar 'stickifying'. OMG, BSOE! Best smell on earth! You can see the raisin ones for K-man and the non-raisin ones for me!

Let me tell ya. This bread was so SOFT and FLUFFY. Was not dense in the least. After eating one, you wanted another. It was worth dealing with the stickiness when rolling and cutting. The buttery goodness the sticky parts the crunchy parts. The toasted pecans with the smoky bacon! THUD....I've died and gone to heaven!
I woke up around 8:30 (fed the cat, made coffee and got a start on these) and we didn't eat them until 11. We were so starving but they were soooooooooo worth the wait!

NOW FOR THE GIVEAWAY!!!!

I made you wait long enough, didn't I? I didn't want to wait for my Blogoversary and I thought my 200th post was good enough.

Since summer is coming to a close and local fruits are starting to wane and we still don't want our kitchen to be hot for the next two months.... I want to send some lucky reader the book:

ICEBOX CAKES~
by Laura Chattman

There is a plenty in here to make with fresh fruits or canned fruits. You can bake your own cake or use premade ones like angel food or freezer pound cake. All the recipes you need for pastry creams, whipped creams, puddings etc. There is so much wiggle room for you to substitute with what works for YOU! There are also some fun cakes using twinkies and swiss rolls!

If you are interested...just leave a comment either about my sticky rolls or your interest in making some new fun ice box desserts for your family.

Sorry friends in other countries....only for US residents at this time!

I really think you'd want this book in your collection....I found it hard to give up and not keep in my own vast cookbook collection. I will have a boston cream pie post very soon and this book gave me the idea for it! Giveaway open until next weekend....my last hurrah before I go back to the classroom! - THIS GIVEAWAY IS NOW CLOSED!

Enjoy!

Monday, August 24, 2009

Chunky for your Hunky

Does someone in your family look at you all 'pouty' wishing they had a particular favorite of theirs around to eat? K-man gave me that look when I made those wonderful crunchy biscotti yesterday and they didn't 'float' his boat....LOL. He said exactly:

K-man: *pouting* I want a candy bar.
JennyMac: You do? What candy bar do you want? (please don't say Butterfinger, his other favorite.)
K-M: Chunky.
JM: Oh okay. I can do that.
K-M: What?! You have some hidden in the house?
JM: (not answering exactly) I have some. (I immediately disappeared into the kitchen)

Of course, I was not able to appear with a 'chunky' in hand immediately. Even though, it didn't take me long to make these; cooling them in the fridge to set was going to take a little bit.

K-man looked at my empty hands sadly when I returned and said "You couldn't find them?" I laughed and said "Patience, hunny!"

Copycat Chunky Bars
this is a 'there-abouts' recipe

approx 8 oz of chocolate (I had bit and pieces of chocolate in the freezer), melted.
1/2 cup raisins
1/2 cup peanuts (mine were a mixture of dry roasted and unsalted)

Melt you chocolate in a bowl in the microwave. Start on 1 minute and keep moving the chocolate around after each minute until melted. Remember some times the chunks left will melt as you stir just from them being moved around in the warm chocolate.

Add your raisins and nuts. Mix well. You want a good ratio of raisins/nuts to chocolate. Not mostly chocolate. That is why this is a 'there-abouts' recipe.

Now I could have put this mixture in a square pan and cut them into little squares to make them look more 'authentic'. But I knew K-man wouldn't care if what SHAPE they were, he just wanted his chocolate, raisin and peanut combo! I did what was convenient....

Line your muffin tin with 8 muffin papers, lightly spray them with non stick cooking spray. Carefully divide out your chocolate mixture into the sprayed cups. You will need to take a rubber scraper and press them down so their are flat on top.

Place in fridge for approx 30 minutes or until set. Peel off muffin papers.

Cut foil into squares and wrap.


Since I didn't go with the 'authentic' square shape of the candy. I tried to make up for it with the wrapper....LOL

You may want to write CHUNKY on the foil BEFORE you wrap your 'bars'.


Well, this copycat inside sure looks like a REAL chunky to me!


K-man LOVED these. He was impressed that I had made them. I purposefully didn't tell him I was going to make them for he'd insist that it was too much trouble and to NOT make them. I wanted to surprise him and he was thrilled. He ate two in one sitting.

Enjoy!

Sunday, August 23, 2009

Bring on the crunch!


If you've figured me out yet, I love a good cookie on here. Unless I make a half batch or I've given some of them away; after a few days the cookies get hard and dry. You know a cookie tastes best in the first one, two days; then it's on it's decline. When I saw these beauties, I said...these would be perfect with coffee in the morning or with ice cream at night. Since they are supposed to be hard and crunchy....no worries about them changing after a few days.

Double Dark Chocolate Walnut Biscotti


-found on The Ginger Cook that she adapted from Gourmet, Dec 1994


Ingredients:


2 cups all-purpose flour
1/2 cup dark cocoa powder
1 teaspoon baking soda
1 teaspoon salt
3/4 stick (6 tablespoons) unsalted butter, softened

1 cup granulated sugar

2 large eggs 1 cup walnuts, chopped
3/4 cup semisweet chocolate chips
1 tablespoon confectioners' sugar


Directions: Preheat oven to 350°F. and butter and flour a large baking sheet.

In a bowl whisk together flour, cocoa powder, baking soda, and salt. In another bowl with an electric mixer beat together butter and granulated sugar until light and fluffy.

Add eggs and beat until combined well. Stir in flour mixture to form a stiff dough. Fold in/mush in with hands the walnuts and chocolate chips.


On prepared baking sheet with floured hands form dough into two slightly flattened logs, each 12 inches long and 2 inches wide, and sprinkle with confectioners' sugar. (I forgot) Bake logs 35 minutes, or until slightly firm to the touch.


Cool biscotti on baking sheet 5 minutes. On a cutting board cut biscotti diagonally into 3/4-inch slices. Arrange biscotti, cut sides down, on baking sheet and bake for 10 minutes. Flip over the biscotti pieces and cook again for 10 minutes, until crispy. Cool biscotti on a rack.

Thanks Katherine, these ROCKED!

The great thing about these, is that K-man wasn't too keen on these....he likes his cookie soft and chewy (who doesn't?) but I didn't mind at all ! More for me! I love biscotti! Sorry K-man, next cookie will be soft and chewy just for you. Speaking of K-man, tune in tomorrow to see what special favorite of his I DID make for him!

Enjoy!

Friday, August 21, 2009

When you are feeling lazy...casserole it!


One of our favorite dinners is enchiladas. I could make them everyday and K-man would be dancing like Gene Kelly around here. Even when I tell him what's for dinner during the week, it's the day that enchiladas are made that he tells me that he was thinking about them all day at work. I guess I am doing something right!?

But let's be honest here, there are some family favorites that are a bit messy and/or time consuming. Enchiladas are one of those dinners I am talking about.

Here's how I cut some time:

1. Roasted Chickens on sale each Sunday at Harris Teeter for 4.99 = already cooked, just de-bone and shred.

2. I didn't have fresh corn tortillas around but I did have leftover tostadas to use up. It is essential to have CORN flavor. Even if you have to use leftover tortilla chips!

3. In order to soften the crunchy tostadas, you must have lots of salsa....THE GOOD STUFF, buy fresh not the jarred, room temperature, cooked junk. This cuts down from all the chopping of fresh veggies you want in your enchiladas. Find it in the refrigerated section of your grocery!

4. Make sure you have plenty of enchilada sauce for the tostadas to soak up!

5. Lots of your favorite shredded cheese!


Let's go shopping:

Chicken Enchilada Casserole

2 cups pre-made roasted chicken, de-boned, skinned and shredded (use whole chicken if using 13X9)
16 oz container of FRESH salsa
CORN! (either corn tortillas, tortilla chips or tostadas - not FLOUR, you need the 'corny' taste, people)
2 cups shredded cheese (I've been using Fat Free to make it healthier for us), divide into 3 piles.
15 oz. (29 oz if you are making a 13X9 sized pan) Enchilada Sauce
1 cup sour cream (we use the light version)
Chopped avocados

Preheat your oven to 350 degrees.

1. Spray your pan with non cooking spray. The casserole dish I used was 1 qt or 6X9 (don't ask me....I acquired it from mom probably circa 1970) you can double this for a 13X9 size if you like.

2. Pour about 1/4 of the can of enchilada sauce on the bottom. Just enough to cover the bottom.

3. Layer your CORN choice on the sauce. If one layer of corn tortillas, cut them in half if you need to get them to fit better. If doing chips/tostadas: cover the bottom as best as you can....don't worry about how high and uneven the chips are (we'll take care of that later).

4. Place half of the container of salsa on the layer of chips....spread gently as you can without making holes among the chips. Sprinkle 1/3 of the cheese on the salsa, then all of your 2 cups of chicken.

5. Now, take your hands and gently press down to hear a lovely CRUNCH. This way all the chips are coming in contact with the wet sauce and salsa.

6. Sprinkle with another 1/3 of the cheese then the remaining salsa. Top with the last layer of tortillas (if using the dry ones...lay palms on it and crunch gently.

7. Pour all the remaining sauce on top and around the edges. Cover with foil or if your casserole has a glass top. Bake for 30-35 minutes or until hot and bubbly. Turn off oven and place last 1/3 of cheese and put back into the oven to melt the cheese only and remove to set while you get your plates ready. You know, getting out the sour cream, chopping the avocados.

Cut slightly cooled casserole into portions and top with dollop of sour cream and avocados. Include a sprig of cilantro if you wish.


BTW- THIS IS GREAT TO MAKE THE DAY BEFORE AND KEEP IN THE FRIDGE FOR THE NEXT DAY- IT WILL ACTUALLY TASTES BETTER (like lasagna, CAPECHE)!

For those of you who may have had a 'naked' preview of this post yesterday with no pix or recipe...sorry about that. Clearly I was 'out to lunch'!

Enjoy!