Showing posts with label appetizers. Show all posts

Wednesday, December 31, 2014

The ones I missed....A 2014 Food in Review!


Happy New Year's Eve Jenny Mac Lipsmack Fans! 

I know I wasn't posting as much this year but I have been cooking quite a bit! I really need to create some system to get my recipes on my blog in an easier way! Any suggestions short of hiring an assistant, feel free to send me suggestions...So Good-Bye 2014....here is some of what I have made chronicling my year in food in review.


Cauliflower Tots is what caught my eye on Pinterest but when I saw the site included her version of Zucchini Tots and that was the abundant item currently from the summer's bounty...it is what I made.  These are pretty healthy with lower fat cheese and were VERY good!  I'd make again!


Bacon and Cheddar Zucchini Bread.  Ha-Ha....mine looked anemic.  Nothing like the picture on the website.  Perhaps I needed to cook it more but the cake tester came out clean.  I was afraid of drying it out.  It was okay.  I'd try again to see if it turned out better, but I was sad over the waste of good bacon in this.  I think half of it got thrown away.  You try it and see if yours looks like the one in their website. Let me know how you did!


I loveeeeeee demonstrating new foods for my students to try.  These were a little treat I found on Pinterest.  The students loved it so much I included it on my school website for the kids to have access to make at home if they wanted.  So if picky 7th graders gobbled these down and wanted more, you may have a hit at home with your kids!


Every so often I become OBSESSED with some type of recipe.  I have biscuits crumbs in my blood due to my grandmother making them all the time (Did I pass Me-mom?) However she would woefully say to us when we'd visit how sorry she was that these were not one of her better batches. WTH? They were always good! She was just overly perfectionistic! So the more I see recipes done on TV about biscuits and the flaky layers and the such...I wanted the same.  See the monster you created in me Me-mom?  Warning the recipe provided is good but it's really about the PROCESS of the dough folding.  Trust me, don't ignore this warning, it's more about the folding than the recipe.  I had to make this about 5 times to understand this.  Don't be stubborn like me.


I made this Pumpkin resembling Cheeseball for halloween.  I had printed it out last year but found it and made it this year.  I searched for the recipe and found it on Food Network.  It was really good with minced jalapeno and coated in ground up Dorito chips.  Next year, I'd make it with more minced jalapenos.  We like it zippy around here!


Sorry, I was too busy cooking on Thanksgiving....and we wanted to eat! But I included this picture because the real standout recipe that was new this year that I would DEFINITELY make again was the Chipotle Sweet Potatoes.  Sweet Heat.  We loved it.  I think I enhanced the recipe by adding just a touch of brown sugar 1/4-1/2 cup to bump the sweetness.  I buy those chipotle peppers in a can and separate the peppers out in their own baggie with some of the sauce and store them in the freezer! That is what this recipe called for ONE of those hot suckers in these here taters! Barely seen on the right...LOL


Christmas Holiday Party! We invited the neighbors to meet and greet.  We hadn't done it in a long time.  Those who came, we had a blast.  Might consider doing this again, maybe a tradition...Hey, it's gets the house cleaned too! LOL.  Found most of my ideas on Pinterest, modified them like the appetizer tree below.  When I figured out that only half of the neighbors were coming I chopped half of my styrofoam cone down (AC Moore, Michael's Craft stores, Jo-Ann's). Covered in plastic wrap. It was fun to assemble but really appropriate for a large crowd. We had much of this tree left over.


This was adorably cute but I'd use a different recipe.  Bottom half was mustard, onion with cheddar cheese and the top (head) was a pesto.  Coated in Parmesan cheese.  I just wasn't WOW'ed by the flavors.  Use the favorite cheese ball recipe of your own and use the picture as a base how to SCULP your snowman.  I will include the link so you can be your own judge if you like it or not.


I have made this Ranch Veggie Tree numerous times.  Kids even love it.  Very easy.  I tweak their version on Pillsbury.com by using dry ranch mix in whipped cream cheese and my decoration of the tree is more prominent. Their site includes a video if you need it.


Classic Sausage Ball recipe by Bisquick.  Next year I am making it with their Gluten Free mix since I have a GF neighbor and I would like to give her more options next time.  Also I think I will hunt for an optional dipping sauce as well.


I am NOT a seafood eater, however my husband is.  A good host has to please other people than herself, so sometimes she's gotta 'suck it up' and touch smell fish! K-man raved about this so this recipe will be repeated to keep him and my other guests in the future happy.  Thanks Pioneer Woman!


Easy Peasy! Phyllo Shells, brie and Cranberry Sauce.  Just melt brie for about 5 minutes in the oven and top with cranberry sauce.  Yum!


Just a peek of the SPREAD....


Party Sweets!  Top: Oreo Truffles, Middle: Salted Caramel Bon-Bons and Bottom: Pretzel Kisses and Pecan Rolo Pretzel Bites.


School Staff Food Gifts...Oreo Snowman
I tweaked this idea with adding sprinkles, and pull apart licorice garland.  Staff loved them!


Lastly, I just wanted an old standby for a sweet treat during the holidays.  Shortbread, simple, satisfies, makes many.


See you next year!

In Foodie Love,

Monday, August 26, 2013

Beef Empanadas

 Here is my 3rd and last Goya recipe for this month of August.  We were also supposed to do a beef recipe from "Beef, It's what for dinner" council.  August is a really busy month with me going back to the classroom so I did a beef recipe with my Goya product.  Knocking out two and one.  So this last one, I really wanted to see if I could find the Goya "Discos" or the puff pastry circles to make Empanadas.  Luckily at my second attempt at a Safeway that seemed to have lots of Goya on their shelves...I tried my luck in the freezer to look for the dough and SCORE!!! I scooped up two.  I stay away from recipes most times that have you make your own doughs.  I just don't have the time or patience for it anymore.  When I saw that Goya made its own dough for Empanadas I had to see if I could find it and so happy I did.
Allrecipes had only one empanada recipe from Goya and in true JennyMac fashion I tweaked it:

-I did not use all their prepared seasonings and such.  I was fearful of it being too salty,
-None of the seasonings (Sazon Goya and Goya Soffrito) were included in my box of goodies so I wasn't going to go out and buy them.
-I added a non-traditional food in it, (K-man doesn't like olives) sweet potato.
-I did NOT FRY them.

Beef and Sweet Potato Empanadas
by JennyMac Lipsmack on Allrecipes.com

1/2 pound ground beef
1/2 medium yellow onion, finely chopped
1 medium sweet potato, peeled and cubed
1/4 cup Goya Tomato Sauce
1 Tbsp. Adobo seasoning
1 teaspoon Minced Garlic
1/2 teaspoon Dried Oregano
Ground Black Pepper, to taste
1 (14 ounce) package Goya Discos (yellow or white), thawed
About 1/4 c. Oil, for cooking and brushing
Preheat oven to 400 degrees.  Heat about 1 tbsp. oil in a large skillet over medium heat. Add ground beef and cook until browned, breaking up meat with a wooden spoon, about 10 minutes. Remove and put to side.  Put another tbsp of oil and onions and sweet potato in the already heated pan. Cook until soft, about 10 minutes. Stir in tomato sauce, adobo, garlic, oregano and black pepper and add the ground beef back into the pan mixture. Taste for seasoning
On a lightly floured work surface, using a rolling pin, roll out discos until 1/2-inch larger in diameter. Spoon about 1 tbsp. meat mixture into middle, fold in half to form a half moon; moisten edges with water and pinch to seal closed, or seal with a fork.
Line cookie sheet with either a silpat or parchment.  Brush with oil.  Place 12 empanadas on sheet and brush with oil.  Place in preheated oven and bake for 15 minutes.  Turn empanadas over and bake for another 5 minutes or until both sides are golden brown.

This is the second time I took a classically FRIED recipe and baked it (I also bake egg rolls now instead of deep frying them) and the dough comes out just as crispy as though it was fried and so little oil is being absorbed by doing this.  
I AM GOING TO GO BACK AND BUY MORE OF THESE DOUGH DISKS....SO CONVENIENT AND THEY WERE AWESOME!!!

All in all, the Goya products were top notch and I used them before, so it was a no-brainer to me about using them.  Also we like to eat beef here so a double  assignment of making a beef recipes wasn't to difficult since we eat it at least twice a week.  It was fun taking a beef recipe and creating a new filling and using a new Goya product.  This was a good month for food from Allrecipes Allstars.

Enjoy!

Sunday, April 21, 2013

Southwestern Egg Rolls with Cilantro Dipping Sauce


This month the Allrecipes Allstars Ambassadors received Herdez® Cooking Sauces.  I got the Classic Chipotle and Roasted Pasilla Chile. The Chipotle one has definitely got some ZING.  I felt it was best suited for the recipe I came up with.  I have had a few versions of different restaurants Southwestern Egg Rolls and I used the corn and black bean salad from my Grocery deli as a shortcut so I wouldn't have to do all the chopping. AND these are BAKED not FRIED!!!  Double Score.  I created a Cilantro sauce to help cool the sting from the Chipotle or to just add another layer of flavor.

Southwestern Egg Rolls with Cilantro Dipping Sauce
by JennyMac's LipSmack

1 lb ground beef
1 jar Herdez® Classic Chipotle Mexican Cooking Sauce
2 green onions, chopped
1 cup corn and black bean salad (or see note to make own)
1 pkg. egg roll wrappers
1 egg, beaten with 1 tsp. water
oil for coating
Cilantro Sauce:
1/2 c. chopped cilantro
2 green onions, chopped
1/4 cup sour cream
1/4 cup mayonnaise
salt and pepper to taste
1.  Preheat oven to 375 degrees
2.  Brown ground beef with green onion.
3.  Add Herdez® Classic Chipotle Mexican Cooking Sauce and cook until reduced. Set aside to cool.
4.  Add Corn and Black Bean Salad (a mixture of yellow corn, black beans, chopped red pepper, green pepper, onions and lime juice.
5.  Put one egg roll wrapper on cutting board. Turn, so it's a DIAMOND not SQUARE. Coat edges with beaten egg with basting brush.  Place 1-2 Tbsp of mixture on bottom of Diamond.  Fold up bottom point to just cover the mixture. Fold over each side (should resemble an open envelope).  Now roll up fold to the top tip of that "envelope/diamond"  Use fingers to press edges so egg can start the wrapper edges to stick to itself.
6.  Brush each egg roll with oil of choice.
7.  Bake for 10-15 until golden.
8.  While baking put cilantro, sour cream, onions, mayo in a food processor.  Blend until smooth.
9.  Serve cilantro dipping sauce with egg rolls for cool finish to with the ZIP of the Herdez® Chipotle Cooking Sauce.


Cook's Notes:
To make your own Corn Salad: 
Corn and Black Bean Salad can be found in your in your grocery store's Deli, perhaps near the potato salad?  If not, don't worry.  You can use canned or frozen corn.  Drain a can of black beans.  Chop up one red, one green pepper and one onion.  Squeeze one lime on chopped stuff. Mix it all up.  Reserve 1 to 1-1/2 cups of salad to put in your beef with Herdez®.  Eat the remainder of your salad another time or as a side.

These were a keeper!  I was shocked K-man loved the cilantro sauce.  No everyone is a FAN of cilantro.  I know it took me awhile to develop a taste for it.  I swore K-man was gonna ask for Ranch instead.  I believe the word he used was "Killer".  I'll take it.

Caliente!

Sunday, February 17, 2013

Family Secret Meatballs and Sauce

I don't think I told you but I was accepted in a little fun program called Allrecipes Allstars.  I have been a member of the web page Allrecipes.com for years.  Sheesh, back in those days they had many sites.  Cookierecipes.com, Maindishrecipes.com, Christmasrecipes.com....there were tons....then they wised up and condensed.  Long story short....they are a place where people like me can post or look up recipes that are TRIED and TRUE.  All the members post their own pictures of how it turned out (if they want)...tons of reviews, suggestions, videos....I've been a member for 13 years.
So I see a FB friend post about this program where you do fun stuff each month they assign.  Sounded like fun AND would give me something to do on my own blog.
This month one of the activities we could do was to select a 'faceless' (no picture) recipe on allrecipes.com and give it try in our kitchen, review it and provide a picture.  Completion would be 3 faceless....or do more if you so desired.
The first one I did not like much.  It was OK, even though I took a picture of it....to start my AR CRED. lol  It was Lemon-Dijon Grilled Chicken. I was not thrilled about it and my review said as such.  Eh.  It needed some herbs.  Too much honey as well.  Ok next recipe....

YAY!  Winner!  I wondered why someone would put a Secret Family Recipe online...I guess we are now at the time in our lives when there are no more secrets anymore....everything good or bad goes on the Internet.  Well HONEY....this is one of those GOOD things to put out there.  Awesome stuff.  These were called Secret Family Meatballs and Sauce.  These are an appetizer kinda thing.  One person pictured theirs on a bed of spaghetti....um, not seeing that.  The sauce has ketchup, onion, vinegar, Worcestershire sauce.....not an Italian thing.  Are people eating BBQ on spaghetti now?   We ate these with a salad and some homemade jalapeno mac and cheese and garlic bread.  I can't wait for the leftovers tomorrow!

Here is the recipe to look over, however the link above is easier to print from if you like:

2 pounds ground beef
3/4 cup rolled oats
6 tablespoons chopped sweet onion (such as a Walla Walla)
1 cup milk
1 1/2 teaspoons salt
1/2 teaspoon ground black pepper
1 1/2 cups ketchup
3 tablespoons Worcestershire sauce
3 tablespoons white sugar
4 1/2 tablespoons chopped sweet onion (such as a Walla Walla)
4 1/2 tablespoons apple cider vinegar
3/4 cup water

1.  Preheat oven to 350 degrees F (175 degrees C). Grease a 9x13-inch baking dish.
2. Mix together the ground beef, rolled oats, 6 tablespoons of sweet onion, milk, salt, and black pepper until thoroughly combined. Roll the mixture into 2-inch meatballs, and place meatballs into the prepared baking dish.
3. In a bowl, mix the ketchup, Worcestershire sauce, sugar, 4 1/2 tablespoons of sweet onion, apple cider vinegar, and water until the sugar has dissolved, and pour the sauce evenly over the meatballs.
4. Bake the meatballs and sauce in the preheated oven until the sauce is bubbling and thickened and the meatballs are no longer pink inside, about 1 1/2 hours. An instant-read thermometer inserted into the center of a meatball should read at least 160 degrees F (70 degrees C).


Delish!


Saturday, February 2, 2013

Sriracha Deviled Eggs

Happy Super Bowl Weekend Kids!I have a fun and easy recipe for you.  If you'd like to change up a familiar recipe for your Super Bowl food tomorrow here's a nice recipe I created.

Sriracha Deviled Eggs
created by JennyMac's Lipsmack

12 hard boiled eggs
2-3 Tbsp of mayonnaisse
2-3 Tbsp of Sriracha
1/8 tsp of dry mustard
salt to taste
cayenne to taste
smoked paprika

Split your hard boiled eggs and remove the yolks.  Here's a fun tip if you choose to try it....place all your yolks in a ziploc bag.  Arrange your whites on a pretty plate.  Close the ziploc and smush all your yolks in the bag until no more chunks.  Add the mayo and sriracha, salt and cayenne (I left the measurements for you to taste and add more or less to your liking).  Taste and make adjustments.  Squeeze out air from bag and close again.  Cut hole on bottom bag about 3/4 inch.  Squeeze most of yolks to bottom of bag.  Squeeze out yolks into eggs.  Use a little pulsing squeeze to get the 'rippled' affect on your yolks as seen on mine.  Top with smoked paprika.  Serve to hungry guests.  Stand Back!

Cooks Notes:
1.  How picky are you?  Some days I am picky about my food some days I could care less.  The boiling and hoping of are they cooked enough or are they over cooked I am tired of the stress of that.  The peeling of the eggs...ugh.  Fresh eggs are NOT to be used for hard-boiled eggs.  The membrane takes out chunks and it makes your eggs look awful.  Hard to believe the older the eggs the better.  I guess fresh is out since you need air between the white and membrane to easily peel eggs.  ANYWAY- my point....do you realize they have already hard boiled eggs in your local grocery?  Yes, they do!  However....they are little more rubbery for my taste.  You own boiled ones are much more soft and delicate.  But if you have a husband who is crazy for deviled eggs....his craziness just may over rule his taste in soft vs. rubbery eggs.  LOL.
Just thought I'd share that with you.

Since my Redskins couldn't make it this year.  I will put a Shout out to our neighbors the RAVENS!  We'll be rooting for you this year!


Enjoy!

Sunday, November 6, 2011

Big Game Food

The Skins have a big game today. They have lost the past 3 games, and they have been playing kinda 'eh' these days but just because your team is being 'eh' doesn't mean your "game food" has to be 'eh' too.

We love nachos but none with the canned cheese like they serve typically at stadiums. Yuck. Nachos are fun because you can tweak them so many different ways.

Super Deluxe Nachos

1 lb. SHAVED beef (this is the good quality super thin sliced beef your butcher does, similar to 'steak-um beef' but don't use that unless you are desperate.)
1 envelope Taco Seasoning
1 cup frozen corn
1 can black beans (drained and rinsed)
shredded cheese
Your favorite tortilla chips
Fresh salsa (I usually make my own but the summer tomatoes are gone)
Chopped Jalapenos (I used three, seeded and deveined)
Sour cream

Preheat oven to 350 degrees. Cook your beef with Taco seasoning. Add corn so it will thaw. When beef is cooked add beans. Cover baking sheet with non stick foil. Layer chips on foil and hearty handfuls of cheese. Add layer of hot beef and corn mixture. Add more cheese on top of beef. Place in oven just long enough to melt cheese. About 10 minutes.
Sprinkle on fresh salsa, scoops of sour cream and jalapenos (don't forget all dairy is the ANTIDOTE for the jalapeno evils).

YUM! Have plenty of napkins, your favorite beverage of choice and you will have a happy tummy regardless of how your team plays!

Enjoy!

Friday, March 18, 2011

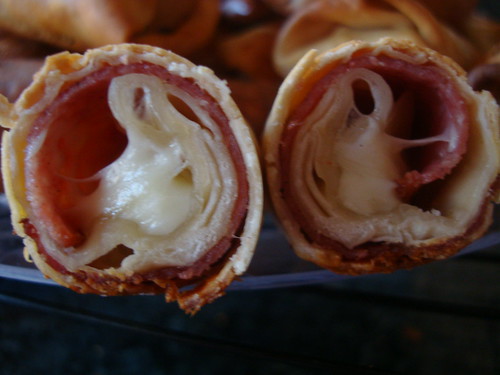
BAKED Salami and Mozzarella Egg Rolls

Baked Salami Mozzarella Egg Rolls
Did you know that you don't have to FRY an egg roll? I saw these beauties on Kaitlin in the Kitchen blog and she saw it on Guy's Big Bite. Fun twist on egg rolls, great appetizer....until I remember...you don't have to deep fat fry egg rolls I discovered last year. Very crunchy and doesn't get SOGGY! Here's how it works....

Baked Salami and Mozzarella Egg Rolls

2 Eggs
12 oz. jalapeno mozzarella cheese sticks (12 in a bag)
24 Slices Thin Salami
24 Egg Roll Wrappers
oil for coating

Preheat your oven to 350 degrees.

In a small bowl beat your eggs until combined. Unwrap your string cheese and cut each one in half. Lay a egg roll wrapper down on a flat surface and brush each side with the egg wash using a pastry brush. Place a piece of salami in the middle of the wrapper, and then 1 piece of the string cheese at the bottom of the piece of salami. Roll the wrapper up from the bottom until piece of cheese is covered, then stop and fold in each side, then continue rolling it and make sure it's sealed well. Repeat until you are done or run out of an ingredient (I had leftover salami but no extra cheese or wrappers- I think I may have eaten one stick?). Place each egg rolls on a baking sheet brush with vegetable oil. Bake for 20 minutes or until golden.

Baked Salami Mozzarella Egg Roll

Cook's Notes:
1. Don't overbake, they will start to bust open and ooze cheese. But I didn't mind the oozy cheese for those crusty puddles are an appetizer in itself!
2. These will be so crunchy that refrigerating the leftovers will NOT make them soggy, great for reheating the next day!
3. Suggested dipping sauce- marinara!
4. Did NOT miss the greasiness or calories!
5. Gonna try another version with ham or roast beef.....

Enjoy!

Thursday, January 27, 2011

A slow return to normalcy....

I am attempting to return to blogging in way that works for me. Why did JennyMac disappear into the blogosphere?

1. People send you suggestions saying you should do this or that...the occasional rude anonymous commenter who feels the need to put you in your place...makes you say to yourself at times..."who's page is this?"

2. Taking pictures is NOT the easiest thing to do at times and sometimes you end up eating the evidence. I am not one of those who snap a gazillion pix (how does Pioneer Woman do it?). One before, a few after....served with garnish maybe....OK, now let's eat. Either the recipe is NOT to my liking to post about or something isn't right with the pictures. NOW, the food is gone so retaking pix are impossible.

3. Sometimes lighting is not your friend. Let's be for real. Many of my meals are dinner and it's NIGHT. Natural sunlight is ideal, if my pic doesn't look appealing enough to eat....I don't wanna post something that looks like the cat coughed it up!

4. Then I got into Facebook, I was learning how to use it....finding old friends....getting addicted to some stupid games (first Cafe World then Frontierville....sigh).

5. Being timely....many blogs post about upcoming holidays/events BEFORE it happens. Halloween foods during the first week of October. Thanksgiving dishes two weeks before T-day. Christmas-y cookies and treats after T-day and two weeks after. Let's be for real here. I want my food and gifts to be fresh. I don't make Halloween treats in my classes Oct 1, the kids want it on Oct 31. I give out my holiday food treats a few days before the 25th not Dec 1. I am not into 'trial runs', practice, saving pix to post early for next year, etc.

6. The intimidation of the wonderfully popular and successful blogs out there. The more and more blogs I read or subscribed to, the more and more I felt unworthy. Also, I so envied my fellow bloggers successes. I see all these giveaways they have from companies contacting them, how lucky of them....I don't get that....I had a few here and there....but nothing like those popular bloggers. Bloggers talking about being invited to conferences, meeting up with other bloggers, guest blogging....posts about appearances on TV, etc. It's all so great for them, sucks for me.

After not posting for a bit, no one said anything. No emails, no inquiries....no one seemed to notice I was not posting. I said to myself "well no one saying anything or asking where I went, so don't bother posting anything because no one is reading my blog obviously...." What a vicious cycle I created for myself in my own little blogging world.

Then something snaps you out of it(hopefully?). You FINALLY get one email from a person who says they appreciate and miss your posts. A co-worker tells you they enjoy your blog and suggests a neat tool I should check out and share with my followers.

Bottom Line: I must do my blog because I enjoy it. I am who I am, I do what I do because it's me. No one else matters and I shouldn't set myself up for failure by comparing my blog to others. How many times did we get that lecture about "being yourself" growing up? Clearly I needed a booster shot. So I am going to share what I share only because it's something that works for me, not something that I think would impress the 'public'. BAH!


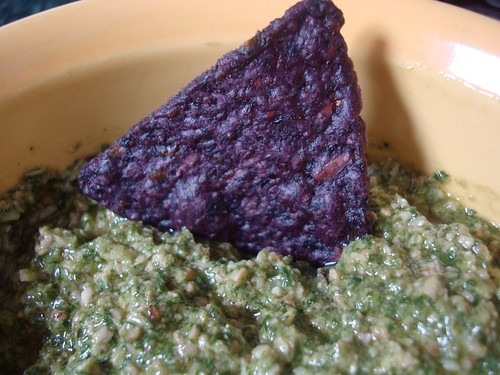
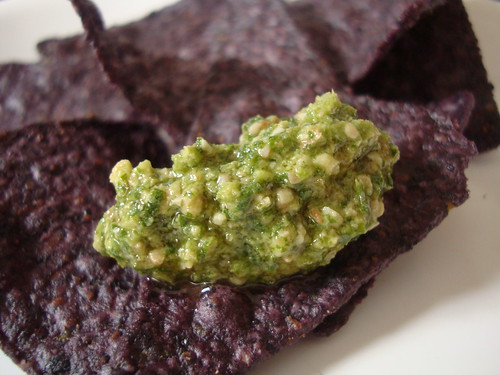
I made this and it's absolutely easy and so yummy. WHIR in the processor. I was apprehensive to try this for I am not a huge fan of cilantro but the combo intrigued me and POOF! I think perhaps I've turned a corner.....

Jalapeno Pesto1

Jalapeno Pesto
by JennyMac Lipsmack

1 cup fresh Cilantro
3 Jalapeno Peppers
2 Garlic Cloves
1/2 cup walnuts
1/4 cup Parmesan cheese, Shredded
juice of 1/2 lemon
1/4 tsp Kosher Salt
1/4 tsp black pepper
1/4 cup Olive Oil

1. Chop and toast walnuts for a few minutes in 350 oven until kitchen is fragrant (about 5-7 minutes). Set aside to cool.
2. In a food processor put a cup of washed cilantro.
3. Using gloves to cover your hands, slice in half the jalapenos, seed and devein. Remember the heat is from the veins, so do what you need to to do to make it hot or not; be careful or haphazard when removing those veins. Roughly chop and place peppers in food processor.
4. Peel garlic and add it in with the walnuts, lemon juice, Parmesan, salt, pepper in the food processor.
5. Pulse until combined and you don't see big chunks of garlic or whole cilantro leaves.
6. Slowly stream in the olive oil until incorporated.
7. Taste....add more salt, pepper or lemon if needed. Add more olive oil to make it consistency you want. Warm water can be done to keep the fat content lower and yet 'loosen' the mixture up.

THUD, this was beyond my expectations....We ate this during a football game with crackers and cheese but the tortilla chips tasted best. You can use instead of mayo on a sandwich. Top on an enchilada or taco....Add some plain rice vinegar or warm water to make it into a salad dressing. We loved this! I can't wait to try this on grilled chicken. I want to spread this on a roast beef sandwich. I am growing tons of cilantro this summer!

Jalapeno Pesto


Enjoy!

Sunday, November 7, 2010

Bacon Wrapped Jalapenos

Bacon Wrapped Jalapenos
adapted from My Wooden Spoon

15 jalapenos (when cut in half, makes 30)
1 pkg. cream cheese
1 pkg. of bacon each slice cut in half
toothpicks

Cut jalapenos in half and clean out. If you want more heat leave in the veins and seeds. Put as much cream cheese as you can on that half and wrap with a half slice of bacon. Try to cover the open end and the top really good there is less cream cheese leakage;) Stick a toothpick in from the top to bottom to hold bacon in place and prevent rolling up for falling off.

Cook in preheated oven at 350 degrees for about an hour or desired crispiness. THUD! These are freakin' awesome! Thanks Lori!

Enjoy!

Saturday, August 7, 2010

Baked Zucchini Chips

Baked Zucchini Chips

We had mini chicken salad sammies for lunch today. Instead of having chips the side (whether they were the evil or BAKED ones) I decided to make a different kinda chip. Here's a fun treat I made. Take advantage of zucchini while it is the summer bounty and make something to eat that you don't have to feel guilty about. Here is the solution. Crunchy outside, soft inside and you can dip it in anything you want! I've included some shortcuts to make it easier.

Baked Zucchini Chips

One large zucchini or two smaller ones
large ziploc bag
approx. 1/3 c. flour
2 eggs
dash hot sauce
seasoned salt (I used Paula Deen's House Seasoning)
pepper to taste
about 2 cups Panko
few shakes of canola or olive oil

Preheat oven to 375 degrees.

Prepare breading station:
1. Put flour in ziploc flour and add a "fingersful" of salt and pepper. Seal and shake.
2. Beat 2 eggs in bowl and mix in few dashes hot sauce.
3. Place panko in something like a pie pan and also season with salt and pepper. Mix
4. Line cookie sheet with nonstick foil.
5. Arrange each in a line in the order as prepared with the cookie sheet last.

Slice zucchini into 'coins' about 1/4 inch thick. Place into flour bag and shake until all coated.

Remember to keep one hand sticky (from flour to the egg) and the other hand dry (panko to cookie sheet)

Take about 2 zucchini from the bag, place them in the egg and keep flipping them over until the egg soaks into the flour. Sticky hand puts zucchini slice on panko....Dry hand grabs more panko from pan and places it on the zucchini coin and press. Dry hand flips over coin and puts on more panko and PRESS. Turn 'coin' on its side so loose panko can fall back into pan. Place on cookie sheet. Season with salt and pepper again.

Repeat until all zucchini is coated and on cookie sheet. Drizzle a little of oil on zucchini and into between 'coins'. Bake until lightly brown (approx 10 min.). Turn over and drizzle a bit of oil again and bake another 10 minutes.

Baked Zucchini Chips1

So delish. I dipped mine in a little bit of green goddess dressing. Great side dish, snack or appetizer. Much easier to eat than a half one baked. WE loved it. Give it a try!

Enjoy!

Sunday, February 21, 2010

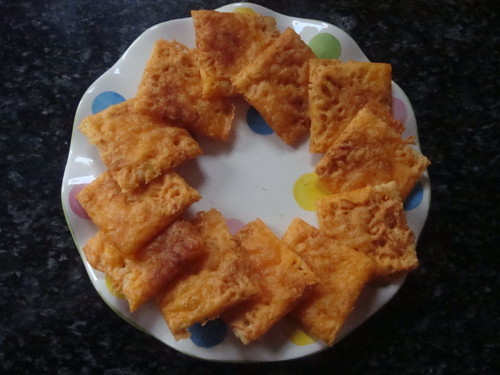
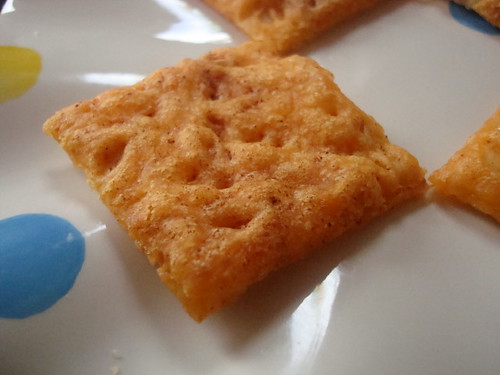
ITs or Nips?

Whatever ! Mmmmmm, Cheesy!

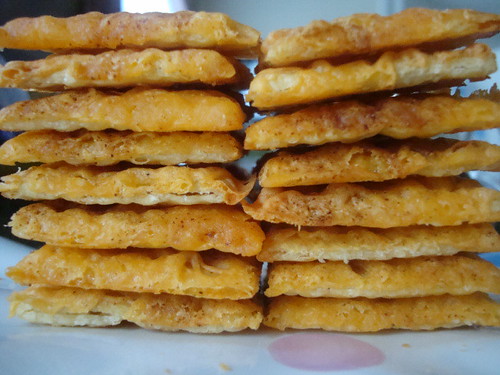
If you remember last year I had made my own cheese it/nips from scratch? That was fun (not) but these were REAL easy! I saw these on Rocquie's blog Sage Trifle. I thought they were real cute.


I did a some tweaking, you know for fun....and for another reason....read on....

Cheese Crackers

adapted from Sage Trifle

2 sleeves saltine crackers
1/4 c. melted butter
8 oz. shredded cheddar cheese
Cayenne pepper
Onion powder or garlic powder

Preheat oven to 350 degrees.

Place the crackers, salted side up, in single layers on baking sheets. Brush with melted butter (I didn't use all the melted butter, I wasn't being heavy handed), then spread the cheese evenly over the tops. Sprinkle with cayenne pepper, to taste (one third had cayenne, one third had onion powder and one third garlic powder, trying for variety).

Bake for 10 minutes and shut off oven. Keep in oven for half an hour more, until crispy and light.

Sage Trifle version: Place under the broiler until the cheese is bubbly, but not brown. Remove the trays and turn the oven to 180 degrees. Bake the crackers for 2 hours until very crispy and light. I have a gas oven. I had a problem with using 2 hours of gas for a snack like thing. Wanting to be a bit more resourceful in this economy I baked it higher (checking that they weren't over browning) and just let them dry out in the oven.


Are they the same as Rocquie's? I wouldn't know but they were light and crispy to me...and they tasted very cheesy like the nips/its! Thanks Rocquie, yummy! And K-man raved when I served these to him with some homemade Minstrone Soup!

Enjoy!

Wednesday, February 3, 2010

More Munchies for Game Day

Oh yum, this dip is a goodie to make for a game or just a lazy day on the weekend. I tried this out and K-man said I could make this for dinner everyday and he wouldn't mind. HAhahahha!


Hot Taco Dip

1 pound lean ground beef
1 small onion, chopped
1 clove of garlic, minced
1 package reduced fat cream cheese
1 package Taco Seasoning
4 ounces Kraft Fat Free shredded cheddar cheese (divided into 2 portions)
4 ounces Cabot's 40% reduced fat Pepper Jack cheese, shredded (divided into 2 portions)
1 jalapeno, seeded and chopped
halved or chopped cherry/grape tomatoes
chopped green onion for garnish

Preheat to 400 degrees. Spray a 9 inch pie plate with cooking spray and set aside.

Brown ground beef over medium heat. Drain and return beef to pan. Add the onion and garlic, cook for 5 minutes until onions translucent. Remove from heat to cool.

In a bowl, combine the cream cheese, taco seasoning. Add the beef and one portion each of the cheeses. Mix to combine. Spoon the mixture into pie plate and sprinkle with remaining portions of cheeses. Top with chopped jalapenos (don't seed or devein, if you want it hotter) and chopped tomatoes.

Bake for 15-20 minutes or until the cheese is golden and bubbly. Sprinkle with chopped green onion on top and serve with tortilla chips (pictured was the BLUE corn ones) or Stacy's baked pita chips.

K-man had no idea that I was using the lower fat versions of many things in order to cut the fat and calories. All he cared is that it was scrumptious!

Enjoy