Saturday, December 24, 2011

French Toast Casserole


My present to you is something simple to pop in the oven on Christmas Morning.  This casserole is soft, buttery and so yummy. Oh did I mention it's easy to make?

French Toast Casserole
from JennyMac Lipsmack

1 loaf french bread, cut into 1-inch cubes (10 cups)
8 eggs
3 cups half and half (or cream if you want it silky rich)
1/4 cup sugar
1 teaspoon vanilla extract
3/4 teaspoon salt
12 strips of bacon, cooked and broken into pieces. 
Topping:
2 tablespoons butter, cubed
3 tablespoons sugar
2 teaspoons ground cinnamon
maple syrup

Using a serrated knife cube your french bread into one inch pieces.  
In a large mixing bowl, beat eggs, cream, sugar, vanilla and salt.  Add bread and mix with egg mixture to coat.  Add bacon pieces and mix again.

Grease a 13X9 baking dish (those non stick glass ones are awesome).  Pour all your eggy bready bacony mixture into the baking dish.  Cover and place in fridge overnight.

Preheat oven to 350 degrees.  Uncover and give the bread another stir.  Sprinkle cinnamon sugar all over the bread cubes and dot with butter.  Cover with non stick foil and bake for 45-50 minutes or until knife inserted in center comes out clean.

Serve with maple syrup.
So rich and creamy, I love the smokey bacon with the sweet maple and the not really sweet eggy bread. 

Cooks Notes:
1.  Do not cut off that fabulous crust.  This recipe is awesome even with a day old loaf.  I bought my bread on Tuesday and prepped this Friday afternoon.  Yes, it was 'sketchy' to cut however my fingers all remained intact.
2. If you have homemade vanilla sugar hanging around like I FORGOT to use, this would be the ideal time to use it.
3.  I am going to try this again with some toasted pecans on top....YUM!!!!


Post Script.....
I hope you all are healthy and WARM this holiday season!  We've had a tough few weeks with no heat.  Our house was built in 1959.  We bought it 5 years ago knowing that the 3 Horsemen of the Homeowner's Apocalypse (the furnace, A/C and hot water heater) were OLD.  We feel we were truly blessed from this whole ordeal.   The Carbon Monoxide detector has been going off since last year and we were being stubborn and complacent.  We thought the detector was probably old...took it down, replaced it.  It didn't go off again....few months later it went off...."oh the batteries probably need to be replaced" (um, there is a signal for THAT by the way on the detector).  All the while the detector was going off during the middle of the night waking us up @ 3 in the morning.  The one night K-man was working through the night on a water main break and I was home alone the detector went off one hour after I turned on the heat when I came home from work.  This was odd.  I called K-man....what do I do?  (WHAT, WHERE was my brain?- mmmm, fuzzy from fumes perhaps?)
I called the Fire Dept and waited with my neighbor outside for them to arrive.  I let them in the front door and watched them come in with their CO monitor in hand.  As soon as he stepped in it beeped and he said It's 148!  Pointed to me.  "YOU- Get out."  What you may or may not know, BELOW 35 ppm (parts per million) is okay but anything above that is considered toxic and potentially lethal.  I was sitting in a house where the million of the oxygen molecules were tainted with 148 carbon monoxide ones!....I had no headache, no nausea, no vomiting, wasn't sleepy....however my common sense and get up and go safety know-how was stagnant.  I remember just standing there with K-man on the phone, listening to him tell me what to do and thinking/pouting...."why can't he be here and do this?"  I NEVER THINK like THAT....Add the symptom of DELERIUM to list from CO exposure.  Alas, a cracked heater exchange on a circa 1988 furnace was the cause.
Anyway.....since major appliances like the furnace, A/C and hot water heater a big to-do, located near one another and connected (via gas) and were ALL old.  Bundle the price, work....replace them all at once.  Holy crap.  1988= furnace and HWH but the A/C was the original install!  None of the houses in our development had A/C originally and the original owner of our house finally broke down in the 60's to put it in.  The estimator said it was a miracle we've been having any A/C in the past summers because this model belonged in a museum.  LOL.  So there you have it....an $11,000 to our wallet during the holidays. LOVELY.  Bottom Line....YOU ALL NEED TO MAKE SURE YOU HAVE A CO DETECTOR IN YOUR HOUSE AND CALL 911 IF IT GOES OFF....we are so lucky to be alive.

Enjoying our warmth and feeling blessed, we wish the very same to you as 2011 comes to a close....

POST POST SCRIPT....thanks Anonymous commenter for your tip on correcting my error on the difference between carbon monoxide (CO) and carbon dioxide (CO2).  Clearly my brain was still not functioning right in writing this post since I DO know my chemical elements and their abbreviations usually.  But thanks for your CONCERN.

Wednesday, November 9, 2011

Sausage, Egg and Biscuit Casserole...

For Dinner? Yes!!!! Why do we feel the societal conformity that eggs, sausage/bacon and biscuits must be eaten for breakfast only and if we eat them for dinner that somehow it is weird or breaking some rule? Is the 'breakfast police' gonna break your door down saying "I'm sorry ma'am you are violating the law by eating waffles, pancakes or eggs for dinner!" LOL. Even though I had eggs for dinner growing up we still regard eggs for dinner as some guilty pleasure. Like eating cookies would spoil our appetite before a meal. So silly, isn't it?

I found this recipe in Cuisine Magazine . It's a magazine solely of recipes with no ads.
I tweaked a wonderfully sinful sausage and egg casserole I think you'd love.


Sausage, Egg and Biscuit Casserole

adapted from Cuisine Magazine by JennyMac Lipsmack

1 lb. sausage or bacon
7 eggs
1 cup milk
1 cup heavy cream
1 tsp. pepper
1/2 tsp. salt
8 biscuits (canned, leftover homemade ones that are a bit stale, frozen, bakery, what you like best)
1-1/2 cups shredded cheese

Preheat oven to 375 degrees. Coat a 7X11 baking dish with nonstick spray. Brown sausage or cook bacon until brown/crispy. Transfer to paper towel to absorb excess grease.

In a bowl, whisk eggs, milk, cream, salt and pepper.

Split biscuits in half and layer bottoms in greased dish. Sprinkle sausage/bacon over biscuits and top with 3/4 cup of cheese. Cover with biscuits tops and pour egg mixture over top.

TIME to make a decision.... EAT this NOW or tomorrow morning?

Eating now.....Bake for 30 minutes or until eggs are set (165 degrees) and no longer jiggly. Cover with cheese and cook for another 10 minutes. Let casserole stand for 10 minutes.

Eating tomorrow.....Cover with foil. Place and bake in preheated oven for 60 minutes until eggs are set. Uncover and place on 3/4 cup of cheese or until melted.

DELISH!!!!

Cook's Notes:
This dish also came with a sage gravy recipe. Any white sauce is butter, flour and milk or cream (depending how rich you want it) but I really felt this recipe was PLENTY rich and didn't really need it.
I was right, plenty moist, rich custardy eggs with cheese....a rich white sauce just made my arteries feel threatened to close.
K-man was OVER the moon with this tasty dish. I felt so guilty from eating it that I felt we should be eating some salad or fruit with it. K-man shook his head and said "just gimme TWO!"

Sunday, November 6, 2011

Big Game Food

The Skins have a big game today. They have lost the past 3 games, and they have been playing kinda 'eh' these days but just because your team is being 'eh' doesn't mean your "game food" has to be 'eh' too.

We love nachos but none with the canned cheese like they serve typically at stadiums. Yuck. Nachos are fun because you can tweak them so many different ways.

Super Deluxe Nachos

1 lb. SHAVED beef (this is the good quality super thin sliced beef your butcher does, similar to 'steak-um beef' but don't use that unless you are desperate.)
1 envelope Taco Seasoning
1 cup frozen corn
1 can black beans (drained and rinsed)
shredded cheese
Your favorite tortilla chips
Fresh salsa (I usually make my own but the summer tomatoes are gone)
Chopped Jalapenos (I used three, seeded and deveined)
Sour cream

Preheat oven to 350 degrees. Cook your beef with Taco seasoning. Add corn so it will thaw. When beef is cooked add beans. Cover baking sheet with non stick foil. Layer chips on foil and hearty handfuls of cheese. Add layer of hot beef and corn mixture. Add more cheese on top of beef. Place in oven just long enough to melt cheese. About 10 minutes.
Sprinkle on fresh salsa, scoops of sour cream and jalapenos (don't forget all dairy is the ANTIDOTE for the jalapeno evils).

YUM! Have plenty of napkins, your favorite beverage of choice and you will have a happy tummy regardless of how your team plays!

Enjoy!

Sunday, October 23, 2011

Nice to be appreciated...

...And I appreciate YOU Katie. Thank YOU!

Some of you may have noticed that I've been dormant for a bit. I have highs and lows about my food blogging. I went strong for about a year and then perhaps a few 'know-it-alls' would comment negatively and it would bug me. Of course I know my stuff and think many people who do make rude, negative comments are idiots generally and don't know what the HELL they are talking about but these comments did trigger an overall feeling of 'why bother' blogging?

One person emailed me a few months ago..."I see you haven't posted in awhile....I guess you threw in the towel"....

Lovely.

I even stopped experimenting with fun recipes for meals for I let the negativity thwart my adventurous juices to get out and try new fun stuff. K-man will be just fine with basics...spaghetti one night, hamburgers on the grill....he was but occasionally he'd HINT about a meal. "This should go on your blog" I felt I lost my mojo. I went and found a new friend on the WWW and started playing Facebook games....they care about me! Yeah, they want me to send them stuff to get farther in the gaming. Two my foodie blog friends who were playing stopping playing the games and devoted their time in blogging....I knew that Cafe World was NOT appropriate replacement for REAL food.

TODAY I got this email (pasted word for word):

Hi Jenny, I just want to send you a quick note to let you know that I found
your blog linked through the Pioneer Woman's blog, (WHAT? I didn't know I was on there?) via your baked Salami and Mozzarella egg rolls. I just started reading your blog and I absolutely LOVE it. It's easy, fun and it makes me feel like I can cook everything myself. I am obsessed with all these wonderful food blogs out there lately, and I recently read your post about how you had been down on yourself and you felt like no one would notice if you stopped blogging. Well, now..I will notice!
I will be constantly checking your fab blog for fun recipes to make for my fiance. I am pumped to make him the jalapeno and sausage breakfast strudel! Especially since he hates anything sweet! (Party pooper!) So thanks for keeping people like me, who aren't confident enough to start my own Foodie blog, inspired enough to give these amazing recipes a whirl in our own kitchens!! So keep up the amazing work and have a wonderful day!! -Katie

AWWWWW. Katie you are so sweet! That really made my day.

I really need to stop letting my inner demons take over and just go with the flow...When something good is happening in the kitchen....blog it about it.

Luckily today with the game coming on I was making something fun to munch on:

Sweet and Spicy Meatballs
JennyMac Lipsmack Creation

1 bottle Heinz chili sauce
1 small jar of grape jelly
1 small jar of jalapeno jelly
3 packages of premade beef meatballs (they had about 12 per package)
1/2 onion minced in food processor
4 jalapenos, deveined and seeded, minced in food processor

Place all meatballs in the the crockpot. Place sauce and jellies on top. Don't worry about mixing it. When the inside gets hot enough to melt everything, THEN you can mix it. Add minced onion and peppers. Cook on HIGH until sauce is thickened and meatballs are coated. Eat with toothpicks as appetizer or as K-man wanted just some bread on the side.

Enjoy!

Sunday, March 20, 2011

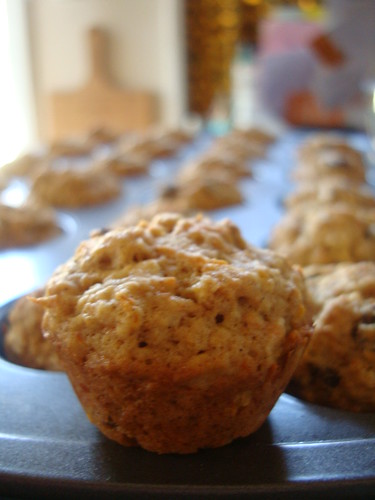
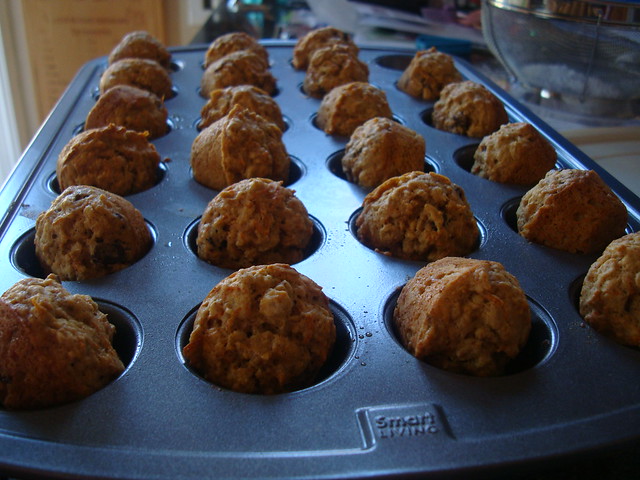
Carrot Oatmeal Muffins

Carrot Oatmeal Muffins

Not only do I get my recipe ideas from recipe websites and food blogs but also from the culinary mysteries I read. This recipe was from the last installment of Devil's Food Cake Murder by Joanne Fluke. Good stuff (story and recipes, that is)!

Carrot Oatmeal Muffins
adapted from Devil's Food Cake Murder Novel

1 and 1/2 cups flour
1 cup oatmeal (I used rolled oats but she used quick oats....I enjoyed the heartiness of the rolled oats)
1 Tbsp. baking powder
1/2 tsp. baking soda
1 tsp. cinnamon
1/2 cup brown sugar
1 cup FINELY shredded carrots (pack them down when you measure)
1/2 cup raisins (soaked in warm water at the start of the recipe)
1/2 cup milk (fat free was fine)
1 egg, beaten
1/3 cup butter, melted
1 tsp. vanilla
1/2 cup walnuts/pecans, toasted and chopped (optional)

Grease a 12 cup muffin pan or 24 mini muffin pan. Set aside.

In a large mixing bowl, combine the flour and oatmeal. Sprinkle the baking powder, soda and cinnamon. Mix thoroughly.

Stir in brown sugar, Mix until everything is blended.

Shred carrots on the small holes on the grater. Fine shred is best. You want them to cook in the same time it takes the muffins to bake and turn golden brown. Add the carrots and raisins to your bowl. Mix.

In a separate bowl, combine the milk, beaten egg, melted butter and vanilla. Give a stir until all combined.

Add the wet to the dry and gently stir until the dry are moistened and no dry pockets remain. Fill muffin cups with ice cream scooper. Bake at 375 degrees for 20-25 minutes for regular muffin tin. Bake 15-20 for the mini. OR until toothpick comes out clean.

Set the muffin pan on a wire cooling rack for 10 minutes. This cooling process is essential because if you try to take the muffins out of the muffin cups now they may break in pieces- YES, they are that moist!

Carrot Oatmeal Muffins

Makes 12 truly EXCELLENT muffins or 24 AWESOME mini muffins.

Mad for Moist Muffins,

Friday, March 18, 2011

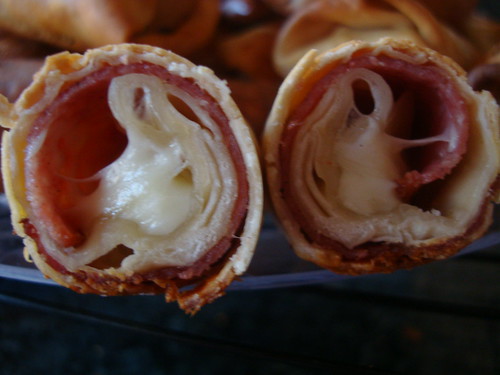
BAKED Salami and Mozzarella Egg Rolls

Baked Salami Mozzarella Egg Rolls
Did you know that you don't have to FRY an egg roll? I saw these beauties on Kaitlin in the Kitchen blog and she saw it on Guy's Big Bite. Fun twist on egg rolls, great appetizer....until I remember...you don't have to deep fat fry egg rolls I discovered last year. Very crunchy and doesn't get SOGGY! Here's how it works....

Baked Salami and Mozzarella Egg Rolls

2 Eggs
12 oz. jalapeno mozzarella cheese sticks (12 in a bag)
24 Slices Thin Salami
24 Egg Roll Wrappers
oil for coating

Preheat your oven to 350 degrees.

In a small bowl beat your eggs until combined. Unwrap your string cheese and cut each one in half. Lay a egg roll wrapper down on a flat surface and brush each side with the egg wash using a pastry brush. Place a piece of salami in the middle of the wrapper, and then 1 piece of the string cheese at the bottom of the piece of salami. Roll the wrapper up from the bottom until piece of cheese is covered, then stop and fold in each side, then continue rolling it and make sure it's sealed well. Repeat until you are done or run out of an ingredient (I had leftover salami but no extra cheese or wrappers- I think I may have eaten one stick?). Place each egg rolls on a baking sheet brush with vegetable oil. Bake for 20 minutes or until golden.

Baked Salami Mozzarella Egg Roll

Cook's Notes:
1. Don't overbake, they will start to bust open and ooze cheese. But I didn't mind the oozy cheese for those crusty puddles are an appetizer in itself!
2. These will be so crunchy that refrigerating the leftovers will NOT make them soggy, great for reheating the next day!
3. Suggested dipping sauce- marinara!
4. Did NOT miss the greasiness or calories!
5. Gonna try another version with ham or roast beef.....

Enjoy!

Wednesday, March 16, 2011

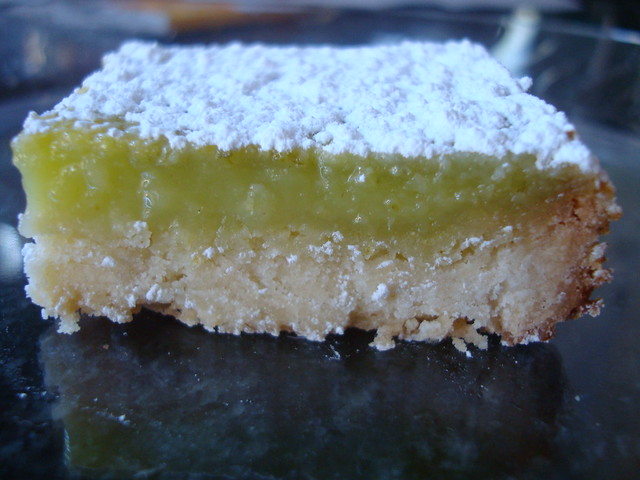
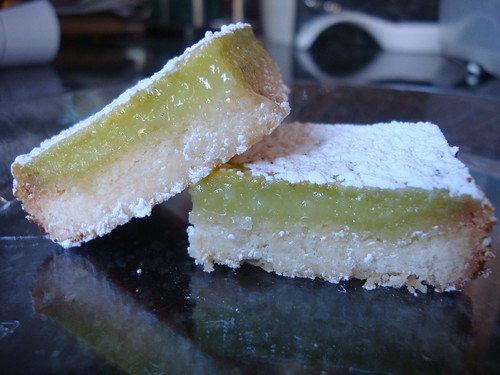
Irish Limey Bars

Lime Bar

Well, they aren't Irish but they are green from the lime....just in time for St. Patty's Day!

So you know you classic lemon bar recipe? Ever change it up and use lime instead? If you bring a GREEN dessert to work, no one will pinch you for not wearing green...but HUG you because they are soooooooooooo delicious.

Limey Bars

2 1/4 cups all-purpose flour, divided
1/2 cup confectioners' sugar
1 cup butter, softened
4 eggs
1 1/2 cups white sugar
1/2 cup lime juice
zest from 3 limes


1. Preheat oven to 350 degrees F (175 degrees C).
2. Mix 2 cups of flour and confectioner's sugar together. Cut in the butter or margarine. Mix well until the dough resembles pie dough consistency. Press the dough into a 9x13 inch baking pan.
3. Bake 15 to 20 minutes or until golden brown.
4. Beat together eggs, sugar, 4 tablespoons flour, lime juice and lime rind for at least 1 minute. Pour the mixture over the baked crust.
5. Bake the bars another 20 minutes, or until the lime topping has set. Sprinkle with confectioner's sugar when cooled.

Lime Bars1

Cook's Notes:
1. Awesome, nicely tart. Thick buttery, shortbread-like crunchy crust. Perfect.
2. Next to the title of the recipe, you can SEE the lime bits....it's wonderful. BUT, you may NOT get 1/2 lime juice from those 3 limes. You may have to supplement with the bottled lime juice. You know how limes are, big on flavor, little on juice. I rolled them, microwaved them for 30 sec. and still got only 1/4 cup of lime juice with all THREE, cheap bastids!
3. Go ahead use those limes you are saving for your cocktails....you got everything else in your fridge/pantry!

Happy St Patty's Day!

Monday, March 14, 2011

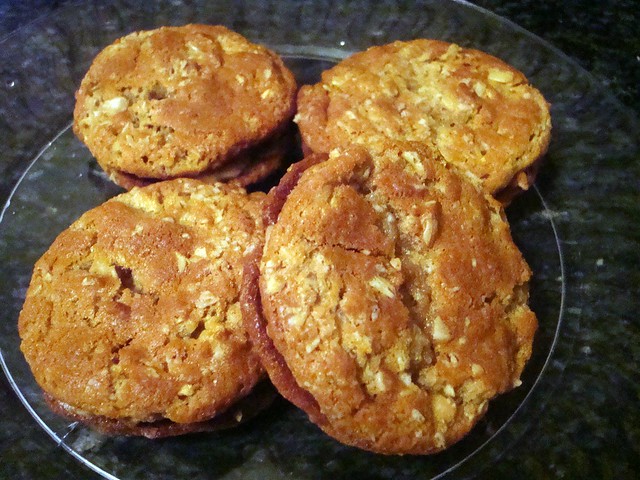
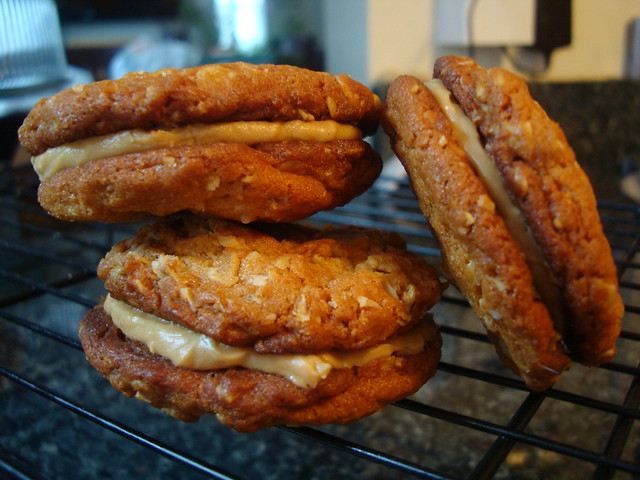
Copycatting the DO-si-Do Girl Scout Cookie

Do-Si-Do Copycats

It's that time of year when the Girl Scouts are delivering their cookies...unless you have a forgetful Girl Scout dad who is supposed to be delivering the goods to your place of work and he misplaces the order form and there is a DELAY in your cookie order. Torture. I remembered some copycat Girl Scout recipes on Baking Bites and thought I'd give her Do-SI-Do's a try.

Homemade Girl Scout Cookie: Do-si-Do
from Baking Bites

Cookies:
2 1/4 cups all purpose flour
2 tbsp baking soda
1 tbsp baking powder
1/2 tsp salt
1 1/2 cups unsalted butter, room temperature
3/4 cup chunky peanut butter
1 cup brown sugar
1 cup sugar
3 large eggs
1 tsp vanilla extract
1 1/2 cups quick-cooking oats (not instant or regular)

Filling:
1 1/2 cups creamy peanut butter, room temperature
1/2 cup butter, room temperature
1/4 cup confectioners’ sugar

Preheat oven to 350F.
Start with the cookies. In a medium bowl, whisk together the flour, baking powder, baking soda and salt.
In a large bowl, cream together butter and peanut butter. Beat in the sugars until fluffy, then add in the eggs one at a time, waiting until each is fully incorporated before adding the next. Stir in vanilla extract.
Working at a low speed, mix in the flour, followed by the oats (if you don’t have quick-cooking, pulse whole rolled oats in the food processor to chop them up a bit).
On a parchment-lined baking sheet, drop teaspoonfuls of batter (roughly 3/4-in. sized balls), leaving about 2 inches between each to allow for spread.
Bake for about 10 minutes, until cookies are a light golden brown. Cool on baking sheet for 5 minutes, making small holes in 1/2 of the cookies (for the tops of the sandwiches) before they set up. Transfer to a wire rack to cool completely.

Once cookies have cooled, make the filling.
In a large bowl, cream together smooth peanut butter, butter and confectioners’ sugar until very smooth. Spread 2-3 tsp onto half of the finished cookies and sandwich with the remaining halves. If you chose to make yours with GS-lookalike holes in some of the cookies, use these as the tops of the sandwiches.
Store in an airtight container.

Makes about 48 sandwich cookies.

Note: Use unsalted butter with this recipe, as different brands of peanut butter can vary hugely in salt content and it’s possible you’ll end up with a too-salty cookie with the salted butter, salted peanut butter and added salt. If you must use salted butter and are using brand of peanut butter that seems a bit salty, you can always reduce or eliminate the added salt. Personally, I like the salty sweet combination with peanut butter, but it’s only fair for me to give a little warning just in case!

Copycat Do-si-Do's

Cook's Notes:
1. These were really good to me for I liked how the cookie wasn't overly sweet. With a sweet peanut butter filling a sweet cookie would have been too much.
2. If you bake the dough right away....it will spread so use a small disher to get a smaller thinner cookie. If you chill your dough, they will be thick as seen here. Do what works best for you.
3. Alot of work baking the cookies, making the filling, schmearing the filling, sandwiching the cookies....not a quick bake and eat cookie....but it's taste was worth the work.....once a year. lol

Got Milk?

Saturday, March 12, 2011

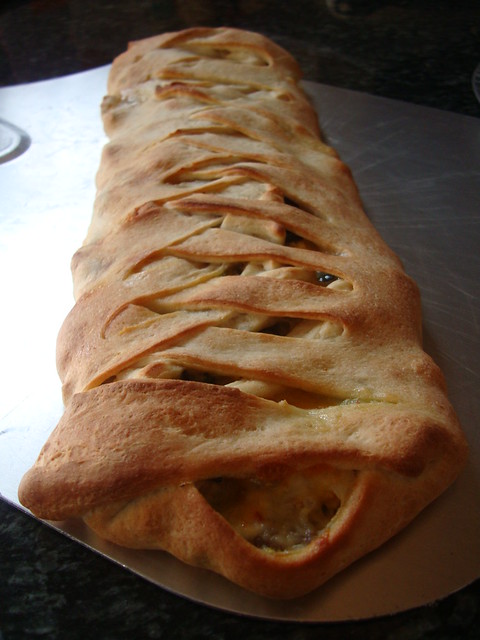
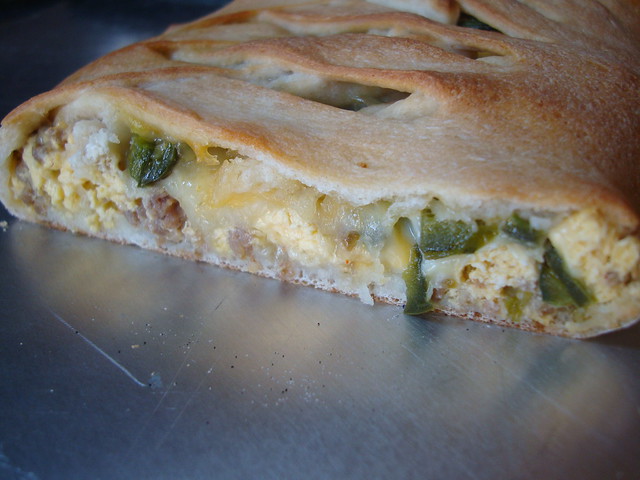
Jalapeño, Sausage and Egg Braid

Breakfast, Brunch, Lunch or Snack? Anytime...it's awesome!

jalapeno sausage egg braid1


Jalapeño, Sausage, Jack, and Egg Breakfast Braid
adapted from Myrecipes.com

1 (13.8-ounce) can refrigerated pizza crust dough (I used Pillsbury thick canned pizza crust)
1 tablespoon olive oil
1/4 cup chopped onion
1/2 lb sausage (I used hot sausage), browned and drained
2 large eggs, lightly beaten
1/2 cup (2 ounces) shredded Pepper Jack cheese
1/4 cup shredded cheddar cheese
1/4 cup chopped seeded jalapeño peppers
1 large egg white, lightly beaten (I forgot to do this and no one died)

Preparation

1. Preheat oven to 425°.

2. Unroll dough onto a silpat or parchment paper; pat into a 15 x 10–inch rectangle.

3. Heat oil in a large skillet over medium heat. Add onion and sausage; cook 9 minutes or until lightly browned. Stir in eggs; cook 1 1/2 minutes or until set. Remove from heat.

4. Sprinkle Pepper Jack lengthwise down center of dough, leaving about a 2 1/2-inch border on each side. Spoon egg mixture evenly over cheese. Sprinkle cheddar over egg mixture; top with jalapeño peppers.

5. Make 2-inch-long diagonal cuts about 1 inch apart on both sides of dough to within 1/2 inch of filling using a sharp knife or kitchen shears. Arrange strips over filling, alternating strips diagonally over filling. Press ends under to seal. Brush with egg white. Bake at 425° for 15 minutes or until golden brown. Let stand 5 minutes. Cut crosswise into slices.

jalapeno sausage egg braid

Braided like my apple strudel just a savory filling with a pizza crust instead of puff pastry. WINNING! K-man's eyes just popped when he saw this for breakfast. You can make all the filling the day before and just assemble it that morning. Yummy stuff. Cuts nicely for snacks later if you like. I'd love to try a bacon version sometime as well!

Enjoy!

Thursday, March 10, 2011

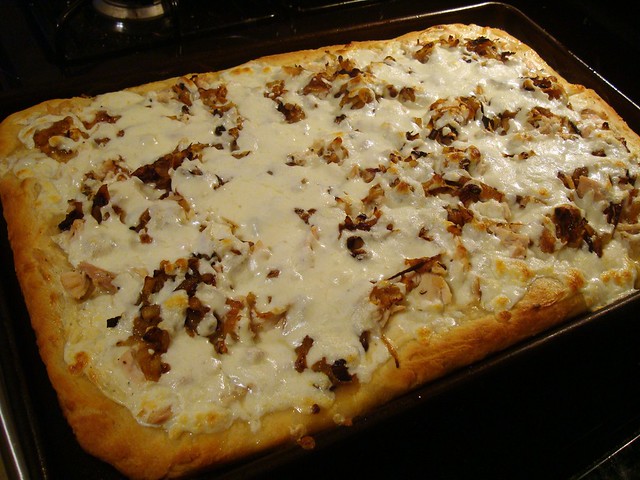
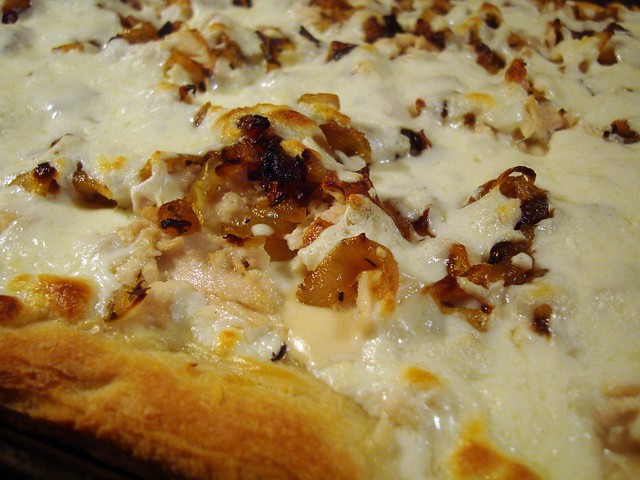
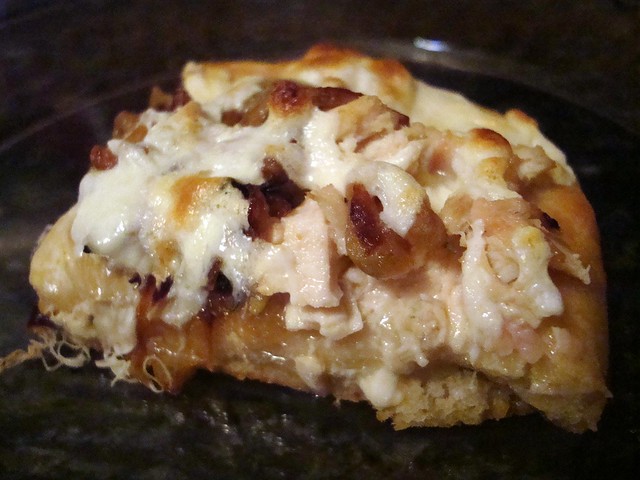
White Chicken Pizza with Caramelized Onions

Surprise!
Another Tweak with the garlic breadsticks dough recipe from a few days ago....

White chicken pizza2

White Chicken Pizza with Caramelized Onions

adapted from Recipe Shoebox

2 Tbsp. butter
3 cups thinly sliced sweet onions
1 tsp. thyme
2 oz. garlic herb cream cheese (I used Boursin light)
1 pre-baked pizza crust (breadstick recipe just NOT cut before baking)
1/3 cup prepared Alfredo sauce
1 cup shredded rotisserie chicken
1 lb. grated FRESH mozzarella cheese

Directions: Prebake Crust from link above (press into jellyroll pan and bake for only 10 minutes)

Melt butter in a skillet and cook onions for 20-25 minutes, until deep golden brown and caramelized; stir in thyme leaves.

Stir cream cheese and Alfredo sauce together.

Spread over pizza crust.

Top with chicken, then onions, then cheese.

Bake at 450° for 10 minutes or until heated through. Enjoy!

White chicken pizza1

Creamy, dreamy...HEAVENLY. I just love white pizzas. The original recipe used sugar with the onions...but it made it too sweet for my taste. Didn't need it.

White chicken pizza

I am not sure if a premade thin crust could handle this....the thick dough of the breadstick recipe held up with the moist Alfredo goodness. Not only is this easy recipe awesome for breadsticks as in this original recipe....it also holds up well for pizza too. Gonna have to play with this recipe for my classes since it's so quick!

Pizza-licious!

Tuesday, March 8, 2011

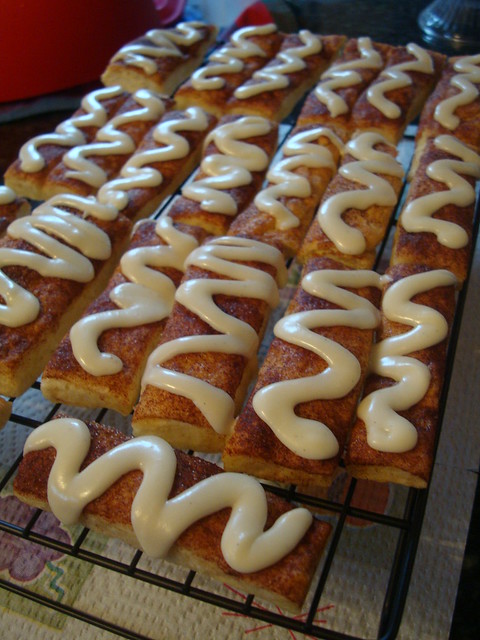
Easy Cinna Sticks!

TA- DAH!

Easy Cinna-Sticks

I told ya I'd tweak those Garlic Breadsticks....stop getting them from Domino's....knowing your own ingredients is DEFINITELY better! Using the same recipe from the garlic ones...here's the tweaked way.

Easy Cinna-Sticks

1 1/2 C warm water
2 T sugar
1 T yeast
1/2 t salt
3 1/2- 4 C flour (amount will definitely depend on your weather)
1/4 C butter (and butter ONLY)
1/2 C cinnamon and sugar mix

1 cup powdered sugar
milk
vanilla
Tbsp of melted butter

1. Mix the water, sugar and yeast together in a measuring cup or in the bottom of your mixer. Let it sit for 5 minutes.

2. Add the salt and the flour, one cup at a time, until it is well incorporated. Mix on high for 5 minutes. Let the dough rest for 5 minutes.

3. Melt the butter and pour half of it into a jelly roll pan (large cookie sheet).

4. Place the dough in the center of the pan. Let it sit for 2 or 3 minutes. Letting the dough rest makes it MUCH easier to shape.

5. Spread the dough out flat onto the pan until it reaches all of the edges. Doing all of the spreading and cutting of these bread sticks, in the pan makes cleaning up your counter so much easier!

6. Pour the other half of the butter onto the dough. Spread it around with your hands. Sprinkle the cinnamon and sugar mix all over the dough.

7. With a pizza cutter cut the dough into three rows lengthwise, and then into about 12 little height wise rows.

8. Put the pan into a 170 degree oven for about 7-10 minutes. The breadsticks should rise about 1-inch.
9. Turn you oven up to 350 and bake for about 12 minutes, or until golden brown.

10. When they come out of the oven let them sit and rest again for about 5 minutes. Then redefine your cutting lines with the pizza cutter. You may find using a pair of kitchen shears is easier to cut the edges where the cutter can't reach!

11. In a ziploc bag (pushed in a glass with edges draped over rim to make it 'hands-free') place the powdered sugar in the bag and add milk by TEASPOONS until still thick. Add a few drops of vanilla. Pull bag out of glass, seal and mix with hands. Open and add Tbsp of melted butter. If icing looks to thick to squeeze out add just DROPS of milk at a time.

12. Snip corner of bag and squiggle on warm (not hot or icing will melt off) sticks. Let drip off a cooling rack. ENJOY, immediately!

Did my TWEAK satisfy? Oh yeah....they will~ PROMISE!

In Cinna-Heaven,

Sunday, March 6, 2011

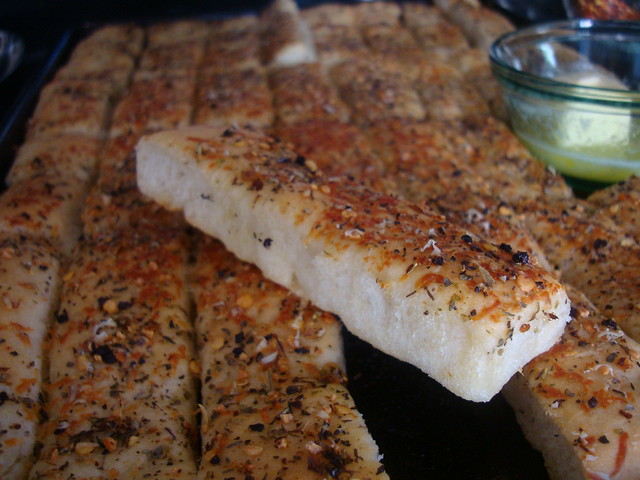
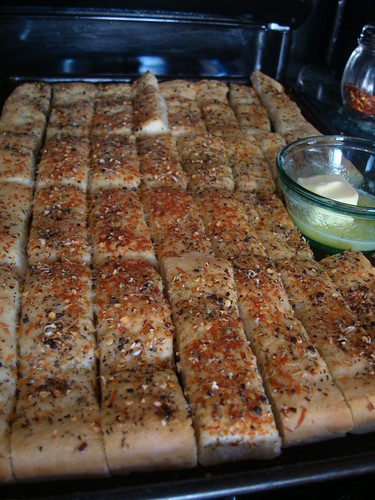
Easy Garlic BreadSticks

Oh yum!

Easy Garlic Breadsticks1

One of my favorite Bloggers Rachelle from Mommy I'm Hungry (she got it from Jamie Cooks it up!) posted about this and it caught my eye....I'm all about easy and in true Jenny Mac fashion- had to tweak it. First let me share the original recipe:

Easy Garlic Breadsticks

1 1/2 C warm water
2 T sugar
1 T yeast
1/2 t salt
3 1/2- 4 C flour (amount will definitely depend on your weather)
1/4 C butter (and butter ONLY)
3/4 C grated Parmesan
Garlic Seasoning/Italian Seasoning

1. Mix the water, sugar and yeast together in a measuring cup or in the bottom of your mixer. Let it sit for 5 minutes.

2. Add the salt and the flour, one cup at a time, until it is well incorporated. Mix on high for 5 minutes. Let the dough rest for 5 minutes.

3. Melt the butter and pour half of it into a jelly roll pan (large cookie sheet).

4. Place the dough in the center of the pan. Let it sit for 2 or 3 minutes. Letting the dough rest makes it MUCH easier to shape.

5. Spread the dough out flat onto the pan until it reaches all of the edges. Doing all of the spreading and cutting of these bread sticks, in the pan makes cleaning up your counter so much easier!

6. Pour the other half of the butter onto the dough. Spread it around with your hands. Sprinkle the seasoning of your choice all over the dough, and then the Parmesan cheese.

7. With a pizza cutter cut the dough into three rows lengthwise, and then into about 12 little height wise rows.

8. Put the pan into a 170 degree oven for about 7-10 minutes. The breadsticks should rise about 1 inch.
9. Turn you oven up to 350 and bake for about 12 minutes, or until golden brown.

10. When they come out of the oven let them sit and rest again for about 5 minutes. Then redefine your cutting lines with the pizza cutter. You may find using a pair of kitchen shears is easier to cut the edges where the cutter can't reach!

Easy Garlic Breadsticks

Break out the lasagna, spaghetti, marinara sauce or tomato soup. This stuff rawks! These definitely taste best the first day. If you eat them past the first day a little warming in the oven is better. If you are "cooking process challenged" then go directly to Jamie for pictorial directions.

OKAY, this was the unaltered recipe....I did it like a good foodie.....BUT tune in next time for my TWEAK...here's a peek. Not tellin' ya what it is yet....you gotta come check it out. Just as easy and the kids will FALL OUT!

Munch Out!

Friday, February 25, 2011

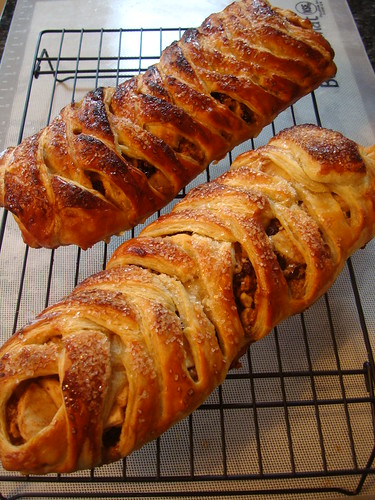
Easy Apple Strudel

This was K-man's request for a dessert. I asked him what he wanted for dessert...."something crunchy, appley, cinnamony, and raisiny"....I went 'trolling around' allrecipes.com to see what I could find under EASY. Always trolling for 'easy'. lol

Easy Apple Strudel2

I took a few ideas from this recipe, and from that recipe.

1. Puff pastry a must....very easy and flaky just like a strudel.
2. Recipes using panko crumbs....hmm good idea...helps absorb the juices so it's not all runny.
3. Plain apple filling or apple cinnamon...K-man likes apples and cinnamon so it won't be authentic strudel....who cares?

So my taking a bit of this and that....this is what I came up with.....

Easy-Peasey Apple Strudel
JennyMac Lipsmack Creation

1 Granny Smith apple - peeled, cored and coarsely shredded
3 Granny Smith apples - peeled, cored and sliced
1 Tbsp. cinnamon
1 cup brown sugar
1 cup raisins
3/4 cup panko bread crumbs
2 sheets frozen puff pastry, thawed
1 egg
1/4 cup milk
sugar for sprinkling

Directions

1. Preheat oven to 400 degrees F (200 degrees C). Line a baking sheet with parchment paper.
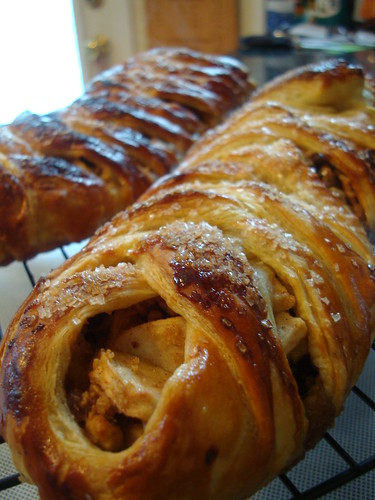
2. Place apples in a large bowl. Stir in cinnamon, brown sugar, raisins and bread crumbs; set aside. Place puff pastry on baking sheet. Roll lightly with a rolling pin. Arrange apple filling down the middle of the pastry lengthwise (taking up 1/3) . Snip with kitchen shears, one inch strips on either side of filling. Fold the pastry lengthwise around the mixture, alternating strips. Left, then right. Repeat. Whisk egg and milk together, and brush onto top of pastry. Sprinkle with sugar.
3. Bake in preheated oven for 35 to 40 minutes, or until golden brown.

Cook's Notes:
1. These had to be made on two separate cookie sheets. Make sure you alternate the sheets midway through cooking time. Clearly I got a bit distracted and one was a lil darker than the other.
2. The panko was SPOT ON.....it absorbs the juices so it was not wet and drippy in the least....very moist, held together.
3. Used the large decorator's sugar for the "sparkly effect." Very pretty. K-man gave "three thumbs up" he said. LOL
4. Use whatever apple you prefer....we like the tart to offset the sweetness. Just recommend a firm apple so it doesn't go 'mushy' on you.

Easy Apple Strudel

Yumminess!

Wednesday, February 23, 2011

Smoked Mozzarella Sausage Pizza

I don't know about you but finding smoked cheeses has been hit or miss around here lately. Sometimes I can find the smoked gouda or cheddar and smoked mozzarella is always around. I guess I need to venture farther than my local Harris Teeter? lol

S, M and SM Pizza

I am ALL about making our own pizza. Sorry I won't do frozen pizza from a box anymore OR calling any local pizza chain either. If we are going to splurge on pizza I am going to make it. Fresh meats, homemade sauce and fresh veggies. The only cheat.....frozen pizza dough. Yup. I am not TOTALLY out of my mind here....gotta have some compromise, right?

I love fresh mozzarella. A very different affect on your pizza if you use fresh over the block stuff and two steps above if you use the 'already shredded' stuff (sorry, I gave up the preshredded stuff too when I found out they add stuff to it to keep it from sticking....I grate my own now too).
I wanted to try the 'smokey stuff' with our sausage to mix it up in our pizza makings....I was great and easy too.

Smoked Mozzarella Sausage Pizza
Lipsmack creation

1 Frozen Pizza Dough (New York Pizza Deli brand puts two in a box, they also make Whole Wheat)
Your favorite sauce (I just used a can of 29 oz store brand plain tomato sauce with 2 T of Italian seasons and some garlic)
1 lb hot italian sausage, browned
1 pint of mushrooms, cooked
1 onion, chopped and cooked
1 lb. smoked fresh mozzarella (found usually in your gourmet cheese section of grocery), sliced
fresh parmesan

Preheat oven to 450 degrees.
Brown your sausage. Remove from pan. In sausage drippings, saute the mushrooms and onions. Add sauce and sausage. Add fresh garlic if you like. Simmer.

While sauce is cooking, roll out dough on parchment paper. If you do not have a pizza stone, turn over a cookie sheet and that will work (WHY haven't you gotten a pizza stone yet? Just keep in in the oven 24/7 like I do....it's too heavy to take in and out....just leave it be. Actually I take it out only for T-day feast cooking). Rectangle or circle, roll out that dough. Place in oven to parbake (I sometimes have to keep a skewer handy to POP the bubbles). Just cook about 8-10 minutes to cook it through. Remove from oven.

Place sliced mozzarella on baked crust (yes you heard me right, cheese first, don't argue with me!). Place sausage/veggie sauce on cheese. Slide dough back into oven until crust is browned, cheese is melted and bubbly.

Cut into 8 slices and add fresh parmesan on top before serving.

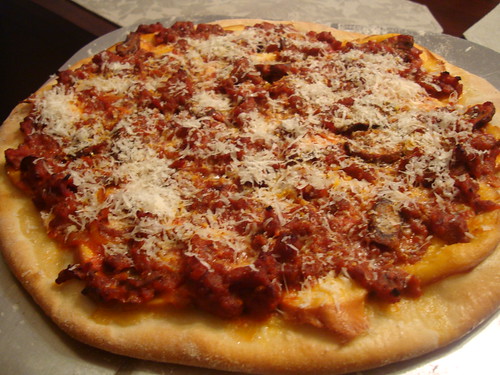
Sausage, Mushroom & Smoked Mozzarella Pizza

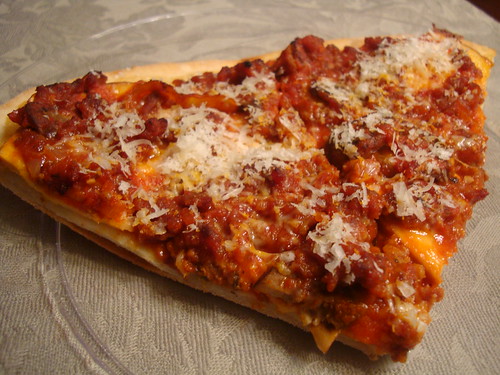
Look at that thing of beauty. You couldn't get a tastier pizza from any box or restaurant, trust me. Homemade pizza rocks. The little extra effort is soooooooooooooo WORTH it!

Commanding you to make more homemade pizza,

Monday, February 21, 2011

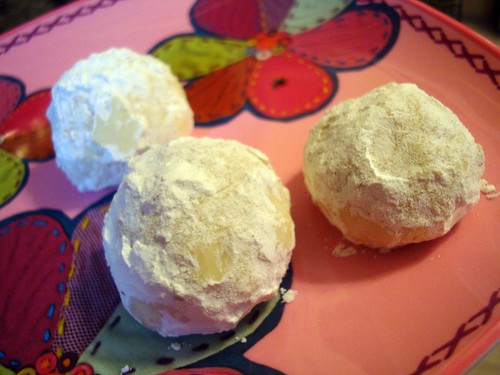
Coconut Balls

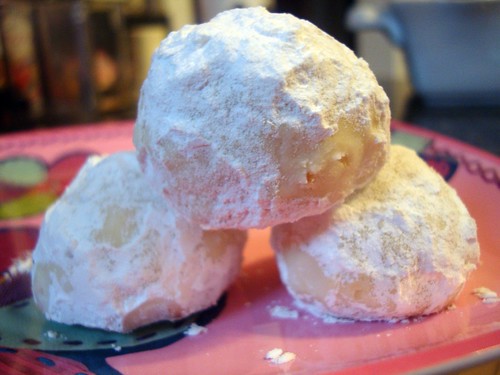
If you like those little Mexican Wedding Cakes or Russian Tea Cakes, (why they have so many names is beyond me) here is a variation I found on MarthaStewart.com

I love a buttery shortbread and any variation of that. So if you love shortbread and coconut, this little sweet treat is for you. Pardon my fingerprints.

Coconut Balls

Coconut Balls
MarthaStewart.com
Makes about 36

2 sticks unsalted butter, softened
1/4 cup confectioner's sugar, plus more for dusting
2 cups all-purpose flour
1/4 teaspoon salt
2 cups sweetened flaked coconut

Preheat oven to 350 degrees. In the bowl of an electric mixer, cream butter with 1/4 cup confectioners' sugar until fluffy. Mix in flour and salt until they're just combined. Stir in coconut.
Roll dough into 1-inch balls; place 2 inches apart on a baking sheet. Bake until just starting to brown, 15 to 20 minutes. Roll the warm cookies in confectioners' sugar; let cool completely.

Coconut Balls1

Very easy, whether you want ground nuts or coconut, they are awesome. For a fancy party or even something like a "quick pop in your mouth" Super Bowl treat, it fills the bill.

Try it, you'll like it

Saturday, February 5, 2011

There is always time for brownies!

Especially before the BIG Game!

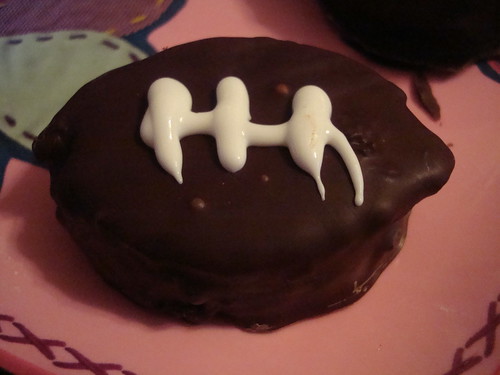
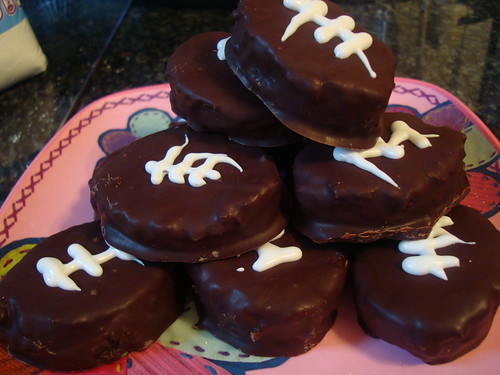
Orange Brownie Football

Aren't these little footballs just adorable?

I too, am busy making my little treats for the Super Bowl. Sorry I am not one of those bloggers who can be timely and post all my recipes BEFORE the big game for you to shop and make beforehand. Unfortunately, I don't cook like that or perhaps I am not the best blogger in the world. However, I want my goodies FOR the game, not one/two weeks before the game just for a blogging post. I am not a millionaire, you know.....LOL. I look at it this way, if you just LOVE what I post in the next few days for Super Bowl treats....then print it out for next year. This way you will be WAY ahead for next year's game!

After all the prep, and chopping for the food for the main event....you kinda want sometime easy for the sweet. I know you already have a box of brownies in the cabinet for emergencies....go ahead take it out.

Orange Brownies

Orange Brownie Football Bites
by JennyMac's Lipsmack
Makes 12-14 Footballs

1 box of your favorite brownie mix (and whatever else it calls for: water, oil and eggs)
1 small can mandarin oranges, drained
zest of one orange
6oz of chocolate chips
1 tsp. oil
prepared white frosting in a tube or powdered sugar

Preheat the oven according to your brownie mix directions.

Place brownie mix in bowl. Drain oranges and chop into pieces.

Place oil in measuring cup and add oranges into the oil in the cup. Add water to the oil and oranges to make up to the total amount of liquid. For example: My box called for 1/2 cup water and 1/4 cup oil. I put 1/4 cup oil and added oranges and filled water until it reached 3/4 cup. Wasn't much water to add for there is plenty of orange juice in those oranges.

Pour orange/oil/water mixture onto brownie mix, add orange zest and mix.

Pour into 9X13 baking pan. I always line mine with foil for easy "lift-out". Bake according to box.

Cool brownies and cut into ovals. If you have a football shaped cookie cutter GREAT. But I didn't so I used a biscuit cutter. Cut one side of circle into brownie and lifted it out and cut the other side into the other half circle making a 'somewhat oval'. You will have alot of scraps but if you have kids...I am sure they won't mind eating THESE!

Melt chocolate chips and tsp of oil in microwave until smooth. Dip ovals into chocolate and put on parchment paper either a tray or cookie sheet will do. Place in

Draw lines on your footballs when chocolate has set.

This can be done with just a plain brownie mix if you like. K-man loves the chocolate and orange combo....so I created this for him. It's all about the football tomorrow right? Not what flavor it is. LOL

Brownie Footballs

Cook's Notes:
1. If you do not have prepared white frosting on hand. Place powdered sugar in a ziploc bag and add just mere DROPS of milk until you get the right consistency. Cut the corner of the bag and draw your white lines. I used the convenience Betty Crocker stuff in a bag with a tip on it....and I was NOT happy the way the lines turned out....those little tails wouldn't stop. My white lines look a hot mess. I really am not THAT sloppy, HONEST!

Good Luck to whatever team you are rooting for. If it ain't the Skins playin'...I am there for the commercials! LOL

Snack Well!