Monday, May 31, 2010

DUTCH, baby!!!

I've made Dutch Babies once in a blue moon....but LOOK at this one! Wow, I don't know if it was just the recipe or how the milk and eggs were at room temperature. But this was Monster. Similar to the popover and tastes pretty much the same....this is too easy to make. This recipe is a keeper. AND, made in a cake pan. I chose square today.


Monster Dutch Baby

2 large eggs (mine were extra large, double yolked farm fresh eggs)
1/2 cup whole milk (I used Fat Free evaporated milk)
1/2 cup all-purpose flour
Pinch of salt
scant flavorings, cinnamon, etc optional
3 Tablespoons of butter

1. Place a cake pan in your oven. Then preheat your oven to 450° Fahrenheit. You know, screaming hot. I suggest using a oven thermometer always.

2. Using a wire whisk, blend your eggs, milk, flour, salt. Set aside.

3. When your oven is fully preheated and your cake pan hot, remove the cake pan from the oven. Put in 3 Tablespoons of butter and quickly swirl the pan so the butter does not brown or burn. When most of the butter is melted, pour in your Dutch Baby batter.

4. Place the pan bake in the hot oven and bake for 7 or 8 minutes. You may need an extra minute or two, depending on your oven. Watch the monster rise!

Serving suggestions:
  • Drizzle with maple syrup
  • squeeze of lemon juice and powdered sugar
  • smear favorite jam, preserves
  • slices of fresh fruit and whipped cream
  • sauteed mushrooms and freshly grated parmesan cheese.
K-man had his piece with orange marmalade, I chose this new jar of rhubarb and raspberry preserves. I needed nothing else. The salty butteriness the sour of the rhubarb and sweetness of the raspberry...I was in heaven. I ate 3 pieces. K-man got one. LOL

Wednesday, May 26, 2010

BAKED Egg Rolls

Yes, I said 'baked' WHEEEEEEEEEEEEEEEEEEEEEE!!!

Baked Egg Rolls1

Two things are going down over here at Lipsmack Land:

1. Counting down the days until summer vacation.
2. Restyling some of my class recipes to cut costs*.

That is when I discovered you can BAKE egg rolls...OMG....why didn't I think of this sooner? First, I hate using so much oil just to fry egg rolls for one class. Second, I know I could use that oil to make other things during the day...but trust me frying foods all day long is not fun (been there done that). I kn0w I could store the oil for later use but again...I don't have the time to wait 3 hours after school for it to cool down....ANYWAY. I don't know why I am justifying myself here (warding off comment making the aforementioned suggestions I guess)....it's MY blog....sheesh. lol

My students love Egg Roll day. I make the filling ahead of time and I teach them how to fold it, roll it and fry it. Kinda sketchy for some kids who are afraid of oil....but I am there to assist....no one ever burned (that badly- lol- kidding) I found this recipe for baked egg rolls and totally ignored the recipe but read the process. I love MY recipe....just was not thrilled over the amount of oil that is being consumed. Problem NOW solved.

Of course my recipe is enough to feed 30 students, several staff members and a carry out plate of like 6-8 for my BFF coworker and me. Forwarning...this recipe makes alot** (60?). Not a number for your typical family of four. Have an egg roll making party! Freeze half of the batch. Share some with neighbors. Eat only egg rolls for dinner one night. Set up an egg roll stand in front of your house. Encourage your child to do a report on China and bring these in to their class.....
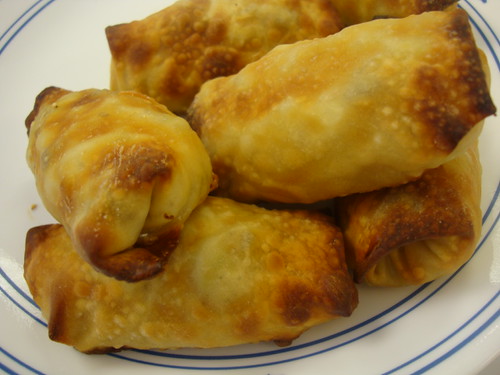
Baked Egg Rolls

Filling:

1lb ground turkey
1 onion, chopped
1 tsp. minced garlic
1 napa cabbage, shredded (use a food processor)
4-5 carrots, peeled and grated (use the smaller holes on the food processor)
1 pkg; cellophane noodles, softened
season salt/pepper

Egg Rolls:

3 pkg egg roll wrappers (about twenty each package)
1 egg, beaten
oil

Preheat oven to 450 degrees.

Boil hot water and soak cellophane noodle in a bowl until soft. Cut noodles with scissors to make shorter pieces. Set aside to cool.

Prepare filling by: cooking turkey, onions, garlic, salt and pepper. Cook until turkey is no longer pink. Cool turkey mixture while preparing vegetables.

Using a food processor, shred washed cabbage, grate carrots. Set aside.

Mix cooled turkey, cooled noodles with vegetables in large bowl. Add season salt and pepper to taste. DON'T SALT YOUR MIXTURE IF YOU ARE PUTTING IN FRIDGE OVERNIGHT. The salt will pull out the water and leave your mixture soggy as though the cabbage was cooked.


Put 1/4 cup of turkey mixture in the center of egg roll wrapper.


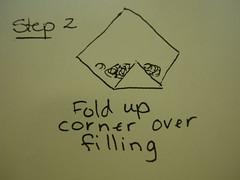
Kinda like the bottom of an envelope.


Making sure being gentle yet tightly tucking filling and rolling.


Brush the top of the unrolled wrapper with egg wash.


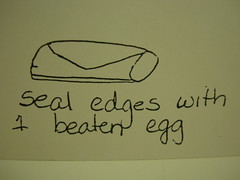
Place on foiled line cookie sheet with seam side down; brush with oil and sprinkle with sesame seeds. Bake for 15 minutes.


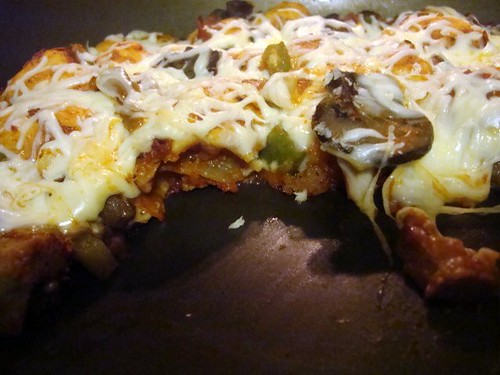
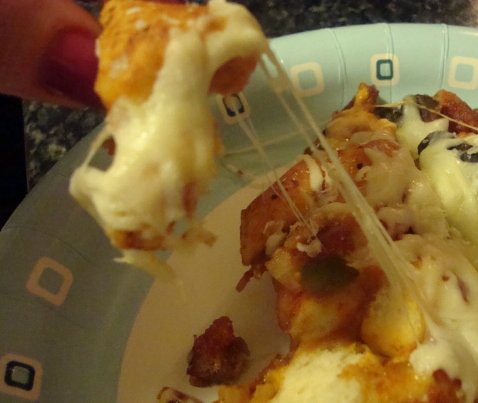
I am never deep fat frying these egg rolls ever again!!! These were absolutely the same. Crispy, crunchy. Great texture inside, not over cooked. Bring on the hot mustard and duck sauce!!!


*The cost cutting was not from this recipe but swapping this recipe being done as a lab experience and the chicken with broccoli stir fry as a demonstration. I was able to buy considerably less chicken and vegetables by doing it as a sample demonstration. During lab they would get a hefty portion with rice. Sad to say that buying a package of 100 chopsticks is probably the cheapest I have to buy.


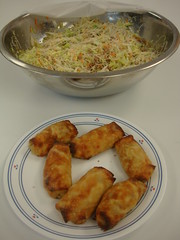
**Look at the bowl of filling....I said a LOT. Perhaps you could only shred half of the cabbage....or use half a package of noodles....1/2 lb of turkey and one package of egg rolls wrappers. Dunno, play around with what works for you. Honestly I just think you should file this recipe under...party appetizers and keep the amount so you don't have half a cabbage, half cellophane noodle and half an open package of turkey to use up afterward. Hey, the more you make, the more friends you will keep. Works for me!

Don't be intimidated. If my 8th graders can do this...so can you!


Rolling around in the joy of less fat in my egg roll,
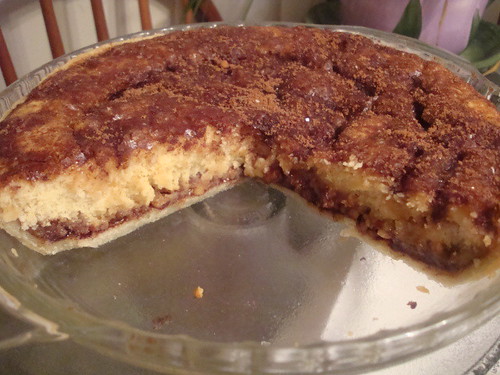
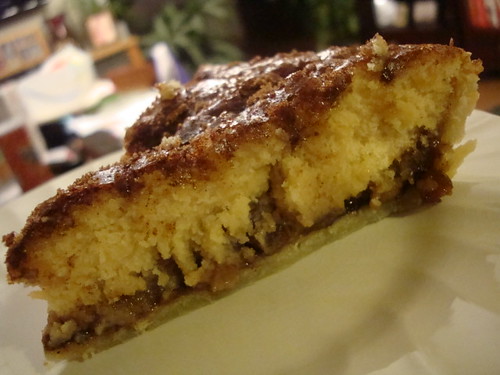
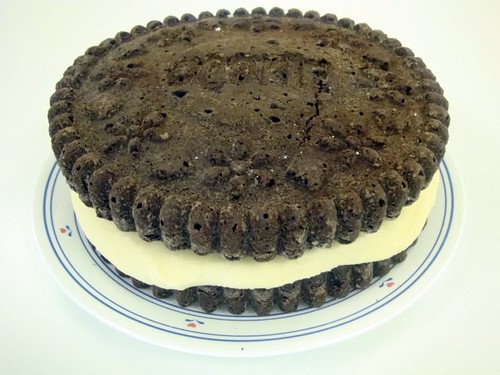
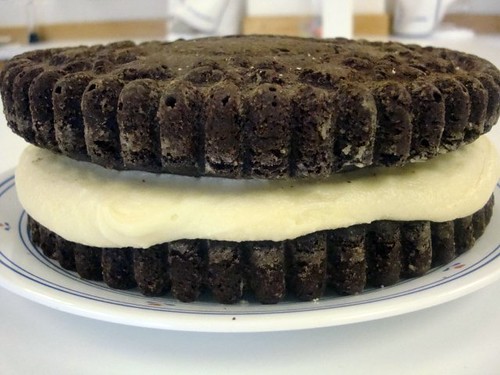
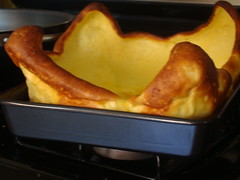
Monday, May 24, 2010

Snickerdoodle Pie

Have you ever read someone's blog entry of the day and immediately made it? Cathy from Noble Pig has that effect on me sometimes.

Snickerdoodle Pie2

On May 5, I made this scrumptious snickerdoodle pie, took pictures, uploaded them, ate it all up and life interfered....'the wind down of the school year' is upon me and it's sometimes crazy for me. When I finally returned back to my blog, I said...."snap, I forgot to post this !!!" Sorry guys, I am awake now.

Snickerdoodle Pie
adapted from Noble Pig that she got from Better Homes and Gardens

1 rolled refrigerated unbaked piecrust or your favorite homemade pie crust (9")
1 Tablespoon raw sugar or coarse sugar
3/4 teaspoon ground cinnamon, divided
3/4 cup pecans, toasted and chopped
1/2 cup butter plus 1 Tablespoon, divided (some softened, some melted)
1/2 cup packed brown sugar
3 Tablespoons water
2 Tablespoons light colored corn syrup
1-1/2 teaspoons vanilla, divided
1/2 cup granulated sugar
1/4 cup powdered sugar
1 teaspoon baking powder
1/2 teaspoon salt
1/4 teaspoon cream of tartar
1 egg
1/2 cup milk
1-1/4 cups all-purpose flour

Preheat oven to 350o F. Prepare pastry and line 9" pie plate. In a bowl combine raw sugar and 1/2 teaspoon cinnamon. Brush melted butter over crust. Sprinkle with 1 teaspoon of cinnamon-sugar mixture and pecans. Set aside.

For syrup, in saucepan combine brown sugar, 1/4 cup butter, the water, corn syrup and 1/4 teaspoon cinnamon. Heat to boiling over medium heat, stirring to dissolve sugar. Boil gently 2 minutes. Remove from heat. Stir in 1/2 teaspoon vanilla. Set aside.

In mixing bowl beat 1/4 cup softened butter with electric mixer on medium speed for 30 seconds. Beat in granulated sugar, powdered sugar, baking powder, salt and cream of tartar until well combined. Beat in egg and 1 teaspoon vanilla. Gradually beat in milk until combined. Beat in flour. Spread evenly in crust-lined plate.

Slowly pour syrup over filling in pie plate. Sprinkle with remaining cinnamon-sugar mixture. Cover edges of pie with foil.

Bake pie 25 minutes; carefully remove foil. Bake 20 minutes more or until top is puffed and golden brown and a toothpick inserted near center comes out clean. Cool 30 minutes on wire rack. Serve warm.

Snickerdoodle Pie1

OMG! Yummy, yummy, yummy. Very rich and something that could be served as thin as a cheesecake slice with some ice cream. Shhhhh, but I tucked an emergency piece in the freezer! Don't tell K-man! Pardon the 'darkish' picture, sigh.

Enjoy!

Saturday, May 15, 2010

Happy Chocolate Chip Day!

I found this recipe on Picky Palate's blog....oh boy! How appropriate with today being Chocolate Chip day! Let's celebrate with a big fat XXL cookie!!! Jenny from PP used M&M's....that was my springboard....so I hit the candy aisle....lookee what else I put on the cookie...

XXL Chocolate Chip Cookies1

What makes these cookies so large is that you use the muffin top pans. I have 3 of them at my school so I borrowed them for this recipe. Perfect! If you'd like more of a tutorial how to use these pans with these cookies check out Jenny's Picky Palate blog for more detailed pix...

XXL Candy Chocolate Chip Cookies
adapted from Picky Palate

2 sticks softened butter
3/4 Cup sugar
1 Cup packed light brown sugar (I used half dark brown and light brown)
2 extra large eggs
2 Tablespoons pure vanilla
3 3/4 Cups all purpose flour
1 1/2 teaspoons baking soda
3/4 teaspoon salt
12 oz bag chocolate chips
1 bag M&M’s, Reese's Pieces, Almond or Peanut M&M's, Heath Bar Bits

1. Preheat oven to 350 degrees F. In a stand or electric mixer beat the butter and sugars until well beaten. Beat in eggs and vanilla until well combined. Place flour, baking soda and salt into a large bowl; mix. Slowly add to wet ingredients along with the chocolate chips. Do not mix in M&M’s!!

2. Scoop 1/4 Cup of dough and press into a muffin top pan (or just press onto a parchment or silpat lined cookie sheet) using your hands or the bottom of a moistened glass. Now, press your M&M’s onto pressed cookies. I did a pan of M&M's (dark) and a pan of Reese's. Another pan of Heath Bar bits....Bake for 12-15 minutes, until edges just start to turn golden brown. Let cool for 10 minutes on muffin top pan or cookie sheet before transferring to a cooling rack.

About 18 XXL cookies!

XXL Chocolate Chip Cookies3

I made a DOUBLE batch to take to my GIRL's weekend at the beach. I know we all needed to have some homemade chocolate lovin' from the oven.

Don't worry....I left a few (like 10) for K-man to enjoy while he spends the weekend alone. Care to guess how many will be left when I return after 3 days?

Thanks Jenny....this XXL ROCKED....I hope we don't eat them all on the drive over to the beach!

Monday, May 10, 2010

Doughnut Cake Pan- A review

Donut Pan

Nuff said...pretty good likeness. Unlike my review of the cookie cake pan with not so good results.

I made this for dessert for our Mother's Day dinner. The family joke is about my grandmother's love for doughnuts. No matter the brunch spread...she will gravitate to the doughnuts. We have gotten her shirts as gifts about liking doughnuts. One year someone gave her some doughnut cologne. Another year during the holidays a family member bought a ginormous boston cream doughnut. It was about the size of a large pizza. It was only fitting that when I saw this pan from Williams Sonoma that I get it to make for grandmom's birthday. Well, since her b-day is in August....and it was Mother's Day....the cake came early!

Honestly, I didn't bother with the recipe on the box for time was lacking. I doctored up a cake mix and had some leftover frosting from another cake in the freezer. I also scooped up some cake to make holes to add some dulce de leche pudding in the middle for a cream filling doughnut affect.

I didn't think this cake pan wouldn't have problem due to the lack of 'detailing' on the cake pan. I will try the cake again using the recipe for I think any cake recipe or mix would work without a problem and so far even a cake mix was just fine. One day I will surprise my homeroom with a 'doughnut' for breakfast. I sure will be a hit for any food or sugar makes them happy always!

So if doughnuts are popular in your family this would be perfect to make with the kids and it will give you huge brownie.... err....doughnut points if you made this.

Enjoy!

Sunday, May 9, 2010

MMMmmm....Spinach Brownies

Ha-Ha, made you look!

Spinach Squares

My 7th grade students are currently doing a research/presentation on fruits and vegetables. I was sitting with Rosie and helping her catch up from her absence and showing her how to format her slide on her least favorite vegetable task. I asked her for a vegetable that she'd eat....but it wasn't her favorite (she said corn was her fave). Her answer was spinach. OK, good.

Next, I took her to the allrecipes.com site to get some spinach recipes. We typed in 'spinach' in their search window. One of the first hits we got was for "spinach brownies" I said "SPINACH BROWNIES?" kinda loud and many surrounding students went EWWWWWWWWW. We laughed. So I looked at Rosie and said 'let's look'....

I didn't think at all it was a chocolate item but still the name of it made me curious. It looked good....so good I made it two days later. That says something. I am including it for our Mother's Day dinner and saving one to bring to school for Rosie to try. Not sure if Rosie kept this recipe I helped add to her project as a suggestion....but it is sure being added to my recipe collection at home.

Spinach Brownies
adapted from allrecipes.com

2 (10 ounce) package spinach, frozen spinach, thawed and squeezed dry
1 cup all-purpose flour
1 teaspoon salt
1 teaspoon baking powder
2 eggs
1 cup milk
1/2 cup butter, melted
1 cup chopped green onions
1 (8 ounce) package shredded mozzarella cheese
1/2 cup romano cheese, shredded

1. Preheat oven to 375 degrees F (190 degrees C). Lightly grease a 9x13 inch baking dish.

2. Place spinach in a medium bowl and microwave until thawed. Use a clean dishtowel to squeeze dry. Set aside.

3. In a large bowl, mix flour, salt and baking powder. Stir in eggs, milk and butter. Mix in spinach, onion and cheeses.

4. Transfer the mixture to the prepared baking dish. Bake in the preheated oven 30 to 35 minutes, or until a toothpick inserted in the center comes out clean. Cool before serving.

Spinach Square

So THANKS ROSIE, who would have thought a student would be providing recipe idea to her FACS teacher! This is called a happy accident! YUM....best tasting accident evah! I will be touching base later with Rosie's reaction to my sample she tried....

Enjoy!

Saturday, May 8, 2010

Mean Green Chicken

When you have the abundance of something from your garden have you considered how you could use it for a marinade for your chicken instead of throwing it away?

When I went to the farmer's market I usually store the green onions soaking in water in a glass. In order for them to fit on the shelf in the fridge I have to WHACK off a good 1/3 of the greens. I can't get over how almost double in length they are compared to the ones at the store. All those green onion ends are too much for a salad yet those flavorful goodies aren't not going to waste! Go grab some of your other favorite fresh herbs some garlic and POW some mean green marinade.

Lookee, what I made....

Mean Green Chicken

JennyMac Lipsmack

4 boneless chicken breasts
1 tsp lemon juice
1/4 cup olive oil
1 full cup of chopped green onions
2 garlic cloves, pressed
handful of chives, chopped
One sprig of oregano, leaves plucked
3 sprigs of thyme, leaves slid off
one handful of parsley, chopped
salt and pepper (tsp of each)

Put olive oil and lemon juice in food processor or food chopper. Place the green onions and puree coarsely. Add the garlic cloves, pulse. Add the chives, do a few more pulses. Add the oregano and thyme. Pulse a few times again. Lastly parsley, pulsing a few last times.

The mixture doesn't need to be finely blended like pesto. It's okay for it to be chunky....gives it character! Place mixture in ziploc bag. Salt and pepper the chicken. Place chicken in bag and smoosh it around. Place bag in fridge for a few hours or overnight.

Grill as you would your boneless chicken normally. Approximately 7 minute per side. I find that if you take it off earlier than when you THINK its ready....it will continue to cook (carry over cooking) as you are plating the rest of your dinner.

These mean green beauties practically melted in our mouth. AWESOME. They were great reheated as slices on my salad the next night too.


Enjoy!

Friday, May 7, 2010

Food Product Review

SoyJoy, review

I've received a few Tastemaker products from Foodbuzz and on occasion some free samples. Soyjoy was offering free samples through Foodbuzz. Or Foodbuzz was offering free samples from Soyjoy. LOL.

I've seen these advertised on TV. I am picky about my soy choices. Not a huge fan....especially of the Tofu. But I do eat the veggie burgers on occasion, dried soybeans or edamame.

But they were Free and thought perhaps I'd throw them in K-man "energy bars for biking stash"

When I got them I dunno....perhaps this brightly purple flyer with my two free bars made me smell blueberries? The flyer says that it tastes like a blueberry muffin. Perhaps it was my morning coffee brewing and my lack of breakfast.

The package called to me...."try me," it whined softly.....mmmmm blueberry muffin with my hot coffee.....oh what the heck!

OH MY!.....The blueberry aroma filled my nostrils as I opened the package that I barely looked over the bar and bit off a chunk. I started to chew more slowly....thinking something is going to give. It will have an aftertaste....the texture will be weird....come on disappoint me.....

NO, IT DID NOT! Shocker. I was pleasantly surprised. This was really good. See don't knock the stuff until you try it. Now I am curious how the other flavors are!

As I sat licking my fingers and washing down my last bite with my steaming hot coffee....I sadly eyed the second or LAST Soyjoy....am I going to give K-man this for his next bike trek afterall?

Thanks Foodbuzz, Thanks Soyjoy....You have a new fan! Well two....K-man loves it too. Yeah, I caved and shared....

Try something new today- it may surprise you!

Thursday, May 6, 2010

A Survival Guide to a Book Signing....

The Good, the Bad and the Ugly.....

The Pioneer Woman was in town for a book signing. YAY, I was so excited. I RSVP'ed through Facebook that I would attend. I warned K-man a month earlier and we plotted the best way to go about it. Afterall, he wouldn't want to be hanging around some many women and yet parking could be an issue. We saw that the Guitar center was across the street and Harley Davidson was nearby so he was entertained while I was doing the book signing thing. He was done in an hour....little did I know I still have a very time time to go....

I called Border's ahead after I raced home from work. How was this being handled? I was told that you arrived and got a slip (colored coded by groups and the groups would be taken in order). She was due to speak @ 6:00pm and start signing by 6:30 and the groups would be lined up one at a time. They were on group 4 already. They had ten groups slotted. 50 per group.

I got there @ 5:30. I got a beige slip and was group 6. The crowd in the back of the store was packed...I sidled off to the side hoping I could see. Thankfully, Ree was on time. She was nervous (as her per usual) about speaking and didn't want to be so formal and just opened up the floor for questions. Meanwhile, everyone is clicking their digital cameras above their heads. I must have taken 10 pictures of someone else's camera who got in my way as I snapped. Grrrrrr.

Who would think that raising your hand above your head and pressing the button to focus would make your hand shake so much. The only clear pix I got were of Ree's head turned and one with a 'unpleasant' grimace. She was probably swallowing or something. I finally gave up of after deleting ten more blurry pix of PW with two heads.

She spoke for only 15 minutes for she wanted to get started on the signing. YAY. Then we waited. I thought the groups colors thing would free us up from being stuck in line for hours. WRONG! They started calling the colors and someone took your name on a post it and put in your book where Ree would sign then they ushered your group over to the OTHER side of the store to line up for her to sign your book. Border's employees decided to start giving out post-its to any color as long as they didn't get in line before they called. COOL. I will get my post-it and get an iced coffee.

Luckily I was second in line...there was only 1 guy working the counter. I thought it odd to have only one staff member there on an evening when there would be so many customers. The food case had one brownie and two bagels left. Another bad sign. About 10 more people get in line for sustenance, poor coffee guy...he's in for it now. As I get my coffee I hear "LAST CALL BEIGE" Huh...what? I walked over and he was starting the pink group by the time I got to the other side of the building. I told the employee I was beige, he said, "Well your pink now." Sigh.

So you know all those bookshelves in the store?....they don't just hold books....they make a great LABYRINTH of corridors for organizing a line of people..... Oh and that calling one group at a time so you could at least pass the time by shopping? NOOOOOOOOOOOOO. Everyone was all lined up like cattle for slaughter zigging and zagging between each bookshelf from one end of the store to the other. We were stuck for hours in a line.

The Good:
  • Bring a friend, husband, boyfriend to keep you company while you wait. They also serve purpose for keeping your place in line while you go to the bathroom. Which will have another long line BTW.
  • Having another person with you is also essential for foraging food or drink from the outside since there is nothing at Border's to sustain you. If you thought you would WHIZ through and get dinner afterward, you are sadly mistaken.
  • Many different people to talk to who are ahead, behind or across from you. I passed out a few of my blog business cards that Foodbuzz gave me last year. Perfect occasion for it.
  • Having an iPhone to place an order to Chipotle and walk down to pick it up in 10 minutes. Sit on the floor for a Mexican picnic. We did not partake in this activity but the smell of burritos was driving me crazy.
  • Having your husband there to walk the kids around, sit with them, take them out for a snack for waiting in a long line is NOT something a small child can endure.
  • Bring your laptop, homework, reading material to keep yourself busy.
  • Good to have your 'conversation piece' ready for when you meet Ree to appear charming, witty and NOT look like a total nerd without having to say: "HI, I am your number one fan!"
  • A guy in line was saying "if I knew this author was so popular I would have rethought doing this." Our surrounding bevy of women asked why and he said he was surprising his girlfriend with a signed copy of the cookbook. We all say "AWWWWWW .....oh no....you will get MAJOR brownie points for this...good call!"
  • Having K-man come over and surprise me with a diet coke because he knew I was parched and when I could get a drink was questionable.
The Bad:
  • Staff at the coffee counter said they were not informed of the book signing when asked by the customers why there wasn't any food left. They also said that they usually have water bottles and little snacks to pass around during a signing. Who dropped the ball on this?
  • Ree sat at a little meager table in front of a display of books of some other author. Why did she not have her OWN backdrop of her book with her picture? Or a big banner with her name? There was NO signage anywhere indicating that she was coming or even there!
  • Bringing small children all by yourself. Lots of crying of bored and cranky children were heard. Many of them wanted a drink or snack and Mommy was not prepared it seemed.
  • The Border's employees talking aloud about the event and not realizing that we could hear. For example: they thought only 150 people who RSVP'ed on FB were the ones attending. 500 showed up.
  • They ran out of PW books to sell for signing @ 6pm. Perhaps they only ordered 150?
  • A border's employee (with a cigarette behind his ear) yelling as he walked through the crowd..."EXCUSE ME! YOU ALL NEED TO KEEP AN OPEN PATH FOR THE EMPLOYEES TO GET TO THE BREAK ROOM."
  • The girl behind me opened her book to place her post it and realized in horror she purchased a book that was already signed. She was very disappointed she waited in line with the rest of us to get her name added.
The Ugly:
  • A group of fans singing their own version of "Home on the Range" personalized about Pioneer Woman.
  • A woman yelling on the phone to her husband about buying a bag of Frito's for Ree. I guess I made some kind of face for she immediately explained to me that Ree said her dog Charlie smelled like Frito's and since she was away from him and missed him dearly that these Frito's were a gift for her to open and smell to remind her of dear dog. OK FREAK.
  • Many attendees were bringing gifts to Ree. Was there a star in the sky? Is Ree the next Messiah we have to bring gifts to? GEEZ people. Although gifts are a nice gesture, these gifts really put a HUGE delay on the line moving along for Ree felt compelled to gush and thank and listen to their story WHY they bought their gift. By the time my turn came up there was a pile of 20 some odd gifts. How is Ree supposed to carry all these into her hotel room?
  • I was about 5 people away from my turn. The lady who was taking our cameras to snap came over to me and said "where are you in line?" I said "Behind that gentleman in the blue shirt (he was 5 feet away between some bookshelves)" She said smiling fakely "well you need to get back into line." I was standing at the end of the book shelving waiting for him to get closer to me. My mouth gaped open over her micromanaging comment as another attendee spoke up. "We've been standing at the ends here waiting so the line doesn't go back into bookshelves....all these people packed between them makes it incredibly hot and I am about to pass out from it being so hot back there" "OH," the control freak employee replied and went back to her fake smile as she took the camera of the next person.
All in all I am glad to have my cookbook signed....as for my wonderful memorable comment to Ree...it was "hi....she said 'good to meet you and thanks for coming' I said 'thank you ' and took my book (after the picture of course)....I was so tired, hungry and with an aching back that I just wanted to get out of there. I hope Ree didn't hear me say to K-man on my way out..."SWEET FREEDOM!" If she did.....hope she didn't take it personally.

At least the good outweigh the bad but I sat finally at 9:35pm in the car and we ate dinner at 10:05pm. I am too old for this stuff.

Taking a nap now!

Wednesday, May 5, 2010

Supreme Pizza Bubble Bread

When you have all the makings for a nice supreme pizza...it really bites when your only 'bread' is some canned biscuits. I said to myself...."I REFUSE to press them out to make mini pizzas! Nor am I going to press them all together to FAKE pizza dough!"

Supreme Pizza Bubble Bread1

So here is what I did to make my pizza 'outside' the box....

Supreme Pizza Bubble Bread
JennyMac Lipsmack Creation

2 cans of refrigerated biscuits (10 count each)
1 cup of chunky tomato sauce (mine is just canned whole tomatoes mooshed with my hands with Italian seasoning, garlic powder and parmesan cheese added to taste)
1/2 cup onions, chopped.
1/2 green pepper, chopped
1 pint mushrooms (raw or sauteed)
1/2 cup pepperoni, chopped in half
1/2 cup Italian sausage, (however styled, mine was leftover from a hot sausage sub night, chopped)
4 mozzarella cheese sticks, chopped
1-2 cups mozzarella cheese, shredded.
Freshly grated parmesan

Preheat oven to 400 degrees.

In a large bowl, mix the sauce, onions, peppers, mushrooms, pepperoni, sausage and chopped mozzarella sticks. Cut each biscuit into quarters and mix into the 'supreme' mixture.

Put supreme mixture on lightly oiled pizza pan (not the ones with holes). Spread it out about 1 inch from edge. Bake for 20 minutes. Top with shredded mozzarella cheese and bake for additional 5 minutes or until cheese is melted. Top with freshly grated Parmesan. Pizza can be served as a slice and eaten with fingers or just serve from pan in center of table and everyone just pull and eat!

Here have a bite!

Supreme Pizza Bubble Bread2

Fun pull apart type of dinner that is kid friendly and chocked full of veggies! Also, this was NOT a supremely EVIL pizza if that is what you are thinking, I used turkey pepperoni and sausage, the mozzarella was reduced fat. So there.

Supreme Lipsmacking,

Tuesday, May 4, 2010

Cookie Cake Pan Review

Hey there Kids!

Lookee, what I got.

I saw this pan months ago on Baking Bites (I searched her page forever under "Gear and Gadgets" and couldn't find the post but she has posted about other Williams Sonoma cake pans.) Of course, being the Cookie Club Sponsor at my school; I had to get it.

And it sat. Why you ask? Because I read W.S. site's mixed reviews about it. Hmmmm. How to accomplish this cake task without wasting my time and ingredients?

Step One: Purchased Wilton's Cake Release - many complained about the cake sticking. Well look at all that detail...of course you can expect sticking. Some said to use the recipe on the back of the box....others said 'don't use THAT recipe on the box...use a brownie mix....ugh!

Step Two: Williams Sonoma produced their own cake mix to use with the pan. Ok, will try it...but I really hate box mixes they all have the same chemical under-taste to me

Step Three: Bake the cake box mix according to their directions and it should look like this:

Not this:

Cookie Cake made from mix1

Cookie Cake made from mix

And if you bake their recipe on the BACK of the box that the pan came in it should look like this:


NOT this:

Cookie Cake made with recipe from box


Cookie Cake made with recipe from box1

A comparison....

Which Cookie Cake is better?

Here are my observations:

1. The box mix tells you to FLOUR the greased pan....ewwwww look at the 'ashy' residue to the cake on the right (above) yet the recipe on the box tells you to dust the greased pan with unsweetened cocoa (that looks better).

2. The box mix raised much like a cake (I should have leveled off the tops like you do when you make a layer cake....my sixth graders were too impatient for that step plus I forgot.

3. The homemade recipe off the box baked much like a brownie with a shiny, flat and crackly top.

4. The box mix came out of the pans with no problem at all....too bad they looked so ugly. Actually they looked worse but I dusted them with some cocoa with a basting brush and they still came out like above.

5. The homemade recipe took some 'banging' to get it out. The first pan came out eventually. The second one- half fell out, half remained in the pan. I had to do 'surgery' to get it out. All I can say is....thank god it was able to be hidden underneath the frosting as the bottom layer.

6. A LOT of butter was used to make both of these cakes. I'd say roughly a POUND of butter each. Two stick for the cake...and two sticks for the frosting. Speaking of which....the homemade frosting....no brainer....anything with two sticks of butter with powdered sugar...YUM. Yet the frosting from the box. It was vanilla flavored powdered sugar. For it called for the same amount of butter and milk added to the FAKE smelling vanilla powdered sugar. ACK....hated the taste.

7. Perhaps the frosting could have used less milk...although it was soft for both....as soon as you put the top 'cookie' on the frosting....the oozing started. QUICK....start cutting!!!!

8. Oh yeah THAT, the cutting. What a hot mess. The picture seen here was NOT how my cake sliced. If you remember one of the pictures above....I had 4 cracks working on one. And I took the picture pretty much after I placed it on top. All I can say is that thank gawd I wasn't serving this to impress a party....I would have been embarrassed. The sixth graders didn't care. They were drooling over the sugar fix they were about to satisfy at 8:30am....BREAKFAST of CHAMPIONS! Two got a piece of each to try for comparison sake.

9. The kids picked the homemade recipe from the box as a better tasting one! Phew!

10. Clean up with the pans....the cake mix stuck very little and clean up wasn't so bad with hot water, soap and good sponge. The homemade recipe...OMG...I soaked and scrubbed and soaked and scrubbed. I finally had to resort to a toothbrush for all those nooks and crannies.

It amazes me over the range of reviews from "horrible-the pans are going back" to "looks better than the picture" They all ranged from using the mix to a store box cake mix. ALL over the board. So what do I tell you? Buy it or not?

Well, I won't be making this anytime soon...I am still exhausted over it. 3 days of demonstration to my students. But since I see that there are people out there who are making this 'nicely' I feel challenged to get it right. I am hopeful to find the right combination. So if you are up to a challenge and looking for a fun thing to make with your kids get the pans....not the mix. Start with the recipe on the box and try other recipes....unless you are a box cake fan...ick. Not me.

Purebred Cookies Rock!

Monday, May 3, 2010

Cascadian Farm Giveaway Winner!

YAY!

Congrats to Jane Valentine!

She is the lucky winner of a boatload of organic cereal from Cascadian Farm and MyBlogSpark!


I appreciate all the entries and your sharing of the 'green' things you do to make our earth a better place.

Since I required it for entry it is only fair that I tell you how we attempt to be greener.....

1. We reduce the amount of trash by recycling. Our city takes quite a bit of everything, most plastic (including lids), phonebooks, disposable pie pans, rinsed aluminum foil (to name a few)

2. I use (and getting quite a collection it seems) of the reuseable grocery bags. I just got a new one yesterday for trading in some of my plastic grocery bags for a cloth one (our city incentive to stop using plastic)

3. I grow as many vegetables as my little garden can fit. This year we have tomatoes, zucchini, green peppers, yellow peppers and jalapenos. I have every herb imaginable hanging off my deck railing.

4. Starting yesterday and every Sunday I save all my produce shopping for our local farmer's market. It is good to support your local farmers. Bring cash. When you doing something like buying asparagus 5.00 per pound and the scales tip to 5.10, if the farmer says 5.00 pay them what you owe. I told the farmer...."oh no, those dimes makes dollars. You get the full amount, don't cheat yourself."

5. We unplug most of all electrical items not in use, you know the fridge, stove and a few other big items we can't reach behind...they stay plugged in.

6. We wash only in cold water and use the RECOMMENDED amount of concentrated laundry soap!

7. We shower by getting wet, turn off the water, soap up/shampoo, turn the water back on to rinse off.

8. When it is just the two of us in the house....we follow the 'if it's yellow, let it mellow, if it's brown flush it down' policy. This policy is waived when guests are around....LOL.

I know we could do more. I toy with the composting thing. Since I've seen raccoons eating the bread I put out for the birds....I am fearful of the compost bin being 'ransacked' by that masked varmit. But as I said....it's the little things that if we all did it together it would start to make an impact.

Thanks again Cascadian Farm and MyBlogSpark and Jane....stock up on that milk GIRL!

Enjoy!

Saturday, May 1, 2010

Only two days left....

Who wants some wonderful crunchy organic cereals for their shelves?

Cascadian Farm Giveaway!

You have until Sunday to comment on here what you do to help the environment or being "green"....nothing major....just one will suffice and POOF, you've entered the giveway from Cascadian Farms and MyBlogSpark.

Add yourself to my Facebook Fanpage and PING, you've entered a second chance.

Just think of all the breakfasts, streusel toppings for muffins, haystacks, granola bars...you can make.....

Giveaway is NOW CLOSED! Thanks for visiting!

Enjoy!