Showing posts with label beef. Show all posts

Thursday, April 7, 2016

Whole30 Day 14 and 15


Still no weird dreams but halfway baby!!!

Day 14

Breakfast: 2 hard boiled eggs, 1 bacon slice, sausage patty
Lunch: leftover chicken and confetti cauliflower
Dinner: Homemade chili, half an avocado, sauteed kale and strawberries.

Easy Sauteed Kale!

2 small bunches of lacianto or Dinosaur Kale
2 cloves of garlic
salt and pepper to taste
ghee or olive oil
juice of half a lemon

Wash and tear your Kale leaves, saute garlic in your ghee or olive oil. Add Kale leaves and stir several times and cook for 5-7 minutes, salt and pepper to taste.  Shut off heat, squeeze lemon all over leaves and stir.  Cover and let rest for 5 minutes.  Enjoy!  This was my first try at eating cooked Kale.  Loved it!


Day 15

Breakfast: 2 hard boiled eggs, bacon slices, banana and blackberries
Lunch: chicken salad in a lettuce wrap.
Dinner: Chicken Poppers, guacamole, salsa, mixed greens salad, strawberries


 Noteable Notes:  Still feeling great, I think a lot about this new plan and how it's hard to not call it a diet but I am really committed to eating organic and grass-fed, etc from now on....I've been on so many diets and they were mostly torture but this isn't.  So I visualize always, will I stay on whole30 or will I go Paleo....that kinda stuff. Have you tried Kombucha? I highly recommend it.  I had heard much about it but never knew why people were drinking it.  It is fermented tea and many companies sell it and their own flavors.  This is good because for the same reason we want to eat yogurt for the probiotic effect we knew in our tummies that those who can't eat dairy, should drink Kombucha.  Unless you are going to eat sauerkraut and kimchi....drinking is easier. I have only tried this company so far and I am going to stick with it.  I know I have heard others try others and have been disgusted but these are offset with natural juices which is compliant for whole30.  If you want to get fancy and place it in a wine glass and pretend you are getting alcohol (it does have a certain tang.) Start slow with flavors you know you will like like strawberry, citrus or cranberry....one of my friends tried the one with chia seeds and she said it was slimey.....lol.  I think I may skip that one....


Here's Kombucha in your eye! Ouch!

Sunday, November 23, 2014

Easy Flank Steak Fajitas

 Here is the second recipe I promised to make for Reynold's this month. It was a no-brainer.  I always use all their foils, the slow cooker bags and turkey bags.  Accept no substitutes! The heavy duty foil is great for the grill and in a campfire.  I adore the non-stick but I said that in my last post already.  Check out this recipe and my extra notes at the end of the recipe too!

Easy Flank Steak Fajitas
Allrecipes.com recipe by  


1 pound beef flank steak, trimmed of fat
1/4 cup lime juice
1 tablespoon vegetable oil
1 tablespoon chili powder
1/2 teaspoon salt
1/4 teaspoon cayenne pepper
2 red, yellow or green sweet peppers (or combination), thinly sliced
1 medium onion, thinly sliced
2 cloves garlic, minced
8 (6- to 7-inch) flour tortillas
Guacamole, salsa, and/or sour cream (optional)

1. Place steak in a large resealable plastic bag. Add lime juice, vegetable oil, chili powder, salt, and cayenne pepper to the steak in bag. Seal bag; turn to coat steak.
 
2. Marinate in the refrigerator 30 minutes to 1 hour. 
 
3. Preheat oven to 400 degrees F. Drain meat; discard marinade. Center meat on a sheet (12x18 inches) of Reynolds Wrap(R) Heavy Duty Aluminum Foil. Bring up foil sides. Double fold top and ends to seal packet, leaving room for heat circulation inside. Center sweet peppers, onion, and garlic on another sheet (12x18 inches) of heavy duty aluminum foil. Repeat steps above to make another foil packet. 
 
4. Wrap tortillas tightly in heavy duty aluminum foil. 
 
5. Bake meat and vegetable foil packets 30 to 35 minutes or until meat is desired doneness (145 degrees F for medium rare) and vegetables are tender, adding tortillas to the oven for the last 10 minutes of baking or until heated through. 
 
6. Open packets carefully by cutting along top fold with a sharp knife, allowing steam to escape; then open top of foil packet. Thinly slice the meat. 
 
7. Fill warm tortillas with meat and pepper mixture to serve. If desired, top with guacamole, salsa, and/or sour cream.


#AllstarsReynolds


 #MealMagic.
 K-man wanted his contribution in all this....

 Cook's Notes:
1. The cooking of the pepper's and onions is great if you need some time to do other things but I like a 'char' on my veggies.
2.  Cooking meat in a foil pack in the oven is not the way I cook a flank steak.  30 minutes was way too long when I cook it for less on a grill and I get the smoky char on it too.
3.  Corn tortillas break up too much for this, flour is better.  I tried one of each. The corn fell away immediately when the flour tortilla stretched with the ingredients with each bite.
4.  Next time I would see how different this would be using the Reynold's foil but on the grill.

Enjoy!

Monday, October 6, 2014

Cheesy Beef Lasagna

Hi Everyone!
Clearly, I have been spending WAAAYYY too much time with my new breakfast sandwich maker.   It is the bomb but I need to get back to some blogging, right?  Well, if I can be honest I stopped blogging mainly because I was doing (still am) Nutri System.  Kinda difficult to be making all these luscious recipes AND trying to lose weight.  So far lost 45 pounds, yet it is still is a struggle only because my husband is NOT needing to lose weight that I have to prepare dinner for him and/or us. It's very complicated...regardless onto what I made this weekend.

For this month of October, I tried a recipe provided by Allrecipes.com sponsored by PAM®.  I was glad to take this on because I use PAM® A LOT.  When you are on a diet plan that wants you to eat virtually no FAT, then I use PAM® every time I cook.  I always used it whether on a diet or not. The Allrecipe Ambassador Allstars had a nice long list of recipes to choose from and since I had many of the ingredients for Lasagna and the weather is starting to turn cold, this was an ideal choice.

Lasagna recipes are funny....some people have the only ONE family recipe they use and none other and others try different ones all the time.  Other than a white lasagna or veggie one.  Are they really THAT different?  Phhffftt.... I think that a basic meat lasagna and it's prep is pretty standard.

HOWEVER-

This one was particularly attractive because you DON'T BOIL THE NOODLES!  Yay!!!!  Just so you know....whether you use the regular noodle to boil or the special noodles that say NO BOIL....it's all the same.  You never have to boil them.  I find a lot of people don't know this.

Use what you got, it doesn't matter.  However fresh pasta (if you can find lasagna noodles in your freezer section of the grocery) are THE BOMB!  The following is the recipe I used and for your entertainment at the bottom of the recipe I will add all the little tips and tricks I do to make my lasagna making easier (I am a Family and Consumer Science teacher in case you forgot, so I have a plethora of fun tips and tricks!)

Cheesy Beef Lasagna
-recipe from Allrecipes.com
JennyMac's Lipsmack adapted changes below

PAM® Original No-Stick Cooking Spray
1 1/2 cups part-skim ricotta cheese
1/3 cup water, divided
3 tablespoons chopped fresh Italian (flat-leaf) parsley
1/2 teaspoon ground black pepper, divided
1 1/2 pounds ground chuck beef (80% lean)
3/4 cup chopped yellow onion
1 teaspoon dried Italian seasoning
1/4 teaspoon salt
2 tablespoons finely chopped garlic
2 (14.5 ounce) cans Hunt's® Petite Diced Tomatoes, undrained
2 1/2 cups Hunt's® Tomato Sauce
2 teaspoons balsamic vinegar
1/4 teaspoon crushed red pepper flakes
9 dry lasagna noodles, uncooked
2 1/2 cups shredded part-skim mozzarella cheese
1 cup Kraft® Grated Parmesan Cheese

 1. Preheat oven to 350 degrees F. Spray 13x9-inch glass baking dish with PAM® cooking spray. Combine ricotta cheese, 2 tablespoons water, parsley and 1/4 teaspoon black pepper in small bowl; set aside.

 2. Heat large skillet over medium-high heat. Add beef and onion; sprinkle with Italian seasoning, salt and remaining 1/4 teaspoon black pepper. Cook 7 minutes or until beef is crumbled and no longer pink, stirring occasionally. Add garlic; cook 1 minute more or until fragrant. Drain. Add undrained tomatoes, tomato sauce, remaining water, vinegar and red pepper flakes to skillet. Reduce heat and simmer 10 minutes, stirring occasionally.

 3. Assemble lasagna by spreading about 1 cup meat sauce over bottom of dish. Place 3 dry noodles over sauce, top with 2 cups meat sauce, half of ricotta mixture, 1 cup mozzarella cheese and 1/3 cup Parmesan cheese. Repeat layers, ending with a layer of noodles topped with remaining sauce and remaining mozzarella and Parmesan cheeses.

 4. Spray underside of aluminum foil with PAM® cooking spray; cover dish tightly with foil. Bake 45 minutes. Remove foil and bake 15 minutes more or until cheese melts and sauce is bubbly. Let stand 15 minutes before serving.

Cook's Notes:
1. First, are you going to eat this today, tomorrow or next month.  Crucial information.  Making today, spray your favorite (suggested deep dish) 9X13 pan.  Making tomorrow, spray.  BUT, if you are making for later to FREEZE, then line your favorite pan with foil, then spray with PAM.  Make your lasagna and FREEZE.  After two days of it finally being rock hard remove the lasagna from the pan with the foil so you can reuse your favorite 9X13 pan.  Why would you hold a pan hostage in the freezer like that?  Use foil and pop it out when it's frozen. Easy peasy!

2.  Ricotta cheese- 3 types, Nonfat, part skim and whole fat.  Use what you need.  If on a dietary restriction or trying to cut the fat in your diet....do whatever you NEED, don't be a slave to what a recipe dictates!  Make it so it works for YOU!  I choose part skim and I didn't use water because I used a beaten egg to help firm it up a bit.  I used a 1/4 cup liquid egg stuff it has no fat to help on the calorie content as well. As for parsley, use what you have...either dried or fresh.  I still had some from the garden this summer but use dried if that is all you have got.

3.  Beef and onion.  I used 1 pound 95% fat beef and 3 hot italian sausages and one whole onion.  GEEZ, it's a one pan meal here!  I am gonna use one whole onion....I don't have to time to peel, chop and MEASURE out 3/4 cup of onion.  I felt crazy enough to throw in the last poblano pepper from our garden too.  No crime in adding more veggies!  What is your SPICE/HEAT capacity?  As for the 3 hot italian sausages, one poblano that 1/4 tsp. hot pepper flakes did not ZING up the lasagna enough for my husband.  His only complaint was that this needed more ZIP.  I am the one with the higher tolerance for spicy foods so coming from HIM that means something.  So add more hot pepper flakes if you need to...I was trying to keep it calm for K-man and he said it was lacking so punch it up if you want.  Just taste it...you will know.

4.  Assembling the lasagna- I felt weird putting 1 cup of sauce down first but it needs it....you are using DRY noodles....so do it.  Those DRY puppies need something to slurp up and make them soft, so don't be stingy. However I did not put 3 noodles but 4!!!  It was too much exposed lasagna layers to do it that way even though I know they will expand...but they won't expand straight across perfectly separating my layers!!!  So I had plenty to spare so I went rogue and did 4 per layer.  I also wet them.  Start the absorption please!  As for the cheese I used 3 cheeses.  The recipe said CHEESY Beef Lasagna.  Two cheeses weren't cheesy enough for me.  I like the meltability of Monterey Jack cheese as opposed to the stringy-ness of the Mozzarella and the potent tang of the Parmesan.  I wanted to make my own blend.  I added an additional cup of Monterey Jack to the Mozzarella and parmesan.

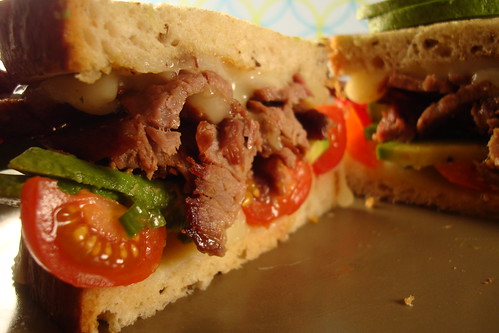
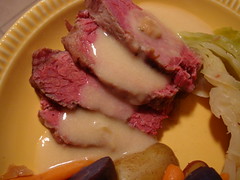
5.  I sprayed the foil and covered and put it in the fridge for the next day.  I never make a lasagna and eat it the same day.  I think my lasagna tastes better this way.  Of course the cooking time will be twice as long heating it up stone cold as opposed to warm from the preparation.  All the seasonings, and herbs and garlic all just co-mingle and be better the first day....rather as leftovers when everything had time to 'sit'.  The next day, preheat your oven bake for 1 and 1/2 until bubble with foil and NO CHEESE.  Remove foil and add remaining cheese.  Bake for 15 minutes until all melted and bubbly.  Put in your garlic bread to toast.....and let it stand for another 15 minutes (this is a must!) I don't care how hungry you are and if the kids are chanting and banging their forks on the table.  The lasagna needs to set or you will not get a piece like this...

See?  No sauce running all over or cheese oozing out.  It's a must!  Just a simple spinach salad on the side.  And look at how swollen these noodles get?!

The noodle were swelling practically over the handle on the glass dish.  SO use a deep dish pan if you have one.  If not....put a cookie sheet under the dish just in case.  We will have it again tonight for dinner then the rest must go wrapped up as individual servings in the freezer.  Yes, the husband K-man has a two day limit to all leftovers.  Back when I was single, this was my lunch and dinner for a WEEK!
#AllstarsPAM

Enjoy, we did!

Monday, August 26, 2013

Beef Empanadas

 Here is my 3rd and last Goya recipe for this month of August.  We were also supposed to do a beef recipe from "Beef, It's what for dinner" council.  August is a really busy month with me going back to the classroom so I did a beef recipe with my Goya product.  Knocking out two and one.  So this last one, I really wanted to see if I could find the Goya "Discos" or the puff pastry circles to make Empanadas.  Luckily at my second attempt at a Safeway that seemed to have lots of Goya on their shelves...I tried my luck in the freezer to look for the dough and SCORE!!! I scooped up two.  I stay away from recipes most times that have you make your own doughs.  I just don't have the time or patience for it anymore.  When I saw that Goya made its own dough for Empanadas I had to see if I could find it and so happy I did.
Allrecipes had only one empanada recipe from Goya and in true JennyMac fashion I tweaked it:

-I did not use all their prepared seasonings and such.  I was fearful of it being too salty,
-None of the seasonings (Sazon Goya and Goya Soffrito) were included in my box of goodies so I wasn't going to go out and buy them.
-I added a non-traditional food in it, (K-man doesn't like olives) sweet potato.
-I did NOT FRY them.

Beef and Sweet Potato Empanadas
by JennyMac Lipsmack on Allrecipes.com

1/2 pound ground beef
1/2 medium yellow onion, finely chopped
1 medium sweet potato, peeled and cubed
1/4 cup Goya Tomato Sauce
1 Tbsp. Adobo seasoning
1 teaspoon Minced Garlic
1/2 teaspoon Dried Oregano
Ground Black Pepper, to taste
1 (14 ounce) package Goya Discos (yellow or white), thawed
About 1/4 c. Oil, for cooking and brushing
Preheat oven to 400 degrees.  Heat about 1 tbsp. oil in a large skillet over medium heat. Add ground beef and cook until browned, breaking up meat with a wooden spoon, about 10 minutes. Remove and put to side.  Put another tbsp of oil and onions and sweet potato in the already heated pan. Cook until soft, about 10 minutes. Stir in tomato sauce, adobo, garlic, oregano and black pepper and add the ground beef back into the pan mixture. Taste for seasoning
On a lightly floured work surface, using a rolling pin, roll out discos until 1/2-inch larger in diameter. Spoon about 1 tbsp. meat mixture into middle, fold in half to form a half moon; moisten edges with water and pinch to seal closed, or seal with a fork.
Line cookie sheet with either a silpat or parchment.  Brush with oil.  Place 12 empanadas on sheet and brush with oil.  Place in preheated oven and bake for 15 minutes.  Turn empanadas over and bake for another 5 minutes or until both sides are golden brown.

This is the second time I took a classically FRIED recipe and baked it (I also bake egg rolls now instead of deep frying them) and the dough comes out just as crispy as though it was fried and so little oil is being absorbed by doing this.  
I AM GOING TO GO BACK AND BUY MORE OF THESE DOUGH DISKS....SO CONVENIENT AND THEY WERE AWESOME!!!

All in all, the Goya products were top notch and I used them before, so it was a no-brainer to me about using them.  Also we like to eat beef here so a double  assignment of making a beef recipes wasn't to difficult since we eat it at least twice a week.  It was fun taking a beef recipe and creating a new filling and using a new Goya product.  This was a good month for food from Allrecipes Allstars.

Enjoy!

Sunday, April 21, 2013

Southwestern Egg Rolls with Cilantro Dipping Sauce


This month the Allrecipes Allstars Ambassadors received Herdez® Cooking Sauces.  I got the Classic Chipotle and Roasted Pasilla Chile. The Chipotle one has definitely got some ZING.  I felt it was best suited for the recipe I came up with.  I have had a few versions of different restaurants Southwestern Egg Rolls and I used the corn and black bean salad from my Grocery deli as a shortcut so I wouldn't have to do all the chopping. AND these are BAKED not FRIED!!!  Double Score.  I created a Cilantro sauce to help cool the sting from the Chipotle or to just add another layer of flavor.

Southwestern Egg Rolls with Cilantro Dipping Sauce
by JennyMac's LipSmack

1 lb ground beef
1 jar Herdez® Classic Chipotle Mexican Cooking Sauce
2 green onions, chopped
1 cup corn and black bean salad (or see note to make own)
1 pkg. egg roll wrappers
1 egg, beaten with 1 tsp. water
oil for coating
Cilantro Sauce:
1/2 c. chopped cilantro
2 green onions, chopped
1/4 cup sour cream
1/4 cup mayonnaise
salt and pepper to taste
1.  Preheat oven to 375 degrees
2.  Brown ground beef with green onion.
3.  Add Herdez® Classic Chipotle Mexican Cooking Sauce and cook until reduced. Set aside to cool.
4.  Add Corn and Black Bean Salad (a mixture of yellow corn, black beans, chopped red pepper, green pepper, onions and lime juice.
5.  Put one egg roll wrapper on cutting board. Turn, so it's a DIAMOND not SQUARE. Coat edges with beaten egg with basting brush.  Place 1-2 Tbsp of mixture on bottom of Diamond.  Fold up bottom point to just cover the mixture. Fold over each side (should resemble an open envelope).  Now roll up fold to the top tip of that "envelope/diamond"  Use fingers to press edges so egg can start the wrapper edges to stick to itself.
6.  Brush each egg roll with oil of choice.
7.  Bake for 10-15 until golden.
8.  While baking put cilantro, sour cream, onions, mayo in a food processor.  Blend until smooth.
9.  Serve cilantro dipping sauce with egg rolls for cool finish to with the ZIP of the Herdez® Chipotle Cooking Sauce.


Cook's Notes:
To make your own Corn Salad: 
Corn and Black Bean Salad can be found in your in your grocery store's Deli, perhaps near the potato salad?  If not, don't worry.  You can use canned or frozen corn.  Drain a can of black beans.  Chop up one red, one green pepper and one onion.  Squeeze one lime on chopped stuff. Mix it all up.  Reserve 1 to 1-1/2 cups of salad to put in your beef with Herdez®.  Eat the remainder of your salad another time or as a side.

These were a keeper!  I was shocked K-man loved the cilantro sauce.  No everyone is a FAN of cilantro.  I know it took me awhile to develop a taste for it.  I swore K-man was gonna ask for Ranch instead.  I believe the word he used was "Killer".  I'll take it.

Caliente!

Sunday, February 17, 2013

Family Secret Meatballs and Sauce

I don't think I told you but I was accepted in a little fun program called Allrecipes Allstars.  I have been a member of the web page Allrecipes.com for years.  Sheesh, back in those days they had many sites.  Cookierecipes.com, Maindishrecipes.com, Christmasrecipes.com....there were tons....then they wised up and condensed.  Long story short....they are a place where people like me can post or look up recipes that are TRIED and TRUE.  All the members post their own pictures of how it turned out (if they want)...tons of reviews, suggestions, videos....I've been a member for 13 years.
So I see a FB friend post about this program where you do fun stuff each month they assign.  Sounded like fun AND would give me something to do on my own blog.
This month one of the activities we could do was to select a 'faceless' (no picture) recipe on allrecipes.com and give it try in our kitchen, review it and provide a picture.  Completion would be 3 faceless....or do more if you so desired.
The first one I did not like much.  It was OK, even though I took a picture of it....to start my AR CRED. lol  It was Lemon-Dijon Grilled Chicken. I was not thrilled about it and my review said as such.  Eh.  It needed some herbs.  Too much honey as well.  Ok next recipe....

YAY!  Winner!  I wondered why someone would put a Secret Family Recipe online...I guess we are now at the time in our lives when there are no more secrets anymore....everything good or bad goes on the Internet.  Well HONEY....this is one of those GOOD things to put out there.  Awesome stuff.  These were called Secret Family Meatballs and Sauce.  These are an appetizer kinda thing.  One person pictured theirs on a bed of spaghetti....um, not seeing that.  The sauce has ketchup, onion, vinegar, Worcestershire sauce.....not an Italian thing.  Are people eating BBQ on spaghetti now?   We ate these with a salad and some homemade jalapeno mac and cheese and garlic bread.  I can't wait for the leftovers tomorrow!

Here is the recipe to look over, however the link above is easier to print from if you like:

2 pounds ground beef
3/4 cup rolled oats
6 tablespoons chopped sweet onion (such as a Walla Walla)
1 cup milk
1 1/2 teaspoons salt
1/2 teaspoon ground black pepper
1 1/2 cups ketchup
3 tablespoons Worcestershire sauce
3 tablespoons white sugar
4 1/2 tablespoons chopped sweet onion (such as a Walla Walla)
4 1/2 tablespoons apple cider vinegar
3/4 cup water

1.  Preheat oven to 350 degrees F (175 degrees C). Grease a 9x13-inch baking dish.
2. Mix together the ground beef, rolled oats, 6 tablespoons of sweet onion, milk, salt, and black pepper until thoroughly combined. Roll the mixture into 2-inch meatballs, and place meatballs into the prepared baking dish.
3. In a bowl, mix the ketchup, Worcestershire sauce, sugar, 4 1/2 tablespoons of sweet onion, apple cider vinegar, and water until the sugar has dissolved, and pour the sauce evenly over the meatballs.
4. Bake the meatballs and sauce in the preheated oven until the sauce is bubbling and thickened and the meatballs are no longer pink inside, about 1 1/2 hours. An instant-read thermometer inserted into the center of a meatball should read at least 160 degrees F (70 degrees C).


Delish!


Sunday, November 6, 2011

Big Game Food

The Skins have a big game today. They have lost the past 3 games, and they have been playing kinda 'eh' these days but just because your team is being 'eh' doesn't mean your "game food" has to be 'eh' too.

We love nachos but none with the canned cheese like they serve typically at stadiums. Yuck. Nachos are fun because you can tweak them so many different ways.

Super Deluxe Nachos

1 lb. SHAVED beef (this is the good quality super thin sliced beef your butcher does, similar to 'steak-um beef' but don't use that unless you are desperate.)
1 envelope Taco Seasoning
1 cup frozen corn
1 can black beans (drained and rinsed)
shredded cheese
Your favorite tortilla chips
Fresh salsa (I usually make my own but the summer tomatoes are gone)
Chopped Jalapenos (I used three, seeded and deveined)
Sour cream

Preheat oven to 350 degrees. Cook your beef with Taco seasoning. Add corn so it will thaw. When beef is cooked add beans. Cover baking sheet with non stick foil. Layer chips on foil and hearty handfuls of cheese. Add layer of hot beef and corn mixture. Add more cheese on top of beef. Place in oven just long enough to melt cheese. About 10 minutes.
Sprinkle on fresh salsa, scoops of sour cream and jalapenos (don't forget all dairy is the ANTIDOTE for the jalapeno evils).

YUM! Have plenty of napkins, your favorite beverage of choice and you will have a happy tummy regardless of how your team plays!

Enjoy!

Wednesday, February 3, 2010

More Munchies for Game Day

Oh yum, this dip is a goodie to make for a game or just a lazy day on the weekend. I tried this out and K-man said I could make this for dinner everyday and he wouldn't mind. HAhahahha!


Hot Taco Dip

1 pound lean ground beef
1 small onion, chopped
1 clove of garlic, minced
1 package reduced fat cream cheese
1 package Taco Seasoning
4 ounces Kraft Fat Free shredded cheddar cheese (divided into 2 portions)
4 ounces Cabot's 40% reduced fat Pepper Jack cheese, shredded (divided into 2 portions)
1 jalapeno, seeded and chopped
halved or chopped cherry/grape tomatoes
chopped green onion for garnish

Preheat to 400 degrees. Spray a 9 inch pie plate with cooking spray and set aside.

Brown ground beef over medium heat. Drain and return beef to pan. Add the onion and garlic, cook for 5 minutes until onions translucent. Remove from heat to cool.

In a bowl, combine the cream cheese, taco seasoning. Add the beef and one portion each of the cheeses. Mix to combine. Spoon the mixture into pie plate and sprinkle with remaining portions of cheeses. Top with chopped jalapenos (don't seed or devein, if you want it hotter) and chopped tomatoes.

Bake for 15-20 minutes or until the cheese is golden and bubbly. Sprinkle with chopped green onion on top and serve with tortilla chips (pictured was the BLUE corn ones) or Stacy's baked pita chips.

K-man had no idea that I was using the lower fat versions of many things in order to cut the fat and calories. All he cared is that it was scrumptious!

Enjoy

Sunday, October 18, 2009

Nothing squeaked in the making of this recipe!

"Bubble and Squeak" now there is a fun name for a recipe.


A name kids could really get into as well. I've seen many recipes for B.A.S., none were the same so I never tried it since I didn't know what the original is really supposed to be short of taking a trip to Great Britain to do so.
So when I made corned beef I was debating the usual....carrots and potatoes? mashed only? So when the beef was was done I decided to make my own version of Bubble and Squeak.

B.A.S. typically uses brussell sprouts (aka mini cabbages) and it's considered a leftover dish of potatoes (either chunk or mashed), onions, beef, ham or bacon being used. I wasn't in the mood for a pile of mush but since we'd been having a COLD rain for the past 3 days....I was in the mood for something like a stew or soup and following the ingredients somewhat.

Lipsmacking Bubble and Squeak Stew

1 corned beef in store package with seasonings
Half package of baby carrots
1/2 cup onions chopped
2 cups of brussel sprouts
1 cup barley (uncooked)
Chicken broth (if you need to thin out your stew)

Cover your corned beef with water and the included seasoning packet in your crock pot. About 3 hours on high or boiling in a pot on your stove.

Remove corned beef and with a fine screen mesh strainer remove the 'seeds' from the seasonings or just use an immersion blender to break them up. Keep the corned beef water in crock pot and put your 1 cup of barley in the water. Cook on high about 30 minutes or until soft.

Use a slotted spoon and remove about half of the barley (about 1 -1/2 cups) and put aside in a small bowl. Use an immersion blender to blend up the barley until smooth. Mixture will be thick. Put in your carrots and brussell sprouts. Cook until vegetables are soft. Put the cooked barley in small bowl back into the crock pot and stir. My stew was very thick and could use a little thinning so I used some chicken broth (I used about 1 cup)

You can decide if you want to cut up your corned beef into the Bubble and Squeak stew or just slices on top of your stew.

This was absolutely delicious and was exactly what we needed after three freezing cold rainy days. I served some crusty buttered bread with this. K-man ate TWO big bowls!

Enjoy!

Sunday, July 19, 2009

Yet another Monster!

*Singing to self* "Oops I did it again...."

Well, it was no accident that I made some Monster Chili Dogs...

Do you have someone in your household that has a fascination with hot dogs? For me, once in a blue moon will I want one. Of course I want only the crunchy ones with skin. But K-man would eat a hot dog with every meal or FOR every meal if he could have his way. So I decided to surprise him not with just a lil ol' hot dog for dinner but a man food -monster sized- chili dog!

Here's what you need:

Monster Chili Dogs

JUMBO franks (mom gets these for me from an Amish Store in Lancaster County PA)
can of chili or pull some out that your stored in the freezer
chopped onion
sub rolls
shredded pepper jack cheese

Chop your onion, shred your cheese, cook your dogs, heat up your chili, toast your buns. Assemble!

Looks like this:

When I say JUMBO, I meant it....here is the comparison. The other one is a Nathan's hot dog. Quite a difference...Get out your rolls now...


So when I say you need sub rolls, I mean it. A regular hot dog roll would not work...

Snug as a bug. Pile on your chili (no pic, it was too blurry, but I figured you could deal)
Add your onions....


Top on your fave cheese.


I love Pepper Jack!


I toasted mine...

But what did K-man want along with HIS chili dog?

Yup, another regular hot dog. With his fave topping of mayo and onions. He was feeling a lil crazy and add a bit of ketchup on his regular hot dog. So there you go proof of the size and what K-man had for dinner. He grabbed it and shoved it in for a bite. Contrarily, I ate mine with a fork and knife and could only eat one side of the roll! By the way, there was a cucumber salad on the side with dinner.....LOL

It's the weekend! Make something fun and messy for your man/family!

Monster Chili Dog on Foodista

Friday, April 24, 2009

Because you Love him...


Sometimes, I just like to put together a dinner, meal or special dessert for my K-man.  That is just how I am....I like to let him know not only do I love and appreciate him but I am thinking of him and his likes....it's fun to surprise him with something 'special' that HE likes (it's win/win, if I like it too) 

Here is a sandwich I put together for my K-man because it has many of his favorite things...

Rye Bread
Avocado (that man will halve and eat an avocado with a spoon in it's peel with pepper only just for a SNACK)
grilled flank steak (we love the Mc Cormick's MESQUITE marinade)
green onion
cherry tomatoes (I should have roasted them!)
mozzarella
horseradish sauce

Let's put it together!


I heated up the leftover flank steak just enough.  I didn't want to lose too much pink in the meat.  Toast your bread by either toaster or grilling on a pan.  Melt your cheese.  Top with meat on one side....tomatoes on the other.  Cheese is very important for it acts as your 'glue' in a STACKED sandwich.


Now I topped the meat with his avocado with some salt and pepper and some green onions on the tomatoes.


Now carefully....STACK IT...


Cut it open and look at what you got...


Yum!

This sandwich definitely produced a huge smile and lots of "Mmmmm-mmmm's"  He even did the dishes afterward!  Again....win/win situation!

Monday, March 16, 2009

Kiss Me, I made Corned Beef and Cabbage!


Wow I love it when the recipes I need are thrown into my lap via Gmail Subscription Reader. If you don't subscribe to all your favorite blogs and have them appear to you via the subscription reader....you are missing OUT!

I wanted to get my Corned Beef and Cabbage going before St. Patty's Day so I could blog about it. I wasn't really sure which technique I was going to use yet. BAM....a few days ago, Gin from Once upon a Gourmet Gin blogged about her corned beef and cabbage "CHECK! *licked finger and marked the air* Thanks GIN!

Then....

You know how some bloggers give a run down of some recipes: they want to use, have used or suggest in a little paragraph of links? One of my fellow Virginians Robin Sue from Big Red Kitchen had a plethora of recipes for her Irish Eggs Benedict creation and on it was a horseradish gravy. Robin Sue got it from Rindy's Mom on Kitchen Klique that she suggested putting on her corned beef and cabbage. BAM again. *clenching fist and jerking my elbow back making the universal 'YES' gesture* Thank you Robin Sue and Rindy!

Now if I could only find someone on my subscriptions who will come and here cook it for me? *eyebrows raised looking around my fellow food blogger* Sound of Crickets......SIGH. I didn't think so....oh well.

If you'd like the original recipes, click on the links above. But as we all do...we tweak recipes to work for us....here are my adaptations:

Corned Beef and Cabbage with Horseradish Gravy
adapted from Once Upon a Gourmet Gin and Kitchen Klique

1 package of corned beef with spice packet
1/2 head green cabbage
1/2 package of baby carrots
1 1.5 lb. package of small potato medley, cut in halves
1 head garlic, roasted
1 tablespoon beef bouillon

(1) Fill a slow cooker with water and set to low. Place corned beef in slow cooker with spice packets and cook 8 to 10 hours. (I jacked my cooker to HIGH and did 4-5 hours instead)
(2) Roast garlic (slice off garlic bulb top, place in foil, cover with olive oil, gather up foil and bake @350 degrees for half hour).
(3) When the corned beef is done, remove from crockpot and let cool so you can slice it.
(4) Add half of the juice from the slow cooker to a big stock pot. Add an equal part water, beef bouillon, potatoes, carrots and roasted garlic. Cook until carrots and potatoes are tender.
(5) Add corned beef and cabbage to pot and simmer until cabbage is tender.
(6) Season with pepper. A word about additional salt: YOU WON'T NEED IT!! If you insist on salting make sure you start slow and taste. You don't want to ruin this masterpiece!!


Horseradish Gravy:


3 Tablespoons Butter
3 Tablespoons Flour
2 cups corned beef broth from above.
1 tbsp. dijon mustard
1-2 tbsp. horseradish


1. Make roux with butter and flour, melt and cook for 1 minute until smells nutty.
2. Add 2 cups corned beef broth, cook until thickened.

3. Add 1 tbsp. Dijon mustard and 1 to 2 tablespoons horseradish. The more horseradish the more your sinuses will clear!


This sauce was awesome! Never again will I eat corned beef and cabbage without this sauce. I poured it all over EVERYTHING (the beef, cabbage, carrots, potatoes) then wiped my plate clean with a biscuit.