Saturday, January 29, 2011

These are a few of my favorite.....

BLOGS!

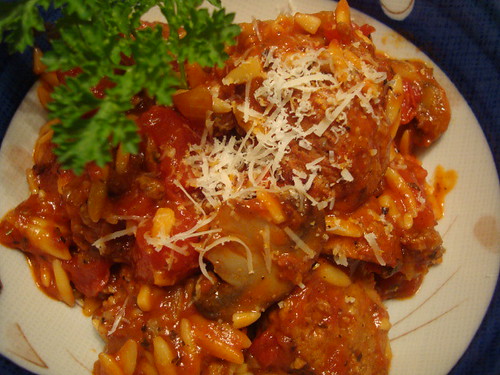
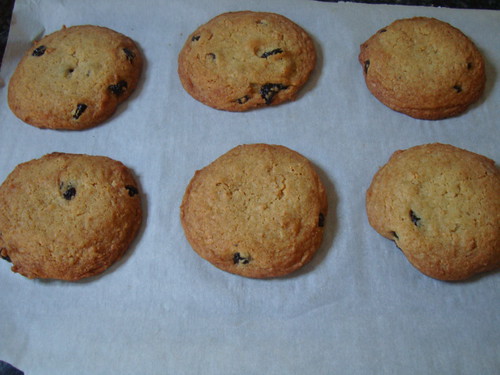
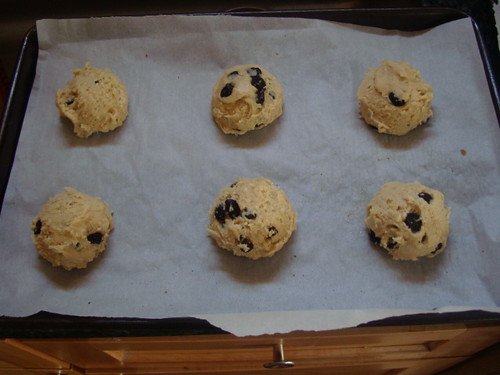
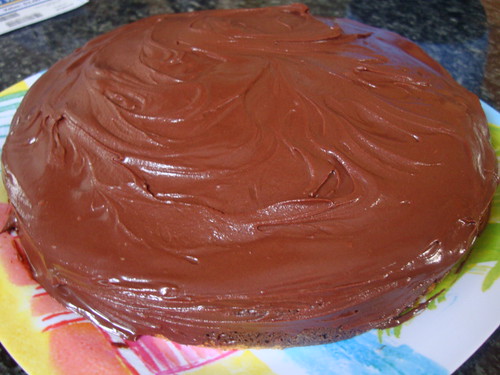
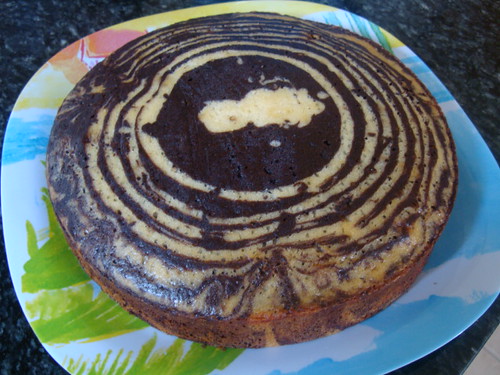
I want to share with you the links and my thoughts about some of my favorite bloggers. Some have become friends, we exchange emails when we want to share private stuff about our lives or just gossip in general. They to me are real people with personality and have things worthy to read about or great recipes to try.

Mommy I'm Hungry

Blogger: Rachelle. Mom/wife with 3 kids. Hugely busy blogger. Tons of giveaway, always sampling products, wide range of recipes. She gets top billing for she was the first to comment on my blog and welcome me into the food blog world. How she balances the products, the cooking, the support of two eldest kids in the racing world. She was smart and got away from playing Cafe World on FB. She and I comment freely on our FB or blog. I admire her yet hate how she throws in my face how beautiful the weather is in sunny Cali. LOL I consider her a friend. You rock Rachelle, not Rachel. giggle.

The Life and Loves of HoneyB
Blogger: Shelby aka HoneyB. Mom of two adult kids. Wife of Grumpy (husband). She was one of the first blogs I started following. I love the range of her blog. She is very connected to many other bloggers. She is open about her husbands likes and dislikes about what she cooks. In my opinion, he is just too picky. She grew up a vegetarian yet eats some meat nowadays. But she always gets back to her veggie roots and makes dishes with Tofu. She is health conscious for the is always seeming to post about a recipe from Cooking Light. I envision a huge bookshelf full of her past issues. She participates in many group cooking blogs, guest blogs, cooks for family occasions and her workplace. She is so very sweet and puts a personal touch in everything. Her food pix are to DIE for perfect!

Once Upon a Gourmet Gin
Blogger: Ginger aka Gin. Mom of a High-schooler and one in college. She is not one I consider a 'rabid' blogger. She too took a leave of absence from blogging as well. She is getting back into the groove of blogging again. Her recipes are wide in variety from ethnic from just plain fun home cooking. We've exchanged emails on the side talking outside the blogs about our family life. We had a cake mix cookie friendly competition frenzy awhile back. I enjoy her blog and friendship.

The Hungry Housewife
Blogger: Leslie. At home Mom of a little girl and boy. Love, love, LOVE her. She does enough videos on her site that I feel kinship to her personality. I feel like if we met we would just talk for hours and laugh our butts off. I hate when she takes the video out to her Tampa Bay backyard and shows us the fabu pool and falls set up. It's nice to have a husband with his own pool/spa business, yes? Leslie is hilarious to hear her tell stories. She is self-deprecating and doesn't care if you judge when she tells how she ate fudge out of the trash. She is skinny and gorgeous with a killer laugh and personality. If I weren't an only child and could have picked a sister....it would be Leslie and we'd be in so much trouble together. She had a brush with the Food Network and came close to being a celebrity but after the visit with Gordon Elliot, and a cooking video...Food Network said essentially they "already had someone like her....called Melissa D'arabian. Ugh. No comparison. Leslie is the shizz! Just you wait. Someone will pick her up and put her on TV....then I can say "hey I used to email her" LOL.

My Tasty Treasures
Blogger: Donna aka FFW (firefighter's wife). This woman is a HOOT. If you looked in the dictionary under the word WILD the definition would be simply: Donna. Her recipes are hearty, easy, kid friendly, appropriate for parties. She often posts a dinner and the dessert/cookie she did with it. Although Donna can be deemed as controversial for people either love her or hate her. Yes, she does get some hate mail on occasion for Donna likes to make her blog....how do I explain this....A sexy food blog. LOL. She does put up some crazy pictures and when people comment loudly how inappropriate that is; (blah, blah, blah) Donna tells them "to get over themselves and don't read her blog if it bothers you." You tell 'em GIRL! I could learn alot from Donna about doing what makes you happy and not to care what others think.

She's Becoming DoughMessTic
Blogger: Susan. Mom of Seven. Not seven children. Her miracle child, Seven. LOL. Susan has been through the wringer in her personal life yet still manages to blog wonderful things. She also caters, and does some amazing cake decorating. SOMEONE HIRE THIS CHICK IN THEIR BAKERY! (however she probably thinks she is busy enough). Kid friendly, baking, meats, salads, candies, cookout fun, all the range is there. Yet she's been around in the blogging world....gone to Martha Stewarts Show a few times (don't ask, lol), gone to conferences, does a kick-A "pantry raid" experience how to budget food and money and keep everyone fed and happy. I think she's amazing despite some marital woes yet I see her as up and coming bigger blogger... Look out for her in bigger places too.

Noble Pig
Blogger: Cathy. Mom/wife/awesome food blogger/new vineyard business owner. I loved reading all the developing stories about Cathy's life upheaval. Her life alone with the boys while her husband was looking for home with appropriate land to start a new life as vineyard-ers. The recipes of yummy, fun or fancy recipes. Sometimes many to choose from for special occasions....the move, the step by step pictures of her land being treed for planting grapes....fast forward to placing orders for wine online now. WOW. She still blogs recipes that I adore yet takes the time to thank new customers for their wine order on FB. Adore her.

OTHER BLOGS I LIKE FOR WHATEVER REASON....

The Cutting Edge of Ordinary
I think I see more of Lisa from Facebook than her blog. lol I enjoy her recipes and crafty ideas. How she posts, her lovely pictures, the recipes; to me, are just warm and fuzzy like a comfy well worn sweatshirt. Her recipes aren't from a box or hoity-toity over the top. They are twisted in just ways that I find fun to read and prepare in my own kitchen.

Orangette:
My cousin sent me the link to her favorite webpage. I had no idea food blogs existed. It started with Molly from Orangette. I checked out some of the links to her favorite food blogs and my gmail reader EXPLODED from there and a year later I started my own blog.

The Pioneer Woman:
The Goddess of food blog world. Her pictorial step by step recipes are INSANE. I have her book. I stood in line and met her at a book signing. She's been on the Food Network on Bobby's Thanksgiving Throwdown. She won. She been all over on local TV new cooking segments. Her food is wonderful. Microsoft contacted her and gave her a separate site just for recipes (Tasty Kitchen.com). Every she touches is so down home- friendly yet she is so grounded almost perfect it seems. She homeschools her 4 kids (only because the school is like close to two hours by bus in the AM and PM-their cattle ranch is remote). Women wish she was your mom, sister, next door neighbor, best friend- yes, she is THAT nice. I love her corny, naughty yet self-deprecating ways.

How to Eat a Cupcake
aka Flour Child Bakery
Sadly this young 24 y.o blogger is too busy to post anymore. She's moved on from yummy postings and funny videos to opening a new bakery with her mom. I am excited that she is located in Virginia Beach. K-man and I have a time share down there and we can't wait for this summer to make a special trip down there to meet Cassie and eats her wonderful goodies. Once she gets settled after a year she will post recipes again.

Girlichef
:
I just love Heather's site. She is all over the place, a smorgasbord of food varieties, an ethnic buffet, a bookstore, a book critic, a cheesemaker.....and the list goes on. She's got over 10 sections to her website and I like to use her recipes and she's part of the reason for my cookbook addiction! Very cool chick....you'll love her too!

Cake Wrecks
Just a fun site from Jen who wanted to post about her irritation for the awful cakes she's seen over her lifetime. It exploded with followers started sending more and more pictures. She's been around so long now the site is almost too big to view in one day and she has her own book now. You will just keep shaking your head over and over with these awful cakes that bakeries are producing. She does NOT make fun of personal cakes people make but the cakes that BAKERS/BAKERIES get paid good money to produce a professional cake. Or NOT. lol

I have tons of blogs on my reader. Of course, I could not post about them all. I have LOTS of favorites but these are my BESTEST faves. Partly because I have some type of connection. We either email and talk personally, have their book, met them....I feel connected to them in some way. I hope I introduced you to a new place for more cooking adventures!

Eat 'em up-

Thursday, January 27, 2011

A slow return to normalcy....

I am attempting to return to blogging in way that works for me. Why did JennyMac disappear into the blogosphere?

1. People send you suggestions saying you should do this or that...the occasional rude anonymous commenter who feels the need to put you in your place...makes you say to yourself at times..."who's page is this?"

2. Taking pictures is NOT the easiest thing to do at times and sometimes you end up eating the evidence. I am not one of those who snap a gazillion pix (how does Pioneer Woman do it?). One before, a few after....served with garnish maybe....OK, now let's eat. Either the recipe is NOT to my liking to post about or something isn't right with the pictures. NOW, the food is gone so retaking pix are impossible.

3. Sometimes lighting is not your friend. Let's be for real. Many of my meals are dinner and it's NIGHT. Natural sunlight is ideal, if my pic doesn't look appealing enough to eat....I don't wanna post something that looks like the cat coughed it up!

4. Then I got into Facebook, I was learning how to use it....finding old friends....getting addicted to some stupid games (first Cafe World then Frontierville....sigh).

5. Being timely....many blogs post about upcoming holidays/events BEFORE it happens. Halloween foods during the first week of October. Thanksgiving dishes two weeks before T-day. Christmas-y cookies and treats after T-day and two weeks after. Let's be for real here. I want my food and gifts to be fresh. I don't make Halloween treats in my classes Oct 1, the kids want it on Oct 31. I give out my holiday food treats a few days before the 25th not Dec 1. I am not into 'trial runs', practice, saving pix to post early for next year, etc.

6. The intimidation of the wonderfully popular and successful blogs out there. The more and more blogs I read or subscribed to, the more and more I felt unworthy. Also, I so envied my fellow bloggers successes. I see all these giveaways they have from companies contacting them, how lucky of them....I don't get that....I had a few here and there....but nothing like those popular bloggers. Bloggers talking about being invited to conferences, meeting up with other bloggers, guest blogging....posts about appearances on TV, etc. It's all so great for them, sucks for me.

After not posting for a bit, no one said anything. No emails, no inquiries....no one seemed to notice I was not posting. I said to myself "well no one saying anything or asking where I went, so don't bother posting anything because no one is reading my blog obviously...." What a vicious cycle I created for myself in my own little blogging world.

Then something snaps you out of it(hopefully?). You FINALLY get one email from a person who says they appreciate and miss your posts. A co-worker tells you they enjoy your blog and suggests a neat tool I should check out and share with my followers.

Bottom Line: I must do my blog because I enjoy it. I am who I am, I do what I do because it's me. No one else matters and I shouldn't set myself up for failure by comparing my blog to others. How many times did we get that lecture about "being yourself" growing up? Clearly I needed a booster shot. So I am going to share what I share only because it's something that works for me, not something that I think would impress the 'public'. BAH!


I made this and it's absolutely easy and so yummy. WHIR in the processor. I was apprehensive to try this for I am not a huge fan of cilantro but the combo intrigued me and POOF! I think perhaps I've turned a corner.....

Jalapeno Pesto1

Jalapeno Pesto
by JennyMac Lipsmack

1 cup fresh Cilantro
3 Jalapeno Peppers
2 Garlic Cloves
1/2 cup walnuts
1/4 cup Parmesan cheese, Shredded
juice of 1/2 lemon
1/4 tsp Kosher Salt
1/4 tsp black pepper
1/4 cup Olive Oil

1. Chop and toast walnuts for a few minutes in 350 oven until kitchen is fragrant (about 5-7 minutes). Set aside to cool.
2. In a food processor put a cup of washed cilantro.
3. Using gloves to cover your hands, slice in half the jalapenos, seed and devein. Remember the heat is from the veins, so do what you need to to do to make it hot or not; be careful or haphazard when removing those veins. Roughly chop and place peppers in food processor.
4. Peel garlic and add it in with the walnuts, lemon juice, Parmesan, salt, pepper in the food processor.
5. Pulse until combined and you don't see big chunks of garlic or whole cilantro leaves.
6. Slowly stream in the olive oil until incorporated.
7. Taste....add more salt, pepper or lemon if needed. Add more olive oil to make it consistency you want. Warm water can be done to keep the fat content lower and yet 'loosen' the mixture up.

THUD, this was beyond my expectations....We ate this during a football game with crackers and cheese but the tortilla chips tasted best. You can use instead of mayo on a sandwich. Top on an enchilada or taco....Add some plain rice vinegar or warm water to make it into a salad dressing. We loved this! I can't wait to try this on grilled chicken. I want to spread this on a roast beef sandwich. I am growing tons of cilantro this summer!

Jalapeno Pesto


Enjoy!

Saturday, November 13, 2010

Easy Crock Chicken

Do you like Beef Stroganoff? Well let me introduce it's distant poultry cousin....It's quite yummy and easy to put together.

DSC02027

Easy Crock Chicken
JennyMac Lipsmack creation

6 skinless, boneless chicken breasts or use a combo of breasts and thighs
1 can cream of chicken soup
1 can cream of mushroom soup
1 can condensed cheddar cheese soup
2 pints sliced mushrooms, sauteed
8oz. sour cream
salt and pepper
1 tsp. garlic powder

Pat dry chicken (either leave whole or cut into cubes....you decide how you like them). Sprinkle with salt and pepper and garlic powder. Place in crock pot. Mix together undiluted soups. Pour over chicken. Add mushrooms that have been already sauteed/cooked. Cook on low 6 to 8 hours. When ready to serve, stir in sour cream. Serve over rice or broad noodles.

Garnish with chopped chives or K-man's suggestion is to add French's Onion Rings on top.
Delish!


Enjoy!

Sunday, November 7, 2010

Bacon Wrapped Jalapenos

Bacon Wrapped Jalapenos
adapted from My Wooden Spoon

15 jalapenos (when cut in half, makes 30)
1 pkg. cream cheese
1 pkg. of bacon each slice cut in half
toothpicks

Cut jalapenos in half and clean out. If you want more heat leave in the veins and seeds. Put as much cream cheese as you can on that half and wrap with a half slice of bacon. Try to cover the open end and the top really good there is less cream cheese leakage;) Stick a toothpick in from the top to bottom to hold bacon in place and prevent rolling up for falling off.

Cook in preheated oven at 350 degrees for about an hour or desired crispiness. THUD! These are freakin' awesome! Thanks Lori!

Enjoy!

Saturday, November 6, 2010

Pumpkin-Apple Gingerbread

Pumpkin Apple Gingerbread Cake

It's Fall, y'all. Have you recovered from Halloween yet? I love this time of the year for pumpkin isn't over and done with as soon as Halloween is gone. It's one of those dual holiday foods. When I was poking around the Pillsbury site I found this recipe that combines the pumpkin and gingerbread....the apple was definitely a bonus but shredded into it into of obnoxious chunks to tear up the cake.

Pumpkin-Apple Gingerbread
adapted from Pillsbury.com

4 cups all-purpose flour
3 teaspoons baking powder
2 1/2 teaspoons ground ginger
1/2 teaspoon baking soda
1/2 teaspoon salt
1/2 teaspoon pumpkin pie spice
1 cup butter or margarine, softened
1 cup granulated sugar
1/2 cup packed brown sugar
4 eggs
1 can (15 oz) pumpkin (not pumpkin pie mix)
1 large green apple, peeled, shredded (1 cup)
1/2 cup molasses
Powdered sugar, if desired

1. Heat oven to 350°F. Grease 12-cup fluted tube cake pan with shortening (do not use cooking spray); coat with flour. In medium bowl, mix flour, baking powder, ground ginger, baking soda, salt and pumpkin pie spice; set aside.
2 In large bowl, beat butter, granulated sugar and brown sugar with electric mixer on medium speed until creamy. Add eggs 2 at a time, beating well after each addition. Beat in pumpkin, apple and molasses. Gradually beat in flour mixture. Spoon into pan.
3 Bake 1 hour to 1 hour 10 minutes or until toothpick inserted in center of cake comes out clean. Cool in pan on cooling rack 15 minutes. Place cooling rack upside down on pan; turn rack and pan over. Remove pan. Cool completely, about 2 hours. Sprinkle with powdered sugar. Serve each slice on serving plate topped with about 2 tablespoons whipped cream if desired.

Cook's Notes:
1. I did not have use the whole can of pumpkin puree. I had some left in a bag in the freezer. It was slightly under. I know that the pumpkin and apple were all about giving this cake the moisture it needed. I added a few tablespoons of apple butter to the puree to make up the 15 oz. to ensure I did not upset the moisture balance. Since there is cinnamon and apple in the cake...I knew it would not change it flavor-wise.
2. My oven temperature gauge did say 350 degrees. Yet I try to always check cakes before the called time (I have a pizza stone and it tends to make the oven hotter). My cake rose GREAT yet was ready shortly after 1 hour. Test your earlier too.
3. This was an awesome cake. Kirk was sad I didn't add raisins...but I am not a fan of raisins like he is and I didn't want it to tear up the cake when I cut it.


Enjoy!

Friday, October 29, 2010

Meaty Orzo Pasta Dish

Meaty Orzo
I absolutely despise jarred sauces. They are full of sugar and other 'stuff'. I am aware of the addiction children get to the sugar in these jars when after my 8th graders made some lasagna with a sauce from scratch a student came up to me and asked if she could have some sugar to put on her lasagna....I about fell on the floor. Absolutely NOT! was my answer to her request. See? You don't think something like jarred spaghetti sauces could feed an addiction to sugar and that was your proof. I had a similar request when I my first year of teaching when a High-Schooler asked to put sugar on the chili they made. THUD.

Here is a fun, meaty pasta dish with sauce from scratch and it's not difficult or lengthy to make.

Meaty Orzo Pasta Dish
by JennyMac Lipsmack

1 lb bulk Italian Sausage
10 large meatballs, cut in half (leftover or from frozen convenience bag)
1 pint sliced mushrooms
1 medium onion, chopped
2 Tbsp. olive oil
2 cloves garlic, minced
1- 29 oz canned diced tomatoes
1- 6oz can tomato paste
1 cup chicken or beef broth or water (more may be needed)
2 Tbsp. Italian Seasoning (or any combo of basil, oregano, thyme, rosemary and parsley)
salt and pepper to taste
1/2 cup orzo
fresh Parmesan

In a large skillet or pot. Brown the sausage, halved meatballs with the onion and mushrooms in the oil. Add the minced garlic and seasonings. Pour the canned diced tomatoes over the meat mixture. Add the tomato paste and meat broth. Stir carefully to incorporate the paste into the broth. Salt and pepper to taste. Let meaty sauce cook for 10 minutes. Mixture should still look watery. Add orzo (it will need a watery sauce to absorb). Cook for 10-12 minutes, stirring every so often to move the orzo around. Keep an eye on the sauce if it's looking dry add 1/2 cup more of broth at a time as needed. This dish/pot can also be baked if desired. Serves 4.

Serve in bowls with freshly grated parmesan (you can put shredded mozzarella on it if you baked the dish). Great with crusty garlic bread!

The effort to put this sauce together was minimal and much better than a jarred sauce. Less chemicals in a can of tomatoes than a jar of sauce too!

Buon Appetito!

Thursday, October 28, 2010

Yukon Gold Breakfast Hash

Yukon Gold Hash1

Perfect for a lazy Sunday morning, great for early Saturday that is hearty enough to carry you through a busy Saturday of errands or even ideal for one of those 'breakfast dinners' during the week.

I like using Yukon Gold potatoes for they are not as starchy as the russet variety and are quite 'velvety' when cooked.

Yukon Gold Breakfast Hash

6-8 small Yukon Gold Potatoes (or 3-4 medium)
6-8 slices of thick bacon, cooked and crumbled
half an onion, chopped
1/4 cup pepper, chopped (I used jalapenos from the garden)
salt and pepper to taste
4 eggs
1 cup colby jack cheese, shredded
minced chives for garnish

Wash potatoes and microwave for 6-10 minutes until soft (time depends on size and amount)
In large ovenproof skilled, cook bacon and drain on paper towels. Keep bacon fat in skillet and add chopped pepper and saute onions until soft/clear. Preheat oven to 350 degrees (or later cook on stove top, your preference). Coarsely chop potatoes with skins and put in skillet. Keep breaking up potatoes until resembling hash and mixing the bacon fat around them. Salt and pepper to taste.
Press potatoes into pan and use spoon to make four 'divots' or dents in potato hash where eggs will go. Crack eggs into custard cup and gently put into each 'designated divot/dent'. Place in hot oven and cook until eggs are starting to set up. Sprinkle on crumbled bacon and top with cheese. Place back into oven until cheese is melted.

Cut the circle of hash into 4. Making sure there is one egg in each quarter. Garnish with chives and serve with fruit! Oh the smell!

Yukon Gold Hash

Crispy bottom, velvety creamy potatoes, crunchy smoky bacon, runny egg, gooey cheese. THUD! All the senses are being hit. AWESOME way to start a day! Loved it!

Enjoy!

Wednesday, October 27, 2010

Chicken and Mushroom Rotini

Chicken and Mushroom Rotini

You saw that beautiful roasted chicken yesterday? Here is it's leftovers! Don't ya just love that. Sliced Roast Chicken one night....totally different chicken the next!

Chicken and Mushroom Rotini
by JennyMac Lipsmack

2 cups leftover cooked chicken
1 package fresh sliced mushrooms
half onion, chopped
drizzle oil
3 Tbsp. butter
3 Tbsp. flour
1 cup leftover chicken broth
1 cup cream
Half package rotini pasta
chopped chives for garnish

Cook pasta according to directions, drain and set aside.
Saute onions and mushrooms with drizzle of oil until cooked. Add butter and melt, add flour. Cook for about a minute until flour starts to smell 'nutty'. Slowly add chicken stock and cream. Stir until thickened. Add chopped/shredded leftover chicken. Mix in cooked pasta.
Garnish with chopped chives.

Easy leftover chicken dish, you'll love it. We did!

Tuesday, October 26, 2010

Sage and Garlic Chicken

A roasted chicken cooking in our house just makes me want to float in the air instead of walking...come to think of it...so does bacon, cookies, fresh bread, tomato sauce. Ok get a hold of yourself Jenny, clearly you love food smells.

Sure I like the ease of boneless chicken parts to cook with mostly but on the weekend I can appreciate the slow roasted chicken when I have more time to spend on preparing it and cooking it.

Sage and Garlic Roasted Chicken
by JennyMac Lipsmack

1 whole chicken roaster
handful of fresh sage, finely chopped (my last from the garden)
2-3 garlic cloves
2-3 Tbsp olive oil
2-3 Tbsp vinegar
1 onion quartered
8-10 whole carrots, washed and peeled

Wash and peel your carrots and line your roasting pan with them. Your chicken will cook on top of them. Unpackage your chicken and be sure to read the directions how long per pound. Don't totally rely on those pop up timers! I've have them not POP before. Be sure to remove the 'chicken stuff' on the inside of you chicken. Dry off chicken and thoroughly salt and pepper it all over inside and out.

Grind up your sage, garlic and olive oil and vinegar in a blend, food processor or mini food chopper (just perfect). Rub mixture under skin, over skin and inside chicken. Place quarter onions inside chicken. Bake in a preheated oven @ 350 degrees.

BEFORE:
Sage and Garlic Roasted Chicken
*I know this picture does not depict how the carrots were instructed to be used in the recipe but after a few attempts, the recipe above rendered more tender and tasty carrots. This picture was attempt number one....I preferred attempt #2's carrots.

AFTER:
Sage and Garlic Roasted Chicken1

I know I should have trussed or tied my chick's legs together, but oh well I figured she'd endured enough animal cruelty! LOL. I made this one afternoon for dinner and something came up and didn't get home in time to cook it. It was great to pop into the oven the next day, already to go. The garlic really was infused throughout the chicken....so juicy too. Don't forget to let your chicken sit for about 10 before carving to let the juices redistribute!

Great lazy Sunday dinner choice!

Sunday, October 24, 2010

Goya Product Tastemaker

Would you like some Black Bean and Jalapeno Rice on the side?

Black Bean and Jalapeno Rice

I received from the Foodbuzz Tastemaker Program some FREE Goya products. YUM! Since I live in diverse area some stores here have a pretty large Goya section. They have many interesting products that I have not used before and when I signed up to take part in the Tastemaker they sent me nothing scary to use. I received a can of black beans, garbanzo beans (chick peas), yellow rice, green olives, olive oil and two recipe booklets highlighting Mexican and Carribean recipes. I noticed in the book the also had two booklets on Central and South American recipes. DRAT, I would have liked those books instead for most of my students come from those areas. I guess that is what the Goya site is for!!! LOL There I found the section for Central America and found a recipe for pupusas. This food item is HOT at our school. Parents bring them in for food events, trucks come to sell them on special events and my students bring them for cooking projects. The pupusa is loved by all -especially the 'gringos'. LOL. Great, I've been waiting for a good recipe!

Enough small talk and onto the recipe. For my recipe, I decided to use:

Black Bean and Jalapeno Rice1

There were no recipes for any 'bean' and rice mixture side dishes. I guessing that the Hispanic culture are purists and like their beans separate from the rice (I am guilty of when I go to Mexican places I mix my refried bean and rice sides together). Not me I am a rebel! Instead of jazzing up the beans with spices and making a rice side plain; I added plain beans to the rice that was seasoned already and jazz it up with the last of my jalapenos from my garden!

BEFORE COOKING NOTE:
Two questions need to be answered before you approach this recipe.
How do you want your peppers?
1. Hot and Spicy, Zingy or Mild?
2. Crunchy or Soft?

Cooking Approach to those answers:
1. The heat depends on the chopping process. If you want them HOT. Just chop off the stems and chop. All the heat is in the veins and seeds. But cooking them will also reduce the 'caliente' scale as well.
2. If you want them with some crunch, stir them in at the end before serving. If you want them 'par cooked' stir them in the rice when they are sitting for the 5 minute rest. If you want them soft: Cook the peppers with the rice.

Now proceed....

Black Bean and Jalapeno Yellow Rice
by JennyMac Lipsmack

1 box Goya Yellow Rice
1 Tbsp Goya Olive Oil or butter
1 can Goya Black Beans
half an onion, chopped
jalapenos (you decided how many you can handle)

Read the instructions on how you want to prepare your rice. Stove Top or microwave. I like the microwave option for I don't have to babysit it and can do other things. Plus, I think this rice comes out PERFECT from the microwave.

Chop your onion, big or small chunks, your preference. Stir the onions, oil or butter, and water with the rice and follow your cooking directions. 5 Minutes on High and 20 minutes on 50% power. Devein and/or chop jalapenos (see below)Open black beans, drain and rinse. When rice is ready the last direction asks you to let the rice 'set' to absorb last of moisture. Stir in beans and peppers and cover for five minutes. Serve with chicken and garnish with freshly chopped cilantro.

To remove the heat from jalapenos:
1. Put on gloves. I have not worn gloves and washed hands several times...washed hair the next morning and still found some "heat" under my nails!
2. Slice one side off pepper from stem to tip. This first slice should be shallow enough to cut off the "meat" of the pepper, leaving the vein with the seeds inside. One quarter turn the pepper and repeat the cut. After the third cut you will have all the seeds and most of the veins on the remaining quarter. Remove stem and use gloved finger to scoop out veins and seeds. Either julienne cut your quarters or finely chop.

Again, THANK you Foodbuzz and Goya. Those of you interested in more Latino Flavor to your recipes definitely hit up Goya's site....very user friendly and authentic recipes easy to follow.

Delish!

Monday, October 18, 2010

Buttermilk Biscuits

I love biscuits!

Buttermilk Biscuits

Breakfast, lunch, dinner, snack....whenever....buttery, jammy, sandwichy....I am not picky. I guess I got the biscuit bug from my grandmother who used to make them all the time. Many biscuit recipes use just plain milk but I really think the buttermilk really makes them tender.

I troll around the food blogs and Cathy from Noble Pig always seems to get me off my butt to try her recipes. Even a biscuit recipe when I've made millions of biscuits by now. I was intrigued by Cathy's tips and the use of cake flour made it different enough that I wanted to give them a try.

Basic Buttermilk Biscuits
Discovered on Noble Pig and she made from Cuisine at Home

1-1/2 cups all-purpose flour
2 teaspoons baking powder
1/2 teaspoon table salt
1/4 teaspoon baking soda
1-1/2 cups cake flour
5 Tablespoons cold vegetable shortening, cubed
4 Tablespoons cold unsalted butter, cubed
1-1/4 cups buttermilk
2 Tablespoons unsalted butter, melted

Preheat oven to 450o F. Line a baking sheet with a silicone baking mat or parchment. Whisk together all-purpose flour, baking powder, salt and baking soda in a bowl; set aside. Pulse cake flour, shortening and cubed butter in the bowl of a stand mixer with the paddle attachment until fats are pea-sized flakes. Mix in all-purpose flour mixture just until blended. Add buttermilk to dry ingredients and mix just until moistened. To avoid overmixing the biscuit dough, stop when the ingredients are just moistened. Even though the dough is wet, don't add more flour, that leads to overmixing.

Turn dough onto a floured surface and knead just until dough holds together. Do not overwork it. Flour your hands to keep the dough from sticking before patting dough into a 1" thick circle. Using a 2" thick biscuit cutter, cut dough into 10 biscuits. Pull cutter up without twisting, as you remove. Twisting results in jagged edges on the biscuits.

Transfer the biscuits to prepared baking sheet and bake until golden, 15-18 minutes. Brush tops with melted butter during last few minutes of baking.

Buttermilk Biscuits1

Cathy's Tips & Tricks for High-Rise Biscuits

-For bigger rise, place any tools, especially the stand mixer bowl and paddle into the bowl, into the freezer for a few minutes before mixing to ensure the fats won't melt until they are in the oven.

-Patting the dough into a circle compresses it less than rolling it with a rolling pin, giving you a loftier biscuit.

-Use a sharp biscuit cutter to cut your biscuits. The sharp edges don't seal the sides thus promoting rising . Juice glasses and tin cans trap air and compress biscuit dough, sealing the sides and reducing rise.

-Excess flour on the tops and bottoms can make the biscuits seem dry, brush off any excess flour from both sides before baking.

-You can reroll the dough once (you'll need to) and still yield tender biscuits. To do so, brush any flour from the scraps and gently fold the dough back together before patting into a circle.

Buttermilk Biscuit

I made mine a bit 'blonde' for I wanted to be able to put them in the freezer and reheat when I needed a biscuit fix, not wanting to over cook them. These were fabulous. The cake flour really made the delicate. Give these a try. Thanks Cathy!

Enjoy!

Saturday, October 16, 2010

Smoky Jalapeno Cheesesteak

Welcome Back! Where you been? Haahahahahaha. No long story what I've been up to....just stuff. Sometimes you just aren't feelin' it. I've felt my cooking at home either was not worthy to blog about or the camera battery was dead when I had something fabulous made. It's always something, right?
Right.


Regardless....today fun sandwich is:


Smokey Jalapeno Cheesesteak
by JennyMac's Lipsmack
makes 2 large sandwiches or 4 average

Sandwich Rolls/Hoagie Rolls (per person)
6 layers of Steak-Um meat or slivered beef (about 1/2 pound)
1 onion thinly sliced
6 jalapenos, deveined/seeded and julienned
Smoked Cheese

Slice onions and peppers and saute in pan until soft. Slice beef into strips and add into onion mixture until beef is no longer pink (take just a minute or so).

Prepare your rolls by heating them up in the oven (if you desire a crusty roll). Slice cheese thinly. Slather on the mayo. Put meat into "mayoed' rolls top with cheese. Serve with your favorite chips -hope your mouth is big enough!

Cooks Notes:

1. The smoked cheese is not something you will find in the grocery with all your other cheeses. This cheese I found at a Farmer's Market. It was actually a Smoked Horseradish Cheese....yummy. BUT normally when a recipe calls for a smoked cheddar I have to go to the section of the grocery when I need Saga Brie, Manchego or Guyere cheeses. Look for it. Today I noticed they had a smoked Guyere right next to the smoked provolone and mozzarella. Wow, they are increasing their stock! It shouldn't be too hard to find. These smoky cheeses are also great on burgers for it tastes like you have bacon on it....when you
don't!

2. As for jalapeno....don't be scared to use this and opt for the plain bell pepper. The heat of you sandwich is directly related to how well you remove the seeds and the veins in the pepper. This is your source of heat. When I am feeling crazy for some heat I just slice them up without regard...and also don't forget the cheese on your sandwich is also your saving grace. Any dairy is the antidote to pepper pain!


Sunday, August 29, 2010

Blueberries and Cream Cookie and Ponderings

Ok, so it's been awhile since I've posted....I am really taking my summer off seriously. A vacation from everything? Including my lil blog?....apparently so. Don't worry, back to work on Monday and School after labor day and back to blogging.

Blueberry and Cream Cookie

So I get the new Bon Appetit magazine this month. I see that some of the most popular recipes from Momofuku Milk Bar are being included. I can't rip through the mag fast enough....is it in here?...really?....drat no. I was looking for the coveted Compost Cookies everyone tries to copycat but what I did find is Christina Tosi's of Milk Bar popular Blueberry and Cream Cookies. I am open to a fruit cookie now and then...it helps balance out all the chocolate ones I seem to make most often.

I'd also seen this recipe from on my 'cookie of the day' email from Martha Stewart and had contemplated it (K-man loves blueberries!). But here is the pondering...

Are you like me and when you see a recipe that has a lot of steps... OR seems too complicated OR takes too long (overnight) - you lose interest in it? I am not the total 'easy breezy' cook here now. "Gimme a can of soup and cook five minutes....Bang -I am there".....NO, not quite. I like the happy medium recipes. But if it doesn't have a final picture to suck my interest in....and a long list of ingredients, too many steps I find that I put it off 'for some day' and I never come back to it. Does that ring any bells for you too?

So, it's my last hurrah for the summer. My time will be tight again. The lady of leisure's last laborious recipe for the summer. Yes, I know baking cookies in the summer does not seem appealing but we've been blessed with my last week of leisure with days in the 80's so I jumped on the opportunity...(next week will be back in the 90's when I am in an overly a/c'ed school all day)

The low down here is; the creator Christina Tosi was an odd duck growing up. She ate lima beans with ranch dressing. Doritos with miracle whip. Kraft's Mac and Cheese mixed with spaghetti-O's. Yes, the very one who created the compost cookie with pretzels, potato chips, coffee grounds and a other wacky things. Although her taste as a child was somewhat gross she developed into an risk taking/avant garde type of baker, that clearly WORKS.

I've included the original recipe as supplied by Bon Appetit, followed by Martha's recipe although it is 'tweaked' it is HALF of the recipe shown here. After the recipes is my review and more pix.

Blueberry and Cream Cookies
from Bon Appetit Magazine by Christina Tosi/Momofuku Milk Bar/NYC

2 cups (4 sticks) unsalted butter, room temperature
1 1/2 cups sugar
1 1/2 cups plus 2 tablespoons (packed) golden brown sugar
1/2 cup plus 2 tablespoons light corn syrup
2 large eggs
5 1/4 cups all purpose flour
2 teaspoons baking powder
1 teaspoon baking soda
1 teaspoon coarse kosher salt
1 1/2 cups Milk Crumbs (see below)
1 1/2 cups dried blueberries

Preparation

Combine butter, both sugars, and corn syrup in large bowl of stand mixer fitted with paddle attachment. Beat on medium-high speed until fluffy and pale, occasionally scraping down sides of bowl, about 3 minutes. Add eggs; beat on medium-high speed until mixture is very pale and sugar is completely dissolved, about 10 minutes. Add flour, baking powder, baking soda, and salt; beat on low speed just until blended, occasionally scraping down sides of bowl. Add Milk Crumbs; mix on low speed just until incorporated. Remove bowl from mixer. Stir in blueberries just until evenly distributed (dough will be very sticky).

Using 1/4-cup ice cream scoop for each cookie, drop dough onto 2 large rimmed baking sheets. Cover with plastic wrap and refrigerate at least 24 hours. DO AHEAD Can be made 2 days ahead. Keep chilled until baking time.

Position 1 rack in top third and 1 rack in bottom third of oven and preheat to 375°F. Line 2 large (18x12-inch) rimmed baking sheets with parchment. Transfer 6 chilled dough scoops to each sheet, spacing at least 4 inches apart (cookies will spread). Bake cookies, 2 sheets at a time, until golden, reversing sheets halfway through baking, 20 to 22 minutes total. Repeat with remaining chilled dough, cooling and relining sheets between batches. Transfer cookies to racks; cool completely. DO AHEAD Can be made 3 days ahead. Store in airtight containers at room temperature.

Milk Crumbs

3/4 cup nonfat dry milk powder
1/2 cup all purpose flour
3 tablespoons sugar
2 tablespoons cornstarch
3/4 teaspoon coarse kosher salt
6 tablespoons (3/4 stick) unsalted butter, melted

Preparation of Crumbs

Preheat oven to 275°F. Line large rimmed baking sheet with parchment. Combine milk powder, flour, sugar, cornstarch, and coarse salt in medium bowl; toss to mix evenly. Add butter; stir with fork until clusters form. Spread mixture evenly on prepared sheet. Bake until crumbs are dry and crumbly but still pale, about 10 minutes. Cool Milk Crumbs completely on sheet. DO AHEAD Can be made 1 week ahead. Store in airtight container at room temperature.

~~~~~~~~~~~~~~~~~~~~~~~~~

Blueberry and Cream Cookies
inspired by Christina Tosi of Momofuku Milk bar but recreated by MarthaStewart.com

2 1/2 cups all-purpose flour
1/4 teaspoon baking powder
1/8 teaspoon baking soda
2 teaspoons salt
1 cup (8 ounces) Plugra European-style unsalted butter (please! regular will work here....sheesh)
1/2 cup plus 2 tablespoons granulated sugar
1/2 cup plus 2 tablespoons light-brown sugar
1/4 cup glucose (duh-corn syrup, why does MS gotta be all extra fancy?)
1 large egg
3/4 cup dried blueberries
1/2 cup plus 1/3 cup Milk Crumbs

Directions

1. Line two baking sheets with parchment paper; set aside.
2. In a large bowl, mix together flour, baking powder, baking soda, and salt; set aside. In the bowl of an electric mixer fitted with the paddle attachment mix together butter, sugars, and glucose until well combined. Add egg and mix until well combined.
3. Add flour mixture and mix until well combined. Add blueberries and milk crumbs and mix until well combined. Using an ice cream scoop about 2 1/8 inches in diameter, scoop dough into balls and place about 2 inches apart on prepared baking sheets.
4. Preheat oven to 375 degrees. Transfer baking sheets to refrigerator until dough is chilled, about 15 minutes. Transfer baking sheets to oven and bake, rotating pans halfway through baking, until cookies are golden brown and tops begin to crackle, about 15 minutes. Transfer cookies to a wire rack to cool.

Milk Crumbs

1/4 cup plus 1 tablespoon nonfat milk powder
2 tablespoons all-purpose flour
1 tablespoon cornstarch
1 1/2 teaspoons sugar
1/8 teaspoon salt
1 1/2 tablespoons unsalted butter, melted
1/4 cup white chocolate, melted

Crummy (lol) Directions

1. Preheat oven to 225 degrees. Line a baking sheet with parchment paper; set aside.
2. In a medium bowl, whisk together 2 tablespoons plus 1 1/2 teaspoons milk powder, flour, cornstarch, sugar, and salt. Stir in melted butter until well combined. Spread mixture on prepared baking sheet and transfer to oven. Bake until dried and crumbly, 8 to 10 minutes. Remove milk crumble from oven and let cool completely.
3. Transfer milk crumble to a large bowl and fold in remaining 2 tablespoons plus 1 1/2 teaspoons milk powder and white chocolate. Use immediately or transfer to an airtight container and keep refrigerated until ready to use.


Cook's Notes:
1. Very surprised and happy with the results. I am glad I exerted the effort.
2. Crunchy edge....soft and chewy center. Those dried berries were working hard in that fridge by soaking up some of the moisture and were plumper and juicier than the ones I was snacking on while making the dough!
3. Recipe says makes 35...I got 37. I am sure it's because I added more blueberries near the end when I noticed less blueberries in the dough.

Blueberry and Cream cookie dough

4. Really watch when you are baking the crumbs...keep them light...keep mixing them to brown evenly. Stay by that OVEN!
5. If you don't have a oven thermometer, get one, you really need to make sure your oven is 375 degrees, no more, no less. Just two minutes extra (by accident) and I felt the cookies were overly brown.

Blueberry and Cream Cookies
6. As you can see, don't squeeze any more than six. The recipe says 1/4 cup ice cream scoop (your standard one probably in your drawer).
7. Bon Appetit says from Christina to sit in fridge for 24 hours yet Martha's says 15 minutes chilled. I made some later that evening and this morning. It rendered the same result. I am not sure if 15 minutes would be enough. But one trial cookie being baked wouldn't hurt.

Blueberry and Cream cookie dough2
8. I included Martha's recipe only because I thought her 'tweak' using white chocolate in the crumbs was worth trying the recipe again. Good that her recipe is HALF the amount. I baked half of these cookies and put the other half in the freezer. These are THICK, chewy and hearty cookies. One will suffice unless you are REALLY starving. I like cookies that satisfy with eating ONE.
9. Very milky, creamy, buttery really. With two sticks in the recipe of course it's buttery. A nice change from what we normally have for cookies here. I felt it was worth the effort and time. Yummy cookie, give it a try for yourself.

Enjoy!

Wednesday, August 11, 2010

Zebra Cake

Zebra Cake with Ganache

I bet you are dying to see what lurks under this yummy chocolate ganache. What does a Zebra Cake look like? Before I give you the recipe I wanted to ask you something. Have you tried any baking using the WEIGHT method versus VOLUME (using measuring cups)? Baking is definitely a science that can be unforgiving if your measuring is off. Get a little heavy handed with the flour or scoop it wrong and it won't rise alot or it's too dry/dense. I will tell you get a little scale from Bed Bath and Beyond (about 20-30 bucks) and use it. I've done it a few times and wished all my recipes were in weight form....so much easier. Give it a try?

Zebra Cake
from King Arthur Flour/Baker's Banter

1 cup granulated sugar
4 large eggs
1 cup milk (whole, 2% or 1%)
1 cup vegetable oil
1 teaspoon vanilla
2 cups King Arthur Unbleached All Purpose Flour
2 teaspoons baking powder
1/4 teaspoon salt
3 tablespoons Double Dutch Dark Cocoa

or if you'd like to weigh it out.....

7 ounces granulated sugar
4 large eggs
8 ounces milk (whole, 2% or 1%)
7 ounces vegetable oil
1 teaspoon vanilla
8 1/2 ounces King Arthur Unbleached All Purpose Flour
2 teaspoons baking powder
1/4 teaspoon salt
3 tablespoons Double Dutch Dark Cocoa

Directions

1) Preheat the oven to 350°F. Lightly spray a 9" x 2" round baking pan with cooking spray. Line the bottom of the pan with a circle of parchment, and spritz again. Set the pan aside.

2) In the bowl of your mixer, blend the sugar and eggs until lightened, about 2 minutes. On low speed blend in the oil, milk and vanilla until well combined and smooth.

3) In a separate bowl, combine the flour, baking powder and salt. Whisk to remove any lumps. Add the dry mixture to the wet ingredients. Combine on medium speed 1-2 minutes or until the batter is smooth and lump free. Be sure to scrape down the bowl halfway through mixing.

4) Remove 2 cups of the vanilla batter and place it in the measure you used for the liquid ingredients. Sift the cocoa over this batter, and stir well to combine. Be sure to use a sifter to avoid cocoa lumps in the batter.

5) Now for the stripes. Spoon about 3 tablespoons of vanilla batter into the center of the cake pan. Next, spoon 3 tablespoons of the chocolate batter into the center of the vanilla batter. This causes the vanilla batter to spread out. Continue to alternate batters, in bulls-eye fashion until all batter is used. You will now have thin rings of each batter on the outer edges of the pan, thicker rings towards the center.

6) Bake the cake in the center of the preheated oven for 40-45 minutes, or until the cake is lightly browned and a toothpick inserted into the center comes out clean. Cool the cake in the pan for 10 minutes, and then turn out onto a wire rack to finish cooling. Frost as desired.

Zebra Cake

Chocolate Ganache
from allrecipes.com
  • 1 cup semisweet chocolate chips
  • 2/3 cup heavy whipping cream
  1. In a heavy saucepan, melt chocolate chips with cream over low heat. Remove from the heat. Refrigerate, stirring occasionally.
  2. For a pourable ganache, cool until mixture reaches 85 degrees F-90 degrees F and is slightly thickened, about 40 minutes. Pour over cake, allowing some to flow down the edges to completely coat. Spread ganache with a spatula if necessary to evenly coat, working quickly before it thickens. Chill until set.
  3. For spreadable ganache, chill until mixture reaches a spreadable consistency. Spread over cake. Chill until set.


    Zebra Cake with Ganache
Keep the amounts of each chocolate and vanilla mixture as exact as you can. For you can see that I had more chocolate mixture left and it upset the 'balance' of the stripes. I guess I could have just stopped and didn't put the extra in. But I figured K-man will be so wowed over the stripes (so would your cake eating guests) that it probably wouldn't be noticed. Very fun....easy to do in one pan....Yummy too! The ganache was perfect!

Enjoy!

Sunday, August 8, 2010

Almond Joy Scones

Almond Joy Scones3

I don't know about you but every so often I really like the coconut, almond and chocolate combination. Just like some people like the chocolate/peanut combo....Or my favorite the sweet/salty pairing as in chocolate covered pretzels. I saw a recipe for a coconut scone and I tweaked it up like one of my favorite candy bars. You can certainly leave out the almond paste or the coconut to restyle it your own way too.

Almond Joy Scones
JennyMac Lipsmack creation

2 cups all-purpose flour
1/3 cup sugar
1 teaspoon baking powder
1/4 teaspoon baking soda
1/2 teaspoon salt
8 tablespoons unsalted butter, frozen
1/2 cup toasted coconut
1/2 package chocolate chips
1/4 cup almond paste
1/2 tsp. coconut extract
1/2 cup milk or cream
1 large egg
1/2 package chocolate chips, melted

1. Adjust oven rack to lower-middle position and preheat oven to 400 degrees.
2. In a medium bowl, mix flour, 1/3 cup sugar, baking powder, baking soda and salt. Grate butter and almond paste into flour mixture on the large holes of a box grater; or use your fingers to work in butter (mixture should resemble coarse meal), then stir in chocolate chips and coconut.
3. In a small bowl, whisk milk/cream, coconut extract and egg until smooth.
4. Using a fork, stir sour cream mixture into flour mixture until large dough clumps form. Use your hands to press the dough against the bowl into a ball. (The dough will be sticky in places, and there may not seem to be enough liquid at first, but as you press, the dough will come together.)
5. Place on a lightly floured surface and pat into a 7- to 8-inch circle about 3/4-inch thick. Use a sharp knife to cut into 8 triangles; place on a cookie sheet (preferably lined with parchment paper), about 1 inch apart. Bake until golden, about 15 to 17 minutes. Cool on cooling rack.
6. Melt remaining 1/2 package of chocolate chips and stir in oil until smooth. Drizzle chocolate on cooled scones. Serve when chocolate is set.

Almond Joy Scones1

Yummy! I think these would have been better with the mini chocolate chips....but the regular is what I had on hand.

Almond Joy Scones2

Although the first picture appearing on this post looks luscious with the chocolate drizzle. It took longer to cool and was not so easy to store. I think they are good with or without the drizzle buy easier to store and tote around for a snack without the drizzle. Regards....delish!

Enjoy!

Saturday, August 7, 2010

Baked Zucchini Chips

Baked Zucchini Chips

We had mini chicken salad sammies for lunch today. Instead of having chips the side (whether they were the evil or BAKED ones) I decided to make a different kinda chip. Here's a fun treat I made. Take advantage of zucchini while it is the summer bounty and make something to eat that you don't have to feel guilty about. Here is the solution. Crunchy outside, soft inside and you can dip it in anything you want! I've included some shortcuts to make it easier.

Baked Zucchini Chips

One large zucchini or two smaller ones
large ziploc bag
approx. 1/3 c. flour
2 eggs
dash hot sauce
seasoned salt (I used Paula Deen's House Seasoning)
pepper to taste
about 2 cups Panko
few shakes of canola or olive oil

Preheat oven to 375 degrees.

Prepare breading station:
1. Put flour in ziploc flour and add a "fingersful" of salt and pepper. Seal and shake.
2. Beat 2 eggs in bowl and mix in few dashes hot sauce.
3. Place panko in something like a pie pan and also season with salt and pepper. Mix
4. Line cookie sheet with nonstick foil.
5. Arrange each in a line in the order as prepared with the cookie sheet last.

Slice zucchini into 'coins' about 1/4 inch thick. Place into flour bag and shake until all coated.

Remember to keep one hand sticky (from flour to the egg) and the other hand dry (panko to cookie sheet)

Take about 2 zucchini from the bag, place them in the egg and keep flipping them over until the egg soaks into the flour. Sticky hand puts zucchini slice on panko....Dry hand grabs more panko from pan and places it on the zucchini coin and press. Dry hand flips over coin and puts on more panko and PRESS. Turn 'coin' on its side so loose panko can fall back into pan. Place on cookie sheet. Season with salt and pepper again.

Repeat until all zucchini is coated and on cookie sheet. Drizzle a little of oil on zucchini and into between 'coins'. Bake until lightly brown (approx 10 min.). Turn over and drizzle a bit of oil again and bake another 10 minutes.

Baked Zucchini Chips1

So delish. I dipped mine in a little bit of green goddess dressing. Great side dish, snack or appetizer. Much easier to eat than a half one baked. WE loved it. Give it a try!

Enjoy!

Tuesday, August 3, 2010

Spice Cake Mix Cookies

Sometimes other people in our lives move us to do something. I was wanting to make these spice cake mix cookies for two reasons.

1. K-man LOVES spice 'anything' especially with raisins. He also loves maple. I combined all these favorites of his in a cookie so he'd be very happy. However, summer time is not when we associate 'spicy' baked goods. We tend to think of fall or winter or the holidays for that kinda stuff. I didn't really care about that kinda like wearing white after labor day.

2. I have a friendship with a fellow food blogger. Ginger from Once Upon a Gourmet Gin, she is just a casual blogger just like me....nuthin' ferocious. One thing that we had in common was our love to create new cookies from cake mixes. I swear we both were chugging out like 1-2 a month for awhile there. I think we may have 20 creations between us. Anyhow, Gin has not been blogging lately but devoting more time with her family rather than blogging and I miss her. I made this cookie as a shout out to her. Miss ya Girl!

So if baking cookies NOW in the heat is not your thing....or the spice part of it is a turn off during the summer then perhaps print this out to use when you ARE in the mood for a soft spice cookie. Okay? Good. Let's commence the cookie goodness.

Spice Cake-Mix Cookies
JennyMac Lipsmack Creation

1/2 tsp. rum extract (substitute any extract you prefer)
1/2 cup raisins
very hot water
1 box spice cake mix
sprinkle of cinnamon
2 eggs
1/2 cup vegetable oil
1 tsp vanilla extract
1 cup powdered sugar
few drops maple extract
1 Tbsp. maple syrup
variable milk (approx 1 Tbsp)

Preheat oven to 350 degrees. Place raisins in a small bowl, cover with hot water; stir in rum extract. Let soak to 'plump' while you prepare the mix.

In a large bowl place the cake mix and sprinkle some extra cinnamon to your liking. Mix. In a short drinking glass, beat up the two eggs, extract then the oil. Pour into cake mix and combine.

Pour off hot water from raisins. Take your hand and squeeze the excess water and put the raisins into the cake mixture. Stir well.

Drop by Tablespoon (or small cookie scoop) onto parchment covered cookie sheet. Bake 12 minutes.

Prepare the frosting in a small bowl. Add powdered sugar, a few drops of maple extract and 1 Tbsp. maple syrup. Mix. Use milk to achieve the perfect consistency. Not too stiff not too soupy. Add drop by drop if need be. Set aside until cookies are cool or slightly warm.

Do not glaze cookies right out of oven or you will have more frosting on the counter than the cookie....

Frost cookies with approx 1 tsp of glaze. Swirling spoon around to form a small circle. Gravity will take care of the rest.

Moist, cakey, spicy, chewy....I tasted one for quality control. The rest go to K-man....I am a chocolate girl.

Gin, here's to ya! I've not forgotten about you my friend and cake-mix buddy!

Here is a link to my cake mix labeled cookie posts and Gin's Most Lemony Cookie of all time.

Enjoy!