Monday, August 10, 2009

When you got cucumbers coming out of your ears...


You make Pickles!

I found this on FoodPhotoBlog which took me to The Hungry Mouse. Perfect, no CANNING!


Look at the 'bit' pictorial step by step, then the recipe will follow:


Wash and dry your pickling cucumbers. If you get them from your own garden, don't let them grow to full size before you cut them off the vine.


Slice them to your pickle slice size.


Put a layer of cucumbers and salt. Repeat.


I used a colander to layer my sliced cucumbers with salt. I wanted the water to drain off, not for them to be soaking in their own salty water.


Zingy Bread and Butter Pickles
adapted from The Hungry Mouse

4 large pickling cucumbers

1 cup unseasoned rice wine vinegar

1 cup water

1/3 cup white balsamic vinegar (I used Chili Pepper Vinegar)

6 Tbsp. sugar

1 tsp. kosher salt (for the cukes) + 2 Tbsp. kosher salt (for the brine)

1/2 tsp. mustard seed

1/4 tsp. celery seed (or ground celery seed)

1/4 tsp. ground tumeric
1 Tbsp. dried red pepper flakes
Makes 4 - 5 cups of pickles (liquid + pickles)

Prep the cukes:
  • Wash them well under cold water and pat ‘em dry. Nip off each end with a sharp knife and discard. Then cut each cuke into slices.
  • Make the slices as even as you can, toss them into a medium-sized bowl and sprinkle with 1 teaspoon of kosher salt.
  • Mix them around to distribute the salt.
  • Let the cukes sit like this on the counter for one hour. This helps to draw water out of the cucumbers, which will help them stay crunchy when they’re pickled.
  • After about an hour, you should have a fair amount of water in your bowl. Drain the sliced cukes and discard the liquid.
  • Layer the pickles in a bowl.
Make the brine:
  • Put the rice wine vinegar, water, and white balsamic vinegar in a medium-sized pot. Add the sugar and 2 tablespoons of kosher salt.Whisk to combine. Set the pot on the stove over high heat.
  • Cook, whisking occasionally, until the sugar and salt completely dissolve.
  • Leave the mixture on high heat. Toss in the mustard seed, celery seed, and tumeric. Whisk the mixture occasionally, and cook on high heat until it comes up to a boil.

Assemble the pickles:

  • When the mixture boils, take it off the heat. Pour it over the sliced cucumbers.
  • Let the pickles cool uncovered until they reach room temperature.
  • Then cover them with plastic wrap and pop them in the fridge overnight.
  • The next day, they should be have developed a deeper yellow color and a fairly intense pickle-y flavor.

Tomorrow your pickles are ready to eat. Keep them in the fridge for a few weeks, if they last that long.

Serve and enjoy!

Thanks Hungry Mouse! Enjoy-

Sunday, August 9, 2009

Don't forget to eat your bowl!

Gotta like a bowl you can eat after you eat your morning eggs...


My last post I made the Artisan Bread. With my second portion of dough that I baked into bread, I cut it in half buttered it and put my breakfast in it.

Here's the recipe:

Breakfast Bowls

Butter
Fresh veggies you want in your eggs (I chose, pepper, onions and tomatoes)
Cheese Slices
Eggs

1. Slice your small bread loaf in half....butter it generously.

2. Chop all your veggies that you want into your egg scramble. Put a pat of butter in the pan and saute them.

3. While your veggies are cooking, scramble your eggs, season with salt and pepper.

4. When your veggies are ready, pour in your eggs and scramble gently.

5. Lay a slice of cheese in your bowl, pile on your egg scramble and top with a cheese slice.

This certainly can be done with smaller rolls and served as a brunch item too!

K-man's eyes lit up when I served this to him. He loved it, so did I and it was fun to tear and eat the bread as you gobbled up your veggie, cheesy eggs!

Enjoy!

Saturday, August 8, 2009

Better Than Store Brand for SURE!

There are a few bloggers out there who've made their own pop tarts.

Although I appreciate making homemade dough, etc. I wanted something easy and to use up the prepared pie crust I had in the freezer.

Seeing this recipe on Chez Pim got me started...So if you want the old school version to make your own pop tarts...click on her link. If you want an easier way...continue reading.


K-man's favorite condiment is orange marmalade. You see all types of filling for those poptarts but no orange filled ones.


Until now....


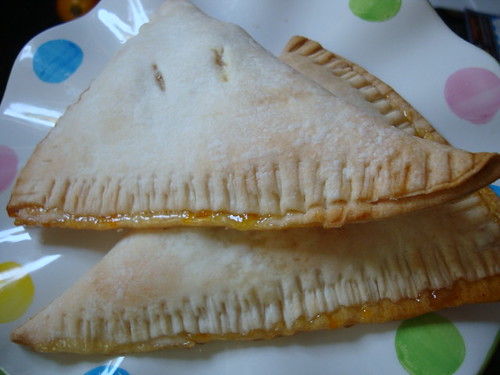
Orange Poptarts

1 prepared pie dough, to room temperature
1/4 c. orange marmalade
1 small can of mandarin oranges, drained

Preheat your oven to 400 degrees.

In a small bowl, put in your mandarin oranges and use a spoon to break them up a bit. Stir in your orange marmalade. Set aside.

Roll out your dough a bit more on parchment paper. Carefully cut your dough into quarters. Spoon your marmalade mixture onto half of the triangle (envision you folding the large quarter in half to make a narrower triangle) After all the quarters have their fillings, fold them over and use a fork to crimp the edges. (Chez Pim cut all her edges to make them neater...I didn't feel the need)

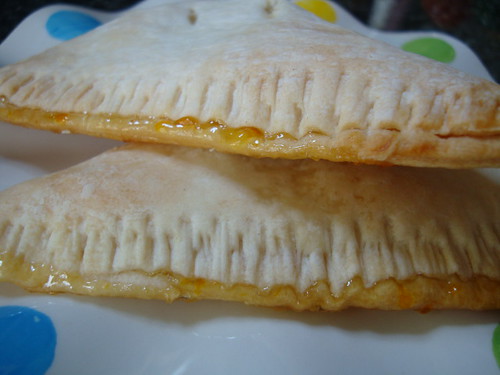
Take a pair of scissors and clip a small vent on the tops or your edges will ooze filling (like mine, I didn't make my cut deeper enough with my knife)

Bake for 18-20 minutes. Check after 15 just in case. Bake until golden brown.


Simply yummy!


These were even better with a little chocolate drizzled on top!


K-man was dancing around when he got his own personal orange "hand pie"!


Enjoy!

Friday, August 7, 2009

I have a weakness...

For onion rings!

When we go out to burger places or other restaurants that have onion rings on the menu....It's either the appetizer or on the side (K-man loves them too and we always share!) But as you are enjoying the crunchy, onion-y goodness...you just don't want to think about the amount of fat they absorbed in the cooking.

We've gotten the frozen ones for home cooking and those just aren't not good enough. We've also tried doing the "baked thing" to something like the potato fries....sure they are healthier but they just don't get crunchy enough. Then I found this recipe...tried it and OH MY GAH! KEEPER!

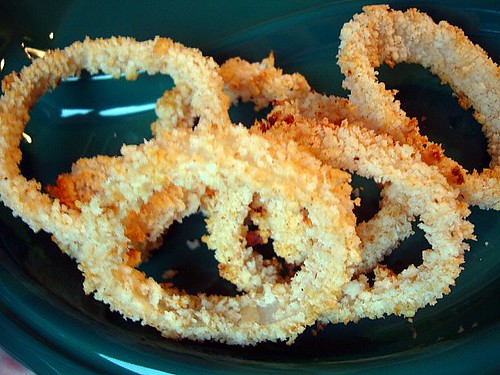
Baked Onion Rings
adapted from Martha Stewart's Everyday Food

2 cups Panko Bread Crumbs (they used crushed cornflakes and plain breadcrumbs)
1/2 cup low-fat buttermilk
1/4 cup all-purpose flour
1/8 tsp cayenne pepper
1 Tbsp Chili sauce (the sweet Asian type- you can use tabasco)
Coarse salt and ground pepper
1 medium sweet onion, such as Vidalia, quartered crosswise and broken into rings
2 tablespoons olive oil


1. Preheat oven to 400 degrees. Put the flour and black pepper in a ziploc bag. In a medium bowl, whisk together, buttermilk and Asian hot sauce. Prepare a shallow dish with your Panko seasoned with salt and cayenne.

2. Dip a few rings in the flour in the ziploc bag, then dip into the buttermilk (letting excess drip off) and dredge in panko. Place onion rings on cookie sheet covered in non-stick foil. The original recipe called for some oil on the bottom of the cookie sheet, I skipped it. With this special foil....it did NOT need it!

3. Bake @ 400 for 20 minutes. Or until the rings are golden brown.

AWE-some, so crunchy, you gotta put your hand underneath your chin. The onions were PERFECT. Not mushy or still raw. One onion was perfect for two.

Enjoy!

Thursday, August 6, 2009

Appetizer Memories Restyled


When I was younger we went to the restaurant Bennigan's a lot. It was new to us at the time and the food was pretty decent. One of things I remember loving was their broccoli bites appetizer. It was a deep fried ball with chopped broccoli, oozy velveeta like cheese and bread crumb outside. Crunchy on the outside and gooey cheese on the inside. It was healthy cuz it had broccoli in it, right? HA! That was my rationale back then. Now I know better. I haven't had those in a long time...boy I'd kill for one now.

In reading two blogs, I kinda made this up from their influence. Eating Well...living Thin had a broccoli and cheese quiche bite recipe. Girlichef yesterday was making a recipe with broccoli and she HAD to go and say "choppin' brocco-lay" (visions of Dana Carvey singing in my head now) and today she used some phyllo (delish looking maple walnut tartlettes!) So I got to thinking....I have some broccoflower and some phyllo and cheese...hmmmmmmm.

This is what I came up with....

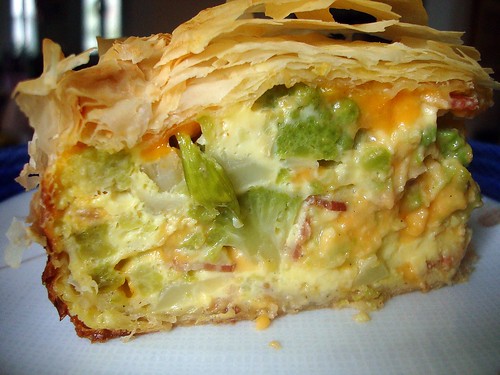
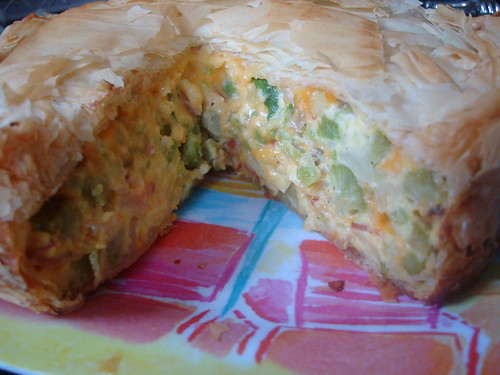
Broccoli and Cheese Phyllo Pie

1 head of broccoflower, cut into 'florettes'
4 eggs
8 strips of bacon, cooked and chopped
1/2 tsp. salt
3 T. flour
1 cup milk
2 Tbsp of mayo (I used this since I was using skim milk)
1/4 cup green onions, chopped
dash of cayenne
1/2 tsp. pepper
1/2 lb smoked cheddar cheese, shredded
1/2 package of phyllo dough sheets (1 of the 2 cylinders in the box), at room temperature
6-7 Tbsp butter, melted (you may or may not be heavy handed with this)

Preheat your oven to 350 degrees.

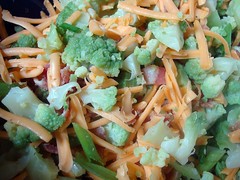
Put your broccoflower in a pot with a enough water to cover and cook for 5 minutes. Drain and set aside. In a large bowl put your chopped bacon, green onions, shredded cheese, mix well.


In a medium bowl put your eggs, salt, peppers, flour, mayo and milk beat well. I used an immersion blender for the mayo tends to 'seize in little pieces from the cold milk. The immersion blender made it all smooth.

Unroll your phyllo dough and cover with a damp paper towel. Either grease your 8 inch springform pan with cooking spray or melted butter. Uncover your dough and remove two sheets of phyllo (replacing the damp towel) and lay into your springform pan. Take your pastry brush and coat it with butter. Making sure the phyllo 'sticks' to the sides. Rotate pan a bit and repeat with two more layers and butter. Keep rotating and layering and buttering until you have quite a thick 'phyllo' nest. Roughly about 3/4 of the roll. Since there are 20 sheets to a roll and you are putting down 2 layers at a time; this will be about 14-16 sheets)

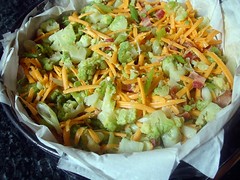
Since your broccoli is cool now, roughly chop it and mix it in with the bacon and cheese mixture. Put the broccoli/bacon/cheese mix into your phyllo nest and gently pat down. Remix your egg mixture (pepper and flour may settle a bit) and pour over your broccoli mixture.


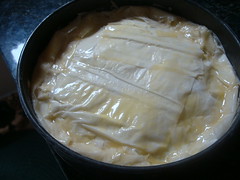
Take your remaining phyllo sheets and put on top 2 layers at a time coating with butter in between. Roll your over hanging edges with the phyllo sides to create a 'crust edge'. Brush top with butter.


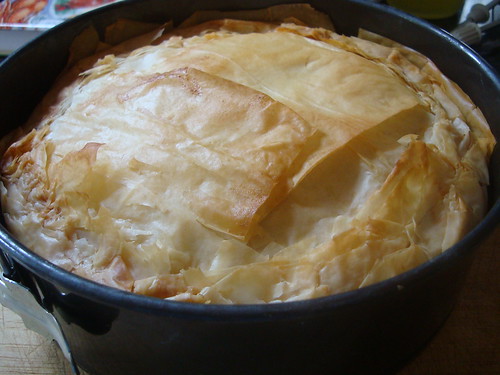
Bake in 350 degree oven for 1 hour and 15 minutes. You may need to cover the phyllo after an hour to keep it from overbrowning. Let sit 15 minutes before cutting (you don't want everything to ooze out on you).


Be careful cutting very gently so you don't MASSACRE your phyllo dough. Use a serrated knife and gently saw. When you get to the bottom where the phyllo is more thick....you don't have to be so gentle.


I tell ya, the smokey cheese, soft yet still firm broccoli and the bits of bacon. This is ON POINT! Granted there is no bread crumb coating....but the crunchy phyllo worked.

Don't be afraid of working with phyllo. Like riding a bike...the more you work with it, the more comfortable you get. For example when I was putting the layers on the bottom....I didn't worry about any tears or total even coverage of butter. I knew once the filling was in....it was all good. This was a total risk from fusing two ideas....and man, it paid OFF!

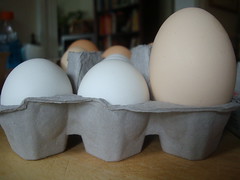
BTW, as I was making this with eggs....thought I'd show you this...

Notice anything? Does the Sesame Street song "one of these things doesn't belong here" come to mind?

My neighbor gives me some farmer's market 'rejects' every so often. By law, the farmer can't sell 'double yolked' eggs apparently? I know I've gotten plenty of them in 'store bought' eggs before...but these eggs must be laid by ginormous chickens. I laugh when I get them for I can't put them in my egg carton with the others. Here was Big Bird's baby picture next to regular birds....LOL


Enjoy!

Wednesday, August 5, 2009

Summertime in a little cake

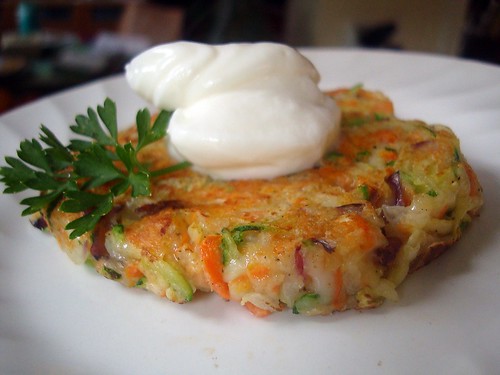
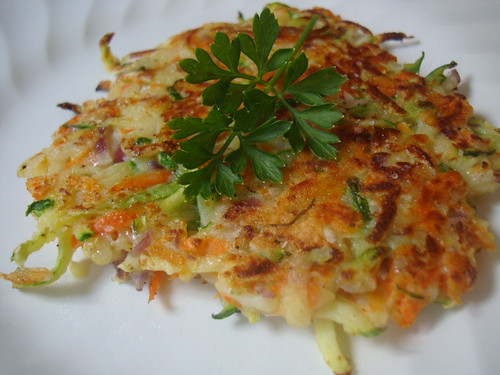
Such freshness in a little cake. Shredded zucchini, onions and carrots. Great snack or side dish.


Vegetable Cakes

1 Medium sized Zucchini, shredded – approx. 3 Cups
1/4 to 1/2 Cup red Onion, finely chopped
1/2 Cup Shredded Carrots (cook with a little bit of water in the micro to take off a bit of the crunch)
1/4 Cup Flour
1/2 tsp Baking Powder
1/2 Cup Shredded Parmesan
1 Lightly Beaten Egg
1/4 tsp. salt

Put the zucchini in a dish towel and squeeze dry. Put aside in a large bowl. Squeeze onions in towel and put on top on zucchini pile. Lastly pile the carrots in the towel and squeeze dry as well. Do not do these together for the colors may bleed into another. Put the remaining ingredients in and mix it all together.

Heat up your non-stick frying pan to medium to high heat. Using a 1/4 cup measuring cup as a guide scoop out patties and cook about 3 minutes on each side or until lightly browned.
You may have to use some oil if your pan is nonstick. I didn't need any oil.


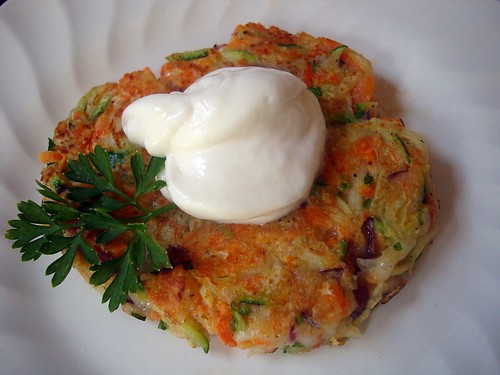
If you take the turner and gently form the patties' edges they will look like the above picture. But if you flatten out your 'cakes' with the turner, they will look like this:

Either way, taste the same. Go for whichever cake you like. Lightly brown and they are cooked. So yummy with a little sour cream. Perfect little guilt free side dish to your summer grilled steak!

Enjoy!

Tuesday, August 4, 2009

I can eat my plate too!

In all honesty, I have never used tostada shells. Taco shells, yes. Tortillas of all size and flavors, zillions! I have seen them on the menu in the restaurants, never felt compelled. But it's all Cathy's fault that I succumbed. I saw here recipe and said "alright, I am going to do this"

Grilled up some chicken and some veggies, made a sauce and piled it on the tostada shells. They were awesome.

Grilled Chicken Tostadas with Cilantro sauce
inspired by Cathy of Noble Pig

Grilled Chicken Breasts, cut into chunks or torn into pieces
Grilled Vegetables (onions, pepper, tomatoes)
Sliced avocado
Prepared cilantro sauce (below)

Slather on a little olive oil, season with salt and pepper and grill your veggies along by your chicken. Remove off grill and cut into pieces, set aside.

While you are waiting for the chicken to finish make your sauce:

Cilantro Sauce

1 cup light sour cream
1/4 cup light mayonnaise
1/4 tsp. cumin
1/4 tsp Chipotle chile powder
1/2 tsp. salt
1/2 tsp pepper
chopped cilantro to taste (I am not a huge fan of cilantro but it's growing on me....I suggest you add it lil by lil and taste until it is how you like it. Cilantro can be a bit overwhelming sometimes)

Mix in all your ingredients in a small bowl.


Chop all your fixins' Pile them onto your tostada shell. Top with chicken grill mixture with the cilantro sauce. Place an avocado slice on top.

Oh my, the smokey goodness. Chicken so tender, the soft veggies, onions with a slight crunch. The smooth avocado mingling with the cumin and cilantro sauce. I couldn't get over how the tostada stayed intact with every bite. Not like some taco shells that fall apart after one bite. Awesome. Thanks Cathy, for the inspiration!

Enjoy!

Monday, August 3, 2009

Swagger on over here!

I printed this recipe out awhile ago, you know for when you are in the mood or for when you have all of the ingredients to make it....or when you remember you actually have the recipe. LOL The latter was my reason. But it was HoneyB from The Lifes and Loves of Grumpy's HoneyBunch that brought it to my attention originally. She's a baking fiend I tell ya. I envy her energy. She must share ALOT at work. LOL


Swag Bars
adapted from MyRecipes.com aka Cooking Light

1 3/4 cups creamy peanut butter
3/4 cup sugar
3/4 cup light-colored corn syrup (I used the reduced sugar version)
1 1/2 cups (6 ounces) chopped lightly salted, dry-roasted peanuts (I used half unsalted peanuts to cut down on the salt)
3 1/2 cups (4 ounces) whole-grain flaked cereal (such as Total), finely crushed
Cooking spray (nonstick foil worked great)
1/3 cup (2 ounces) chopped dark chocolate

1. Combine first 3 ingredients in a heavy saucepan over medium-high heat. Cook 4 minutes or just until mixture begins to boil, stirring constantly. Remove from heat; stir in peanuts and cereal. Spread mixture evenly into a 13 x 9–inch baking pan coated with cooking spray or the nonstick foil.

2. Place the dark chocolate in a small microwave-safe bowl. Microwave at HIGH 1 minute or until chocolate melts, stirring every 20 seconds. Drizzle chocolate evenly over peanut mixture. Score into 36 bars while warm.

Nutritional Information

Calories: 155, Fat: 9.2g, Fiber: 1.5g


This is what these swag bars taste like. The peanut chew candy. Peanutty and chewy on the inside....dark chocolate on the outside. Of course the candy is enrobed in dark chocolate....the swag is only 'topped'. Regardless, the taste is the same and so luscious!

Enjoy!

Sunday, August 2, 2009

Which is worse?

The cinnamon breadsticks that you get from your favorite pizza delivery spot or...


the ones your local grocery chain makes so you can make them at home?


Let's compare our options....


*Ring-a-ling*

Hello?
I'd like to order some cinnamon bread sticks to be delivered.
Okay.
My phone number is 202-555-1234
Your location is 1600 Pennsylvania Ave?
Yes.
Would you like to add some pizza or chicken wings to your order?
Nope.
Do you need some soda with your cinnamon sticks?
No. How much will that come to?
If you order two medium pizzas you can get your cinnamon stick for half price.
Thank you but no. What is my total?
4.90
How long will that take?
30 minutes ma'am.
Thank you
*Click*


Or, you throw the store bought ones in your cart. Unpack. Rip open. Follow directions.


*Bing* Eating Cinnamon sticks


Don't they look awesome? I could have snipped my corner of my icing packet to make my icing lines a little thinner.


Looks good but...

Now to taste.

Sad.

My monkey bread recipe with canned biscuits tastes more buttery and crusty from the cinnamon sugar.

We all know that making our own dough from scratch is much better but let's admit....sometimes we just need/want to cut a few corners.

Bottom line don't buy these pre-made jobbies.

But here's a corner cutter for you...

I found on the web from CD kitchen their recipe for the copycat CinnaStix. Here it is:


Domino's Copycat CinnaStix
from CDkitchen.com

Ingredients
:

***Sticks***
1 package refrigerated pizza dough (or your favorite recipe)
1/4 cup melted butter
1/2 cup sugar
2 teaspoons cinnamon


***Icing***
1 pound powdered sugar
1 tablespoon milk
1 tablespoon melted butter
1/4 teaspoon vanilla extract


Directions:
Preheat oven to 350 degrees. Roll out pizza dough into a large rectangle. Brush melted margarine over dough. In a small bowl combine sugar, and cinnamon, mix well. Sprinkle the cinnamon and sugar mixture liberally over the pizza dough. Slice the dough into either long sticks, or cut dough in half, and then slice into smaller sticks. (The smaller sticks are easier to handle.) Place on an lightly greased cookie sheet and bake for approximately 15 minutes or until done.

While the pizza sticks are cooking mix together the powdered sugar, milk, melted butter, and vanilla. Mix until smooth. You may need to add an extra teaspoon of milk. Serve icing with sticks.


Mmmmmm, so much better with a more buttery taste. I like having the crunchiness of the sugar on it. The one from the store only gave like 2 Tbsp. and it was so pulverized that it seemed flat on cinnamon flavor. And the icing....what a difference when you make your own. Their vanilla 'flavoring' just is awful. Even though this still uses 'convenience' dough, this recipe is 100 times better in taste!

Enjoy!

Saturday, August 1, 2009

Summer Bounty issues...

Did I tell you why I don't have zucchini this summer?

It's because I have cucumbers!

You ASSUME that when that little stake says 'zucchini' in the pot, it is. I know veggie plants mostly and when you buy your seedlings from the nursery at the beginning of spring....certain plants have similar leaves.

Zucchini and cucumber plant babies are pretty similar....

I also know enough about growing veggies that zucchini plants grow concentrically or from the middle and the cucumber grows out laterally in one long line. That stakes in it that said "Zucchini", I have the proof. I did not have success with my cucumbers last year (it grew crazy big along up my deck and produced not one cuke) so I purposefully grabbed a zucchini plant this year....Or so I thought.

As my little plant started to grow.....with a long lateral vine (and the lil curly grippers)....I said "oh crap, someone mixed up the tags and I have a FREAKING cucumber, NOT a zucchini. Dang it!

Well, I am happy to say....that cucumber plant doesn't disappoint...(see my future post on pickles! LOL) So I have to buy my zukes from the store or farmer's market this year....oh well. We also have tomatoes coming out of our ears.....so putting some zucchini and tomatoes together...

Zucchini and Tomato Bake


3 zucchini, sliced (the original recipe called for 6 zucchini but I felt that was too much)
1 cup chopped tomato, seeds and juice removed, pat dry
3 eggs, beaten
1 cup mayonnaise
1 small onion, diced
1 cup grated Romano cheese
1/4 teaspoon ground black pepper
1 pkg. buttery round crackers, crushed
2 tablespoons butter, melted

1. Preheat oven to 350 degrees. Spray a 9x13 baking pan with cooking spray (I just lined mine with nonstick foil).
2. Place sliced zucchini in a large saucepan. Pour in enough water to cover, and bring to a boil over high heat. Boil until barely tender, about 2 minutes. Drain and set aside. Seed and chop your tomatoes, drain off liquid and pat dry.
3. In a large bowl, whisk together eggs and mayonnaise until smooth. Stir in onion, cheese, and pepper. Fold in squash and tomatoes, then pour mixture into prepared baking pan.
4. Add melted butter to crushed crackers. Mix well. Sprinkle zucchini mixture with crushed crackers.
5. Bake in preheated oven for 30 to 40 minutes, until middle of casserole is no longer moist, and springs back when gently pressed.


Right after it came out of the oven....I know this is for dinner...smells to good. I am having some now!


This was about an inch high. 6 zukes would have made this too thick I think.


Here's what I saw.....Zucchini was not watery still had some resistance, not mushy.


Here's my bite. Crispy buttery ritz crackers, tender zucchini, sweet tomato, creamy cheese filling (kinda like a quiche)


I went back for another piece. Ok, now my dinner is ruined. No wait. That was my dinner. Looking like hot dogs for K-man's dinner!


Enjoy!