Tuesday, June 30, 2009

I'm backkkkkkk.....

Ahhhh, such a lovely picture to remember our trip by.....although getting a beautiful picture like this has it's price.....Getting up @ 6:30 am ain't pretty! It was our last morning at Va Beach and I wanted sunrise pic (so nice and easy to get sunset pix in Cali, huh?). But when you are getting up from a totally dark room and open up the door to the balcony and that SUN is a painful slap to those retinas!!! Such a nice week of relaxation....sun, breezes, shopping, music and not cooking was so bizarre. As I am getting excited to get back to my foodie fun..............

I take my first picture.....BEEP! "No space remaining in memory stick" WTH? I always delete my pictures after I post them. I don't store my pix on the cam...that's what FLICKR is for....grrrrrrr. Oh well, a few wonderful creations will have to be repeated.....(snap of fingers)DRAT! LOL.

So I was forced to play around with my camera (which I am still getting used to) to see what is the major deal here. I figured out that there is ANOTHER area on the memory stick that you have to delete all your pictures from. GEEZ. (head slap) I guess that is a safeguard for any inadvertent picture deletion, eh? Oh well, it's all good now. Now I have room for 632 more photos!!!! YAY!

Lastly, after you return from vacation, there is the unpacking, the general adaption of getting back to your routine and opening up my RSS reader? OMG! Either I subscribe to too many blogs or you guys were busy this week. SHEESH! Um, this wasn't the type of 'summer reading' I thought I was going to be doing!!!

See you guys tomorrow!

Saturday, June 20, 2009

I am being stalked....

by my calendar....


THIS has been looming over me for the past month. Every time I checked something on my free calendar I got from Betty Crocker.com awhile back THIS luscious thing has been shouting at me...."MAKE ME! Come on....I know you wanna!"

Since we are going on vacation tomorrow I wanted something yummy to take with us. So I made these tonight.


Peanut Butter Truffle Brownies
from Betty Crocker.com

Brownie Base
1 box (1 lb 6.5 oz) brownie mix
(Water, vegetable oil and eggs called for on box)

Filling
1 stick butter, softened
1/2 cup creamy peanut butter
2 cups powdered sugar
2 teaspoons milk

Topping
1 cup semisweet chocolate chips (I used the dark chocolate I had on hand)
1/2 stick of butter

1. Heat oven to 350°F. Grease bottom only of 13x9-inch pan with cooking spray or shortening. (For easier cutting, line pan with foil, then grease foil on bottom only of pan.)

2. In medium bowl, stir brownie mix, water, oil and eggs until well blended (I added about a 1/2 cup of mini chocolate chips to the batter.) Spread in pan. Bake 28 to 30 minutes or until toothpick inserted 2 inches from side of pan comes out almost clean. Cool completely, about 1 hour.

3. In medium bowl, beat filling ingredients with electric mixer on medium speed until smooth. Spread mixture evenly over brownie base.

4. In small microwavable bowl, microwave topping ingredients uncovered on High 30 to 60 seconds; stir until smooth. Cool 10 minutes; spread over filling. Refrigerate about 30 minutes or until set. For brownies, cut into 9 rows by 4 rows. Store covered in refrigerator.

Definitely peanut butter cup on CRACK! Moist fudgy brownie underneath the creamy peanut butter. K-man loves peanut butter cups....he is going to be soooooo surprised when I pull these out!

See you all in a week.....we are off to Virginia Beach...I am going to see if I can find where Cassie (from How to Eat a Cupcake) lives and see if she will make me something....I will trade for these brownies!

Thursday, June 18, 2009

Restylizing your fun meal...

My post has multi-purposes....

a) I went to the farmer's market two weeks ago...I really needed to get rid of the tons of green onion I still had left. We are going on vacation in a few days and I didn't want to think of what I was going to come back to if I still had green onions left....

b) It was our last day of school today and I wanted to have a fun meal to celebrate.

c) We had multi types of bread (also wanting to use up)and I could use it in a fun way using this recipe....

d) I got this idea from Big Red Kitchen and thought I could use it with my adaptions to fit all the above!

White Castle-ish Sliders and Hamburger Dogs
adapted from Big Red Kitchen

2 lbs of ground beef (80% for flavor purposes)
1/2 cup dried onion (but I used 1-1/2 cups fresh chopped green onion)
1 Tbsp. minced dried garlic
1 Tbsp ground black pepper
salt to taste (approx 1-1/2 tsp)
cheese slices of your choice
pickles
ketchup
mustard
buns (slider buns, hot dog buns, evil biscuits)

Preheat oven to 400 degrees

Line your small cookie sheet or 9X13 pan with onion (of choice)


I didn't know they grew red/purple scallions. I figured since I was using fresh onions...I'd use the dried garlic as seen here!


Press your meat onto onions and season with salt and pepper on top.


Yes, Plenty of pepper. And look at those hearty flakes of kosher salt!


Bake for 25 minutes


Blot with paper towel


Layer cheese slices and let melt. (Sorry forgot to snap this pic....we were hungry.)

Cut burger into pieces to fit your bun of choice. (I got about 15 squares plus one 'hotdog' length) Here is the onion side in case you were wondering....


Assemble on buns with pickle, ketchup and mustard


Angelic ...................................and the......................................Evil

Now you KNOW after my last post with my evil biscuits....this biscuit was IDEAL for a slider....burger with bacon and cheese built in? PERFECTION!

I also cut the beef to make:


Hamburger Dog

Of course no burgers would be complete with out Fries!

But we eat Sweet Potato Fries here! We love them! We put our newly purchased bacon salt on these...yummy!

Making sliders the 'white castle' way was so easy, fun and very tasty! I highly recommend making yours this way. Thanks Robin Sue for the idea!

So did you check out that platter in the beginning of the post? K-man loved this meal so much that he ate the Hamburger Dog, an Evil Slider and 3 of the regular sliders (and 2/3 of the fries)!!!! For me, one slider was perfect and after a handful of fries...that last evil slider was very tough to finish! K-man is excited about tomorrow's lunch of the same meat between two toasted pieces of rye bread.....a kinda "patty melt."

Wednesday, June 17, 2009

Evil Biscuits!

I got this neat cookbook called Small Batch Baking. I wanted this book specifically for that reason. I just didn't want all the leftovers we have all the time it seems. So each recipe makes one little cake or 2-3 biscuits, 2-3 cookies. Perfect for a couple. When I saw the following recipe I said no way we could only have 2 of THESE biscuits! How ironic, right?

So getting back to the title, what makes these biscuits evil....bacon isn't THAT bad. Many biscuits are made with butter and you can bump up the richness by using heavy cream. Um, well, this recipe also uses the BACON GREASE! That constitutes EVIL to me. Since I am already making these biscuits evil, I am going for heinously evil by adding cheese. I suggest wearing rubber soled shoes while making these biscuits in case of lightning strikes!

Rustic Bacon Biscuits
increased in size from Small Batch Baking by Debby Maugans Nakos

12 slices of bacon
3 cups flour
3 tsp. baking powder
3/4 tsp. baking soda
1 tsp. salt
3 Tbsp saved bacon grease, frozen
6 Tbsp of cold butter (if just plain bacon biscuits)
or 3 Tbsp butter with 1 1/2 c. shredded cheese)
1 -1 & 1/2 cups cold heavy whipping cream (the extra 1/2 is to be added little by little if your dough seems dry)

Cook bacon until crisp. Drain on paper towels. Pour 3 Tbsp of bacon grease in a small bowl and freeze it until the drippings are solid, 10-15 minutes. Finely chop the cooked bacon and set it aside.

Place rack in the center of the oven and preheat the oven to 450 degrees.

Sift the flour, baking powder, baking soda and salt into a bowl. Scoop out the bacon drippings by teaspoonfuls and drop them onto the dry ingredients. Add the butter pieces. Cut the dripping and butter into the flour mixture with a fork by dragging the tines of the fork through the flour, pressing the tines to the bottom of the bowl, until the remaining lumps are no larger than small peas. Toss in the chopped bacon. Pour the cream over the mixture, and toss lightly with the fork just until the dough begins to hold together. Use the remaining 1/2 cup cream to drizzle in if necessary to make the it hold together as a soft dough.

Flour your hands, and lightly knead the dough in the bowl, 5 or 6 times. Lightly flour a cutting board, place the dough on it, and pat the dough out to form a rectangle 1/2 inch thick. Cut out biscuits with a 2-1/2 inch round cutter. If you wish, form the scraps into 'free-form' biscuit.

Place the biscuits on parchment paper on the baking sheet. Bake until the biscuits are golden, 10-15 minutes.

Remove the baking sheet from the oven and serve hot or warm.

K-man just LOVED these! Well, he really liked them but when I cooked an egg and sandwiched it in one of these bad boys and sent them with him to work....then he LOOOOVVVVEEDDDD them. I am sure you can imagine his coworkers looking at their fast food breakfast sandwich and then his and being very envious!

Wednesday, June 10, 2009

Did you know?

These were sent to me awhile back...pretty cool or pretty lame? I thought I'd share some with you if you have the time to 'experiment!'

Bananas-
Peel a banana from the bottom and you won't have to
pick the little 'stringy things' off of it. That's how the primates do it.

Take your bananas apart when you get home from the store. If you leave them connected at the stem, they ripen faster.

Cheese-
Store your opened chunks of cheese in aluminum foil..
It will stay fresh much longer and not mold!
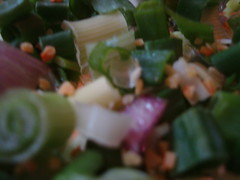
Veggie stuff-
Peppers with 3 bumps on the bottom are sweeter and better for eating.
Peppers with 4 bumps on the bottom are firmer and better for cooking.

Add garlic immediately to a recipe if you want a light taste of garlic and at the end of the recipe if your want a stronger taste of garlic.
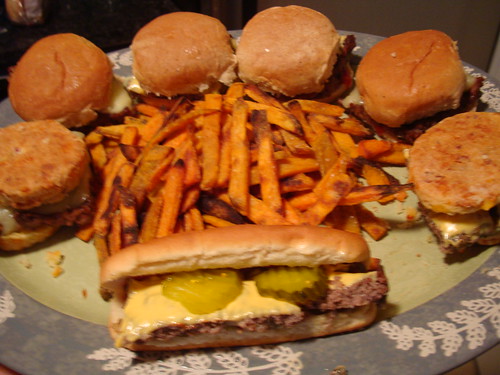
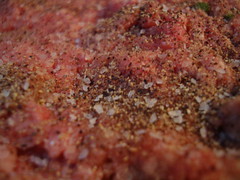
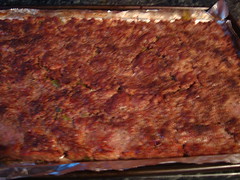
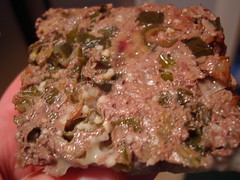
Meats-
Add a teaspoon of water when frying ground beef.
It will help pull the grease away from the meat while cooking.

To really make scrambled eggs or omelettes rich add a couple of
spoonfuls of sour cream, cream cheese, or heavy cream in and then beat them up.

Easy Deviled Eggs
Put cooked egg yolks in a zip lock bag. Seal, mash till they are all broken up. Add remainder of ingredients, reseal, keep mashing it up mixing thoroughly, cut the tip of the baggy, squeeze mixture into egg. Just throw bag away when done easy clean up.
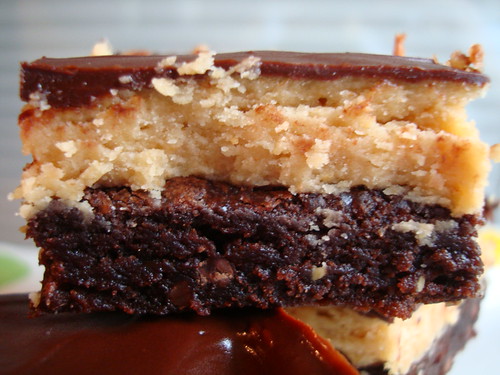
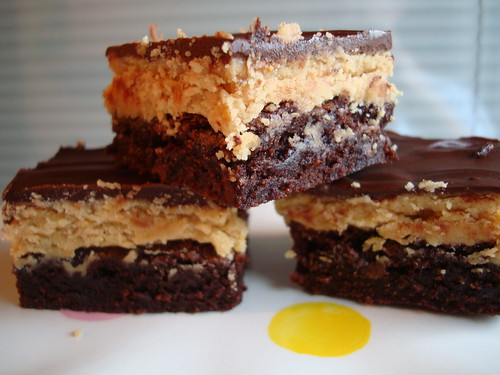
Sweets-
For a cool brownie treat, make brownies as directed. Melt chocolate mint patties
in double broiler and pour over warm brownies. Let set for a wonderful minty frosting.

Leftover snickers bars from Halloween make a delicious dessert. Simply chop them up with the food chopper. Peel, core and slice a few apples.. Place them in a baking dish and sprinkle the chopped candy bars over the apples. Bake at 350 for 15 minutes!!! Serve alone or with vanilla ice cream. Yummm!

Reheat Pizza
Heat up leftover pizza in a non stick skillet on top of the stove, set heat to med-low and heat till warm. This keeps the crust crispy. No soggy micro pizza. I saw this on the cooking channel and it really works.
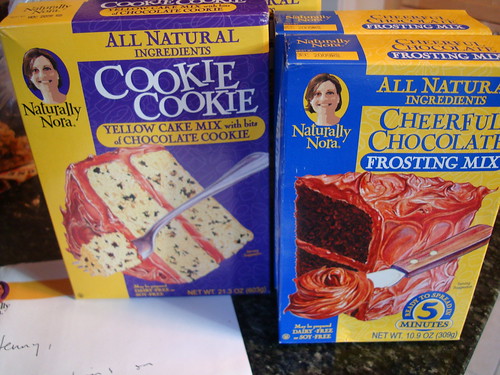
Expanding Frosting
When you buy a container of cake frosting from the store, whip it with your mixer for a few minutes. You can double it in size. You get to frost more cake/cupcakes with the same amount. You also eat less sugar and calories per serving.

Reheating refrigerated bread
To warm biscuits, pancakes, or muffins that were refrigerated, place them in a microwave with a cup of water. The increased moisture will keep the food moist and help it reheat faster.

Newspaper weeds away-
Start putting in your plants, work the nutrients in your soil. Wet newspapers, put layers around the plants overlapping as you go cover with mulch and forget about weeds. Weeds will get through some gardening plastic they will not get through wet newspapers. (I tried this and it will s-l-o-w down the growth of the weed but not keep them out forever!)
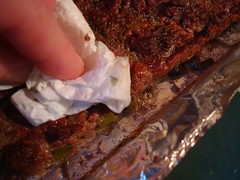
Broken Glass
Use a wet cotton ball or Q-tip to pick up the small shards of glass you can't see easily. (I use baby wipes for this!)

No More Mosquitoes
Place a dryer sheet in your pocket. It will keep the mosquitoes away. (I also heard spraying Listerine on surfaces outside, citronella candles, bug spray and they still bite me- best suggestion -don't go outside!)

Squirrel Away!
To keep squirrels from eating your plants, sprinkle your plants with cayenne pepper.
The cayenne pepper doesn't hurt the plant and the squirrels won't come near it. (BULL- I wiped TWO whole habanero peppers on my pumpkin....and I was left with a stem after one week! I've also heard using moth balls!)

Flexible vacuum
To get something out of a heat register or under the fridge add an empty paper towel roll or empty gift wrap roll to your vacuum. It can be bent or flattened to get in narrow openings.

Reducing Static Cling
Pin a small safety pin to the seam of your slip and you will not have a clingy skirt or dress. Same thing works with slacks that cling when wearing panty hose. Place pin in seam of slacks and... TA DA!... Static is gone.
Measuring Cups
Before you pour sticky substances into a measuring cup, fill with hot water. Dump out the hot water, but don't dry cup.
Next, add your ingredient, such as peanut butter, and watch how easily it comes right out. (I just spray with non-stick spray....works great for me!)

Foggy Windshield?
Hate foggy windshields? Buy a chalkboard eraser and keep it in the glove box of your car.
When the windows fog, rub with the eraser! Works better than a cloth!

Reopening envelope
If you seal an envelope and then realize you forgot to include something inside (yeah sure!), just place your sealed envelope in the freezer for an hour or two. Viola! It unseals easily.

Conditioner
Use your hair conditioner to shave your legs. It's cheaper than shaving cream and leaves your legs really smooth. It's also a great way to use up the conditioner you bought but didn't like when you tried it in your hair. (I totally do this one!)

Goodbye Fruit Flies
To get rid of pesky fruit flies, take a small glass, fill it 1/2' with Apple Cider Vinegar and 2 drops of dish washing liquid; mix well. You will find those flies drawn to the cup and gone forever!

Get Rid of Ants
Put small piles of cornmeal where you see ants.. They eat it, take it 'home,' can't digest it so it kills them. It may take a week or so, especially if it rains, but it works and you don't have the worry about pets or small children being harmed!

Let me know if they work for you OR if something works better!

Tuesday, June 9, 2009

Easy as Pie

Tamale Pie that is....


You saw awhile back that I made tamales the old fashioned way. Well even though I thought those weren't so bad to make....if you were intimidated at all by that recipe hopefully you will find this even easier for you to try!

Here are a few pictorial steps for you and the full recipe will follow:


Buy your premade polenta from your grocery. Just plain I suggest nothing with prominent flavors.


Cut your polenta in half and take that half and cut into slices to fit you dish you are using. Shown is a 8X4 glass dish. It's usually perfect for a couple (plus 2 extra servings for another dinner or lunches)


Get your chili ready. Here I had some from the freezer that I made plus some added pork tenderloin I wanted to use up.


Put your chili on top of the sliced polenta. Pack down slightly.


Put corn or hominy shown here on top of your chili layer.


Place half of your shredded cheese on top of corn (step not shown) and top with remaining polenta.


Bake for 35 @ 375 degrees and put remaining cheese on top during the last five minutes to melt. Let sit for 10 minutes before cutting to serve.


Top with sliced tomato, sour cream and green onions.


Easy Tamale Pie


1 tube prepared polenta
2 cups chili
1 cup corn (I used hominy today)
1-1/2 cups Pepper Jack or cheddar cheese, grated ( I used 3/4 cups each)
1 tomato, sliced
1/2 cup sour cream
1/2 cup green onion, chopped

Preheat oven to 375.

Spray dish with nonstick spray. Cut your polenta in half and cut the half into slices to fit the pan you are using. Save the remaining half for the top later on.

Layer your chili of choice (either homemade or canned) on top of polenta slices. Put corn/hominy on top of chili. Put half of shredded cheese on top of hominy. Slice second half of hominy and place on top of cheese. Save remaining cheese for later.

Cover and bake for 35-40 until hot and bubbly. Pull out dish 5 minutes before serving and top with remaining cheese. Bake until melted. Remove from oven and let set for 10 minutes.

Cut into portions to serve and top with sliced tomatoes, dollop of sour cream and green onions.

OH the yummy noises I got from this dish...lol. I swear K-man was a hispanic in another life. He absolutely loves anything I make with latin flavors.....Pupusas, chilequiles, enchiladas, tamales, tacos, salsa, guacamole, fajitas, I guess if it's got cumin, chili powder and/or jalapeno he's as happy as a jumping bean!

Easy Tamale Pie on Foodista

Monday, June 8, 2009

CCC's with a twist


I know that there are many cookies that have cereal in it to give it some crunch. I found one of those such recipes, it called for corn flakes. But I wanted a twist, so I used my Special K Red Berries. So I got my crunch and a berry twist.

I read culinary mysteries if you didn't know. I love a good mystery and it feeds the food blogger in me with recipes throughout the story. LOVE IT. The base of this recipe came from the Chocolate Chip Crunch Cookie Murder book by Joanne Fluke.

Chocolate Chip Strawberry Crunch Cookie
adapted from CC Crunch cookie recipe by Joanne Fluke

2 sticks of butter, melted (yes all her recipes call for melting the butter)
1 cup brown sugar
1 cup granulated sugar
2 tsp. baking soda
1 tsp. salt
2 tsp. vanilla
2 eggs (just beat with a fork in a glass)
2 1/2 cups flour
2 cups Special K Red Berries, crushed (just crush them with your hands)
1-2 cups chocolate chips

Preheat oven to 375 degrees.
Melt butter, add the sugars and stir. Add soda, salt, vanilla and beaten eggs. Mix well. Then add flour and stir it in. Add crushed corn flakes and chocolate chips and mix it all thoroughly.
Form dough into walnut sized balls using your small ice cream scooper. Place on parchment paper covered cookie sheet. I put about 8 balls on the sheet to test sizing when baking. So glad I did. The recipe said 12 per sheet and they would have all been stuck together! So 8 is great. Use a fork to press them down slightly before baking. Bake for 10 minutes. Cool on cookie sheet for 2 minutes, then remove to a wire rack until they are completely cool.

I handed one of these to K-man when they were slightly warm. All he said was "UH" as he closed his eyes and chewed. I said "are they awful?" He said...."yeah, awfully GOOD!"
These cookies are chewy yet crunchy not crispy. These are a definite keeper!


Chocolate Chip Strawberry Crunch Cookies on Foodista

Friday, June 5, 2009

Battle of the T's

Turnover or Tart?


You know....you have some apples hanging around that aren't being eaten. You see some puff pastry at the store....yeah....I'll use up those apples with that. Then you open the package. I hate how they put two pastry sheets in one package. Can't they put two separately wrapped sheets in one box? Well, I always feel compelled to use them both. It's like once you break the seal of the dough package....you think it will get freezer burn or my fear...that the leftover will fall into the dark recesses of the freezer and you won't get to use it for it will be ruined before you find it again....Do you torture yourself with these type of conversations in your head?

First I made some apple turnovers....

Apple Turnovers

2 apples sliced
1 sheet puff pastry
1/3 c. brown sugar
1 tsp. cinnamon
pinch of nutmeg
1/4 tsp. salt
1 egg, beaten
cinnamon and sugar mixture (don't you have some in a little container in your cabinet?)

Preheat oven to 400 degrees.
Unfold the puff pastry. I rolled out the dough a little more. Cut into 4 squares. You can cut the dough into smaller squares if you'd like. (I didn't want to be eating apple turnovers for weeks.)

Peel and slice the apples in a bowl and add the brown sugar, cinnamon, nutmeg and salt. Mix and put the apples in 4 portions in the center of the squares you cut. Brush edges of squares with egg. Fold and press. Repeat to all. Brush tops of triangles with remaining egg and sprinkle with some cinnamon sugar on tops.
Bake for 20 minutes.

While those were baking I assembled the apple tarts...


Apple Tarts

2 apples, cored and sliced
1/4 c. flour
1/4 c. sugar
1 egg, beaten (plenty leftover from the recipe before)
cinnamon and sugar mixture (have you put some in a little jar yet?)

Preheat oven to 400 degrees.
Unfold puff pastry and roll out a bit to even out dough cut into halves. Put flour and sugar mixture down center of dough (just a stripe for the apples to lay on).

Slice the apple and arrange on sugar/flour mixture on the dough. Sprinkle cinnamon and sugar mixture down the middle. Bake for 20 minutes.

Mmmmmm, breakfast and dessert for the weekend!

Guilty pleasure: I just love when sugar melts onto the parchment after baking. I take the baked good away and peel off the melted sugar. Sometimes it's crunchy or chewy.....mmmmmmm....all for me!

Tuesday, June 2, 2009

If you can't stand the heat....

Get out of the kitchen and .....put it on the grill!!!

Roasted Potatoes

About 6-8 baby red potatoes
1 sweet potato (I had one I needed to use)
fresh herbs
1-2 garlic, put in garlic press
salt and pepper to taste
olive oil
green onions to garnish

Wash and chop your potatoes to bite size.

Put all the potatoes in your bowl with your fresh herbs. Shown here is rosemary, thyme, chives. I wished I had been heavier handed with them for I forgot the roasting process is going to mellow out the herb flavors. Add your salt and pepper to taste and about 2 Tbsp olive oil.

I have a special grilling pan for roasting things like veggies when you are grilling out. Keep on eye on these and keep moving them around. I was busy in the kitchen while K-man was tending the grill and he had the heat up a bit too high if you didn't notice a 'few' black potatoes in the bunch. But it was all good....those few didn't ruin the batch.

I just looooooooovvvvvee roasted potatoes on the grill. Next time you are grilling your steak or chicken....cook your potatoes this way right next to them.... you will be glad you did!

Monday, June 1, 2009

Playing with my food...

Wheeeeeeee! I got my prize!

I entered Mommy I'm Hungry's blog giveaway and this is what I won....

More importantly....I got a handwritten letter from Nora too....writing notes is a lost art. How sweet of her!!!

Soooooo, I am looking at my two cake mixes....thinking....hmmmmmmm. I will make a cake with the one....what should I do with the other for FUN? Should I make a cake? Cupcakes? Hmmmm, it's been awhile since I made a cake-mix cookie though....hmmmmm. How about BOTH!!!!!

So here is how I did it....


I weighed out the mix and put half in a bowl. The directions called for 1-1/4 cups of milk, 1/2 cup oil and 2 eggs.
I figured for a half batch of cupcakes (the box makes 24) I would use 1/2 cup plus 2T milk, 1/4 cup oil and 1 egg.


For fun....I had some extra cookies hanging around. Some oreos and some chocolate cookies. The mix seemed like it needed more 'friends'....lol. Got out the ol' rolling pin...*crunch-crunch* K-man yelled from the basement "Come-in!" hahahahahaha


Here's half of the mix and the 'extra friends' added.


I baked the cupcakes for the time recommended on the box....nicely rounded tops.....

...and the mix cut in half made *18 cookies. *Not all shown for they were being tested for 'quality control'

For the cookie cake mix recipe:

Half of cake mix
1/4 cup oil
1 egg
2 tsp. milk

Mix. Add milk by tsp until it comes together more like a cookie dough. Bake @ 375 for 10 minutes. Let set on cookie sheet for 2 minutes and transfer to cooling rack.


Cook's Notes: These were awesome! Often times I can detect this 'taste' that all cake mixes have. It's weird, no matter what flavor the cake mix....they all have this 'fake taste' thing going on....Not this mix. AND, it was so nice to read the ingredients and be able to not only recognize what they were but also to pronounce them all. LOL. Thank you so much Naturally Nora.....and I promise....to make my next box...unadulterated! The Chocolate frosting was incredible...I will never use the canned stuff every again! Thanks Rachelle for the giveaway....good pick!


Cake Mix Cookies on Foodista