Thursday, August 20, 2009

I had no idea my blogging would come to this....


I am here for the FOOD....judge me for my recipes if you will. But I had no idea that photography was going to be such a HUGE portion of it.


In my first couple of months of being a newbie food blogger I have become aware of the multiple facets to the FOOD BLOGGER:


  • Some of us are here just for the fun.
  • Some want to help inform, educate and/or share.
  • Some take pictures, some don't.
  • Some take step by step pictures, some show only a final product shot.
  • Some bloggers shoot AWESOME pictures, some take dark, fuzzy pictures.
  • Some food photogs ensure a 'blank' background to showcase their food, others include their 'counter stuff', house window or backyard as their background.
  • Many bloggers take pictures to submit to food porn sites to increase traffic to their site and take their rejections personally.
  • Some food bloggers have Kick Azz cameras (costing over $500), most bloggers have your average a tiny $200 camera.
  • Some food bloggers don't care about their pix (love my pix or not, eh) and some would like to learn tips and tricks to improve their photography.
I am sure there are some other finer points of blogging I missed as well....

I am going to speak about the LAST point. Trying to improve your pictures. I have picked up tips and tricks from the blogs of food stylists and photogs who try to help us amateurs:

How to lighten the dark pix, how to edit the fuzzy, creating interest, making creative shots, etc. One of the 'tricks' I found was how to make your own light box. Made from a cardboard box, white tissue paper, desk lamps.....blah blah blah....I made one. Ok....it improved my pix a little light-wise. But when you store it on your dining table....it's hard to store it away and very delicate with tissue paper sides. This was a 'homemade' version to help those who couldn't afford to buy those professional photo light box, lights, reflective screens, etc. Then I found an alternative....

From a catalog I received among millions was Fresh Finds. I spied on a tabletop photo studio that has everything you need (not camera of course) and it folds up and packs away neatly. About 60 bucks, if you don't find that too pricey- to me, this price beat the professional photo prices BUT the convenience of it FOLDING won me over.

Here's what it looks like set up:

Here is my set up in the dining room, nice big window behind and lighting from above (only on if taking pix at night)


Comes with tripod, two lamps, blue or gray backgrounds, pockets for all the equipment.


It has BLUE background but I think is white best, so I just put in some butcher paper (pictured above).


The other side of the blue background is a gray one if you so desire.


Here it is all unattached and open, ready to fold up....


The sides velcro together and a black cover folds over it like a wallet


Here are both lights. One open and standing, the other with the legs put away. You gather the legs together at the bottom and they PUSH up into the base of the light. See? Easy storage, so far.


Nice professional switches. They are conveniently just below my table's edge when I need to turn them off/on.


Three pockets for your tools. Nice and roomy for your folded cords (even though I don't have them tucked in at this moment).
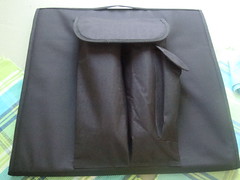


Ok, now all cords are folded away and the pocket tops are nicely velcro-ed on (in case for some reason you pick this upside down).
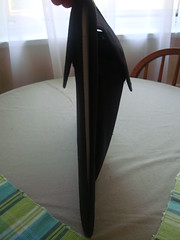


Here's how flat it is when you are all done packing it up. Not shown is the available handle on top, no biggie.
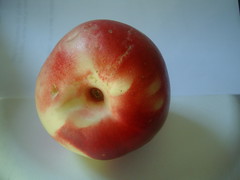


Here is my normal 'daylight picture in the kitchen. I open the back door for optimal light, object on a white plate plate and I am holding some white paper behind the object. The shadow is being created from my arm blocking so of the light from the left as I hold my camera with my right hand.


Here is the same object in the lightbox. The tripod is GREAT to have so you don't have to keep holding the camera while you move around your object. If you have one of the OLDER cameras that are large....it may be too heavy for the tripod. I have a little slim Sony cybershot, even when I tilt the camera on the tripod it tends to get a bit 'top heavy'.


Just so YOU know....I have gone from knowing virtually nothing about food photography and now am doing THIS to improve my pix. I am still very much an amateur for I haven't even scratched the surface using technical photo editing software (just the free tweaks I get from "Picnik" provided by Flickr).

So if you are an amateur like me and want to spend this bit of money for a cute and convenient light box to BUMP up your photo game....order it like I did. I am sure FG and TS will still not like my 'unflattering composition' but at least DARK won't be an issue anymore!

Lastly, if you are bummed over the constant rejections from your photos you have some very appreciative and LOVING food porn sites who won't turn you away:

FoodPhotoBlog
TasteStopping


Have fun!

Wednesday, August 19, 2009

Who says it HAS to be a sandwich?

Who doesn't love a BLT during the summer when the tomatoes are at the height of their season? Let me show you how 'tweak' your chicken BLT style...

BLT Chicken

2-4 chicken breasts
flour for dredging
salt and pepper to taste
2 cups of stewed tomatoes, warm and ready to go (or any style of tomato you are have on hand)
romaine lettuce leaf per serving
1-2 strips of bacon per serving

1. Fry your bacon until crisp, drain on paper towels and set aside. Depending on how much fat your bacon rendered, either pour off or keep the bacon fat in the pan to fry your chicken. The bacon flavor here is essential!
2. Salt and pepper your chicken and dredge in flour (ziploc bag is great). Set aside while pan heats up.
3. Place chicken in hot bacon grease and cook for about 10 minutes. Both sides should be browned and juices run clear. Let chicken rest on paper towel while you get your plate ready.
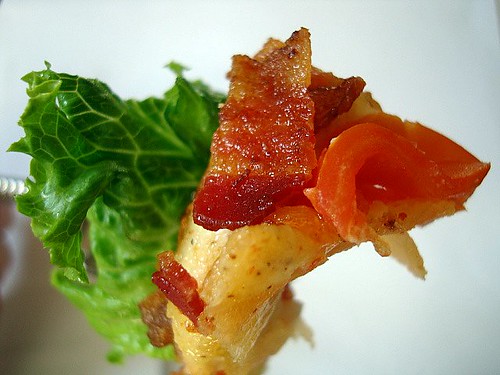
4. Place ice cold romaine leaf on your plate, slice up your chicken and nicely arrange it on the lettuce. Spoon about 1/2 cup of stewed tomatoes atop your chicken.
5. Top with bacon. Whether you keep it whole or crumble it is up to you!


Oh the tastes/textures! Tangy tomatoes with crisp smoky bacon. Juicy chicken with crunchy outside. Icy cold romaine fighting it out with the hot food on top of it.


Enjoy!

Tuesday, August 18, 2009

Getting Stewed


Look people, don't put off making something with your tomatoes until the END of the summer. Start now! I decided to make something with my bounty of tomatoes BEFORE it got out of control and I had to make several things at once or give most of them away. Since I still have more tomatoes coming I wanted to get ahead of the game.

My grandmother (Me-mom) always made stewed tomatoes. Her southern way was to cook them forever and she used so much sugar in it that they were DARK red. Almost too dark. They were also so sweet that they were almost like a dessert, you only put a small spoonful on the side of your plate.

Here's to you Me-mom, I love ya but I'd prefer my sugar in my cookies!

Stewed Tomatoes

24 large tomatoes - peeled, seeded and chopped (you can also use cans of diced tomatoes)
1 cup chopped celery
1/2 cup chopped onion
1/4 cup chopped green bell pepper
1 tablespoon white sugar
salt and pepper to taste
4-6 slices of stale bread

In a crockpot, combine tomatoes, celery, onion, bell pepper, salt/pepper and sugar. Cook on LOW for 6 hours or HIGH for 3 hours or until vegetables are soft. A few minutes before serving cube your bread and stir into tomato mixture. The bread is essential to thicken up your 'stew' so it's not as watery.

Makes about 8-10 cups.

Cooks Notes: Let your stewed tomatoes come to room temperature before you put them into containers to freeze. Be sure to leave room at the top of the container (about an inch). The mixture will expand when frozen.

TUNE in tomorrow to see how I varied the use of my stewed tomatoes!

Stewed Tomatoes on Foodista
Enjoy!

Monday, August 17, 2009

Magically Delicious

Ever used these? Do you REALLY like them? I thought I did.

I remember when Magic Shell first came out and I thought it was the bomb. Then for many years, I stopped using it and forgot all about it. It had been a least 10 years since I used Magic Shell (it did come out in the 80's you know!), until last summer. OMG - Ick. Why did I like this stuff? I guess my chocolate palate has changed/developed with age.

Then I remembered...

I've had this recipe on my school webpage for years, it's made with REAL chocolate. Why not give it a chance. OH so much better!


It doesn't matter whether you prefer milk, dark or white chocolate, making your own magic shell with REAL quality chocolate makes all the difference!


Magic Shell
Printable Recipe

4oz chocolate chips
3 Tbsp. of butter

Melt chocolate chips and butter together, when ready to serve pour over ice cream, or even cake, this makes a wonderful frosting. You may need to make more, but keep it within these ratio's.

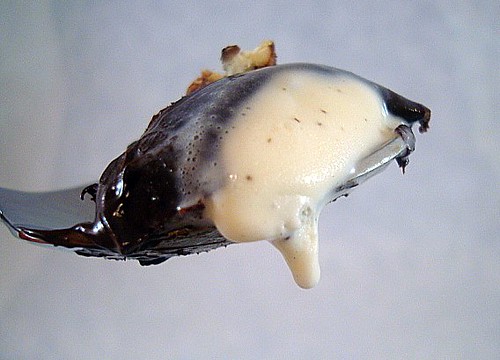
Cook's Note: Be sure to spread on a thin layer/or just stripes for if put on thick it will be difficult to break apart with your spoon!

Yeah, I had to wrestle cutting this open. I highly suggest a THIN layer, unless frozen fudge is your thing. LOL

Chocolately Goodness!

Enjoy!

Sunday, August 16, 2009

Ha-Ha - Fooled ya!

Betcha, didn't know that we were on vacation for a week! hee-hee. Thanks to 'posting options' I was able to pre-date all my posts while I was away. I didn't think it was wise to advertise online that we weren't going be home. So now we are back from our stay @ Deep Creek Maryland. Here is a view of Deep Creek Lake from the chair lift coming down from Wisp Resort.

This is about 1/3 of the lake. Did I take any pictures of our rental or the view from it? Of course not. LOL. Our place was called "Island View" and the view from our dock was a lil pile of rocks that the boaters had to navigate around. Some 'island' LOL. I should have gotten a pictures of THAT....perhaps next year!

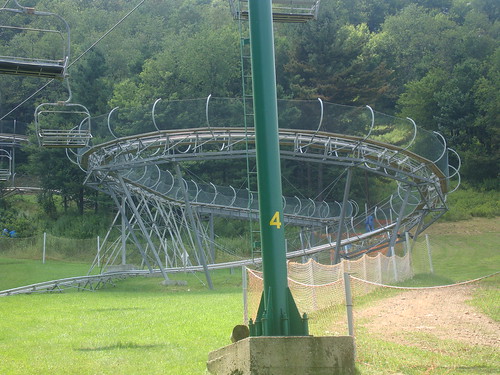
One of the perks about DCL is that Wisp Mountain Resort is nearby. So, DCL caters to the summer folk who like water as well as the winter sport folk. Here I took a picture of me going up to the top of the Mountain Coaster @ Wisp. I still have very far to go....since I was bored....why not take a few pictures. I didn't take any of my trip down for you have to keep the lever pressed down to get FULL SPEED and I wanted to go FAST.

As I am being pulled to the top of the mountain coaster....on the right here you see the turns I am in for on the way down. Of course many want to pull the brakes thinking they are going to fly off and you are belted down and so it the coaster....so FULL THROTTLE BABY!


Did you know that they had a full White Water Rafting on top of a mountain? We didn't. We were shocked when we found this last year. I was sure to bring my camera this year. Quite a huge undertaking to pump all this water on top of a mountain. We did not partake in the rafting trip this year. Perhaps I can convince K-man to do this next year. He is a little 'shaky' about fast stuff.


I call this picture: "K-man and the Boulders" LOL. Great Rock Band name....LOL

When I wasn't cooking for the crew of us in the rental, K-man and I went to two new places to eat as well as one favorite we found last year.

Archie's Barbecue- ROCKED! You know a place is good when it's packed on a Saturday night and since BBQ has to be cooked low and slow; getting our carryout quickly (our steaks were still frozen when we arrived) was a snap. Right on Rt. 219 A rack of ribs for 13.95 is a bargain when they start for 19.99 down here!

Santa Fe Grille - American Cuisine with a Mexican Flair. Not overtly Mexican but a little tweak of Mexican flavors here and there. Very nice. K-man got the Chipotle Bourbon Salmon and I got the Reuben Flatbread Sandwich. We shared some awesome Onion Rings for an appetizer. I could only eat half of my sandwich. Again on Rt 219 (next to the Visitor Center).

Brenda's Pizzeria - We love pizza and since we got rained out on our first attempt to go to Wisp we went here for lunch; for we noticed it was packed on Friday night when we drove in. A packed restaurant indicates good food everyone wants to eat. Of course the rain cleared and we had an awesome view of the lake and this pizza - 16" was the smallest they offer. If you bring your hungry family they have a 26" called the abondanza. I liked how they 'tweaked' some of the Italian classics like Shrimp Calzone. I've never seen Shrimp offered in a calzone...We shared a "Sei Cosi" six item pizza with pepperoni, sausage slices, onions, peppers, mushrooms and extra cheese. Surely a choice for when all diets are OFF on vacation! Yummy! We had 3 slices left to take home!

It was relaxing to get away, but it wasn't a vacation from cooking all the week. We were with the 'elders' of the family and they don't get around as well. Since cooking is my thing/career, I just take the helm cuz I am organized and I know they all appreciate that they don't have to do it. K-man manned the grill so he felt the pressure as well. Poor guy is used to a gas grill and had to cook over charcoal. Although charcoal is mused to render better tasting foods....it's slower, heats uneven and I still can taste the lighter fluid from the "match light" briquets. Ick.

I didn't take any pictures of the things I made for this rental was dark inside and honestly I wanted a break from dealing with picture snapping. It's pressure at times I tell ya. YOU know.
I did make a cake for my grandmother's birthday but I didn't take a picture of it for I didn't like how it turned out taste wise and I wanted to work on the recipe more before I blogged about it.

Bottomline folks, if you are even in need of a vacation. Western Maryland has Deep Creek Lake nestled into mountain resort called Wisp. Perfect place that has so much to do for the active sort. K-man totally loved it for he was able to bike all around through the national parks. Give it a look into if you are near enough! We love it!


Saturday, August 15, 2009

Hi, I am JennyMac and I'm a Southern Girl

Despite my love for ethnic foods, every so often I gotta have some of the southern foods I ate when I was younger.


I had very eclectic food influences in my life. My mom grew up eating Polish foods and we ate peirogies, stuffed cabbage, kielbasa, etc mostly during the holidays. During the week it was traditional fare that the typical American family was eating ...burgers, hotdogs, pizza, spaghetti (ironically not American of origin! LOL) Yet my Dad liked having a traditional southern breakfast many weekends. Although we were NOT the traditional southern food eating family of the greens, fried chicken, stewed tomatoes, and/or biscuits and sausage gravy; breakfast always remained the same. Fried Eggs, scrapple, fried tomatoes, grits and maybe biscuits (only if we managed to take a batch home from Me-mom, my Dad's mother).


Now in my making breakfast for K-man, he has not taking a liking to grits *sniff-sniff*. He ate hominy growing up where I did not. So if I want grits for breakfast. I make them only for me, K-man will pass.

Since our tomatoes are in abundance right now and I have the free time for a fun lunch right now...I thought...JennyMac is going to prepare a southern brunch for herself!

Typically my Me-mom and Dad would only dredge the tomatoes in flour/salt and pepper and that was it. They were okay that way but they were soggy, wet and never developed any crunch probably because the flour only dissolved in the oil and burned. Since I am college trained in food preparation...I know the proper way to fry my tomatoes to get a CRUNCH. Sorry Dad....

Fried Tomatoes and Grits

Old Fashioned Hominy Grits
Tomatoes
salt and pepper
cornmeal
flour
1 egg
hot sauce
oil for frying

Prepare your grits according to the package. One serving was 1 cup of water to 1/4 c. hominy grits (I use milk to make them more creamy) Cook for about 15 minutes on simmer. Stirring on occasion. While grits are cooking, let's prepare the fried tomatoes.

Slice your tomatoes. Sprinkle them with a little salt and let them rest on a paper towel. While you prepare the coating stations.


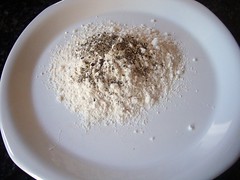
About 3 Tbsp. of flour on a plate. Season with salt and pepper. Mix well with a fork.


Crack egg in a small bowl and some hot sauce to taste and beat well.


About 1/3 cup of cornmeal, salt and pepper and cayenne sprinkled. Mix well with a fork.


Flour tomato, patting gently, drop into egg...flip it several time for the egg will not want to stick at first. Keep flipping until you see the flour start to get gummy. Then put into cornmeal and flip and press lightly Keep turning until you feel it's a coated well. Set all the coated tomatoes aside on a plate while you heat up some oil in a pan. Just about 1/4 inch of oil in the pan will do. Medium heat. Cook on each side about 1-2 minutes or until lightly browned. Drain on paper towel while you get your plate ready.

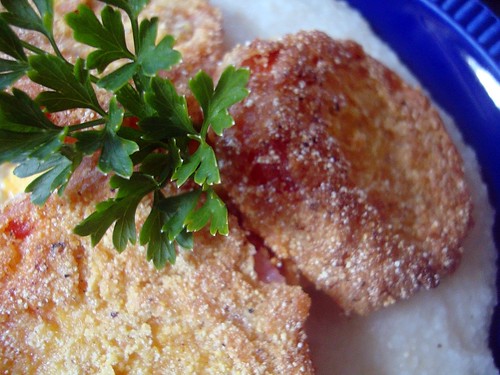
Plate your grits. I like them with a little butter and pepper. (BTW, in the picture: under the fried tomatoes was the leftover egg mixture that I cooked up like scrambled eggs -no point in wasting them) Lay your fried tomatoes on your grits.

Crunchy toasted corn outside, soft and sweet inside. The creamy grits with a bite of the fried tomato added another experience to the textures. Oh so goooooooooodd.

Today was a nice day with no humidity and a slight breeze. I took these out on the deck with some lemonade to each for lunch. All I needed was a hoop skirt and a parasol and I would be set!

Enjoy!

Friday, August 14, 2009

Buttah makes Everything Bettah!

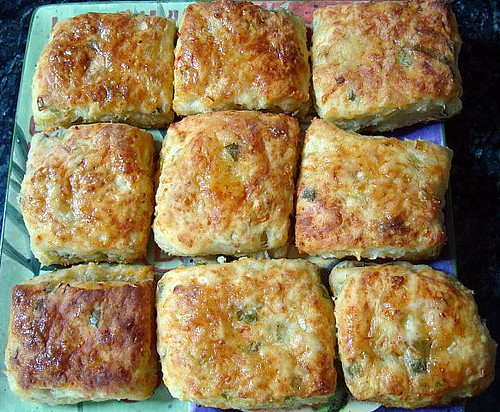
You bet your sweet bippie! Look at that butter glisten!


OH bread is such a weakness of mine. The butterier the better I say! Or is that 'have some bread with your butter?'

Butter Dips
(from Chow Times)

2 1/2 cups all purpose flour
1 tablespoon sugar
3 1/2 teaspoons baking powder
1 teaspoon salt
1/2 cup grated sharp cheddar cheese
3 green onions, finely chopped
1 cup 2% milk (I used buttermilk)
1/2 cup butter

1. Sift dry ingredients together in a large bowl. Stir in cheese and green onions. Add milk and stir slowly with a fork until dough clings together.

2. Turn the dough onto a floured board, coat the dough with flour and knead lightly about 10 times. Roll the dough out to about 1/2 inch thick. Cut into 1-inch squares.

3. Melt butter in a 450°F degree oven in a 8×8 square baking pan. Coat all the sides of the squares in the melted butter. Bake in same pan for 25 to 30 minutes. After baking, flip the little buns over in the pan to coat the top with any remaining butter.

Pull apart and serve warm.


Crusty, crunchy bottom, soft and fluffy on the inside. Light onion-y taste. Great to accompany soup, chili or a casserole. Good Stuff!


Enjoy!

Thursday, August 13, 2009

I say "Toe-Mah-toe Taht"

Seeing as how we have tomatoes (or toe-mah-toes) coming out our ying-yang over here (and I am certainly not complaining!!) It's been fun finding all sorts of different ways to cook with our homegrown beauties!


On Kraft's First Taste site and it's kinda like a Baked BLT. But they didn't call it that. Regardless, it was yummy.

Rustic Tomato Tart
from Kraft's First Taste

1
ready-to-use refrigerated pie crust (1/2 of 15-oz. pkg.)
3
plum tomatoes (1 lb.), seeded, sliced
1-1/2
cups KRAFT Shredded Cheddar & Monterey Jack Cheese
1/3
cup KRAFT Mayo with Olive Oil Reduced Fat Mayonnaise
6
slices OSCAR MAYER Bacon
1
cup arugula

HEAT oven to 400ºF.

UNROLL pie crust on baking sheet. Arrange tomato slices in circular pattern on crust, overlapping slices as necessary to fit and leaving 2-inch border at edge. Mix cheese and mayo; spread over tomatoes. Fold edge of crust over tomatoes.

BAKE 20 to 24 min. or until cheese is melted and crust is golden brown. Meanwhile, cook bacon until crisp. (My bacon was already cooked from the day before, since it was cold I put the chopped bits on top of the tart during the last five minutes of cooking)

COOL tart 10 min. Crumble bacon. Top tart with arugula and bacon.

Have a BITE!


You should have seen K-man eat this. He ate all the lettuce off the top first, like it was some punishment to eat his salad before he was allowed to get to the bacon-y goodness. I on the other hand had a piece of lettuce with each bite of tart. Too funny he is. He certainly likes his 'good stuff' at the end!


Enjoy!

Wednesday, August 12, 2009

More Berryliciousness!


I tell ya....I am really enjoying having a garden with my own veggies but more importantly; taking advantage of all those fresh seasonal fruits as much as possible!


One of our favorite fruits is the blueberry. I swear it get two pints each time I go to the store. I've also been putting them in the freezer as well.


Berry Oatmeal Bars
adapted from allrecipes.com

1 (18.25 ounce) package yellow cake mix (I had some Naturally Nora's Yellow cake mix, hers was a bit larger in size)
2 1/2 cups quick cooking oats (I used rolled oats, I like the chewiness)
3/4 cup margarine, melted
1 cup jam (I used strawberry preserves)
1 tablespoon water
1-2 cups fresh/frozen blueberries
1 cup finely chopped nuts (I used walnuts)

1. Preheat the oven to 375 degrees F (190 degrees C). Grease a 9x13 inch pan. I lined it with nonstick release foil!

2. In a large bowl, mix together oats, cake mix, and melted margarine so that it makes nice clumps and there is no dry mix left. Press 1/2 of the oats mixture evenly into the bottom the prepared pan.

3. In a separate bowl, mix jam/preserves with water, and spread over the crust. Sprinkle the blueberries over the preserves.

4. Mix the nuts with the remaining oat mixture and sprinkle evenly over the top.

3. Bake in the preheated oven for 18 to 23 minutes, or until the top is lightly browned. Cool before cutting into bars.


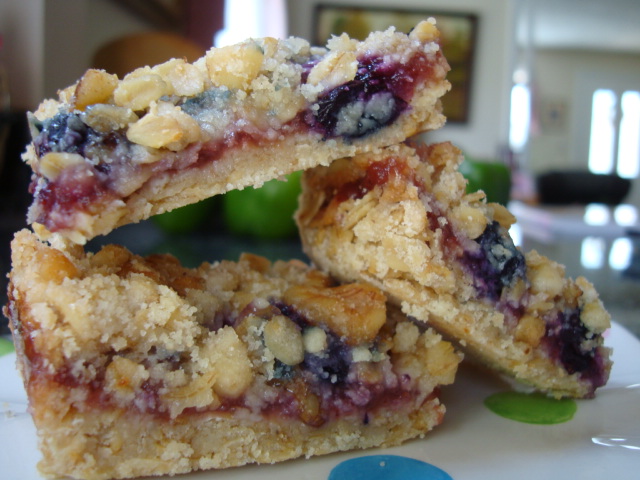
These were SUPER yummy! I am glad I added the nuts on top. Perfect dessert or snack! K-man eats two in one sitting! I like the compromise of the cake mix and adding some other fresh ingredients!

Enjoy!