Thursday, December 17, 2009

Putting the biscotti to bed... and gifting them...

Ok, time to wrap up the biscotti chapter with a perfect choice during the holidays:


Gingerbread Biscotti

1/2 cup butter, softened
1/2 cup firmly packed light brown sugar 1/2 cup sugar
2 large eggs
1/4 cup molasses
2 1/2 cups all-purpose flour
1 teaspoon baking powder
1 teaspoon baking soda
1-1/2 teaspoons ground ginger
1 teaspoon ground cinnamon
1/2 teaspoon ground nutmeg
1/4 teaspoon ground cloves
1/4 teaspoon salt

Beat butter and sugars in a large bowl at medium speed with an electric mixer until light and fluffy. Add eggs, beating well; beat in molasses.

Combine flour and next 7 ingredients; add to butter mixture, beating at low speed until blended.

Divide dough in half; using floured hands, shape each portion into a 9" x 2" log on a lightly greased baking sheet.

Bake at 350° for 28 minutes or until firm. Cool on baking sheet 5 minutes. Remove to a wire rack to cool 10 minutes. Reduce oven temperature to 300°.

Cut each log diagonally into 3/4"-thick slices with a serrated knife, using a gentle sawing motion. Place slices on ungreased baking sheets. Bake 8 to 10 minutes; turn cookies over, and bake 8 to 10 more minutes. Cool completely on wire racks.

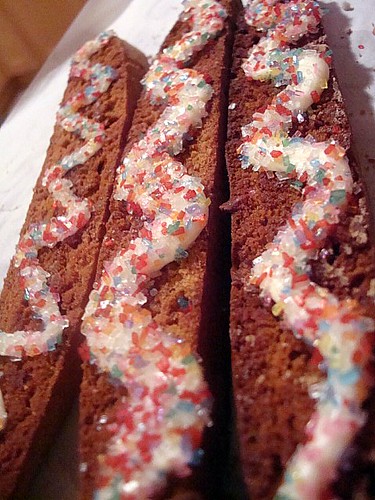
I put a squiggle of white chocolate on some and white chocolate with sugar crystals on top for others. Very festive!

Now, for the gift idea....


Clearly label your gift bags (I got mine from Oriental Trading pretty cheap- search for 'goodie bag', the ones that are cellophane not paper)

This is in case your friend forgets which is which...
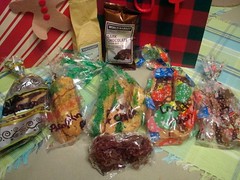


Make sure you have one of each flavor.

I put in two or three of each biscotti, depending on their size.


Yes, you are sneak peeking at some chocolate macaroons here!


Select some kind of beverage. Cocoa, tea, coffee, hot cider...


Bag the loot.....
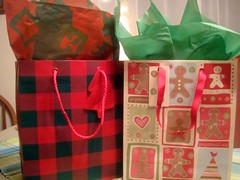


Stuff in some tissue paper


These are great so your friends have something to snack on when they are wrapping their presents late with some coffee/tea. Your friends can use these for an emergency dessert for unexpected guests. These could also be eaten Christmas morning if you didn't feel like cooking! Don't wait until right before Christmas to give these, you want you loved ones to have the full range of advantage of having sweets around if they don't feel like baking themselves!

Happy Ha-ra-days! (lol)

Wednesday, December 16, 2009

Bit more of Biscotti

You know, biscotti doesn't have to be the standard anise flavored or almond dipped in milk chocolate or chocolate dipped in white chocolate. I searched long and hard for unique biscotti recipes and I even went overboard in creating a new one...

The next two I am showcasing for you are:

Almond Joy Biscotti
well, it started with coconut biscotti from cookinglight.com...

1 1/2 cups all-purpose flour
3/4 teaspoon baking powder
1/4 teaspoon salt
1/4 teaspoon baking soda
3/4 cup sugar
1 teaspoon vanilla extract
2 large eggs
1 cup flaked sweetened coconut
1/4 cup almond paste
1 cup almonds (I used sliced)
3/4 cup dark chocolate chips

Preheat oven to 300°.

Lightly spoon flour into dry measuring cups; level with a knife. Combine flour and next 4 ingredients. Place sugar, vanilla, and almond paste in a large bowl; beat with a mixer until incorporated. Add one egg at a time and beat at medium speed 2 minutes or until thick. Add flour mixture and coconut; stir to combine (dough will be very sticky). Turn dough out onto a heavily floured surface; knead lightly 7 or 8 times to add almonds. Shape dough into 2 logs 3"X12". Place rolls on a baking sheet lined with parchment paper, and pat to 1-inch thickness. Bake at 300° for 30 minutes or until roll is golden brown. Cool for 5 minutes on a wire rack.

Cut roll diagonally into 20 (1/2-inch-thick) slices; stand slices upright on baking sheet. Bake 20 minutes (cookies will be slightly soft in center but will harden as they cool). Remove from baking sheet; cool completely on wire rack.

Melt dark chips in ziploc bag, clip corner and squiggle on cooled biscotti.

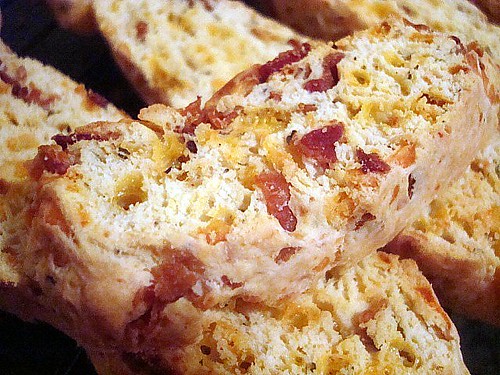
Now, I am really going to surprise you with my next choice. It's not a sweet dessert/snack to eat with your coffee or tea.....but a SAVORY accompaniment to DIP into your soup!

Feast your eyes...

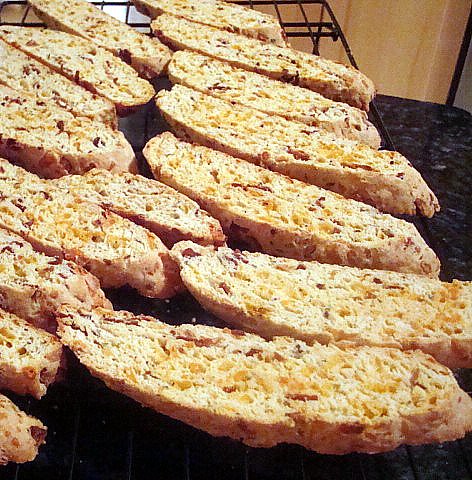
Bacon and Cheese Biscotti

2 cups all-purpose flour
2 tablespoons yellow cornmeal
1 teaspoon baking powder 1 teaspoon salt
1 teaspoon sugar
1/2 teaspoon dried parsley 1/2 cup nonfat sour cream 2 tablespoons margarine, melted
3 egg whites
1/2 cup (2 ounces) shredded smoked cheddar cheese
1/2 cup bacon, cooked and crumbled

Combine first 6 ingredients in a large bowl. Combine sour cream and next 2 ingredients in a small bowl; stir with a wire whisk until blended. Stir in cheese; add to flour mixture, stirring until well-blended (dough will be crumbly).

Turn the dough out onto a lightly floured surface, and knead bacon in lightly. Shape dough into a 16-inch-long roll. Place roll on a baking sheet coated with cooking spray, and flatten roll to 1-inch thickness.

Bake at 350° for 30 minutes. Remove roll from baking sheet to a wire rack, and let cool 10 minutes. Cut roll diagonally into 24 (1/2-inch) slices, and place, cut sides down, on baking sheet. Reduce oven temperature to 325°, and bake 15 minutes. Turn slices over, and bake an additional 15 minutes (biscotti will be slightly soft in center but will harden as they cool). Remove from baking sheet; let cool completely on wire rack.


Can you see yourself eating some of these with some thick and steamy tomato soup?

I was snacking on a few while I was packing up the biscotti in the gift bags.

Delish!


Crunch-tastic!

Tuesday, December 15, 2009

Biscotti Madness!

Every year during the holidays, I make tons of cookies to give as gifts. I only keep a few if I plan on entertaining. This year I decided to make ONLY biscotti. Many types of biscotti. The main reason, they require very little fat in them. They also don't require you to bake sheets after sheet after sheet of only 12 cookies. One sheet two logs. Easy!

I will give you two recipes for the next few days and on the last day show you how I packaged them as gifts!

Let's get started.....

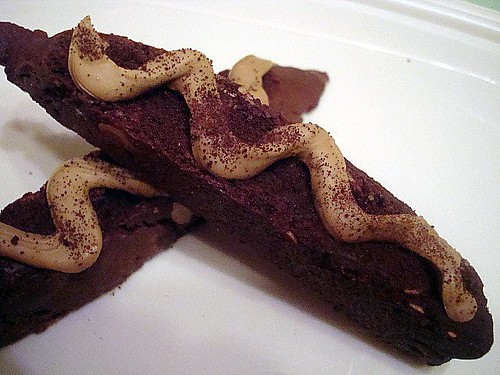
Chocolate Cappuccino Biscotti
2 cups all-purpose flour
1/2 cup Hershey's Special Dark cocoa powder
1 teaspoon baking soda
1 teaspoon salt
6 tablespoons butter, softened
1 cup granulated sugar
2 large eggs
3/4 cup semisweet chocolate chips
1 tablespoon confectioners' sugar
1/2 cup cappuccino chips (World Market)
Instant Espresso Powder

Preheat oven to 350°F. and butter and flour a large baking sheet.
In a bowl whisk together flour, cocoa powder, baking soda, and salt. In another bowl with an electric mixer beat together butter and granulated sugar until light and fluffy. Add eggs and beat until combined well. Stir in flour mixture to form a stiff dough. Fold in/mush in with hands the chocolate chips.
On prepared baking sheet with floured hands form dough into two slightly flattened logs, each 12 inches long and 2 inches wide, and sprinkle with confectioners' sugar. Bake logs 35 minutes, or until slightly firm to the touch. Cool biscotti on baking sheet 5 minutes.
On a cutting board cut biscotti diagonally into 3/4-inch slices. Arrange biscotti, cut sides down, on baking sheet and bake for 10 minutes. Flip over the biscotti pieces and cook again for 10 minutes, until crispy. Cool biscotti on a rack.
Melt cappuccino chips in a ziploc bag for 30 second intervals until melted. Snip corner and squeeze a thick 'squiggle' on the biscotti. While squiggle is still wet, sprinkle espresso powder.


Pumpkin Pie Biscotti
adapted from Myrecipes.com

3 1/2 cups all-purpose flour
1/2 cup firmly packed brown sugar
1/2 cup Splenda brown sugar
2 teaspoons baking powder
1/2 teaspoon salt
2 teaspoons pumpkin pie spice
1/2 cup canned, mashed pumpkin
2 large eggs, lightly beaten
1 tablespoon vanilla extract
2 tablespoons butter or margarine
1 cups walnuts, coarsely chopped

Combine first 5 ingredients in a large bowl; stir well. Combine pumpkin, eggs, and vanilla, stirring well with a wire whisk. Slowly add pumpkin mixture to flour mixture, stirring until dry ingredients are moistened. (Mixture will be very crumbly; it will gradually become moist after stirring.)

Melt butter in a large skillet over medium heat; add walnuts. Cook, stirring constantly, until nuts are browned. Remove from heat, and cool completely. Knead or gently stir cooled nuts into dough.

Place dough on a lightly floured surface, and divide into 2 portions. Lightly flour hands, and shape each portion into a 3" x 15" log. Place logs 2" apart on cookie sheets lined with a silpat or parchment.

Bake at 350° for 23 minutes; cool logs 15 minutes. Reduce oven temperature to 300°.

Cut each log crosswise into 1/2" slices, using a serrated knife. Place slices on ungreased cookie sheets. Bake at 300° for 15 minutes. Cool completely on wire racks.


Crunchalicious!

Monday, December 14, 2009

You ARE joking right?

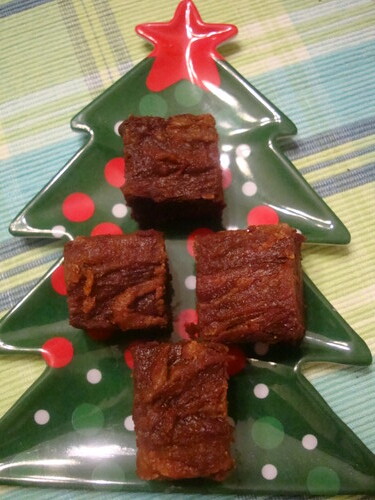
Here is it....some guilt free fudge for you to enjoy over the holidays!

I discovered the cookbooks from Hungry Girl and they are very tasty and so fun!

Click here for the website for her books...there is a table of contents for all her recipes, pictures of each and the nutrition information for all.

Her website in general, you can subscribe to your email and she will send you all sorts of tips how to lower fat, swap foods and she provides recipes as well. My favorite is the email she sends with the hot new low fat products available (I am still looking for the new peppermint tootsie pops!).

I just cut to the chase and bought the two books. Ask Santa for a copy of each. Her newest one I have not have a chance to review yet.

As promised, your guilt free fudge...

Dreamy Chocolate Peanut Butter Fudge
from Hungry Girl

1-18.3 oz Betty Crocker Fudge Brownies Traditional Chewy Mix
2 cups canned pure pumpkin
2 Tbsp. reduced fat peanut butter, at room temperature

Preheat oven to 350 degrees.

Combine pumpkin with brownie mix in a large bowl. Mixture will be very thick.

Spray a square 9X9 baking pan (I lined mine with non stick foil) with non stick spray and pour in the mixture. Spoon peanut butter on top and use a knife to swirl it around the top of the batter. Bake for 35 minutes. Allow to cool.

Cover pan with foil and place in refrigerator for 2 hours. Cut into 36 squares.

PER SERVING (1 piece):
65 calories, 1g fat, 57mg sodium, 14g carbs, 1g fiber, 9g sugars, 1g protein
POINTS® value 1*


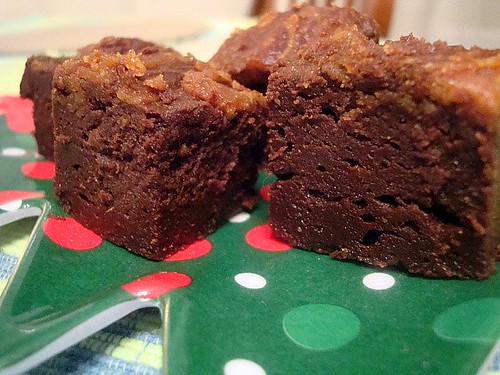
I think these lil beauties got better with time. At first they just tasted like under done brownies....but over time they really tasted like fudge. Awesome!

Make these for yourself to enjoy and I bet if you put them out with the rest of your holiday goodies....they'd never know the difference!

Enjoy!

Sunday, December 13, 2009

Where did the time go?

I do so love the holidays....but between the shopping, decorating, parties and baking....gosh the time just gets away from you! My poor little blog was being ignored...but not forgotten. Cuz I was taking pictures of what I was baking at least!

In the past when I was baking cookies as a kid....they were to have around for guests or to take to family gatherings. Now that I am older....I love cookies but you know how it is if they are hanging your house....they are forming a new layer of BUTT under the jeans!

So for the past few years, I've been making cookies to give as gifts to my neighbors, friends and family. Let THEM get the bigger BUTT. LOL. This way I can try new recipes, sample one or two and give them away without a problem.

Actually, the more time I spend baking myself to death in the kitchen with several types all in one day or weekend....I kinda get sick of seeing them and smelling them!

So tune in this week for a guilt-free fudge, 5 kinds of biscotti and for the finale....some killer chocolate macaroons that I have been waiting YEARS for the recipe! Yes, years! The story about THOSE beauties will come later.

Crumbly yours,


PS. The above picture is NOT of the decorations in my house! I wish!

Friday, December 4, 2009

Don't hate me if you can't find these...

You are rolling through the grocery aisles and your eye catches on something. You walk to it, pick it up, look it over, say "COOL!" and you throw it in your cart. Then many months later, your friends see it and they want to know where you go it and you tell them what store and they say they can't find it.

JennyMac: "Oh, it was just hanging off one of those hooks in one of the aisles."
Friend: Well, which aisle was it?
JennyMac: Sheesh, I don't remember....maybe the snack, chip aisle?
Friend: But I was in THAT aisle, I didn't see it.
JennyMac: Maybe, they sold out of them.
Friend: (frowning) Sigh.
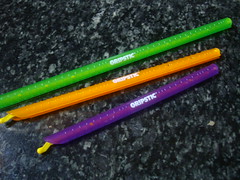
JennyMac: Here have one of mine (handing the orange one over since I like the purple and green one better).
Friend: (beaming) YAYYYYYYY!!!!!!


Well, if you can't find these at your stores....Amazon has them.

Take your bag in question....snacks, chips, lettuce mix, frozen veggies, broken ziploc-ed bag and SLIDE IT ON BABY!


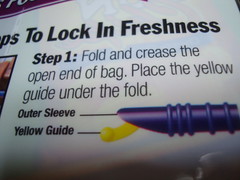
Here's the first step on the package, it's really all you need....the other steps...BAH


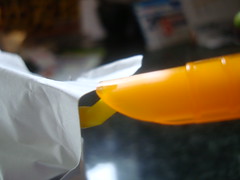
Fold the opened end, put the guiding 'thingy' under the crease and ZING!


Nice tight seal. Give your clips a rest. These are cool. Love the tutti frutti colors too!


I use so many 'food closure' gadgets. Just when I think I have a million....there are some days I am rummaging through my drawer...."what? I only have two clips here?" A few weeks later I can't close the drawer cuz a clip got in the way. *Shaking head*

Clip it-clip it good!

Thursday, December 3, 2009

Still have leftovers?

At this point, you probably have a little bit of this and a little bit of that...nothing much to make meal out of....
Don't worry about amounts....wing the fillings to work for you!

How about making yourself a

Thanksgiving Leftover Burrito!

1/2 cup shredded leftover turkey
2-3 spoonfuls of mashed potatoes
1/4 cup turkey gravy (just enough to give moisture but NOT make it soupy)
1/2 cup green bean casserole
1/2 cup stuffing/corn pudding/corn bread
1/4 cup leftover vegetables (I used a corn, pepper and bean mix)
1/4 cup shredded low fat cheese
2 large tortillas
poultry seasoning
non-stick spray

In a medium bowl gently mix your leftovers and turkey bits. First 6 ingredients. Microwave until warmed through. Mix in cheese.

Warm tortilla in microwave for 10-15 seconds to make it more flexible. Place half of leftover mixture in tortilla. Fold up bottom, then sides, then roll gently to keep filling in place. Place on non stick foil on cookie sheet. Repeat with second tortilla.

Spray with butter flavored non-stick cooking spray. Sprinkle with poultry seasoning. Bake in 350 oven for 10-15 minutes or until tortilla is crispy or light brown.

How you like this twist? K-man LOVED it. So different than a plate of T-day stuff warmed on a plate.

All done with Turkey fun,

Wednesday, December 2, 2009

Fatty Finale?

Of course NOT! After I painstakingly cut the fat from my T-day side dishes did you really think I was going to blow it all on dessert? Nope, I remained strong.

Where I did compromise was on the sugar. OH well, you gotta find some middle ground.

Here is a yummy and moist peanut butter cup like dessert for you to try. The fat present is only in the peanut butter....whether you use all natural, creamy chunky, lower sugar or the peanut butter imposters....it's really all in the amount of your filling. Portion control!


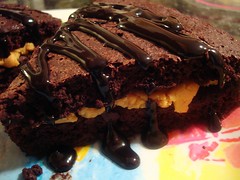
No pudge Peanut Butter Cup Brownie Torte
(yes I know this title COULD be longer)

1 box No Pudge Brownie mix
yogurt, no sugar applesauce, or fat free coffee creamers
1/2 cup peanut butter
Hershey's Dark Chocolate Syrup

Mix no pudge brownie mix according to the directions. They call for using yogurt in your brownie mix you can use applesauce or a FF coffee creamer if you like.

Spray a tart pan with a removable bottom. Line that bottom with a coffee filter or parchment paper and spray again. Pour brownie mix into tart pan and bake according to box directions but shave about 10 minutes off the time and check with a cake tester/toothpick.

Remove from tart ring and let cool. Invert onto plate and peel off filter/paper. Cut circle in half and cut into 4 or 6 slices (repeat the same for the other half).

Microwave peanut butter to soften. Thin out with a bit of coffee creamer or milk if needed. Spread PB on slice and top with another slice. Drizzle Hershey's on top or just dust with powdered sugar.

Just amazingly delicious!!!!

Confessed Chocoholic,

Tuesday, December 1, 2009

Who stole my crust?

Pies wouldn't be so evil if it weren't for the flaky buttery, crunchy crust. Sigh. I stalk those people who eat only the pie and leave their crusts. "Are you going to eat that?" I will ask....No?....Nom, nom, nom!

But this year I wanted to enjoy some of the things without all the bad stuff. Crust won't disappear forever....just eating it later on I tell myself.

I found a recipe for pumpkin custard on another food blog and that was my inspiration of pumpkin pie without the crust.

Harmless Crustless Pumpkin Pie
inspired by Lynn's Kitchen Adventures

1 cup of hot water
1 can fat free evaporated milk
1/4 cup splenda
1 1/2 cups egg substitute
1 teaspoon vanilla
1 teaspoon pumpkin pie spice
1 can pumpkin
extra water for water bath

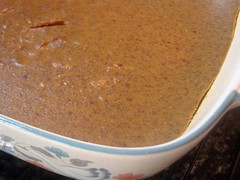
Whisk together ingredients. Take one 9×13 pan and fill with about 1/2 inch of hot water, creating your water bath. This is necessary to get the correct texture of the custard.
Place 8x8 pan in 9×13 pan filled with water. Pour custard mixture into the 8x8 pan. Bake at 325 for 1 hour. Eat warm or cold.


We ended up serving this as cold side dish with our dinner. Shockingly, we really loved slathering it on our rolls like pumpkin butter!

Pumpkin is still being used for the fall....whether you use Lynn's version or my guilt-free harmless version.....won't you give this a try?

As Lynn noted....don't be afraid of the lackluster picture. It is really tasty!

By the way, how do you turn pumpkin into squash?

Throw it in the air and there you have it.....squash. Hahahahahaahaha

Enjoy!

Monday, November 30, 2009

Pudding or Bread, you decide....

Are you like me during Thanksgiving and HAVE to have something corn? Cornbread stuffing, corn pudding, succotash....something corn. Besides loving the taste of corn, perhaps it's something about the roots of Thanksgiving and the pilgrims learning the use of corn from the natives.....Nahhhhhh, I am not thinking THAT deep on T-day. I just love sweet yet buttery corn.

The springboard recipe I used was from Cooking Light and if you know me....I tweaked it. I am such a rebel.

Corn Pudding
adapted from Cooking Light's Colonial Corn Pudding
  • 3 cups frozen whole-kernel corn kernels, thawed and divided
  • 3/4 cup evaporated fat-free milk, divided
  • 2 tablespoons smart balance
  • 1/2 teaspoon salt
  • 1/8 teaspoon white pepper
  • Dash of freshly ground nutmeg
  • 1/2 egg substitute
  • half a box of jiffy corn muffin mix
  • Cooking spray
  • 1/2 cup (2 ounces) shredded Fat Free cheddar cheese
  • 2 teaspoons butter, melted

1. Preheat oven to 350°.

2. Combine 1 cup corn, 1/4 cup evaporated milk, and smart balance in a blender; process until smooth. Combine remaining 1/2 cup evaporated milk, salt, pepper, nutmeg, eggs in a large bowl. Stir in pureed corn mixture, remaining 2 cups corn, cheese and corn muffin mix.

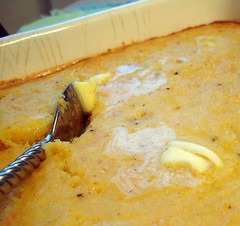
3. Spoon mixture into an 8-inch square baking dish coated with cooking spray. Bake at 350° for 30 minutes or until golden brown. Serve warm.

So yummy!!! It was nice to have the fat cut significantly in the pudding yet have a bit of butter on top to make the whole thing seem so rich! This is a 'do-again' recipe for sure!


Sunday, November 29, 2009

It's not the holidays without....

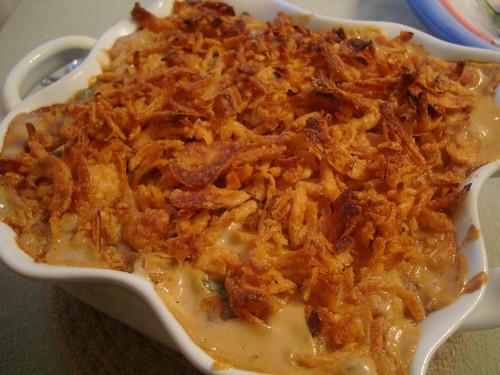
Green Bean Casserole of course!

Some people find this yucky. Some people are tired of it. I never tire of it for I only have it during the holidays. So I look forward to it.

I wanted to have this for dinner, yet cut back some of the fat....yes I know green beans are vegetables and not normally have fat.....but this is another one of those evil side dishes with FAT and sodium.

Our family used cream or half and half and a can or two of the campbells mushroom soup....but the only fat in this beauty is those French's onion rings on top. I didn't bother looking at the content on the can. Somethings are better left alone and besides I wasn't eating the whole casserole, just a spoonful. Maybe next time I will try the recipes original version with sauteed onions and bread crumbs!

Lean Green Bean Casserole
adapted by Low Cal Diner

1 Package (16 OZ) Frozen Green Beans
1 Onion, chopped
1 Garlic Clove, minced
1 Teaspoon Margarine (I used smart balance)
½ Pound Fresh Mushrooms, chopped
1 Can (12 OZ) Fat Free Evaporated Milk
3T Flour
½ can of water (in milk can to thin out white if too thick)
¼ Teaspoon Poultry Seasoning
1/8 Teaspoon Pepper
1/2 tsp. salt

Topping: French's Onions Place beans in a microwavable bowl. Cover and cook on high for 7-9 minutes. Drain. In a skillet add the onions, garlic and margarine. Sauté until tender, 4 minutes. Add the mushrooms and cook until tender. Reduce heat to low, add in and stir until combined. Mix the milk and flour and add to the mushroom mixture. Add the remaining ingredients and cook for 2 minutes or until it thickens. Transfer to a 2-quart baking dish. Stir in the beans. Bake uncovered at 375° for 15 minutes. Add French’s onion rings and sprinkle over the casserole and bake for another 10 minutes.

Enjoy!

Saturday, November 28, 2009

Have a ball during dinner!


Whether you use Stovetop stuffing from a box or make it from scratch, making balls out of it is a great idea for these reasons:

1. Stuffing put in the bird soaks up tremendous amounts of fat, these only have the amount of fat you put in them.
2. Less worry about bacteria when stuffing is cooked separately.
3. You can make these ahead of time and warm them up right before serving.
4. These are already portioned out, one scoop per person (or whatever your count is).
5. Easy to serve/handle.
6. Best of both worlds crunchy on the outside, soft on the inside.
7. Can be made appetizer size or dinner size.
8. Adds visual interest on any plate!

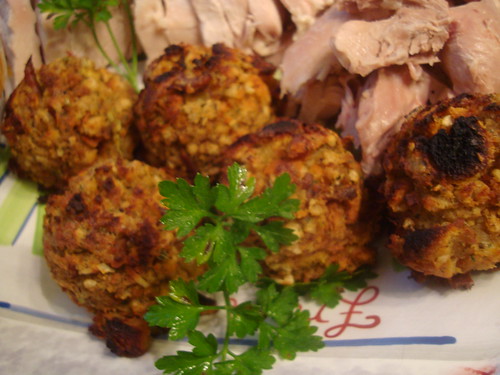
Lisa of The Cutting Edge of Ordinary inspired me to do this and I thought they looked rather cute on the platter with the turkey!

Our stuffing recipe from the family is usually EVIL. So much fat....Cooked sausage....onion and celery sauteed in the pork fat....add a stick of butter then cooked in the turkey..... THUD!
Here's what I did to make them more reasonable fat-wise!

Lower Fat Stuffing Balls

1 turkey neck
3 cups water
scant olive oil
1 onion chopped
2 celery stalks, chopped
1 tsp. poultry seasoning
salt and pepper to taste
3 cups of stale bread cubes (rye is great!)

In a sauce pan, place 3 cups of water and cook the turkey neck until reduced by half. Notice that there is some turkey fat floating around....just what you need. Remove turkey neck and remove as much meat as you can and chop. Add to broth.

In frying pan, one turn of olive oil in pan and saute the onions and celery. Add poultry seasoning and salt/pepper. When onion/celery is soft, turn off heat and add the bread cubes. Stir in broth little by little until absorbed but not mushy.

Line cookie sheet with foil and again another swirl of olive oil in foiled lined pan. Take your ice cream scoop and make portions onto cookie sheet.

Bake in 350 oven for about 10 minutes or until crispy on bottom. I put the 'balls' under the broiler for a minute before serving to get extra brown.

I'd do these again with sausage as an appetizer!

YUMMY!

Friday, November 27, 2009

Use it or Lose it?


How did you roast your Turkey this year? Did you stuff it? Brine it? Cook on high heat then reduce to a lower heat? Deep Fat Fry it? Massage it with butter and stuff with herbs? Baste it every 1/2 hour? I have done all of those (well, I've not fried a turkey for it's just to scary a task for me!)


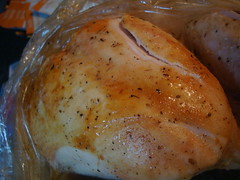
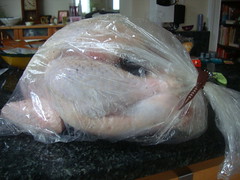
I cooked the turkey this year was with a roasting bag. It's self basting and browns the turkey pretty well. Those roasting bags are pretty mainstream now....they are pretty much in all the stores (those slow cooker liners are not easy to find though).

If you haven't used a roasting bag....please do. They are great. Not only can I massage the oil/butter with the bag instead of my hands but lifting the turkey to put in the roasting pan is no fuss-no muss.


Simple instructions, preheat oven @ 350 degrees. Follow the chart for the time per pound. Season and oil your bird. I put tons of fresh herbs in the cavity. Rub down with oil, salt and pepper and a Tablespoon of flour or two down in the bag under the turkey. Seal bag with tie provided. Cut a few slits on top and shove that gobbler in the oven. About halfway I did use a temperature probe for I wanted to make sure the leg temperature was 180 degrees( I was NOT going to use that stupid 'pop up' thing to tell me if/when my turkey was done!


When I carve, I like to cut behind the breast meat (knife along the breast bone) and all the way down. Removing the WHOLE breast and then slice as shown. So much easier. My dad always used one of those electric knives and the meat just seemed to shred. This way 'fans' on the platter nicely.


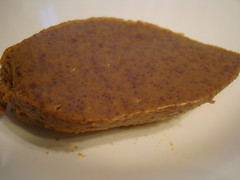
Here you go, meat and stuffing balls with gravy ready for the table! It was so moist!


So my advice? USE IT, this post may have come after T-day....but now you are ready to go for Christmas. Better yet, you can use these roasting bags for chicken and pot roast too anytime during the year!

Tune in next time for the stuffing balls!

Gobble-gobble,

Wednesday, November 25, 2009

Gobble it up!

Happy Thanksgiving everyone!!! It's nice to have the day before T-day off so I can do some pre-preparations for tomorrow.

So what are you guys making for your big day? Are you having tons of family, going away or having a small dinner at home? Last year K-man and I went to his mom's but this year it's a small quiet dinner for just the two of us. What is on your menu?

As some of you know already, I've been avoiding my blog a bit since I've been on a weight loss plan. Already 15 lbs gone in 3 weeks! YAY! So, not wanting to totally blow it out tomorrow a few things have the fat cut. It's really hard when your diet is NO FAT, NO SUGAR and NO SALT. I feel great but when I find recipes or products there is always something of those three that is present making it difficult to work around recipes or eating. But I think I found a good combo of foods (with K-man's input of what he wanted) to make our dinner a good one.

Here is what is in store for us tomorrow:

Turkey (cooked in a roasting bag)
Mashed Potatoes and gravy
Stuffing Balls
Green Bean Casserole
Corn Pudding
Pumpkin Custard
No Fat Brownie Tart

Stay tuned for the next few days to see how these recipes turned out and what I did to 'tweak' the fat contents. The links above were the spring board for the recipes I used and wanted to give my thanks for their initial recipes that gave me inspiration to have my holiday food and still be 'somewhat' good on my plan without going totally bonkers.


Gobble-gobble!

Tuesday, November 17, 2009

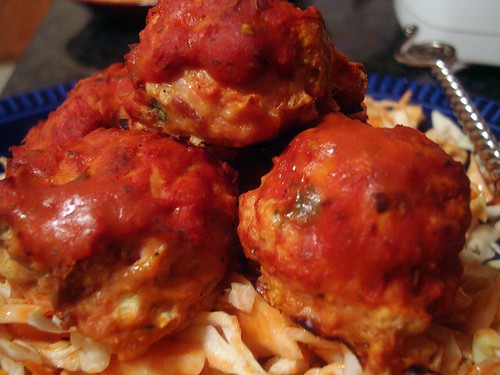
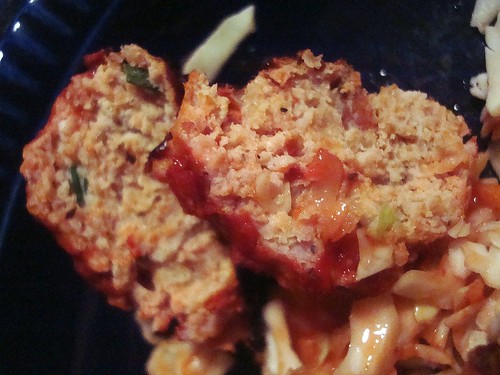
Guilt Free Meatballs

Who doesn't love a meatball? I know I certainly do! Here's what I did to keep out the fat of my meatballs and yet add flavor and keep the moisture!

Guilt Free Chicken Meatballs

1 serving of Fat Free Bagel Chips (look to your package what that is)
Fat Free PLAIN coffee creamer
2 slices of cooked turkey bacon, finely chopped
3 green onions, finely chopped
2 garlic cloves, pressed through garlic press
1 tsp. freshly ground pepper
salt to taste
1/4 cup egg substitute
1 lb ground chicken
2 Tbsp tomato paste, divided
1 Tbsp calorie free, sugar free ketchup (Walden Farms makes this)
1 Tbsp Italian Seasoning

Preheat oven to 400 degrees. Crumble up bagel chips and cover with creamer in bowl. Stir and coat and break up with spoon until softened.

Chop up turkey bacon finely and green onions and put in bowl with softened bagel chips. Press garlic and add. Mix. Add salt, pepper, tomato paste, egg substitute and mix again. Add ground chicken.

Mix until incorporated with fork. Use small scooper (the one I use for cookies) to make meatballs onto nonstick foiled cookie sheet. Bake for 10 minutes. In a small custard cup, mix ketchup, tomato paste and Italian Seasoning.

After ten minutes, brush ketchup mixture onto meatballs and bake for another ten minutes.

Absolutely moist and very tasty! Great on spaghetti squash!

Enjoy!

Sunday, November 15, 2009

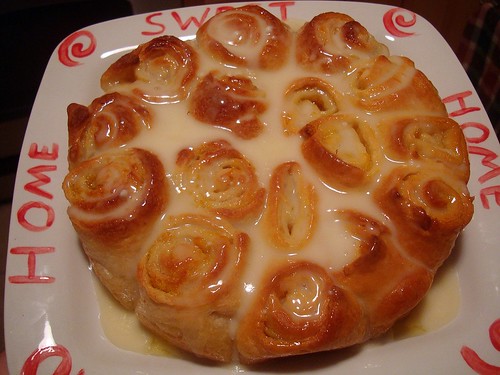
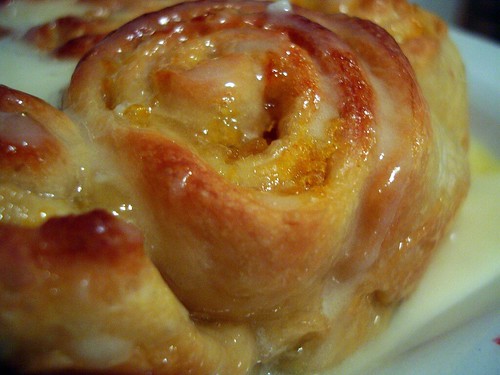
Orange these yummy!!!


K-man loves those orange rolls made by Pillsbury in a can from the refrigerated section in the grocery. Every so often he requests them for breakfast as a treat. But I am not buying them anymore because I found some recipes. Pioneer Woman's site Tasty Kitchen is where many of her fans can submit recipes. Two inspired me.

Orange Rolls
(from mamabunny) and also Orange Marmalade Rolls (the site author Ree Drummond, also can be found in her new cookbook). I wasn't in the mood to make dough from scratch so here's what I did....

Orange Sweet Rolls

2 cans of refrigerated pizza dough or 2 can of crescent dough (they make them without perforations now)
1/4 cup melted butter
1/2 cup sugar
1 orange zested

Glaze:
2 T melted butter
1/2 tsp. vanilla
2 cups powdered sugar
juice from that zested orange

Roll out dough. Brush with melted butter and sprinkle with mixture of sugar and orange zest. Roll up from the long side. Cut each roll into 8(making 16 rolls- and I used dental floss as well). Place in greased cake pan either 10 inch or 13X9 pan. Bake at 350 degrees for 15-20 or until lightly browned on top.

For the glaze, in a bowl add the powdered sugar, melted butter and vanilla. GRADUALLY add the orange juice until you get the desired spreadable frosting/glaze you want. Spread over rolls while hot.

K-man really loved these he loved "the little bit of sweet and little bit of the tang" The house smells incredible right now too!

Enjoy!