Showing posts with label muffins. Show all posts

Sunday, May 6, 2012

Gluten Free Morning Glory Muffins

Moist- full of fiber from carrots, apples and raisins!  Perfect for breakfast, snacks or dessert.  Make sure to check out my notes at the end for suggestions.

Morning Glory Muffins
adapted from Paleo Comfort Foods

2-1/2 cups blanched almond flour
1 Tbsp. cinnamon
2 tsp. baking soda
1/2 tsp. salt
2 cups shredded carrots (about one bag of carrots depending on thickness), grated
1 large apple, peeled, cored and grated
1 cup toasted coconut (adds nutty-ness)
3 large eggs (organic-omega-3)
1/2 cup organic liquid egg whites
2 Tbsp. honey
1/3 cup coconut oil (....see notes)
1 tsp. vanilla

1.  Preheat oven to 350 degrees and line standard size muffin tin.  I needed to line 20...depending on your 'scoop size'.
2.  Combine almond flour, cinnamon, baking soda and salt in a large bowl.  Add carrot, apple coconut and raisins and combine well.
3.  In a separate bowl whisk eggs, egg whites, honey, oil and vanilla  together.
4.  Pour the wet over the dry and mix well.  Batter will be thick.
5.  Using an ice cream scoop place batter into lined muffin tin(s).
6.  Bake for 25-30 minutes or until a toothpick inserted in the top comes out clean.
7.  Cool muffins for 8-10 minutes and then remove to a cooling rack.


Baker's Notes:
1.  I use Honeyville Almond flour from Amazon.com.  It is $36 for a 5 lb. bag.  Best bargain and works best than others I have used.
2.  I am not too fond of coconut oil that tastes like coconut.  It's too much or may be disconcerting to eat sauteed mushrooms that taste like coconut....ugh.  I prefer Spectrum.
3.  In using the organic coconut, I like the flakes over the finely grated.  This adds to the muffins giving it more chewiness as you would get from oatmeal (not used here).  Toasting will tone down the coconut flavor....giving it a subtle undertone.
4.  Go honey, don't substitute stevia for I find it will give a funny after taste.  Think about it....2 Tbsp of honey divided amongst 20 or so muffins?  That is about 1/2 tsp per muffin...not bad for sugar.  I love how these are lightly sweet not like I am eating cake.
5.  Although fat is not the enemy in the Paleo lifestyle, the recipe originally called for 1/2 cup coconut oil.  When peeling off the muffin papers, they absorbed alot of the oil.  What is the point for so much oil if it's only going to leech into the papers, right? I suggest 1/3 cup over using 1/2 cup.  For the muffins still stuck a bit to the papers.

Enjoy!

Monday, February 20, 2012

Strawberry Cheesecake Muffins

Strawberry Cheesecake Muffins

Sometimes when I post, there's a story.  First, a lovely picture and it's recipe.  There is some background as to how and why this recipe came about, if you are curious....read on.

1 (4 ounce) package cream cheese
1/3 cup confectioners' sugar

1/4 cup strawberry preserves

1/2 cup dry biscuit mix
2 tablespoons white sugar
2 tablespoons cold butter

2 cups dry biscuit mix('heart smart/lower fat version is okay)
3/4 cup white sugar
2/3 cup milk
1 egg
1/3 cup butter, melted
2-4 Tbsp. chopped pecans

  1. Cream together the cream cheese and confectioners' sugar in a bowl.
  2. Shape the cream cheese mixture into a log, then wrap with plastic wrap and place in the freezer.
  3. Place the strawberry preserves in a small bowl and freeze while preparing the remaining ingredients.
  4. Place 1/2 cup biscuit mix and 2 tablespoons white sugar in a bowl.
  5. Cut 2 tablespoons cold butter into the biscuit mix-sugar mixture with a knife or pastry blender until the mixture resembles coarse crumbs; refrigerate crumb mixture.
  6. Preheat an oven to 375 degrees F (190 degrees C).
  7. Line 6 extra large muffin cups with paper liners.
  8. Whisk together 2 cups biscuit mix, 3/4 cup white sugar, milk, egg, and 1/3 cup of melted butter in a bowl.
  9. Fill each prepared muffin cup half full of batter. Reserve remaining batter.
  10. Divide the cold strawberry preserves evenly over the batter.
  11. Cut the cold cream cheese log into 6 equal pieces, and place each piece on top of the strawberry preserves.
  12. Top each muffin cup with remaining batter.
  13. Sprinkle muffins with the crumb mixture and chopped pecans.
  14. Bake in the preheated oven until golden brown, about 25-30 minutes. 

Cook's Notes:
1.  Freezing the cream cheese and jam keeps it from melting into oblivion during the baking process.  DO NOT skip this.
2.  The muffins will sink as the cream cheese cools.  Proteins expand.  The sinking of the cream is normal.

Now, for the story.

I submitted this recipe YEARS ago to allrecipes.com.  When I first became a member I submitted MANY.  Three were published (easy decadent truffles, blue cheese broccoli salad and pesto tortellini salad) and the rest sat in dust.  I am not even sure the dates of my submission but I know we are talking the 90's!!!  I had contacted them in the early 2000's and asked what was the hold up....they responded that they get thousands of submissions and for me to be patient.  I went on with my life.
Now allrecipes.com has really flourished.  Published cookbooks, video tutorials, links to big company sponsors....
A few days ago they emailed me saying I was published again.  This time is was my strawberry cheesecake muffins.  I had created these from going to starbucks and eating one of their pumpkin cheesecake muffins.  After a few failed attempts with oozy cream cheese and learning to FREEZE it beforehand, I came upon a successful recipe finally.  I have only two reviews for it.  The first one was not a good one for I realized I called for using the WHOLE brick of cream cheese when only half should be used.  WHAT was I thinking?  I submitted the second review giving the correction.  Hopefully people will notice that.

This recipe is a rich one, thank goodness it only makes 6.  I plan on giving some away.  You know, calories on someone else's hips other than MINE!  Let me know how it works for you!
 
Enjoy!

Sunday, March 20, 2011

Carrot Oatmeal Muffins

Carrot Oatmeal Muffins

Not only do I get my recipe ideas from recipe websites and food blogs but also from the culinary mysteries I read. This recipe was from the last installment of Devil's Food Cake Murder by Joanne Fluke. Good stuff (story and recipes, that is)!

Carrot Oatmeal Muffins
adapted from Devil's Food Cake Murder Novel

1 and 1/2 cups flour
1 cup oatmeal (I used rolled oats but she used quick oats....I enjoyed the heartiness of the rolled oats)
1 Tbsp. baking powder
1/2 tsp. baking soda
1 tsp. cinnamon
1/2 cup brown sugar
1 cup FINELY shredded carrots (pack them down when you measure)
1/2 cup raisins (soaked in warm water at the start of the recipe)
1/2 cup milk (fat free was fine)
1 egg, beaten
1/3 cup butter, melted
1 tsp. vanilla
1/2 cup walnuts/pecans, toasted and chopped (optional)

Grease a 12 cup muffin pan or 24 mini muffin pan. Set aside.

In a large mixing bowl, combine the flour and oatmeal. Sprinkle the baking powder, soda and cinnamon. Mix thoroughly.

Stir in brown sugar, Mix until everything is blended.

Shred carrots on the small holes on the grater. Fine shred is best. You want them to cook in the same time it takes the muffins to bake and turn golden brown. Add the carrots and raisins to your bowl. Mix.

In a separate bowl, combine the milk, beaten egg, melted butter and vanilla. Give a stir until all combined.

Add the wet to the dry and gently stir until the dry are moistened and no dry pockets remain. Fill muffin cups with ice cream scooper. Bake at 375 degrees for 20-25 minutes for regular muffin tin. Bake 15-20 for the mini. OR until toothpick comes out clean.

Set the muffin pan on a wire cooling rack for 10 minutes. This cooling process is essential because if you try to take the muffins out of the muffin cups now they may break in pieces- YES, they are that moist!

Carrot Oatmeal Muffins

Makes 12 truly EXCELLENT muffins or 24 AWESOME mini muffins.

Mad for Moist Muffins,

Thursday, April 22, 2010

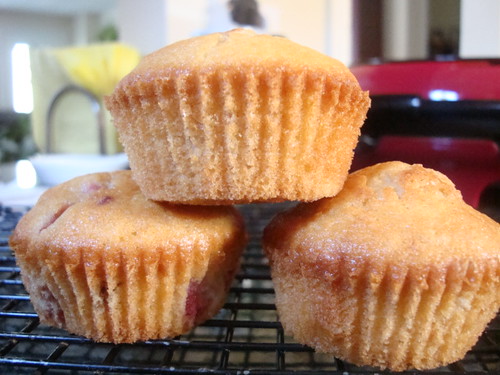
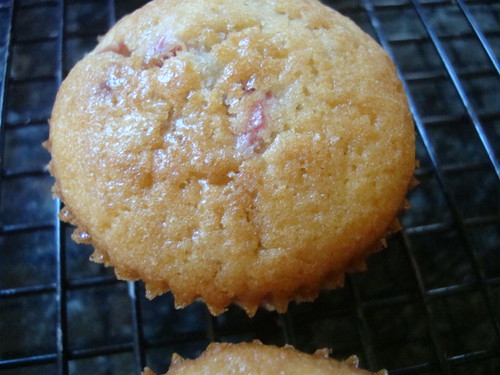
Strawberry Muffins


Strawberry Muffins

2 cups all-purpose flour
3/4 cup sugar
2 1/2 teaspoons baking powder
1/4 teaspoon baking soda
1/4 teaspoon salt
1 cup milk
1/2 cup vegetable oil
2 large eggs
1 1/3 cups chopped strawberries 0r any other berry or combination.
sugar for sprinkling on top

Directions:

Position a rack in the center of the oven and preheat to 400°F. Lightly butter twelve 2 1/2-inch muffin cups or place paper muffin cups in the muffin tin.

In a medium bowl, whisk the flour, sugar, baking powder, baking soda and salt to combine and make a well in the center. In another medium bowl, whisk the milk, oil and eggs. Mix well and pour into the well. Stir just until blended. Fold in the berries. Spoon equal amounts of the batter into the muffin cups, filling them about three-fourths full. Sprinkle some sugar on top.

Bake until a toothpick inserted into the center of a muffin comes out clean, 15 to 20 minutes. Cool in the pan for 5 minutes. Remove the muffins and serve warm or cool on a wire rack.


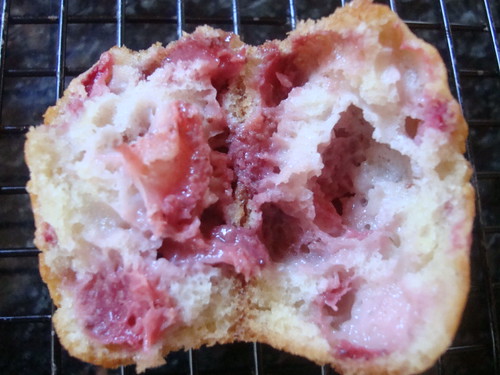
Very moist!

Very Berry!

Great for snacking or for a quick breakfast!

Wednesday, March 31, 2010

No ordinary buns for this pork BBQ!!!

Pepper Jack Rolls Baby!

I've been a fan of the Artisan Bread in 5 minutes book and have made my own bread a few times. Yummy! I used the Vermont Cheddar Bread recipe (page 106) as my springboard idea.

Pepper Jack Rolls
adapted from Artisan Bread in Five Minutes a Day

3 cups lukewarm water
1 1/2 Tbsp. granulated yeast
1 1/2 Tbsp. salt
1 1/2 Tbsp. sugar
6 1/2 cups flour
1/2 cup white cheddar powdered cheese
1 cup grated pepper jack cheese
1 tsp. red pepper flakes
1 egg, beaten

1. Mix the yeast, salt and sugar with the water in a 5 quart bowl (I used my lidded non air tight food container that I store my dough in).

2. Mix in the dry ingredients, grated cheese, powdered cheese and pepper flakes without kneading, using a spoon. You can use a 14 cup food processor with a dough attachment but mixing this dough directly in the container was just fine.

3. Cover (not airtight) and allow to rest at room temperature until the dough rises and collapses (or flattens on top), approximately 2 hours.

4. The dough can be used immediately after the initial use, though it is easier to handle when cold. Refrigerate in lidded (not airtight) container and use over the next 7 days.

5. When baking rolls, dust the surface of the refrigerated dough with flour and cut off dough pieces roughly equal portions (about the size of a plum) Shape each one into a smooth ball. Allow them to rest and rise on a cornmeal-covered pizza peel for 40 minutes (or just 20 minutes if using fresh unrefrigerated dough).

6. Twenty minutes before baking time, preheat the oven to 450 degrees with a baking stone placed on the middle rack Place an empty broiler tray on any other shelf that won't interfere with the rising bread.

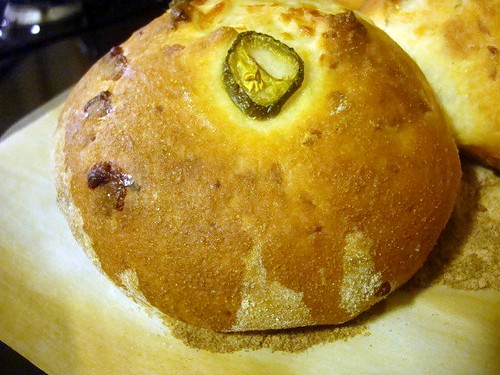
7. Just before baking, coat with beaten egg and stick a few jalapenos on top.

8. Slide the rolls directly onto hot stone. Pour 1 cup of hot tap water into the broiler tray and quickly close the oven door. Bake for 20-25 minutes, or until deeply browned and firm.


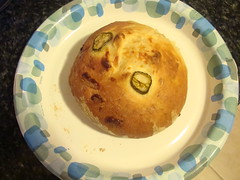
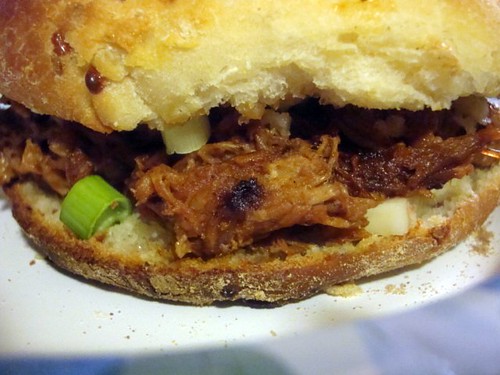
Here is one of the final rolls in relation to the place size. Ginormous! Honestly too much bread for me. I think I overestimated my size of plums. LOL. Although K-man was ecstatic about his man sized pork BBQ sandwich!


I could have probably put more pepper flakes in the dough as you can BARELY see the pepper. The bread wasn't a cheesy as I thought it would be. Although bread was fluffy and tender. The crust held up GREAT to the smooshy BBQ inside.


AWESOME!

But when you still have BBQ left and a bit of dough what do you do to restyle your dinner?

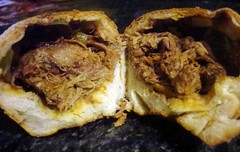
BBQ Pork Rolls!

The dough that remained after making 6 ginormous sandwich rolls was just enough to cut into 6 small circles. Using my greased TEXAS sized muffin tin....

Place a handful of green onions on the dough about 1/4 cup BBQ on the onions. Pull up dough around the filling and place in greased muffin tin dough edges down.

Throw a few slices of jalapenos around the dough in the muffin tins. Preheat oven to 450 degrees and put tin on the stove to let dough rise enough to fill up the muffin cups.

Bake for 20 minutes until brown. Serve with chilly coleslaw...sprinkle a bit of chili powder on top of it to compliment your BBQ rolls. Pickles, some extra BBQ sauce on the side for dipping and PERFECTION!

BTW, making your own Pork BBQ is very easy too!

Bake a Pork Butt according to package directions. Rubbed with favorite dry BBQ dry rub (mine was 6 lbs and it took about 4 hours). Stick a fork in the roast until when twisted is falling apart. Remove from pan and put on plate and let cool until able to tear apart with a fork. Add your favorite bottle of BBQ sauce to pork shreds. DELICIOUS!

Made enough for 4 HUGE sandwiches, 6 pork rolls and package of BBQ for two more average sandwiches for the freezer for a quick dinner another night!

Oink!

Monday, March 15, 2010

Baklava for Breakfast?


SURE! Why not?

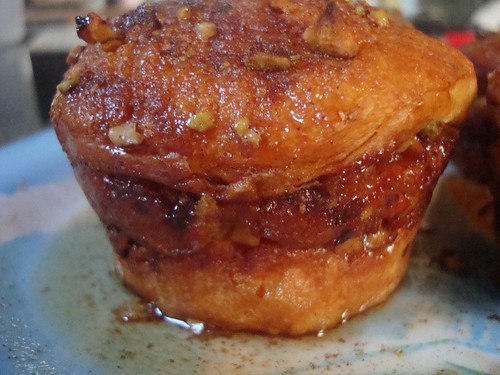
Breakfast Baklava Muffins
adapted by Simply Delicious Recipe Swap on FaceBook

SYRUP:
1/4 cup granulated Sugar
1/2 cup honey
1/3 cup water
1 tsp. lemon juice
1/8 teaspoon ground cinnamon
Dash salt
3 whole cloves

NUT FILLING:
1/2 cup pistachios, chopped
1/4 cup walnut, chopped
1 tablespoon granulated Sugar
1/2 teaspoon ground cinnamon
Dash salt, if desired


BISCUITS:
1 can (16.3 oz) Pillsbury Grands! Flaky Layers Butter Tastin' refrigerated biscuits (8 biscuits)


Directions:

Heat oven to 350°F. Generously spray 8 (2 3/4 x 1 1/4-inch) nonstick muffin cups with Cooking Spray.

In 1-quart saucepan, mix syrup ingredients; heat to boiling. Remove from heat; cool 10 minutes. Discard whole cloves.

Meanwhile, in food processor bowl with metal blade, place filling ingredients. Cover; process with on-and-off pulses until finely chopped. Set aside.

Separate dough into 8 biscuits. Separate each biscuit into 3 layers. Place 1 biscuit layer in bottom of 1 muffin cup. Brush dough with syrup; top with 1 1/2 teaspoons nut filling and drizzle with 1 1/2 teaspoons syrup. Place second biscuit layer on top; press edge of second biscuit into side of bottom biscuit. Brush with syrup; top with 1 1/2 teaspoons nut filling and drizzle with 1 1/2 teaspoons syrup. Top with third biscuit layer. Brush with syrup; sprinkle with 1 teaspoon nut filling. Repeat with remaining biscuits. Reserve remaining syrup (about 1/2 cup).

Bake 18 to 22 minutes or until deep golden brown. Cool 1 minute. Remove from pan. Serve warm with remaining syrup.

This was so nice to NOT have to wrangle with phyllo dough!!!... Make these for breakfast or for dessert. I preferred these hot to warm....cold, the biscuits were too firm. Foods that are warm always have better flavor!

Give these a try...they are fun to make and delicious. I don't think you will be disappointed.

Yassou!

Wednesday, May 13, 2009

Berry GOOD!

I didn't go out to the store and get Mom a sweater for Mother's Day....I cooked for her. Check out what I made for her to take home and enjoy!


Lemon-Raspberry Muffins

adapted from Cooking.com

1 dozen muffins

The secret to the sparkling flavor of these delicately crumbed muffins is the strips of lemon zest finely ground into the sugar. Enjoy the muffins warm right from the oven.

1 lemon
1/2 cup sugar
1 cup nonfat buttermilk*
1/3 cup canola oil
1 large egg
1 teaspoon vanilla extract
2 cups flour
2 teaspoons baking powder
1 teaspoon baking soda
1/4 teaspoon salt
1 1/2 cups fresh AND frozen (not thawed) raspberries**

*Don't forget...If you don't have buttermilk.... Mix 1 tablespoon lemon juice into 1 cup milk.

DIRECTIONS
Preheat oven to 400 degrees F.

Coat 12 large (1/2-cup) muffin cups with cooking spray or line with paper liners.

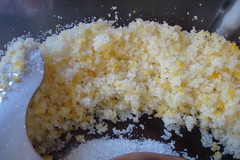
Use a vegetable peeler to remove the zest from the lemon in long strips. Combine the zest and sugar in a food processor; pulse until the zest is very finely chopped into the sugar. Add buttermilk, oil, egg and vanilla and pulse until blended.

Combine all-purpose flour, baking powder, baking soda and salt in a large bowl. Add the buttermilk mixture and fold until almost blended. **(the day before I took the PERFECT whole raspberries and spread them on a cookie sheet and slipped them into the freezer. At the time I was ready to mix them in the batter I measure them out frozen...I didn't want the raspberries to break up in the batter for they are so fragile!) Fold in raspberries. Divide the batter among the muffin cups.

Bake the muffins until the edges and tops are golden, 20 to 25 minutes. Let cool in the pan for 5 minutes before turning out onto a wire rack. Serve warm.


Tune in tomorrow to see what I made for our Mother's Day Dessert after dinner!

K-man was very sad he didn't get to eat any of these...I guess I going to have to make them again just for him....when he floated in on the 'lemony fumes' and went MMMmmmm.... I think I saw a tear when I informed him they were going home with MOM.

Thursday, May 7, 2009

Breakfast Ideas for Mom...

Time to start gearing up for the spoiling of Mom. Breakfast in bed is highly suggested! One of my mom's favorite fruits is the blueberry and she's always preferred the scones over biscuits or muffins...Not too sweet and not too dry. Perfect. Just like Mom.

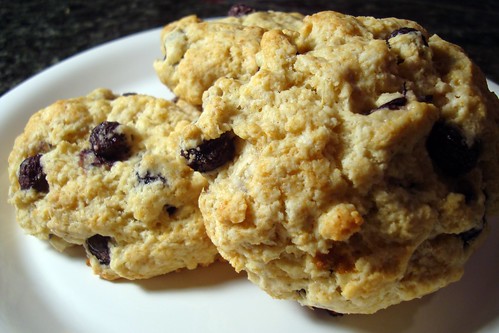
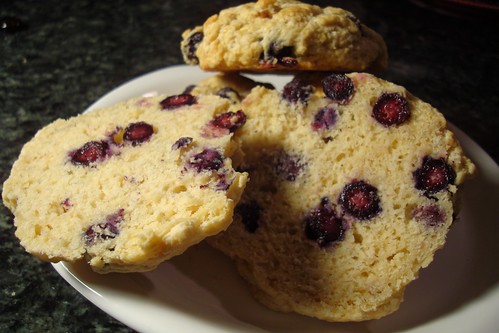
Blueberry Scones
from allrecipes.com

2 cups all-purpose flour
1/4 cup packed brown sugar
1 tablespoon baking powder
1/4 teaspoon salt
1/4 cup butter, chilled
1 cup fresh blueberries
3/4 cup half-and-half cream
1 egg

1. Preheat oven to 375 degrees F.
2. Cut butter into mixture of flour, sugar, baking powder, and salt. Add blueberries and toss to mix.
3. In separate bowl beat together cream and egg, and slowly pour into dry ingredients, stirring with rubber scraper until dough forms. Knead just until it comes together, 3 or 4 times. Don't overhandle.
4. Divide dough in half. On lightly floured board, shape each half into a 6-inch round. Cut into 6 wedges.
5. Bake on ungreased sheet about 20 minutes at 375 degrees F. Serve warm!!

Don't forget the butter and the coffee to wash it all down!

Sunday, April 12, 2009

Breaking It In !!!

Wheeeeeeeee!! Best Birthday Present Ever! Thanks K-man! I feel like I got a new car or something. The shopping around for the right model. Did I want 5Qt, 6QT or 7QT. Did I want it to tilt or not? Green, Black or Platinum....sheesh....the work!

Let me tell ya....those 20% off coupons that get sent from Bed Bath and Beyond are lifesavers! You bet we used that 20% off for THIS purchase! If you have a BBB in your area get online and put yourself on their mailing list, each month you will get a 20% off coupon. AND....you can stockpile them! I've had like 10 coupons (9 were expired) and they STILL take them! More stores need to send out coupons like BBB...that alone will stimulate the economy! LOL

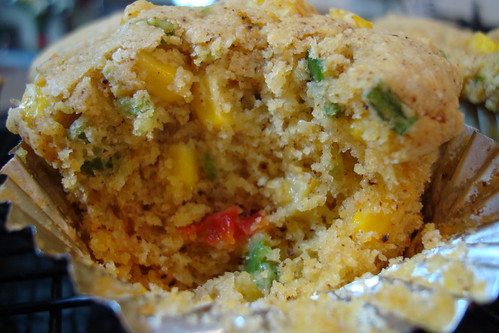
For my maiden voyage on my Kitchen Aid...I chose to try out Dorie Greenspan's Savory Corn and Pepper Muffins. Of course, as I am making them....I realize, I don't really need a mixer for this recipe. Dork. Oh well. I HAD to break it in!

I am very attentive to all the different TWD baker submissions each week. I see a plethora of the same recipes and yet it's amazing how the same recipe looks so different from blog to blog. You wonder: did they change the recipe a bit? Was it their oven temperature? Did they over mix it? Was their baking powder expired? Was it poor lighting in the photo? All cookbooks need to have pictures for you to go by something on how it looks. Anyone can certainly take creative license on anything they make and serve/prep it anyhow they want....but it's just nice to have an IDEA....Well these muffins I made do not have a picture in Dorie's book....but I surely got an eyeful from all the blogs on how my muffins ought to look today. Thanks kids!


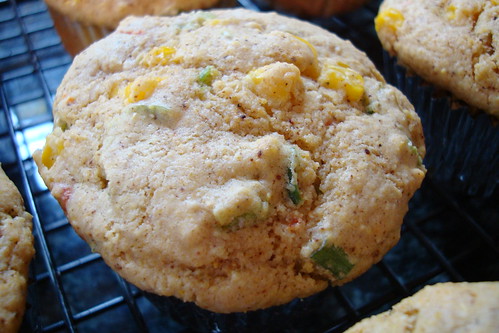
Savory Corn and Pepper Muffins
adapted from Dorie Greenspan's Baking from my home to yours


1 cup flour
1 cup yellow cornmeal
3 Tbsp. sugar
1 Tbsp baking powder
1-1/2 tsp. chili powder
1 tsp. salt
1/2 tsp. baking soda
1/4 tsp. pepper
1 cup buttermilk
1 stick melted butter
1 large egg yolk
1/4 cup corn, fresh or frozen, if canned drained and patted dry (I used the whole 14 oz can, I like it corny)
1 small jalapeno, seeded, deveined and finely diced (I used two small ones-me likes it spicy)
1/4 red bell pepper, seeded, deveined and finely diced (I minced up a trio of bell pepper from the salad bar)
1/4 c. of chopped green onion (this was not in the recipe but I had some to use up and it gave great flavor addition!)
2 Tbsp. cilantro (I omitted this, I would have had to purchase a huge bunch of it from the store to need just a small bit for this recipe)

Preheat oven to 400 degrees. Spray or line a muffin tin pan. Silcone ones would need neither.

In a large mixing bowl, whish together the flour, cornmeal, sugar, baking powder, chili powder, salt, baking soda and black pepper. In a large glass measuring cup or another bowl, whisk the buttermilk, melted butter and egg yolk together until well blended. Pour the liquid ingredients over the dry ingredients and, with the whisk or a rubber spatula, gently but quickly stir to blend. Don't worry about being thorough, the batter will be lumpy, and that's just the way it should be. Stir in the corn, jalapeno, red pepper and cilantro (if you add it). Divide the batter evenly amoung the muffin cups (I suggest using a ice cream scoop).

Bake for about 20 minutes, or until the tops are golden and a thin knife inserted into the center of the muffins comes out clean. Transfer the pan to a rack and cool for 5 minutes before carefully removing each muffin from it's mold.


These would be great with chili or with breakfast!

Saturday, March 7, 2009

Kiss Me, I'm an Irish Soda Bread Muffin!

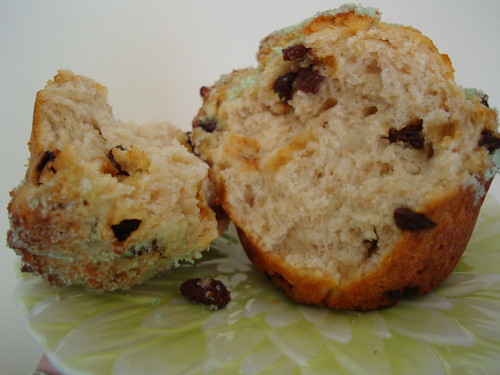
Yes, I know more Irish Soda bread...but sometimes you have to try different recipes, have you made your soda bread yet? NO? Well how about a muffin instead?

I found this on the King Arthur Flour Website:

Irish Soda Bread Muffins

1- 1/2 cups King Arthur Unbleached All-Purpose Flour
3/4 cup King Arthur 100% White Whole Wheat Flour
2 teaspoons baking powder
1/4 teaspoon baking soda
1/2 teaspoon salt
1/3 cup granulated sugar
1- 1/2 cups currants (first choice) or raisins
1/2 to 2 teaspoons caraway seeds, to taste (I didn't use)
1 large egg (I used two egg whites to cut the fat)
1 cup buttermilk, yogurt, or sour cream
6 Tablespoons butter, melted; or 1/3 cup vegetable oil (I used smart balance 50/50 blend)
sparkling white sugar, for topping

Directions

1) Preheat the oven to 400°F. Lightly grease a standard muffin pan; or line with papers, and grease the papers.

2) In a medium-sized mixing bowl, whisk together the flours, baking powder, baking soda, salt, sugar, currants or raisins, and caraway seeds.

3) In a separate bowl, whisk together the egg, buttermilk (or equivalent) and melted butter (or equivalent).

4) Quickly and gently combine the dry and wet ingredients; honestly, this won't take more than a few stirs with a bowl scraper or large spoon. As soon as everything is evenly moistened, quit; further stirring will cause the muffins to be tough.

5) Spoon the batter into the prepared pan, filling the cups about 3/4 full; the stiff batter will look mounded in the cups.

6) Bake the muffins for 20 minutes, until a cake tester inserted into the center of a muffin comes out clean. Tip the muffins in the pan, so their bottom don't get soggy. Remove them from the oven, wait 5 minutes, then transfer the muffins to a rack to cool. Serve them plain, or with butter and/or jam

Side note:
I've been off from work this week for I've been back and forth from the hospital for my mother had a heart attack last weekend. She was in ICU for the first 4 days and now we are hoping today for her to be discharged, one week later. It was very scary there for awhile and quite a reality check for many of us! She is 64 years old and a wow moment washed over us when we realized that her own father died of a massive heart attack at age 64. Someone up there said...it wasn't her time yet. So in honor of my mom....I certainly will do my best to add side notes in my recipes how to cut the fat, cholesterol and/or salt. I love you Mom, we are glad you are on the mend....sorry, I won't be adding many fish recipes on here (her Dr. wrote on her discharge orders to eat fish 4X a day....we said "WHAT?"....he said 'oops, I meant a 'week'). Well I am glad mom enjoys fish...that would be a problem for me...ick!

Monday, February 9, 2009

It's not all about stitchin' and stewin', ya know!

Your honor, exhibit A, proves that Family and Consumer Science classes reinforce what students learn in Math classes. This class is NOT "Housewifery 101" as many like to think...

Yes, FACS classes can crunch numbers. Barely, but I get them to try. I tell my students when they ask "why does Math matter? We aren't going to use it anymore after we graduate".....Here is my proof. (hey if they think they aren't going to use Math anymore....they might as well hand over all their money to me now....)

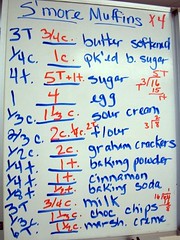
My 8th grade classes were learning to measure in class and before I started the recipe, I realized that the recipe made only 6 muffins. Well, we can't have that when 17 kids will be expecting a muffin afterward. Even if we doubled the recipe that was 12 and half a muffin still wouldn't be enough. So Ms MacK made a lesson out of it and let's quadruple it!!!

As an introduction before the demonstration, the blue writing was the original measurements. I made the students multiply everything by 4 and STILL I had to convert things like teaspoons into tablespoons and tablespoons into cups....What an undertaking!!! You have no idea how difficult this was! Basic addition or multiplication is one thing....OMG, fractions....they would just guess, they didn't care. (get cooking lady, they were thinking)

Anyhow.....So we got the measurements for 24 muffins. CHECK. The ingredients. CHECK. Oven preheated. CHECK. All the equipment out. CHECK. Audience ready to listen. CHECK.

I show them the four basic measuring tools, dry measuring cups, liquid measuring cups, measuring spoons and the spatula. I HAVE to do this demonstration, for all my students watch their parents 'eyeball method'....shaking the measuring cups....using their fingers to level....the food network has pre-measured prep bowls of food they dump in. Rachael Ray using her palm method....all these examples are too confusing. I have to show proper OLD SCHOOL methods....then explain....as they get older....they can measure with their palms (or sneakers for all I care) when are experienced cooks...LOL


I Want S'more Muffins
from Taste of Home

* 3 tablespoons butter, softened
* 1/4 cup packed brown sugar
* 4 teaspoons sugar
* 1 egg
* 1/3 cup sour cream
* 2/3 cup all-purpose flour
* 1/2 cup graham cracker crumbs (I did not buy the premade stuff, I mashed my own and left it real chunky too)
* 1/4 teaspoon salt (it got left out inadvertently, we didn't miss it since it had plenty sodium from the leavenings)
* 1/4 teaspoon baking powder
* 1/4 teaspoon ground cinnamon
* 1/8 teaspoon baking soda
* 3 tablespoons 2% milk
* 1/3 cup milk chocolate chips (we used regular semi-sweet)
* 6 tablespoons marshmallow creme

DIRECTIONS

In a small bowl, cream butter and sugars until light and fluffy. Beat in egg. Stir in sour cream. Combine the flour, graham cracker crumbs, salt, baking powder, cinnamon and baking soda; add to creamed mixture alternately with milk just until moistened. Fold in chocolate chips.
Coat six muffin cups with cooking spray; fill one-fourth full with batter. Spoon 1 tablespoon marshmallow creme into each muffin cup. Top with remaining batter.
Bake at 400° for 14-16 minutes or until a toothpick comes out clean. Cool for 5 minutes before removing from pan to a wire rack. Serve warm (a MUST).

Yield: 6 muffins

Teacher's Notes:
  • I can't tell from their pictures if they are using the Texas Sized Muffins to be making only six, but after quadrupling....we made 24 perfectly
  • Can I just say....these were AWESOME. Keep this recipe!!!
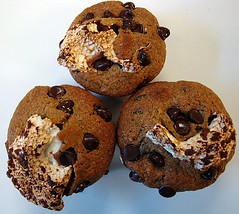
  • The muffins came out just like theirs did in the picture!!! I was sure that their marshmallows on top were some type of food styling trick so I got mini marshmallows to decorate the tops in case....NOPE, never used them. The marshmallow fluff burst out just like their pictures.
  • The marshmallows were slightly crunchy on top just like a roasted marshmallow....OH HAPPY DAY.
  • I can see why the recipe only makes 6 now. When they are hot out of the oven the warm creaminess of the chips, the gooey marshmallow with a crunchy top (just the right amount of 'burnt taste' to it....but after you put them cooled in your sealed container for later....the next day....it's just not the same! Good but not GREAT like they were yesterday. Just a warning.


As you can see, lip smacking good!!


BTW: I also make my students Read in classes too. I know, I know....how mean of me!