Showing posts with label chocolate. Show all posts

Friday, May 13, 2016

Still Whole30 with Paleo Parts


Seems so long ago when I was starting Whole30 and it was such a struggle....Really? Maybe the first few shopping trips and all that reading of labels....

Eating "Whole30 with Paleo Parts" so let me explain what THAT means. If you are STRICTLY Whole30, you are not allowed to do things like make pancakes (the Paleo egg and banana ones) or make pizza crust (out of cauliflower and cheese) and slicing potatoes and frying them in oil (fries or chips). Taking Whole30 compliant foods and putting them together to make processed foods we are addicted to or should be avoiding are NOT Whole30 compliant (this being your first initial undertaking of it). Keeping with eating Whole30 all day is not difficult or a struggle anymore. But my Paleo parts consist of....making Paleo Banana Bread and eating that for breakfast. Making my favorite Chebe/Cheenies Bread and adding NO cheese. (It worked and I can't wait to post about THAT soon!) Made some Paleo Cookies and ate a small sliver of Against All Grain Pesto Pizza.
No sugars at all, ate a few GMO, GF tortilla chips...Very doable....very happy. Here's a chocolate bar I made:


Coconut Chocolate Bar

1/4 cup coconut oil
1/4 cup ghee
1/2 cup cacao powder
1/4 cup honey
1/4 tsp. vanilla (I make my own)
pinch of sea salt
1/4 cup unsweetened organic shredded coconut.

Line pan with foil. Stir all of the above together, pour in lined pan and chill in fridge until set.  YUM!

Did some more research on Dairy....so I have been following the many FB live posts of Civilized Caveman and he talks a lot and eats only RAW dairy.  Now, "Paleo-purists" do not use dairy at all, other "Paleo-ists" do only raw dairy, and "dairy-don't-care  Paleos"....eat all dairy (that is what I used to do). As I did my research many states allow for the sale of raw dairy and many states like mine (dang you Virginia) do not allow the sale of raw dairy or milk. I can get raw cheese but not raw milk, cream or butter in VA. Some states sell raw dairy for "pet consumption only" and the people drink it.

The theory is when milk is pasteurized for the fear of bacteria, it kills about 90% of the nutrients like iron, calcium, and vitamin C from the milk leaving it relatively as good source of water and over 80% people who suffer from lactose intolerance do not have the symptoms anymore when they switch. Lastly raw dairy, boosts the immune system and protects again allergies. I ate some raw cheese on my burger and none of my allergies were triggered.

Here are some good sites to read about raw dairy:
http://www.drdeborahmd.com/health-benefits-raw-milk
http://draxe.com/raw-milk-benefits/
https://chriskresser.com/raw-milk-reality-benefits-of-raw-milk/ 

Of course, the CDC doesn't agree....lol-- but they don't want their butts in litigation if they said it was totally safe....there is a risk to everything...I could fall off my chair during this post and sue the furniture company who sold it to me....but somethings aren't worth it.


I am so very excited about my next products I am trying....
Again, Civilized Caveman George, made some cookies and spoke about this company Primal Bake Shop who makes a line of products called "Pread." Now, I am no newbie to baking Paleo products but sometimes you just don't want to bother making it from scratch, you want some convenience of less measuring, quicker but STILL WHOLESOME! and it's P-A-L-E-O!!!!!

When I went to buy the cookie mixes online, I VERY hesitantly purchased some pumpernickel bread. I ordered Paleo bread online from Julian's Bakery twice....hated it.  So dry. Used to make my own....meh....it was okay but it never rises very high for me. Got the pumpernickel because that was new...never seen it anywhere....risky Jenny....

Got my box today....Toasted a slice with my baked chicken and mixed green salad dinner and OMG...with some ghee on it....this is when you start singing a little song as you chew (inaudible) and wiggle in you chair as you eat it...nom, nom, nom...Winner!  So getting this again....Even K-man liked it. He was jealous that I had bread with dinner and he didn't....Bah....eat your potstickers K-man....you got your wheat in there somewheres...lol. Primal Bake Shop Sliced breads $13.00


Here is the ingredient list to the bread if you don't believe me....


Me want....COOKIEEEEEEEEE!!!!
From left to right: Chocolate chip, Chocolate Brownie and Salted Caramel.  I have made plenty Paleo CCC and this I am excited about.  Then, when I make the salted caramel....I am gonna add BACON.  Just you watch. This was the Cookie Monster Mix $34 Order it online, fast delivery. Quality product!!

Thanks George for enlightening me about Primal Bake Shop!

Thanks Dana if that pumpernickel is that good...can't wait for these cookies to make me fall off my chair!


Paleo it's Good!

Wednesday, October 29, 2014

Easy Fudgy Blossoms

Hey! Search no more...

I know you are looking for a quick and easy, last minute Halloween treat to whip up before Friday.

*SCREECH* Stop looking it's HERE!

Here is a very quick, insanely easy and intensely fudgy treat.  Suitable for Halloween or any holiday depending how you top it
PROMISE!

Easy Fudgy Blossoms
or Evil Witch's Hats
created by JennyMac's Lipsmack
published on Allrecipes.com

Ingredients:

1 box of chocolate cake mix (I used a dark chocolate variety-use what you prefer)
1-15 oz can pumpkin puree (NOT pumpkin pie mix)
1/2 c. mini chocolate chips
Dark Chocolate Hershey Kisses or any variety you prefer or nuts or BOTH


Directions:

1. Preheat oven to 350 degrees. 
2. Place chocolate cake mix in a bowl. Add pumpkin puree and mini chips. 
3. Mix well. Rubbing the mixture on the sides of the bowl to ensure there are no 'pockets' of dry mix. 
4. Line cookie sheet with parchment paper. 
5. Using a small cookie scooper put 12 scoops on parchment. You will fill two sheets and can still fit a couple of extra in between each scoop, they won't spread much. 
6. Bake for 15 minutes. 
7. Place sheets on cooling rack and place either a kiss or nut of choice on center and gently push. When cool, the cookie will hold the centered treat just fine.
Baker's Notes:
1.  I call these Evil Witch's Hat, because they are so moist and fudgy, you will think that they gotta be bad for you.  Nope, no oil, no egg.  They are dark so let everyone else think they are evil so that leaves more for you.
2.  ADDED BONUS!!! Kids can eat these and they will be getting some squash or veggies into their little tummies. *rubbing hands*  BWAHAHAHAHAHA! So now YOU are Evil but in a good way.

3.  You can store these in a tin because they have so much moisture you won't worry about them drying out. You can use the orange candy corn kisses to amp up the Halloween factor if you want. Or one of those new MEGA M&M's in the center....maybe for Christmas?

4. Published on Allrecipes.com!!!

Enjoy! I did!

Sunday, December 23, 2012

Ooey Gooey Chocolate Mint Crackles

If you want a sweet treat before the holidays that is easy to make.  Here is your recipe!!  These are soft, moist and taste just like a Girl Scout Thin Mint Cookie.  Not Paleo....but these can be your 'cheat' or think of the kids or visitors who would enjoy them.

Ooey Gooey Chocolate Mint Crackle Cookies
by JennyMac's Lipsmack

1 (8-ounce) cream cheese, softened
1 stick butter, softened
1 egg
1 teaspoon vanilla extract
1 (18-ounce) box moist chocolate cake mix
1/4 cup unsweetened cocoa
1 cup andes candies (I used the bag of them already chopped in the pink and white candy cane-you can use the green one and chop yourself)
Confectioners' sugar, for dusting

Preheat oven to 350 degrees F.
 In a large bowl with an electric mixer, cream the cream cheese and butter until smooth. Beat in the egg. Then beat in the vanilla extract.
Beat in the cake mix and cocoa.
Add in the chopped Andes Candies.
Roll the into tablespoon sized balls and then roll them in confectioner's sugar. Place on an ungreased cookie sheet, 2 inches apart. Bake 12 minutes.
The cookies will remain soft and "gooey." Cool completely and sprinkle with more confectioners' sugar, if desired.

Cook's Notes:
I came across one last cookie forgotten in the Holiday tins.  It was STILL soft.  SNARF.  Gone.   No one died eating a week old cookie.  LOL


Merry Christmas to you and yours!

Saturday, October 27, 2012

Vomit Piles


HHAHAHAHA!  Why not?  Halloween is coming!!!  What I absolutely ADORE about Halloween is that it is my opportunity to take a simple no bake treat with chocolate and oatmeal and rename it and it totally works!

I have this recipe elsewhere called a Raggedy Robin or Cow Patties.  I made this on Friday for my students, they loved it.  It worked nicely for our abbreviated periods (we had early release) for I was able to make it, chill it and they ATE.  Please tune in for more recipes to come or go to my link to ALL my Halloween recipes on my school web page.

Vomit Piles
by JennyMac Lipsmack

 1/2-cup milk
1 stick margarine
1/4 cup unsweetened cocoa
2 c. sugar
1/2-cup peanut butter
1 tsp. vanilla

3 c. oatmeal
 
Combine first four ingredients.  Cook on medium heat until boiling.  Rolling boil for 1 - 1 & 1/2 min.  Remove from heat and mix vanilla and peanut butter.  Mix well.  Pour over oatmeal in a large bowl.  Mix quickly in a large bowl.   Spoon out onto wax paper*.  Let cool for 10 minutes.
 
*Grosser addition: add some 'chunks' like raisins, dried apricots bits, nuts for more gross out value!!

My recipes to come that I am making at school are:
  • Spider Web Breadsticks
  • Hairy armpits
  • Spider Cake (made with a Zebra Cake base)
  • Used Tampons (don't worry, it's for a ALL girl class- only they could appreciate)
  • Ghost Cake 
  • Maybe a picture of my classroom kitchen decorated for Halloween (a FIRST!)


Enjoy!

Wednesday, April 18, 2012

Paleo Brownies

Whether you are on a diet or experiencing a new lifestyle of eating....sweets are always recommended to be in moderation.  I am a confessed 'chocoholic' and when I choose to go "Paleo" and found it was not on the 'forbidden' list like grains, sugar, legumes, etc; I was a happy camper.

I've trolled around the web a bit to find a good recipe as well as used a recommended one from a fellow Paleo co-worker who turned me onto this new way eating (forever in your gratitude Ginny!).  Alas, my first attempt was not a good one.  I blame it on the second type of coconut oil I was using; it was a highly scented and flavored of coconut.  I did not want my brownies to taste like Almond Joy (yet).

Since I think I've got a pretty good starting grasp on my use of Almond flour and baking in general....I made my own.  It's thin, yet fudgy.  I am happy with it....perhaps you will enjoy it too.  Let me know.

Yummo-Paleo Brownies
-created by Jenny Mac's Lipsmack

1/2 cup honey
3 (1 oz) squares unsweetened chocolate (or 1/2 cup cocoa powder and increase oil to 5 T)
2 T coconut oil, organic butter or favorite oil of choice
1 tsp. vanilla
2 eggs
1 cup almond flour

Preheat oven to 350 degrees.

Melt oil and chocolate in the microwave for 1 minute intervals, until melted.  Thoroughly stir in honey.  Blend in eggs one at a time.  Mix well.  Add vanilla.  Stir in flour.

Spread in a 8X8 baking pan (a disposable aluminum one works awesome without greasing).  Bake for 30 minutes or until a knife comes out clean.  Cool and cut into 16 squares.


Enjoy!

Wednesday, August 11, 2010

Zebra Cake

Zebra Cake with Ganache

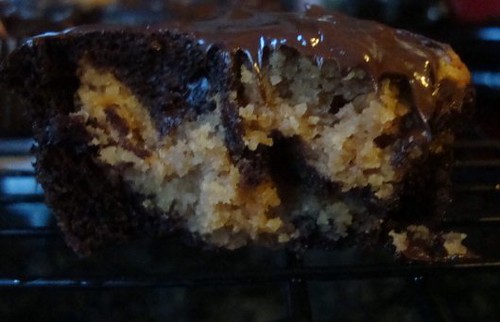
I bet you are dying to see what lurks under this yummy chocolate ganache. What does a Zebra Cake look like? Before I give you the recipe I wanted to ask you something. Have you tried any baking using the WEIGHT method versus VOLUME (using measuring cups)? Baking is definitely a science that can be unforgiving if your measuring is off. Get a little heavy handed with the flour or scoop it wrong and it won't rise alot or it's too dry/dense. I will tell you get a little scale from Bed Bath and Beyond (about 20-30 bucks) and use it. I've done it a few times and wished all my recipes were in weight form....so much easier. Give it a try?

Zebra Cake
from King Arthur Flour/Baker's Banter

1 cup granulated sugar
4 large eggs
1 cup milk (whole, 2% or 1%)
1 cup vegetable oil
1 teaspoon vanilla
2 cups King Arthur Unbleached All Purpose Flour
2 teaspoons baking powder
1/4 teaspoon salt
3 tablespoons Double Dutch Dark Cocoa

or if you'd like to weigh it out.....

7 ounces granulated sugar
4 large eggs
8 ounces milk (whole, 2% or 1%)
7 ounces vegetable oil
1 teaspoon vanilla
8 1/2 ounces King Arthur Unbleached All Purpose Flour
2 teaspoons baking powder
1/4 teaspoon salt
3 tablespoons Double Dutch Dark Cocoa

Directions

1) Preheat the oven to 350°F. Lightly spray a 9" x 2" round baking pan with cooking spray. Line the bottom of the pan with a circle of parchment, and spritz again. Set the pan aside.

2) In the bowl of your mixer, blend the sugar and eggs until lightened, about 2 minutes. On low speed blend in the oil, milk and vanilla until well combined and smooth.

3) In a separate bowl, combine the flour, baking powder and salt. Whisk to remove any lumps. Add the dry mixture to the wet ingredients. Combine on medium speed 1-2 minutes or until the batter is smooth and lump free. Be sure to scrape down the bowl halfway through mixing.

4) Remove 2 cups of the vanilla batter and place it in the measure you used for the liquid ingredients. Sift the cocoa over this batter, and stir well to combine. Be sure to use a sifter to avoid cocoa lumps in the batter.

5) Now for the stripes. Spoon about 3 tablespoons of vanilla batter into the center of the cake pan. Next, spoon 3 tablespoons of the chocolate batter into the center of the vanilla batter. This causes the vanilla batter to spread out. Continue to alternate batters, in bulls-eye fashion until all batter is used. You will now have thin rings of each batter on the outer edges of the pan, thicker rings towards the center.

6) Bake the cake in the center of the preheated oven for 40-45 minutes, or until the cake is lightly browned and a toothpick inserted into the center comes out clean. Cool the cake in the pan for 10 minutes, and then turn out onto a wire rack to finish cooling. Frost as desired.

Zebra Cake

Chocolate Ganache
from allrecipes.com
  • 1 cup semisweet chocolate chips
  • 2/3 cup heavy whipping cream
  1. In a heavy saucepan, melt chocolate chips with cream over low heat. Remove from the heat. Refrigerate, stirring occasionally.
  2. For a pourable ganache, cool until mixture reaches 85 degrees F-90 degrees F and is slightly thickened, about 40 minutes. Pour over cake, allowing some to flow down the edges to completely coat. Spread ganache with a spatula if necessary to evenly coat, working quickly before it thickens. Chill until set.
  3. For spreadable ganache, chill until mixture reaches a spreadable consistency. Spread over cake. Chill until set.


    Zebra Cake with Ganache
Keep the amounts of each chocolate and vanilla mixture as exact as you can. For you can see that I had more chocolate mixture left and it upset the 'balance' of the stripes. I guess I could have just stopped and didn't put the extra in. But I figured K-man will be so wowed over the stripes (so would your cake eating guests) that it probably wouldn't be noticed. Very fun....easy to do in one pan....Yummy too! The ganache was perfect!

Enjoy!

Wednesday, July 21, 2010

Cowboy Cookies and New use for a Pan

I am always a sucker for good homemade cookie. If it's chocolate or got chocolate in it...done deal!
Of course, during the summer who wants to heat up the kitchen. Save these for one of those rainy days when it isn't so hot and want something to do with the kids!!!


Cowboy Cookies
3 dozen large cookies; 6 dozen small cookies

3 C Flour
1 Tbsp. Baking Powder
1 Tbsp. Baking Soda
1 tsp. Salt
1½ c. Butter (3 sticks), at room temperature
1½ c. Sugar
1½ c. Light Brown Sugar, packed
3 Eggs
1 Tbsp. Vanilla
3 c. Semisweet Chocolate Chips
3 c. Old-Fashioned Rolled Oats
2 c. Sweeten Coconut Flakes
2 c. Chopped Pecans (8 oz)

Directions:

1. Preheat oven to 350º

2. In a large bowl, combine flour, baking powder, baking soda, and salt. Set aside.

3. In a large bowl, beat butter on medium speed until smooth. Add sugar and brown sugar to butter and beat for an additional 2 minutes. Add one egg at a time and beat after each egg.
Add vanilla and beat.

4. Add flour mixture and stir until combined. Do not over mix.

5. Hand mix the chocolate chips, oats, coconuts and pecans and combine.

Place ¼C (use either a measuring cup or an ice cream scoop) of dough on ungreased baking sheet about 3 inches apart. Bake for 15- 17 minutes or until edges start to brown.

Remove cookies and let sit on tray for about 1-2 minutes before placing on a cooling rack. OR

For smaller size cookies use a regular size cookie scoop. My cookie scoop measures about 1 Tbsp. Bake for about 10-12 mins.

NOW FOR THE UNIQUE USE OF A PAN!!!!

I purchased one of those "Perfect Brownie" Pan sets. Ironically, I have not used them for brownies yet. LOL

I put one scoop of each cookie in each space. ( I put the remaining cookie dough formed in balls in a ziploc bag in the freezer for future cookie cravings) Baked @ 350 degrees for 10-15 minutes.

Lower pan on stand, lift dividers out come your squares. I loved how each square had it's own crusty edge. YUM.


Cowboy Cookies on Foodista
Delish!

Saturday, May 15, 2010

Happy Chocolate Chip Day!

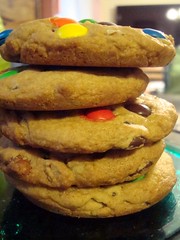
I found this recipe on Picky Palate's blog....oh boy! How appropriate with today being Chocolate Chip day! Let's celebrate with a big fat XXL cookie!!! Jenny from PP used M&M's....that was my springboard....so I hit the candy aisle....lookee what else I put on the cookie...

XXL Chocolate Chip Cookies1

What makes these cookies so large is that you use the muffin top pans. I have 3 of them at my school so I borrowed them for this recipe. Perfect! If you'd like more of a tutorial how to use these pans with these cookies check out Jenny's Picky Palate blog for more detailed pix...

XXL Candy Chocolate Chip Cookies
adapted from Picky Palate

2 sticks softened butter
3/4 Cup sugar
1 Cup packed light brown sugar (I used half dark brown and light brown)
2 extra large eggs
2 Tablespoons pure vanilla
3 3/4 Cups all purpose flour
1 1/2 teaspoons baking soda
3/4 teaspoon salt
12 oz bag chocolate chips
1 bag M&M’s, Reese's Pieces, Almond or Peanut M&M's, Heath Bar Bits

1. Preheat oven to 350 degrees F. In a stand or electric mixer beat the butter and sugars until well beaten. Beat in eggs and vanilla until well combined. Place flour, baking soda and salt into a large bowl; mix. Slowly add to wet ingredients along with the chocolate chips. Do not mix in M&M’s!!

2. Scoop 1/4 Cup of dough and press into a muffin top pan (or just press onto a parchment or silpat lined cookie sheet) using your hands or the bottom of a moistened glass. Now, press your M&M’s onto pressed cookies. I did a pan of M&M's (dark) and a pan of Reese's. Another pan of Heath Bar bits....Bake for 12-15 minutes, until edges just start to turn golden brown. Let cool for 10 minutes on muffin top pan or cookie sheet before transferring to a cooling rack.

About 18 XXL cookies!

XXL Chocolate Chip Cookies3

I made a DOUBLE batch to take to my GIRL's weekend at the beach. I know we all needed to have some homemade chocolate lovin' from the oven.

Don't worry....I left a few (like 10) for K-man to enjoy while he spends the weekend alone. Care to guess how many will be left when I return after 3 days?

Thanks Jenny....this XXL ROCKED....I hope we don't eat them all on the drive over to the beach!

Tuesday, May 4, 2010

Cookie Cake Pan Review

Hey there Kids!

Lookee, what I got.

I saw this pan months ago on Baking Bites (I searched her page forever under "Gear and Gadgets" and couldn't find the post but she has posted about other Williams Sonoma cake pans.) Of course, being the Cookie Club Sponsor at my school; I had to get it.

And it sat. Why you ask? Because I read W.S. site's mixed reviews about it. Hmmmm. How to accomplish this cake task without wasting my time and ingredients?

Step One: Purchased Wilton's Cake Release - many complained about the cake sticking. Well look at all that detail...of course you can expect sticking. Some said to use the recipe on the back of the box....others said 'don't use THAT recipe on the box...use a brownie mix....ugh!

Step Two: Williams Sonoma produced their own cake mix to use with the pan. Ok, will try it...but I really hate box mixes they all have the same chemical under-taste to me

Step Three: Bake the cake box mix according to their directions and it should look like this:

Not this:

Cookie Cake made from mix1

Cookie Cake made from mix

And if you bake their recipe on the BACK of the box that the pan came in it should look like this:


NOT this:

Cookie Cake made with recipe from box


Cookie Cake made with recipe from box1

A comparison....

Which Cookie Cake is better?

Here are my observations:

1. The box mix tells you to FLOUR the greased pan....ewwwww look at the 'ashy' residue to the cake on the right (above) yet the recipe on the box tells you to dust the greased pan with unsweetened cocoa (that looks better).

2. The box mix raised much like a cake (I should have leveled off the tops like you do when you make a layer cake....my sixth graders were too impatient for that step plus I forgot.

3. The homemade recipe off the box baked much like a brownie with a shiny, flat and crackly top.

4. The box mix came out of the pans with no problem at all....too bad they looked so ugly. Actually they looked worse but I dusted them with some cocoa with a basting brush and they still came out like above.

5. The homemade recipe took some 'banging' to get it out. The first pan came out eventually. The second one- half fell out, half remained in the pan. I had to do 'surgery' to get it out. All I can say is....thank god it was able to be hidden underneath the frosting as the bottom layer.

6. A LOT of butter was used to make both of these cakes. I'd say roughly a POUND of butter each. Two stick for the cake...and two sticks for the frosting. Speaking of which....the homemade frosting....no brainer....anything with two sticks of butter with powdered sugar...YUM. Yet the frosting from the box. It was vanilla flavored powdered sugar. For it called for the same amount of butter and milk added to the FAKE smelling vanilla powdered sugar. ACK....hated the taste.

7. Perhaps the frosting could have used less milk...although it was soft for both....as soon as you put the top 'cookie' on the frosting....the oozing started. QUICK....start cutting!!!!

8. Oh yeah THAT, the cutting. What a hot mess. The picture seen here was NOT how my cake sliced. If you remember one of the pictures above....I had 4 cracks working on one. And I took the picture pretty much after I placed it on top. All I can say is that thank gawd I wasn't serving this to impress a party....I would have been embarrassed. The sixth graders didn't care. They were drooling over the sugar fix they were about to satisfy at 8:30am....BREAKFAST of CHAMPIONS! Two got a piece of each to try for comparison sake.

9. The kids picked the homemade recipe from the box as a better tasting one! Phew!

10. Clean up with the pans....the cake mix stuck very little and clean up wasn't so bad with hot water, soap and good sponge. The homemade recipe...OMG...I soaked and scrubbed and soaked and scrubbed. I finally had to resort to a toothbrush for all those nooks and crannies.

It amazes me over the range of reviews from "horrible-the pans are going back" to "looks better than the picture" They all ranged from using the mix to a store box cake mix. ALL over the board. So what do I tell you? Buy it or not?

Well, I won't be making this anytime soon...I am still exhausted over it. 3 days of demonstration to my students. But since I see that there are people out there who are making this 'nicely' I feel challenged to get it right. I am hopeful to find the right combination. So if you are up to a challenge and looking for a fun thing to make with your kids get the pans....not the mix. Start with the recipe on the box and try other recipes....unless you are a box cake fan...ick. Not me.

Purebred Cookies Rock!

Thursday, April 29, 2010

Brownies on Steroids?

The Incredible Hulk of Brownies needs to be put in a glass jail for your safety?

Mystery Goodie!

Um, that is a definite YES....for the safety of your waistline....keep under lock and key. I found this recipe on the Cutting Edge of Ordinary. I saw them and said "these look a lot like those Magic 7 layer bars made with sweetened condensed milk".... Sure enough...they are. OH MAN a chocolate version of an already decadent bar cookie? My waistline is in TROUBLE.

Brownies on Steroids?

I was in trouble alright when I was in the middle of making it and realized what I thought was sweetened condensed milk in the pantry was evaporated milk. OH SNAP! Quick run to the computer to look up how to make your own sweetened condensed milk (I'd seen it before yet never tried it).

These babies are rich. See the size of these squares?....Half of that will suffice a sweet tooth.... unless you are having a super stressful day, then eat TWO big ones.

Death by Black Magic Bars

adapted from Lisa's The Cutting Edge of Ordinary recipe

1 & 3/4 cup all-purpose flour
3/4 cup confectioner’s sugar
1/3 cup baking cocoa (I used the Hershey's Dark)
3/4 cup cold butter (1 & 1/2 sticks), cut into 1-inch squares
14 ounce can sweetened condensed milk *(see recipe for emergency below)
1 teaspoon pure vanilla extract
1 cup Coconut Cream Hershey's Kisses, chopped
1 cups semi-sweet chocolate chips
1 cup coarsely chopped toasted pecans
1/2 cup shredded, sweetened coconut
1/3 cup English toffee bits or Heath Bar bits (toffee with chocolate)

Oven to 350. In a food processor, combine the flour, sugar and cocoa. Add the butter and pulse just until the mixture resembles coarse crumbs. Press into the bottom of a well-greased 13×9″ baking dish. Bake on center rack at 350 for 10 minutes.

While crust is baking, combine condensed milk, vanilla extract and 1 cup of chopped Coconut Cream kisses in heavy-bottomed saucepan and cook over low-medium heat, stirring constantly, until mixture is smooth. When crust has cooked for 10 minutes, remove from oven and pour chocolate mixture directly over crust, spreading gently with a spatula if necessary.

Sprinkle top with coconut, nuts, heath bar bits and 1 cup chocolate chips. Press down to set, and return brownies to oven to continue baking at 350 for 18-20 minutes. Remove from oven, allow to cool, and cut into squares of desired size.

Brownie on Steroids?

*For the rare emergency that you don't have Sweetened Condensed Milk when you need it....

Homemade Sweetened Condensed Milk

Ingredients:
3/4 C. sugar
1/2 C. water
1 C. plus 2 T. powdered milk

Preparation:
Combine all ingredients. Heat to boiling. Cook until thick, this will take 15 to 20 minutes.
This equals one can.

Notes:
This is a great way to make this milk, especially if your recipe calls for it and you don't have any in the house. It is lot cheaper to make it this way, and it does work nicely for baked goods.

Thanks Lisa.....awesome recipe! I made sure I brought some to work and gave some to my neighbor for no way I was letting all that BLACK MAGIC hit my hips! Besides....it's good to share. Thanks for sharing Lisa, you DA BEST!

Enjoy!

Saturday, April 24, 2010

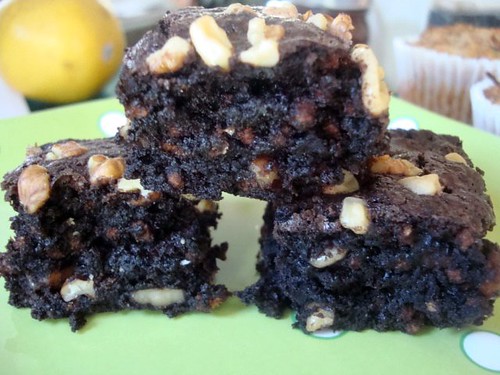
All-Bran® Bran Buds® Brownies

Yes, I know, hard to believe there is BRAN in here!

I promised some Brownies made with bran from the cereal I got from my Tastemaker samples and here they are....YUMMMMMMMMMMMM. So moist. If you think BRAN makes things DRY and all 'fibery' tasting....you are WRONG!

All-Bran® Bran Buds® Brownies
from all-bran.com

Ingredients
2/3 cup all-purpose flour
1/4 teaspoon salt
1/2 cup cocoa powder (I used Hershey's Dark)
2 eggs
1 cup sugar
1/2 cup All-Bran® Bran Buds®
1 teaspoon vanilla
1/2 cup margarine or butter, melted, cooled
1/2 cup chopped walnuts

Directions
1. Stir together flour, salt and cocoa powder. Set aside.

2. In large mixing bowl, beat eggs until light. Add sugar gradually, beating until fluffy. Fold in KELLOGG'S ALL-BRAN cereal, vanilla and margarine. Fold in flour mixture and walnuts. Spread evenly in 8 x 8-inch pan coated with cooking spray.

3. Bake at 350° F about 30 minutes or until wooden pick inserted near center comes out clean. Cool completely in pan.

Definitely being made AGAIN,

Tuesday, April 20, 2010

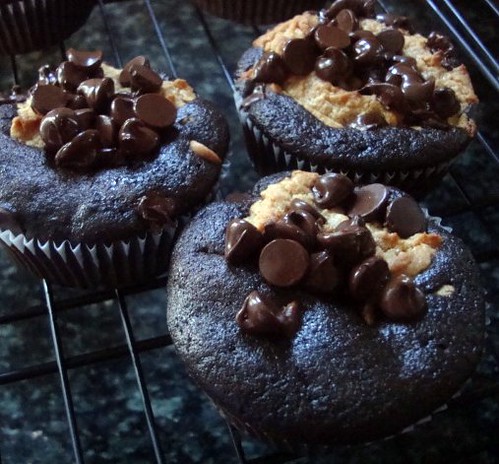
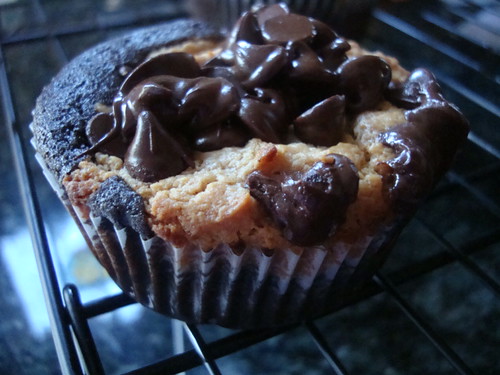
Chocolate Peanut Butter Layered Cupcakes

I am always in the mood for Chocolate and Peanut Butter Combinations! I found these on Pillsbury's site!

Chocolate Peanut Butter Layered Cupcakes
from Pillsbury.com

1 1/2 cups all purpose flour
1/3 cup baking cocoa (I used Hershey's Dark)
1 cup packed brown sugar
1 teaspoon baking soda
1/4 teaspoon salt
1/3 cup oil
1 cup water
1 tablespoon white vinegar
1/2 teaspoon vanilla
1 egg
1 package (8 oz) cream cheese, softened
3/4 cup peanut butter
1/3 cup granulated sugar
1/3 cup powdered sugar
1/4 cup peanut butter chips
1/4 cup semi-sweet chocolate baking chips


1. Heat oven to 350°F. Place paper baking cup in each of 18 regular-size muffin cups.
2. In large bowl, mix flour, cocoa, brown sugar, baking soda and salt. Add oil, water, vinegar and vanilla to flour mixture, stirring just until smooth (do not overmix).
3. In another large bowl, beat egg, cream cheese, peanut butter and granulated sugar with electric mixer on medium speed until smooth. Add powdered sugar; beat until creamy.
4. Spoon 1 level tablespoon chocolate batter into each cup; evenly spread 1 level tablespoon peanut butter filling on top. Repeat layers. Sprinkle with peanut butter chips and chocolate chips.
5. Bake 25 to 30 minutes or until toothpick inserted in center comes out clean (do not overbake). Cool in pan 15 minutes. Remove from pan to cooling rack; cool 15 minutes. Serve warm or cool.

Recipe says makes 18.

We shared with two neighbors. One was moving and this was my goodie for them in case they got hungry during the move. The remaining ones I left for K-man and I were gone in 3 days!

Easy and so yummy!