Showing posts with label pizza. Show all posts

Saturday, November 22, 2014

Homemade Spinach Pizza Roll

If I asked what is the ONE dinner that you eat at least once a week, regardless of work night, school night or weekend....what would your answer be?

Fast Food? (please don't say McDonald's) Soup? Sandwiches? Spaghetti? Pizza? PB and J? Cereal?

Ours is PIZZA! First of all, we rarely call out for pizza if we do I am, knocked out, dragged out too tired from work to even walk into the kitchen and we have this little hole in the wall pizza place we call, no Domino's or Pizza hut (yuck) However, when I want an easy night to make dinner, it's Pizza Night! We like a thin crust, no sauce, one meat and lots of veggies!

For November, the Allrecipes.com Allstar Ambassadors could choose Reynolds this month to cook, blog and share about. I jumped on that!  I am a huge fan and use the Reynold's Non-stick Foil practically everyday. I have a roll in the drawer and always a spare in the cabinet for when you finish the "roll in the drawer." Nothing is more infuriating than to pull out the foil to cover a long pan and BOOP!- you get a 3 inch strip and naked cardboard roll! Dammit, you say because you have no more.  Not me.  As soon as I open the new roll, I am shopping for the back up roll next week.  So yeah I am THAT devoted and it really is totally different that regular foil.  I especially love using it when I bake my bacon.  I do not fry it on the stove anymore.  350º for 20 minutes on the non stick foil....so much easier. 

Ok, back to pizza.  One of the recipes I choose was the Homemade Spinach Pizza Roll.  I love variations on a popular favorite!  Some people would call this a stromboli but whatever, my mouth and stomach don't care what it's called.  It was delish! Take a look at some of my notes after the recipe.

Homemade Spinach Pizza Roll
from Allrecipes.com, recipe by

1 tablespoon cornmeal
8 ounces bulk Italian sausage
1 (13.8 ounce) package refrigerated pizza dough
1 cup shredded mozzarella cheese, divided
1 cup fresh baby spinach
1/4 cup grated Parmesan cheese
1 egg, lightly beaten
1 (8 ounce) can pizza sauce, warmed

1. Preheat oven to 375 degrees F. Line a large baking sheet with Reynolds Wrap(R) Non-Stick Aluminum Foil; sprinkle with cornmeal. Set aside.
2. Brown sausage in large skillet on medium-high heat. Drain and set aside.
3. Unroll pizza dough onto prepared baking sheet. Carefully stretch or roll dough into a 13x10-inch rectangle. Arrange sausage on dough to within 1/2 inch of the edges. Sprinkle with 1/2 cup of the mozzarella. Layer spinach on cheese. Top with the remaining 1/2 cup mozzarella and the Parmesan. Starting from a long side, roll up dough to make a 13-inch-long loaf. Pinch seam and ends to seal.
4. Place loaf, seam side down, on the prepared baking sheet. Brush with egg. Using a sharp knife, cut four 2-inch slits in top for steam to escape.
5. Bake 20 to 25 minutes or until golden brown. If necessary, cover the last 5 minutes of baking to prevent over browning. Remove from oven and slice into rounds to serve with pizza sauce.
#AllstarsReynolds 
#MealMagic
Cook's Notes:
1. Don't ask why my photos were taken at an angle.  I viewed them now and in the cropping process I was like WTH, was I thinking?  Stupid but oh well. I am NOT one of those photogs that take too many pictures.  I click for what is needed and CHOW DOWN, no time to mess around.
2.  This was actually my second attempt, the sausage went in that version.  It stuffed it too much and although it was ok....the internal picture wasn't as nice. So when I made TAKE 2.  I had only meatballs on hand.  Chopped up and sauteed olive oil.  They worked just fine.
3.  My first attempt was using a store brand canned pizza dough, I also rolled it out too thin, don't do that.  The second one I used Pillsbury and didn't push my luck on the thinness, I stretched it out just about 2 inches more than it's original size.  You can see the breading around holds the ingredients well. 
4.  i REALLY liked the spinach on this.  I hate how you can pile on tons of fresh spinach and it reduces down to nothing.
5.  Even though the Non-Stick foil really sticks less, the cornmeal really helps make this virtually non sitck.  I use cornmeal on my fresh pizza dough nights too.
6.  What I adore mostly about making pizza or pizza rolls/strombolis is that they are so versatile.  Whatever ingredients you have on hand will work and you will never get tired of Pizza Night each week.


Bite it!

Thursday, March 10, 2011

White Chicken Pizza with Caramelized Onions

Surprise!
Another Tweak with the garlic breadsticks dough recipe from a few days ago....

White chicken pizza2

White Chicken Pizza with Caramelized Onions

adapted from Recipe Shoebox

2 Tbsp. butter
3 cups thinly sliced sweet onions
1 tsp. thyme
2 oz. garlic herb cream cheese (I used Boursin light)
1 pre-baked pizza crust (breadstick recipe just NOT cut before baking)
1/3 cup prepared Alfredo sauce
1 cup shredded rotisserie chicken
1 lb. grated FRESH mozzarella cheese

Directions: Prebake Crust from link above (press into jellyroll pan and bake for only 10 minutes)

Melt butter in a skillet and cook onions for 20-25 minutes, until deep golden brown and caramelized; stir in thyme leaves.

Stir cream cheese and Alfredo sauce together.

Spread over pizza crust.

Top with chicken, then onions, then cheese.

Bake at 450° for 10 minutes or until heated through. Enjoy!

White chicken pizza1

Creamy, dreamy...HEAVENLY. I just love white pizzas. The original recipe used sugar with the onions...but it made it too sweet for my taste. Didn't need it.

White chicken pizza

I am not sure if a premade thin crust could handle this....the thick dough of the breadstick recipe held up with the moist Alfredo goodness. Not only is this easy recipe awesome for breadsticks as in this original recipe....it also holds up well for pizza too. Gonna have to play with this recipe for my classes since it's so quick!

Pizza-licious!

Wednesday, February 23, 2011

Smoked Mozzarella Sausage Pizza

I don't know about you but finding smoked cheeses has been hit or miss around here lately. Sometimes I can find the smoked gouda or cheddar and smoked mozzarella is always around. I guess I need to venture farther than my local Harris Teeter? lol

S, M and SM Pizza

I am ALL about making our own pizza. Sorry I won't do frozen pizza from a box anymore OR calling any local pizza chain either. If we are going to splurge on pizza I am going to make it. Fresh meats, homemade sauce and fresh veggies. The only cheat.....frozen pizza dough. Yup. I am not TOTALLY out of my mind here....gotta have some compromise, right?

I love fresh mozzarella. A very different affect on your pizza if you use fresh over the block stuff and two steps above if you use the 'already shredded' stuff (sorry, I gave up the preshredded stuff too when I found out they add stuff to it to keep it from sticking....I grate my own now too).
I wanted to try the 'smokey stuff' with our sausage to mix it up in our pizza makings....I was great and easy too.

Smoked Mozzarella Sausage Pizza
Lipsmack creation

1 Frozen Pizza Dough (New York Pizza Deli brand puts two in a box, they also make Whole Wheat)
Your favorite sauce (I just used a can of 29 oz store brand plain tomato sauce with 2 T of Italian seasons and some garlic)
1 lb hot italian sausage, browned
1 pint of mushrooms, cooked
1 onion, chopped and cooked
1 lb. smoked fresh mozzarella (found usually in your gourmet cheese section of grocery), sliced
fresh parmesan

Preheat oven to 450 degrees.
Brown your sausage. Remove from pan. In sausage drippings, saute the mushrooms and onions. Add sauce and sausage. Add fresh garlic if you like. Simmer.

While sauce is cooking, roll out dough on parchment paper. If you do not have a pizza stone, turn over a cookie sheet and that will work (WHY haven't you gotten a pizza stone yet? Just keep in in the oven 24/7 like I do....it's too heavy to take in and out....just leave it be. Actually I take it out only for T-day feast cooking). Rectangle or circle, roll out that dough. Place in oven to parbake (I sometimes have to keep a skewer handy to POP the bubbles). Just cook about 8-10 minutes to cook it through. Remove from oven.

Place sliced mozzarella on baked crust (yes you heard me right, cheese first, don't argue with me!). Place sausage/veggie sauce on cheese. Slide dough back into oven until crust is browned, cheese is melted and bubbly.

Cut into 8 slices and add fresh parmesan on top before serving.

Sausage, Mushroom & Smoked Mozzarella Pizza

Look at that thing of beauty. You couldn't get a tastier pizza from any box or restaurant, trust me. Homemade pizza rocks. The little extra effort is soooooooooooooo WORTH it!
Commanding you to make more homemade pizza,

Wednesday, May 5, 2010

Supreme Pizza Bubble Bread

When you have all the makings for a nice supreme pizza...it really bites when your only 'bread' is some canned biscuits. I said to myself...."I REFUSE to press them out to make mini pizzas! Nor am I going to press them all together to FAKE pizza dough!"

Supreme Pizza Bubble Bread1

So here is what I did to make my pizza 'outside' the box....

Supreme Pizza Bubble Bread
JennyMac Lipsmack Creation

2 cans of refrigerated biscuits (10 count each)
1 cup of chunky tomato sauce (mine is just canned whole tomatoes mooshed with my hands with Italian seasoning, garlic powder and parmesan cheese added to taste)
1/2 cup onions, chopped.
1/2 green pepper, chopped
1 pint mushrooms (raw or sauteed)
1/2 cup pepperoni, chopped in half
1/2 cup Italian sausage, (however styled, mine was leftover from a hot sausage sub night, chopped)
4 mozzarella cheese sticks, chopped
1-2 cups mozzarella cheese, shredded.
Freshly grated parmesan

Preheat oven to 400 degrees.

In a large bowl, mix the sauce, onions, peppers, mushrooms, pepperoni, sausage and chopped mozzarella sticks. Cut each biscuit into quarters and mix into the 'supreme' mixture.

Put supreme mixture on lightly oiled pizza pan (not the ones with holes). Spread it out about 1 inch from edge. Bake for 20 minutes. Top with shredded mozzarella cheese and bake for additional 5 minutes or until cheese is melted. Top with freshly grated Parmesan. Pizza can be served as a slice and eaten with fingers or just serve from pan in center of table and everyone just pull and eat!
Here have a bite!

Supreme Pizza Bubble Bread2

Fun pull apart type of dinner that is kid friendly and chocked full of veggies! Also, this was NOT a supremely EVIL pizza if that is what you are thinking, I used turkey pepperoni and sausage, the mozzarella was reduced fat. So there.

Supreme Lipsmacking,

Monday, February 1, 2010

Dishing Deep

I've made many a pizza and love how you can change it up with the different toppings, dough or sauce....but how about changing around the ORDER of those toppings to make your pizza different?

If you are aware that Chicago Style pizza is not only DEEP DISH but they put their sauce on top rather under the cheese. So I felt in the mood to play around with our pizza .....with the ORDER, that is.

If you have a deep dish pizza pan (mine has holes on the bottom so my dough type wouldn't work this time) a larger cake pan would work....but a 10 inch springform pan is just perfect.

Deep Dish Pizza

Pizza Dough of choice (you can use the refrigerated type, frozen pizza dough or the dough mix in an envelope)
1/2-1 cup of Meat of choice (pepperoni, sausage, chicken, soy crumbles)
8 oz package of favorite cheese (either grated or sliced is fine)
1 cup of sauce (meat or tomato only)
veggies of choice (pictured mushroom and onion)

1. Preheat oven to 400 degrees.

2. Place dough in nonstick pan. I find a greased pan is difficult for the dough will keep shrinking back. Use hands to press dough on bottom and up the sides about 1 inch. 2 inches if you plan on loading up the toppings.

3. Layer your pepperoni's or sausage. Whatever you choose, the meat goes on the dough first.

4. Now for the cheese. I used a mixture of shredded and sliced. I put on the shredded first and the slice last. I did this intentionally for I knew that I'd been spreading around sauce on it and didn't want the cheese to get mixed into the sauce.

5. Top with your sauce. You may want to watch how the amount spreads. You want only just enough to cover the cheese. Those of you who are using only a veggie based sauce probably even less. When the sauce heats up it will spread. So go on the light side.

6. Arrange your veggies on top last for you want them to cook more from the oven's heat. Having the veggies under the cheese or sauce....they will not cook as much and will still be crunchy (unless that is what you are going for).

7. Bake for 25 minutes or until crust is brown and crispy and veggies on top are cooked to your liking.

8. Remove your springform ring and slide pizza off springform pan bottom to cut on a cutting board or large plate. You don't want to ruin your nonstick pan bottom with a pizza cutter do you?


Add some freshly shredded Parmesan on top (we did, but only after I snapped the pic).


Cook's Notes:

  • I used the dough from an envelope for this recipe and I was concerned that the dough would be mushy since it was not yeast based. SURPRISE! It was nice and firm and crunchy! It was cheesy but the sauce being on top and was a bit different for us and I was glad I didn't go overboard. It was messy enough holding and biting in our slices anymore would have been a disaster.
  • This was a fun alternative but we still like our pizza 'sauceless.' We enjoy tasting the toppings and find that the seasonings from the sauce is just too much competition. If you enjoy a saucy pizza then this recipe is for you!
Enjoy!

Wednesday, August 26, 2009

Pizza, that's how I roll...

Mmmmm Pizza....

I don't know about you but we have one night a week when we have pizza for dinner. I am not talking about the delivery stuff or the frozen stuff.

We enjoy a homemade pizza. My only cheat is that I use a variety of pre-pared dough to save on time . We prefer the Mama Mary's thin crust. I've also used tortillas and when I am feeling industrious I will make homemade dough. I know the Boboli crusts are popular but even their thin crust is still too thick for us.

I had remembered seeing on Lynn's Kitchen Adventure her post for Pepperoni Rolls and coincidentally our store had the Pillsbury Pizza crust in a can 'buy one get one free' so I couldn't resist. I had used these when I was younger still living at home and when they were new on the market. They were okay. Them being on sale, I decided to give them a try to see if they were the same, hopefully not.

Right away I noticed that the shape of the dough was bigger, the can was longer too. I also remember wrestling with the dough years ago for no matter how much you stretched it, it always would shrink back. This dough was holding it's shape pretty well and didn't seem to want to stick or tear.

Pizza Rolls
adapted from Lynn's Kitchen Adventures

1 can Pillsbury Pizza Crust
1 package pepperoni (we use the turkey, so NOT greasy)
1 cup cheddar cheese (I use Fat Free to cut down on the puddles of grease)
1 cup mozzarella cheese
1/4 cup parmesan cheese
Italian Seasoning
Preheat oven to 375 degrees.

Roll out the dough into a rectangle. Place pepperoni all over the dough. Sprinkle your cheeses. Sprinkle a bit of the Italian Seasoning over cheese. Roll dough from it's longest side into a log.

Prepare your cookie sheet with either a silpat or parchment paper. Take your log and slice with a serrated knife. Saw the dough don't press. Each slice should be 3/4-1 inch thick. Place each slice swirl side up and sprinkle with more Italian Seasoning. These will not spread or puff out much when cooking, only about 1 inch between each slice should be fine.

Bake for 10-15 minutes or until lightly brown or cheese is melted and bread is cooked.

The pizza rolls can be eaten alone or dipped in some warmed spaghetti sauce on the side.


This was a great variation to your traditional pizza. K-man loved it the next day to pop a bunch in a ziploc bag and put them in his back shirt pocket when he when cycling the next day for a snack!


Don't forget to enter my FIRST giveaway, just a quick comment gets you in the running! Last day to enter Sunday August 30...

Enjoy!

Saturday, May 9, 2009

Cooking/Bonding Experience

I know that often Mother's Day is when we should give Mom a rest in the kitchen. But some of you mom's just can't sit still. Here is a fun activity in the kitchen that the kids can do and you can get your cup of coffee and watch/relax while they bump up their cooking skills!


Let my 6th grade class demonstrate for you how to do it and the recipe will follow:


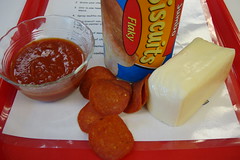
Gather your ingredients:

-can of biscuits (your choice of type/size) -pepperoni slices (we always use the turkey ones) -about 1/3 package of mozzarella cheese
-parmesan cheese/ garlic salt
-tomato sauce (plain not the spaghetti sauce from the jar - too much sugar in it!!!)


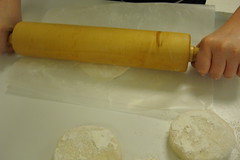
Put some flour on your counter and lightly coat each piece from the can. The kids love opening the can and having it POP in their hands! Tear off a piece of wax paper, fold in half and have the kids roll out the biscuit to be flatter and bigger. (Sorry....flour and biscuits are difficult to see on white counter tops! Look hard!)


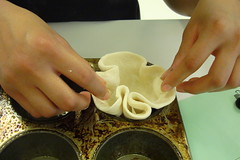
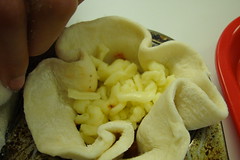
In a muffin tin spray with non stick cooking spray, line 8/10 cups with your flattened dough (the number of 'pizzas' will depend on the number of biscuits per can) These thick 'flaky' jumbo biscuits could have easily been split in half to make 16 pizzas but you will see how they turn out later....


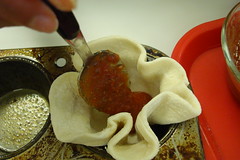
Place a tsp of sauce in each cup. Prior to this, my students put 1 tsp of Italian seasoning in about 1/2 cup of tomato puree. This group forgot to add 1 Tbsp. of grated parmesan cheese. Oh well.


Put in a slice of pepperoni on top of your sauce.


Prior to this step, you want your kids to grate their own cheese. I know that it's easier to buy the shredded cheese but they put 'stuff' on that shredded cheese to keep it from sticking and I don't think the bagged stuff tastes as good AND...it's good to have your kids experience grating cheese...nice and slow no harm will come to them....now grating carrots....a little more risky!


Alrighty, these puppies are ready to be put in their PREHEATED oven (another important thing to impress on the kiddies!)

Moms....don't put these in the ovens for your kids. Let them put the oven mitts on and do this....ovens are not to be scared of if used properly! You have no idea how many of my students are terrified of putting their hands in the oven....I have to show them (with my own hands) the heat is nothing to fear....it's the metal inside but with an OVEN MITT on....again....no fear. Teach your kids confidence....not fear! I really think many people avoid cooking as adults from scary/misguided cooking experiences!

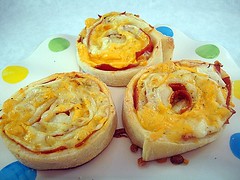
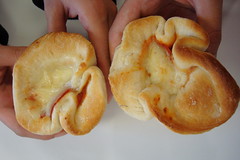
TA-DA! Ginormous hand-held kid friendly pizzas. These are great for family snacks, dinner (with a side salad) or something perfect for those slumber parties where all the kids are involved. Trust me there is plenty for many kids to do with this recipe!


Lunch Box Pizzas

1 tube (7-1/2 ounces) refrigerated biscuits* (8-10 biscuits)
1/4 c. tomato sauce (I like puree better for it's thicker)
1 tsp. Italian seasoning
1 Tbsp. grated parmesan cheese
1/4 tsp. garlic salt
10 slices pepperoni
3/4 c. shredded Monterry Jack or Mozzarella cheese

Flatten each biscuit into a 3-inch circle and press into a greased muffin cup. Combine the tomato sauce and Italian seasoning, parmesan, garlic salt; spoon 1 tsp into each cup. Top each with a slice of pepperoni and about 1 Tbsp of cheese. Bake at 425º for 10-15 minutes or until golden brown. Serve immediately or store in the refrigerator. 8-10 servings.

*The grands type or jumbo type biscuit are great....renders jumbo sized pizzas. Also the flaky types of biscuits can be split to give you double the amount of biscuits. I have also had the kids you the tortilla press with the biscuits. I offer both rolling pin and the press and let them decide which is 'funner'

ENJOY and GET THOSE KIDS COOKING (and washing the dishes too!)

Saturday, May 2, 2009

Philly Cheesesteak Restyled!


Do you have a night when you always have pizza? We do. K-man has band practice one night a week so we have dinner a bit on the late side and it's easy to have pizza on those nights. Heck no, we don't call out (perhaps due to things like this!) for it. Always homemade over here!

EASY Philly Cheesesteak Pizza

Prepared Pizza Crust (your fave- we like the thin crusts)
Olive Oil
Bag of frozen onion and peppers
Clove of minced garlic
Frozen Cheesesteak Meat
Mozzarella Cheese
Parmesan


This is the pizza crust at our store, yes they have Boboli but we like this better cuz it's thinner and


It has two of them. One for this week and one for next week...AND....


They provide you with a bag to store it in. Now, it's that nice of them?


Heat up your pan and cook your sliced meat (I slice it frozen so I won't have to wrangle with it while it is burning hot.


Put in your frozen veggies of choice. Season with salt and pepper. I put in my raw garlic now...


Coat your crust with olive oil for you don't want it getting soggy. And notice....we don't put sauce on our pizza. Yes, we like to TASTE the toppings not the overspice and sugar jars of sauce. When we start getting our summer tomatoes we will put them all over the pizza instead of sauce!


Now doesn't that look good?


Add your mozzarella and bake @ 400 degrees until edges get brown and cheese is melted.


Grate some fresh parmesan on top and slice it up....

Gawd, we love pizza!

Monday, March 23, 2009

Cheeeburger Anyone, er Pizza?


I love a good cheeseburger and I certainly love pizza. Why can't we have the best of both worlds and combine the two? Done! So does that make this a Cheeseburger Pizza or an Open Faced Cheeseburger? Oh I know....

Extra Large Open Faced Cheeseburger!

1 pizza crust or (I used 2 Middle Eastern Breads here called 'Lavash,' it's thin and has no pocket)
1 lb ground beef, browned
1 tsp. smokey hickory salt
1/2 onion, chopped
3 Tbsp ketchup
2 Tbsp mustard
cooked bacon
sliced cheese
mushrooms
red onion
sliced tomatoes
shredded lettuced (I always use the angel hair cabbage, for it stands up to the heat on the pizza and stays crunchy, it doesn't taste 'cabbagey')


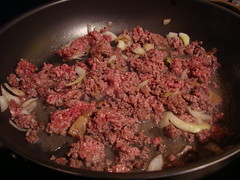
1. Brown the ground beef and chopped onion. I added the hickory salt in here for I wanted my beef to have an "off-the-grill" kinda flavor to it. Drain off fat.


2. Mix your mustard and ketchup together.

Do you notice the lil red spots on the white of the bowl? It was the last of my ketchup so aside from the random spattering around the edges I also got a chuckle from the 'farting' noise it makes when it gets to the end of a bottle...LOL. Yes, I teach middle schoolers, can you tell?


Spread your ketchup/mustard mixture on your crust or 2 breads.


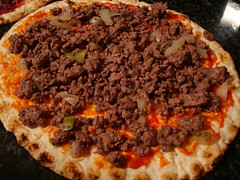
Spread on your browned beef and onion mixture.


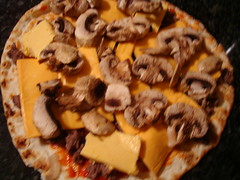
Put on your sliced cheese. I had a combo of Velveeta I was trying to use up and some 2% american cheese slices.

Add your mushrooms on top.

Bake @ 400 degrees until cheese melts and mushrooms shrivel.

While baking...


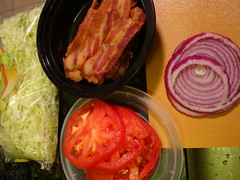
Slice up your toppings! Make sure they are all thin!
Crumble your bacon or leave in strips...you preference.


Make you open faced cheeseburger now. Put on the crumbled bacon or slices. Layer the cabbage or lettuce, arrange your tomato slices and finish with red onion!

This was soooooooooo yummy!

Saturday, March 21, 2009

Kids Love Pizza!

This is probably the only lab experience I never change. Why? Because all kids love pizza. As I am doing the demonstration I explain how the pizza joints use yeast dough that they make in the morning and each dough is portioned by size. (Have you ever called for a large pizza and they told you they didn't have any larges but they had mediums. Then you looked incredulously at the phone and said WTH?) and that yeast takes a long time to rise....blah, blah, blah, etc.

Since my 7th graders have only 44 minutes to get out all their equipment, make a pizza, clean up, put all the equipment away and eat at least one slice....three words....baking powder dough. Last year I tweaked the recipe and we made cheese stuffed crust pizzas. The kids love this lab! Very few ingredients yet all are mostly in your fridge already and BAM- a large pizza!

The following are pictures of my students showing you the steps, recipe follows:


Measure out the 3 dry ingredients, stir.


Add milk


and the oil, then mix until you see....


add a little extra flour if you need it until the dough sticks only to the spoon, not the bowl.


After kneading about 10 times, roll out the dough on a floured surface until it's 2 inches larger than your pan.


Take your cheese sticks and lay them on the EDGE of your pan.


Fold towards the inside of the pizza, use a little water to if you need to. When done you should NOT see any of the pan edges.


Spread out your sauce and place in 425 degrees oven for 10 minutes.
* You can't put the rest of the ingredients on yet, for baking powder is not strong enough to rise dough with the weight of cheese and pepperoni on it. Trust me!


Dump all your cheese and spread with your hands. Sprinkle on your Italian Seasoning and pepperoni.

Cook only for 5 minutes until you get this...


Kid Friendly Cheese Stuffed Crust Pizza

2 c. flour
1 tsp. baking powder
1 tsp. salt
2/3 cup milk
1/4 c. oil
1/2 cup favorite tomato sauce
8 oz. mozzarella cheese, shredded
20 turkey pepperonis
1-2 tsp. Italian Seasoning
4 mozzarella sticks, cut into halves lengthwise or 8 pieces

Preheat oven to 425 degrees.
Combine the dry ingredients in a large bowl, add the wet and stir until mixture forms a ball.

On floured surface, knead about 10 times. Use hands to form dough into a circle and roll dough out to about 3 inches larger than your pizza pan.

Very carefully, fold in dough into fourths and place it on pizza pan. Unfold.

Place the 8 halves of the cheese sticks around edge of pizza pan on dough. Fold dough over cheese sticks and press into dough to seal.

Spread 1/2 cup of tomato sauce on crust. DO NOT ADD ANYTHING ELSE !!!!!

Bake 10 minutes and keep oven ON.

Remove pizza from oven and top with shredded mozzarella, sprinkle on Italian seasoning and top with pepperoni.

Slide pizza off pan or use pizza peel and bake for 5 minutes without the pan or until cheese is melted.

Pick up what you need after work for some pizza and make this with your kids tonight. Seriously, this will increase your cool points AND you are teaching them a skill. Don't you want that THEY can make dinner for YOU on some nights?!