Showing posts with label vegetables. Show all posts

Sunday, November 23, 2014

Easy Flank Steak Fajitas

 Here is the second recipe I promised to make for Reynold's this month. It was a no-brainer.  I always use all their foils, the slow cooker bags and turkey bags.  Accept no substitutes! The heavy duty foil is great for the grill and in a campfire.  I adore the non-stick but I said that in my last post already.  Check out this recipe and my extra notes at the end of the recipe too!

Easy Flank Steak Fajitas
Allrecipes.com recipe by  


1 pound beef flank steak, trimmed of fat
1/4 cup lime juice
1 tablespoon vegetable oil
1 tablespoon chili powder
1/2 teaspoon salt
1/4 teaspoon cayenne pepper
2 red, yellow or green sweet peppers (or combination), thinly sliced
1 medium onion, thinly sliced
2 cloves garlic, minced
8 (6- to 7-inch) flour tortillas
Guacamole, salsa, and/or sour cream (optional)

1. Place steak in a large resealable plastic bag. Add lime juice, vegetable oil, chili powder, salt, and cayenne pepper to the steak in bag. Seal bag; turn to coat steak.
 
2. Marinate in the refrigerator 30 minutes to 1 hour. 
 
3. Preheat oven to 400 degrees F. Drain meat; discard marinade. Center meat on a sheet (12x18 inches) of Reynolds Wrap(R) Heavy Duty Aluminum Foil. Bring up foil sides. Double fold top and ends to seal packet, leaving room for heat circulation inside. Center sweet peppers, onion, and garlic on another sheet (12x18 inches) of heavy duty aluminum foil. Repeat steps above to make another foil packet. 
 
4. Wrap tortillas tightly in heavy duty aluminum foil. 
 
5. Bake meat and vegetable foil packets 30 to 35 minutes or until meat is desired doneness (145 degrees F for medium rare) and vegetables are tender, adding tortillas to the oven for the last 10 minutes of baking or until heated through. 
 
6. Open packets carefully by cutting along top fold with a sharp knife, allowing steam to escape; then open top of foil packet. Thinly slice the meat. 
 
7. Fill warm tortillas with meat and pepper mixture to serve. If desired, top with guacamole, salsa, and/or sour cream.


#AllstarsReynolds


 #MealMagic.
 K-man wanted his contribution in all this....

 Cook's Notes:
1. The cooking of the pepper's and onions is great if you need some time to do other things but I like a 'char' on my veggies.
2.  Cooking meat in a foil pack in the oven is not the way I cook a flank steak.  30 minutes was way too long when I cook it for less on a grill and I get the smoky char on it too.
3.  Corn tortillas break up too much for this, flour is better.  I tried one of each. The corn fell away immediately when the flour tortilla stretched with the ingredients with each bite.
4.  Next time I would see how different this would be using the Reynold's foil but on the grill.

Enjoy!

Friday, October 5, 2012

Gearing up for Halloween

Let's start out healthy on our treats for Halloween and slowly get evil?  Nah, Halloween food is all about deception and FUN.
I was just telling some colleagues about how I used to do the food for my school's Halloween dances.  My funny observance?  When it comes to FREE food and teenagers....watch out, you may lose a hand.  Chips, cookies, candies for free.....WHOOSH!  It's gone in a few minutes.  When I did the food and gave it gross names and formed it to resemble things like POOP....SCREECH!  For some reason taking raisins stirred melted chocolate forming it into little logs and calling them "Fruit Poops"....I had to talk them INTO coming BACK to the table and eating it.  That was hilarious!  Anyhow, more of those recipes to come. 

Today I'd like to share with you what I made for my fellow FACS teachers at our meeting.
My little Veggie Skeleton.  Isn't he CUTE?  It was just us Middle School teachers the high school teachers were a no show so they missed out.  The four of us 'killed' him easily.  Hahaha.

So if you are planning a Halloween party with a lot of junk....make this little guy and you'll be surprised that he may disappear before the high calorie stuff.  Make sure you hit my cook's notes at the end for the SHORTCUTS!!!

Veggie Skeleton

2 cups of ranch dip
2 celery stalks cut into 3 parts
1 red pepper cut into strips (see picture)
6-8 mushrooms, sliced
2 cauliflower flowerets, halved
8 baby carrots
1 black olive, pitted and cut in half
10 spinach leaves
10 cucumber slices

This really has no directions other than save the picture and arrange it on your platter as shown.  However...

Cook's Notes:
1.  Most of these items I took from the salad bar at my grocery.
2.  Grabbed a tub of ranch dip and placed in white bowl, stuck in spinach leaf hair and two eyes.  Didn't feel the need for a mouth.
3.  I only bought a whole red pepper because the salad bar was LOW on the red ones.
4.  I purchased a container of the celery stalks because the salad bar always chops up their celery for salads.  Same goes for baby carrots.  And you are going to need extras to use up all the dip. 
5.  Very easy to put together and cute as a button!

Tuesday, February 1, 2011

Spinach Stuffed Chicken

I love when I can get my protein and veggies in one dish. One stop cooking is ideal some days. The versatility of this recipe is that you can change up the cheese or seasoning to tailor the dish to your tastes.

Spinach Stuffed Chicken

Spinach Stuffed Chicken
by JennyMac Lipsmack

olive oil
1/2 medium onion, chopped or 1/2 cup green onion, chopped
3 garlic cloves, minced (make two piles: 2/3 and 1/3)
10 ounces boxed spinach, thawed
1/2 cup cheese (feta, monterry jack, cheddar, swiss -your preference)
salt and pepper to taste
3 Tbsp. butter
1 cup breadcrumbs (italian, plain, panko, cracker- whatever you have on hand)
1 tsp. oregano (basil, rosemary, sage- whatever floats your boat)
4 boneless, skinless chicken breast (split in half lengthwise)

Preheat oven to 425 degrees. Heat 1 Tbsp olive oil in small pan on medium heat. Add the onion and 2/3 of the reserved garlic, cook until softened 3-4 minutes. Place cooled onions in bowl with thawed spinach, cheese and season with salt and pepper. Melt butter in pan used for onions, turn off heat and add crumbs, herbs and remaining garlic. Toss around to mix herbs, crumb and butter.

Drizzle a baking dish with another 1 Tbsp of olive oil. Split each chicken breast lengthwise but not all the way (like a book). Stuff with spinach and cheese mixture, letting the stuffing overflow at the edges. Place the chicken pieces in the baking dish and top with breadcrumbs. Bake until juices run clear or internal temperature is 165 degrees or about 20 minutes.

Serves 4.

Spinach Stuffed Chicken1

Serve with a some bread and a leafy salad and you are good. This was delicious. I can't wait for the leftovers tomorrow!

Go stuff yourself!

Saturday, August 7, 2010

Baked Zucchini Chips

Baked Zucchini Chips

We had mini chicken salad sammies for lunch today. Instead of having chips the side (whether they were the evil or BAKED ones) I decided to make a different kinda chip. Here's a fun treat I made. Take advantage of zucchini while it is the summer bounty and make something to eat that you don't have to feel guilty about. Here is the solution. Crunchy outside, soft inside and you can dip it in anything you want! I've included some shortcuts to make it easier.

Baked Zucchini Chips

One large zucchini or two smaller ones
large ziploc bag
approx. 1/3 c. flour
2 eggs
dash hot sauce
seasoned salt (I used Paula Deen's House Seasoning)
pepper to taste
about 2 cups Panko
few shakes of canola or olive oil

Preheat oven to 375 degrees.

Prepare breading station:
1. Put flour in ziploc flour and add a "fingersful" of salt and pepper. Seal and shake.
2. Beat 2 eggs in bowl and mix in few dashes hot sauce.
3. Place panko in something like a pie pan and also season with salt and pepper. Mix
4. Line cookie sheet with nonstick foil.
5. Arrange each in a line in the order as prepared with the cookie sheet last.

Slice zucchini into 'coins' about 1/4 inch thick. Place into flour bag and shake until all coated.

Remember to keep one hand sticky (from flour to the egg) and the other hand dry (panko to cookie sheet)

Take about 2 zucchini from the bag, place them in the egg and keep flipping them over until the egg soaks into the flour. Sticky hand puts zucchini slice on panko....Dry hand grabs more panko from pan and places it on the zucchini coin and press. Dry hand flips over coin and puts on more panko and PRESS. Turn 'coin' on its side so loose panko can fall back into pan. Place on cookie sheet. Season with salt and pepper again.

Repeat until all zucchini is coated and on cookie sheet. Drizzle a little of oil on zucchini and into between 'coins'. Bake until lightly brown (approx 10 min.). Turn over and drizzle a bit of oil again and bake another 10 minutes.

Baked Zucchini Chips1

So delish. I dipped mine in a little bit of green goddess dressing. Great side dish, snack or appetizer. Much easier to eat than a half one baked. WE loved it. Give it a try!

Enjoy!

Thursday, July 22, 2010

Zucchini Pepper Jack Mac

My summer bounty, I average one every other day sometimes two.....


Searching under those large leaves each day is like an Easter Egg Hunt. Constantly I am heard saying "OMG!" Mother Nature amazes me yet I saw this yesterday....

WHUT? Methinks this little zucchini is confused. He thinks that if he poses as a CROOKNECK squash that I won't eat him? Sowwy, little guy...I eat all squash, all colors, all shapes, I do not discriminate! Here is what I made from large zucchini....and so easy.

Zucchini Pepper Jack Mac
created by JennyMac Lipsmack

1 large zucchini, shredded
1/4 onion, grated
2 Tbsp. butter
2 Tbsp. flour
1 cup milk, cream, or even FF evaporated milk if you like
1-1/2 to 2 cups Pepper Jack cheese, shredded (from a block, don't use the bagged stuff)
2 cups cooked pasta (macaroni, egg noodles, penne or whatever you have on hand)
1 cup plain bread crumbs, panko, crushed ritz crackers or potato chips
2 Tbsp. butter, melted

1. Preheat oven to 350 degrees. Mix your crumbs of choice with melted butter, set aside.

2. Shred your cheese, set aside your pile. Shred your zucchini and place in large bowl. Shred the onion and mix into the zucchini.

3. Cook your pasta according to the directions. Drain and mix into zucchini and onion mixture.

4. In the used pot from the pasta, start your white sauce. Melt butter, add flour and cook flour until it smells nutty. About one minute. Slowly whisk in your milk. (It's ok if it's thick for the water from the zucchini, onion and pasta will help thin it out.) Add shredded cheese and mix over low heat until no lumps remain.

5. Add pepper jack cheese sauce to zucchini/pasta mixture. If you think the mixture is not 'loose' enough you can mix a little more milk if so desired.

6. Place cheesy pasta mixture in a greased glass baking dish/casserole, approx 2 quart size. Top with butter and crumb mixture.

7. Bake for 20-30 minutes or until mixture is hot and bubbly and crumbs are light brown.


Great sidedish with your favorite grilled steak or chicken. Nice brunch item as well... creamy, yummy and the shredded zucchini cooks up in a flash this way.

Enjoy!
Tuesday, July 20, 2010

Summer Corn and Tomato Salad

Got tomatoes coming out of your ears? We do. No worries just restyle them each dinner time for a great side dish. No cooking, easy wonderfully tasty!

Summer Corn and Tomato Salad
adapted from Chow.com

2 cups sweet white corn kernels, from 3-4 medium cobs
1 tablespoons lime juice
3/4 teaspoon kosher salt
1/4 teaspoon freshly ground black pepper
3 tablespoons extra-virgin olive oil
1 /2 cup grape or juliet tomatoes (seen here), halved (can use cherry or pear)
1/4 cup red onion, small dice
6-8 leaves fresh basil, chiffonaded (sliced into ribbons

1. This could be a great use of leftover corn from dinner or I just used raw corn removed from the cob...so sweet and refreshing. Cook in microwave for 4 minutes if you prefer if cooked.

2. Combine lime juice, salt, and pepper in a large bowl. While continuously whisking, add oil in a steady stream until completely incorporated. Add remaining ingredients and cooled corn and toss until well coated. Serve.

Cook's Notes:
I found that if you refrigerate this, you may want to let it sit out before serving. Olive oil tends to cloud over and tighten in the fridge. Either use canola to keep it from seizing but if you enjoy the flavor of olive oil a few minutes in a bowl on the table before you eat dinner it should be fine and loosen up.

Summer Corn and Tomato Salad With Fresh Basil on Foodista

Enjoy!
Monday, July 5, 2010

Got Leftover Grilled Veggies?

As I was looking at my kitchen counter this morning....I noticed that we are being taken over by the tomatoes and zucchini here (no complaints, really) AND the fact that we have leftovers of summer grilling in the fridge as well.

I used this recipe before with great success. So whether you use fresh veggies, leftover grilled ones or a combo of each (as I did), this is a great brunch, lunch, snack or side dish. Give it a try?

(Leftover?) Garden Veggie Bake
adapted from bettycrocker.com

1 cup grated FRESH Parmesan or Romano cheese
1 cup chopped zucchini (either leftover grilled or parcooked)* see note
1/2 cup corn kernels(mine was leftover roasted with onion from the grill)
1 medium tomato, chopped (1 or 1/2 cup)
1/2 cup sauteed mushrooms, chopped
1 medium onion, chopped (1/2 cup) (omitted since onions were in the mushrooms and corn)
3/4 cup Bisquick Heart Smart® mix
1 cup fat-free (skim) milk (I used FF evaporated milk)
1/2 cup fat-free egg product or 4 egg whites
1/2 teaspoon salt (I used Paula Deen's House seasoning, love it!)
1/4 teaspoon pepper

1. Heat oven to 375°F. Spray 8-inch square (2-quart) glass baking dish with cooking spray. Sprinkle 1/4 cup of the cheese in baking dish. Top with zucchini, corn, tomato, mushrooms and onion. I sprinkled more 1/2 cup more cheese in between the veggie layers as well.
2. In small bowl, the baking mix, milk, eggs and seasonings until blended. Pour over vegetables and top with remaining 1/4 cup cheese over vegetables.
3. Bake uncovered 32 to 35 minutes or until knife inserted in center comes out clean. Let stand 5 minutes before cutting.


Cook's Notes:
  • The corn, mushrooms and tomatoes were great! Even though the zucchini was cut in small pieces, they still were a bit 'firm'. If you look at the pic above, notice the one cube on the left side and you can SEE the line of cooked versus 'less cooked'. Don't get me wrong, the zucchini wasn't CRUNCHY or hard. But if you like your zucchini tender crisp then follow the recipe as listed. I know that when I reheat this, it will be perfect.
  • I think fresh, raw onion would be not only crunchy but heavy in onion taste, if you are into it.
  • Mellowing out or making the zucchini and/or onion softer could be done easily in the microwave cooking it for a minute or two until both are 'not so raw'.
STILL TIME LEFT! ENTER MY GOOD EARTH GIVEAWAY!

Enjoy!

Sunday, May 9, 2010

MMMmmm....Spinach Brownies

Ha-Ha, made you look!

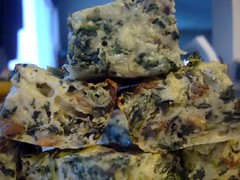
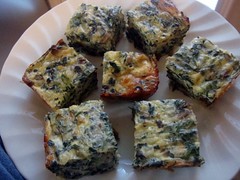
Spinach Squares

My 7th grade students are currently doing a research/presentation on fruits and vegetables. I was sitting with Rosie and helping her catch up from her absence and showing her how to format her slide on her least favorite vegetable task. I asked her for a vegetable that she'd eat....but it wasn't her favorite (she said corn was her fave). Her answer was spinach. OK, good.

Next, I took her to the allrecipes.com site to get some spinach recipes. We typed in 'spinach' in their search window. One of the first hits we got was for "spinach brownies" I said "SPINACH BROWNIES?" kinda loud and many surrounding students went EWWWWWWWWW. We laughed. So I looked at Rosie and said 'let's look'....

I didn't think at all it was a chocolate item but still the name of it made me curious. It looked good....so good I made it two days later. That says something. I am including it for our Mother's Day dinner and saving one to bring to school for Rosie to try. Not sure if Rosie kept this recipe I helped add to her project as a suggestion....but it is sure being added to my recipe collection at home.

Spinach Brownies
adapted from allrecipes.com

2 (10 ounce) package spinach, frozen spinach, thawed and squeezed dry
1 cup all-purpose flour
1 teaspoon salt
1 teaspoon baking powder
2 eggs
1 cup milk
1/2 cup butter, melted
1 cup chopped green onions
1 (8 ounce) package shredded mozzarella cheese
1/2 cup romano cheese, shredded

1. Preheat oven to 375 degrees F (190 degrees C). Lightly grease a 9x13 inch baking dish.

2. Place spinach in a medium bowl and microwave until thawed. Use a clean dishtowel to squeeze dry. Set aside.

3. In a large bowl, mix flour, salt and baking powder. Stir in eggs, milk and butter. Mix in spinach, onion and cheeses.

4. Transfer the mixture to the prepared baking dish. Bake in the preheated oven 30 to 35 minutes, or until a toothpick inserted in the center comes out clean. Cool before serving.

Spinach Square

So THANKS ROSIE, who would have thought a student would be providing recipe idea to her FACS teacher! This is called a happy accident! YUM....best tasting accident evah! I will be touching base later with Rosie's reaction to my sample she tried....

Enjoy!

Monday, April 19, 2010

Mac and Cheese?

Is it or isn't it?

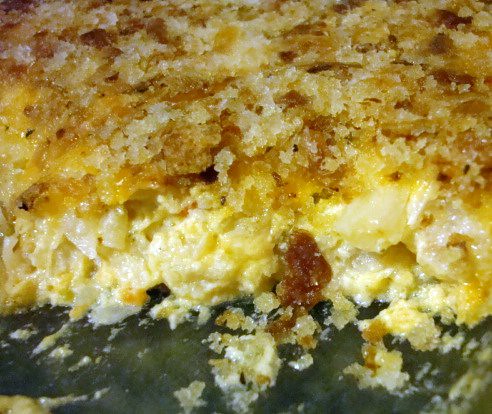
Looks are deceiving for sure. This is my FAUX Mac and Cheese made with cauliflower!

Faux Mac and Cheese
JennyMac's Lipsmack

1 bag (14 oz) frozen cauliflower
2 cups cheese, shredded (I used half sharp and half 2%)
½ c. egg substitute
1/4 cup milk/cream or Fat Free evaporated milk
1/2 tsp. salt
1/2 tsp. white pepper

TOPPING:
1 c. bread crumbs
1/2c. French’s onion rings, crushed
½ tsp. garlic powder
½ tsp. salt
½ tsp. pepper
1 Tbsp. butter

Preheat oven to 350 degrees.

Place bag of cauliflower in microwave and cook at 1 minute intervals until hot (rotating and turning over with each-took me about 4 intervals) Drain in colander and cool slightly.

In medium mixing bowl, add cheese(s) egg substitute, milk and seasoning. Mix well.

In a small bowl, mix ingredients for topping. Mix well.

Chop cauliflower into pieces that would resemble the size of elbow macaroni (I used a pair of kitchen shears in bowl). Add to egg cheese mixture and mix well.

Place cauliflower mixture into greased 1 quart casserole and top with bread crumb mixture.

Bake for 30 minutes until firm and bread crumbs are browned.

Lipsmacking Notes:
  • Very yummy! If you are going for the lower carbs, omit the crumbs. K-man loved it and he's the picky one about his Mac and Cheese!
Enjoy!

Thursday, April 1, 2010

Stuffed Peppers as a sidedish


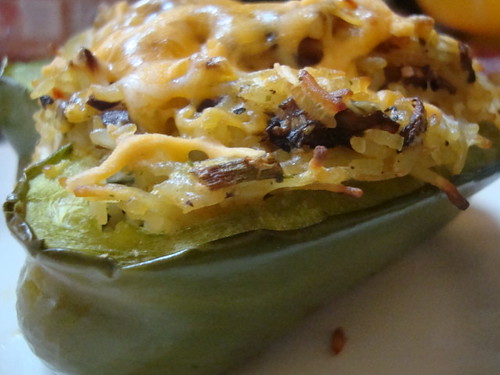
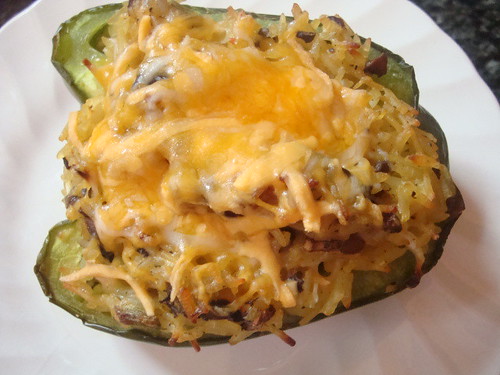
Mushroom and Rice Stuffed Peppers
created by JennyMac

2 green peppers
1 package of favorite flavored rice (I used Uncle Ben's Chicken Rice)
1/2 cup cooked mushrooms, chopped
1/4 cup green onions, chopped
1 cup cheddar cheese, grated (divided 3/4 cup and 1/4 cup)
1 tsp. freshly ground pepper

Preheat oven to 350 degrees.

Slice peppers in half, core, seed and de-vein. Prepare rice according to package directions. Under cook rice by five minutes since you will be baking this in the peppers later. Rice will seem a bit wet, this is okay.

Mix mushrooms, green onion with 3/4 cup cheddar cheese and pepper. Mix in cooked rice and scoop into pepper halves and press gently. Bake for half hour or until peppers are soft or tender crisp. Top with last 1/4 cup of cheese and let melt while you prep the rest of your dinner.

Your double dose of veggies, your starch and some dairy to round out your protein for dinner. This went great with our baked chicken!

Enjoy!

Tuesday, February 2, 2010

More Game Day suggestions...

We needed some goodies for watching the Pro Bowl which is a perfect excuse to try out some more food that I can suggest you make for the upcoming Super Bowl on Feb 7.

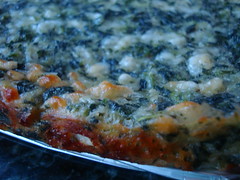
Some finger food resembling a crustless spinach and mushroom quiche....

Spinach, Mushroom and Cheese Squares
I cut some FAT corners on here to help make your party food so evil but if you don't tell your guests I am sure they won't notice!

2 Tbsp butter
1 cup chopped mushrooms, sauteed
3 eggs
1 cup flour
1 cup Fat Free evaporated milk
1 tsp. baking powder
t tsp. black pepper
2 packages of Cabot 70% reduced fat white cheddar, shredded
2 (10 ounce) packages frozen chopped spinach, thawed and squeezed dry
1 Tbsp minced onion.

Preheat oven to 350 degrees. Saute chopped mushrooms in butter until browned. Set aside to cool. Spray 9X13 baking dish with non stick cooking spray. In large mixing bowl, beat eggs well. Mix in flour, evaporated milk, pepper and baking powder. Add cheese, spinach, mushrooms and onion. Spoon mixture into greased baking dish. Bake for 35 minutes. Let cool for 30-40 minutes or until room temperature. Cut into bite sized squares.


Come by tomorrow to try the tasty Taco Dip I made...

Enjoy!

Sunday, December 27, 2009

Butterscotch or Brown Sugar?

I got a new cookbook for Christmas and as I was looking through it I saw a recipe for carrots that made me change something on our Christmas Dinner menu. I had some butternut squash and still was kinda soft on how I was going to prepare them.

I've seen recipes for brown sugar carrots before....but butterscotch/nut squash seemed tasty with a fun name.

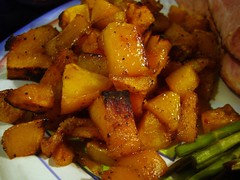
Roasted Butterscotch-Nut Squash

1 butternut squash, peeled, cored and chopped into chunks (our grocery has boxes of these already done for you!)
1/2 stick butter, melted
1/4 cup brown sugar (I used Splenda brown sugar)
1/2 tsp. salt
freshly ground pepper

Preheat oven to 450 degrees or use the broiler if you wish.
Line baking sheet with non-stick foil or spray with non-stick spray. Place squash on baking sheet. Stir in brown sugar and salt into melted butter. Pour over squash and use a rubber scraper to help move the squash to coat. Don't worry too much for the sugar will melt and coat better as you go along.

Cook in oven for about 20-30 minutes (depending on the heat level you used). Keep a watchful eye on your squash and moving them around every so often with rubber scraper. When the sugar has thickened and the squash is soft enough or the sugar has encrusted enough on your squash (you decide how you want it)

Keep in mind you need a high heat to caramelize the sugar and achieve some sugar crunchiness. If you also, over cook it or move it around too much....you may end up with butternut mush. Sprinkle with freshly ground pepper before serving.


This was absolutely DELISH with our Christmas ham dinner. The saltiness of the ham and the sweet cubes of squash....K-man thought these were sweet potatoes! I like the idea of having squash instead of sweet potatoes to cut down on the carbs. Hmmmm, this would be interesting to mix the squash as well as some sweet potatoes and roast them together one night....hmmmmm

Give this a try, it will not disappoint!

Enjoy!

Sunday, November 29, 2009

It's not the holidays without....

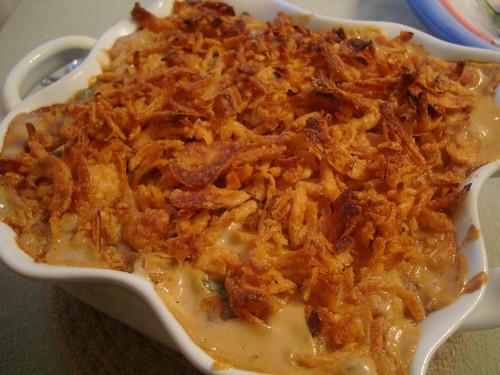
Green Bean Casserole of course!

Some people find this yucky. Some people are tired of it. I never tire of it for I only have it during the holidays. So I look forward to it.

I wanted to have this for dinner, yet cut back some of the fat....yes I know green beans are vegetables and not normally have fat.....but this is another one of those evil side dishes with FAT and sodium.

Our family used cream or half and half and a can or two of the campbells mushroom soup....but the only fat in this beauty is those French's onion rings on top. I didn't bother looking at the content on the can. Somethings are better left alone and besides I wasn't eating the whole casserole, just a spoonful. Maybe next time I will try the recipes original version with sauteed onions and bread crumbs!

Lean Green Bean Casserole
adapted by Low Cal Diner

1 Package (16 OZ) Frozen Green Beans
1 Onion, chopped
1 Garlic Clove, minced
1 Teaspoon Margarine (I used smart balance)
½ Pound Fresh Mushrooms, chopped
1 Can (12 OZ) Fat Free Evaporated Milk
3T Flour
½ can of water (in milk can to thin out white if too thick)
¼ Teaspoon Poultry Seasoning
1/8 Teaspoon Pepper
1/2 tsp. salt

Topping: French's Onions Place beans in a microwavable bowl. Cover and cook on high for 7-9 minutes. Drain. In a skillet add the onions, garlic and margarine. Sauté until tender, 4 minutes. Add the mushrooms and cook until tender. Reduce heat to low, add in and stir until combined. Mix the milk and flour and add to the mushroom mixture. Add the remaining ingredients and cook for 2 minutes or until it thickens. Transfer to a 2-quart baking dish. Stir in the beans. Bake uncovered at 375° for 15 minutes. Add French’s onion rings and sprinkle over the casserole and bake for another 10 minutes.

Enjoy!

Wednesday, November 25, 2009

Gobble it up!

Happy Thanksgiving everyone!!! It's nice to have the day before T-day off so I can do some pre-preparations for tomorrow.

So what are you guys making for your big day? Are you having tons of family, going away or having a small dinner at home? Last year K-man and I went to his mom's but this year it's a small quiet dinner for just the two of us. What is on your menu?

As some of you know already, I've been avoiding my blog a bit since I've been on a weight loss plan. Already 15 lbs gone in 3 weeks! YAY! So, not wanting to totally blow it out tomorrow a few things have the fat cut. It's really hard when your diet is NO FAT, NO SUGAR and NO SALT. I feel great but when I find recipes or products there is always something of those three that is present making it difficult to work around recipes or eating. But I think I found a good combo of foods (with K-man's input of what he wanted) to make our dinner a good one.

Here is what is in store for us tomorrow:

Turkey (cooked in a roasting bag)
Mashed Potatoes and gravy
Stuffing Balls
Green Bean Casserole
Corn Pudding
Pumpkin Custard
No Fat Brownie Tart

Stay tuned for the next few days to see how these recipes turned out and what I did to 'tweak' the fat contents. The links above were the spring board for the recipes I used and wanted to give my thanks for their initial recipes that gave me inspiration to have my holiday food and still be 'somewhat' good on my plan without going totally bonkers.


Gobble-gobble!

Friday, November 13, 2009

Schweeetttttt!


We just finished studying Soul Food in my eighth grade classes. For each cuisine they learn about; they do one lab experience (cornbread) and after their mini quiz on Friday they get one more demonstration of another food for them to see the preparation of it and to sample it. I've done grits, hoppin' john, jambalaya, fritters, hoe cakes and I wanted to try something new. I wanted to make sweet potato pie.

Here's the problem I can't make a pie, bake it, chill it and have them eat it all before they leave in 45 minutes. I had to do the TV magic thing and make one before to pull out when I put it in the oven. Then I thought of another thing...ugh...the slicing....the need for forks and plates and cutting one pie into 12 slices, etc. So I thought....why can't I make them into mini sweet potato pies?


And I did....

Here was my recipe adapted from allrecipes.com

Mini Sweet Potato Pies

Vanilla Wafers
1 (16 ounce) can mashed sweet potatoes
3/4 cup evaporated milk
3/4 cup packed brown sugar
1/2 cup light corn syrup
2 eggs
1 tablespoon butter, melted
1/2 teaspoon salt
1/2 teaspoon ground cinnamon
1 pinch ground nutmeg
Marshmallow Fluff

Preheat oven to 400 degrees.

Line each a 2 muffin tins with 18 muffin papers. Spray lightly with non stick spray. Put a vanilla wafer in each cup.

In a mixing bowl blend sweet potatoes, milk, sugar, corn syrup, eggs, butter, cinnamon, salt and nutmeg and beat with a electric hand mixer until smooth. Scoop filling into muffin cups with an ice cream scoop. Bake for 20 minutes or until set.

While pies are still hot place a dollop of fluff on each pie to melt. Place in refrigerator to chill.


The kids RAVED over these. I didn't like the fact that these looked more like pumpkin pie (being brown) and not orange from the sweet potatoes. When I do these again, I am going to use real sweet potatoes and not the canned ones which tend to be a dark brownish orange. The fluff was a bit sticky to peel off the paper....but most remained on the mini pie. Sadly, I wasn't able to taste them since my "plan" doesn't allow this kinda stuff....but if the kids were happy and begging for more, it worked for me.

Try your own favorite pie recipe filling as a mini version for the holidays!

Enjoy!

Tuesday, October 13, 2009

A yummy way to cut some carbs!

I sure do LOOOOOOOOOOVVVEEEEE da mashed potatoes.
The holidays are coming soon and there is going to be a lot of mashed potatoes coming our way!

But I am always looking of ways of cutting the carbs in my diet, not entirely but somewhat along the way (carbs and me, don't get along).

I've also seen how people have made the 'mock mashed potatoes' out of cauliflower. No matter how much butter, sour cream, chives, etc. They still taste like mashed cauliflower (not that I have a problem with that) but more importantly, they have no real body to it.

Are you seeing where I am heading yet? I like mashed potatoes and mashed cauliflower why not cut the carbs a bit and combine the two?


Mashed Potatoflower (K-man's name for it)

one head of the ORANGE cauliflower (my store sells the white, purple, orange and green [aka broccoflower])
1-1/2 lb package of refrigerated mashed potatoes, very warm not piping hot
butter to taste
salt and pepper to taste
chives, chopped

Cook washed, and roughly chopped cauliflower in the microwave. Cook until semi soft (about 5 minutes?) Place chopped cauliflower in the food processor with some pats of butter. Blend until smooth. You may have to stop it to scrape the cauliflower as it may whirl around on the bottom and stay chunky on the surface. When smooth, add your warm mashed potatoes and pulse until blended. Salt and pepper to taste and whirl one last time. Garnish with chives or mix them in.

These were also great as a leftover. I sprayed some Pam in a glass dish and baked it until hot. Edges got a lil crusty....topped it with some French's Fried Onions in the last few minutes until brown.

Not only does K-man love cauliflower and was excited for this new recipe. But he especially when THUD when I served it as a leftover with the fried onion rings on top the next night!

ALSO-----

I received an award from Melissa of Serendity is Sweet. YAY....my first award! SO cool!

As for Melissa's site..... Oh my, she's got several blogs going AND she home schools too! She has lots of resources/links on her site for you to use in regards to home schooling. She also has a ton of pumpkin "things" you can do in your class or at home to extend school learning. Check out her site. I sure did and there was so much to see that I needed to subscribe for I didn't want to miss a thing!


Enjoy!