Showing posts with label peanut butter. Show all posts

Saturday, October 27, 2012

Vomit Piles


HHAHAHAHA!  Why not?  Halloween is coming!!!  What I absolutely ADORE about Halloween is that it is my opportunity to take a simple no bake treat with chocolate and oatmeal and rename it and it totally works!

I have this recipe elsewhere called a Raggedy Robin or Cow Patties.  I made this on Friday for my students, they loved it.  It worked nicely for our abbreviated periods (we had early release) for I was able to make it, chill it and they ATE.  Please tune in for more recipes to come or go to my link to ALL my Halloween recipes on my school web page.

Vomit Piles
by JennyMac Lipsmack

 1/2-cup milk
1 stick margarine
1/4 cup unsweetened cocoa
2 c. sugar
1/2-cup peanut butter
1 tsp. vanilla

3 c. oatmeal
 
Combine first four ingredients.  Cook on medium heat until boiling.  Rolling boil for 1 - 1 & 1/2 min.  Remove from heat and mix vanilla and peanut butter.  Mix well.  Pour over oatmeal in a large bowl.  Mix quickly in a large bowl.   Spoon out onto wax paper*.  Let cool for 10 minutes.
 
*Grosser addition: add some 'chunks' like raisins, dried apricots bits, nuts for more gross out value!!

My recipes to come that I am making at school are:
  • Spider Web Breadsticks
  • Hairy armpits
  • Spider Cake (made with a Zebra Cake base)
  • Used Tampons (don't worry, it's for a ALL girl class- only they could appreciate)
  • Ghost Cake 
  • Maybe a picture of my classroom kitchen decorated for Halloween (a FIRST!)


Enjoy!

Monday, March 14, 2011

Copycatting the DO-si-Do Girl Scout Cookie

Do-Si-Do Copycats

It's that time of year when the Girl Scouts are delivering their cookies...unless you have a forgetful Girl Scout dad who is supposed to be delivering the goods to your place of work and he misplaces the order form and there is a DELAY in your cookie order. Torture. I remembered some copycat Girl Scout recipes on Baking Bites and thought I'd give her Do-SI-Do's a try.

Homemade Girl Scout Cookie: Do-si-Do
from Baking Bites

Cookies:
2 1/4 cups all purpose flour
2 tbsp baking soda
1 tbsp baking powder
1/2 tsp salt
1 1/2 cups unsalted butter, room temperature
3/4 cup chunky peanut butter
1 cup brown sugar
1 cup sugar
3 large eggs
1 tsp vanilla extract
1 1/2 cups quick-cooking oats (not instant or regular)

Filling:
1 1/2 cups creamy peanut butter, room temperature
1/2 cup butter, room temperature
1/4 cup confectioners’ sugar

Preheat oven to 350F.
Start with the cookies. In a medium bowl, whisk together the flour, baking powder, baking soda and salt.
In a large bowl, cream together butter and peanut butter. Beat in the sugars until fluffy, then add in the eggs one at a time, waiting until each is fully incorporated before adding the next. Stir in vanilla extract.
Working at a low speed, mix in the flour, followed by the oats (if you don’t have quick-cooking, pulse whole rolled oats in the food processor to chop them up a bit).
On a parchment-lined baking sheet, drop teaspoonfuls of batter (roughly 3/4-in. sized balls), leaving about 2 inches between each to allow for spread.
Bake for about 10 minutes, until cookies are a light golden brown. Cool on baking sheet for 5 minutes, making small holes in 1/2 of the cookies (for the tops of the sandwiches) before they set up. Transfer to a wire rack to cool completely.

Once cookies have cooled, make the filling.
In a large bowl, cream together smooth peanut butter, butter and confectioners’ sugar until very smooth. Spread 2-3 tsp onto half of the finished cookies and sandwich with the remaining halves. If you chose to make yours with GS-lookalike holes in some of the cookies, use these as the tops of the sandwiches.
Store in an airtight container.

Makes about 48 sandwich cookies.

Note: Use unsalted butter with this recipe, as different brands of peanut butter can vary hugely in salt content and it’s possible you’ll end up with a too-salty cookie with the salted butter, salted peanut butter and added salt. If you must use salted butter and are using brand of peanut butter that seems a bit salty, you can always reduce or eliminate the added salt. Personally, I like the salty sweet combination with peanut butter, but it’s only fair for me to give a little warning just in case!

Copycat Do-si-Do's

Cook's Notes:
1. These were really good to me for I liked how the cookie wasn't overly sweet. With a sweet peanut butter filling a sweet cookie would have been too much.
2. If you bake the dough right away....it will spread so use a small disher to get a smaller thinner cookie. If you chill your dough, they will be thick as seen here. Do what works best for you.
3. Alot of work baking the cookies, making the filling, schmearing the filling, sandwiching the cookies....not a quick bake and eat cookie....but it's taste was worth the work.....once a year. lol

Got Milk?

Tuesday, April 20, 2010

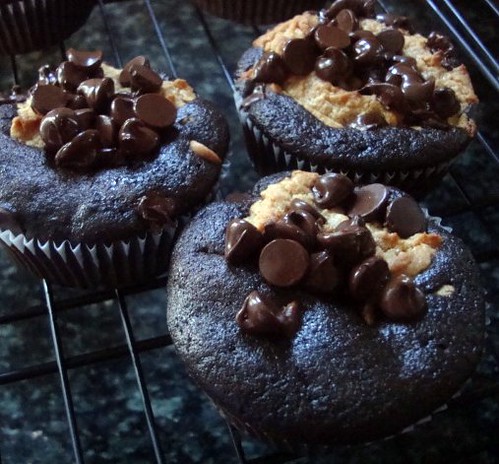
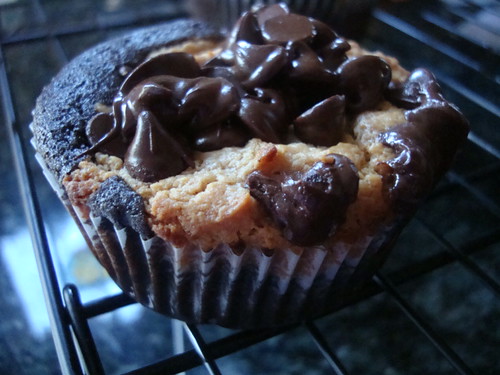
Chocolate Peanut Butter Layered Cupcakes

I am always in the mood for Chocolate and Peanut Butter Combinations! I found these on Pillsbury's site!

Chocolate Peanut Butter Layered Cupcakes
from Pillsbury.com

1 1/2 cups all purpose flour
1/3 cup baking cocoa (I used Hershey's Dark)
1 cup packed brown sugar
1 teaspoon baking soda
1/4 teaspoon salt
1/3 cup oil
1 cup water
1 tablespoon white vinegar
1/2 teaspoon vanilla
1 egg
1 package (8 oz) cream cheese, softened
3/4 cup peanut butter
1/3 cup granulated sugar
1/3 cup powdered sugar
1/4 cup peanut butter chips
1/4 cup semi-sweet chocolate baking chips


1. Heat oven to 350°F. Place paper baking cup in each of 18 regular-size muffin cups.
2. In large bowl, mix flour, cocoa, brown sugar, baking soda and salt. Add oil, water, vinegar and vanilla to flour mixture, stirring just until smooth (do not overmix).
3. In another large bowl, beat egg, cream cheese, peanut butter and granulated sugar with electric mixer on medium speed until smooth. Add powdered sugar; beat until creamy.
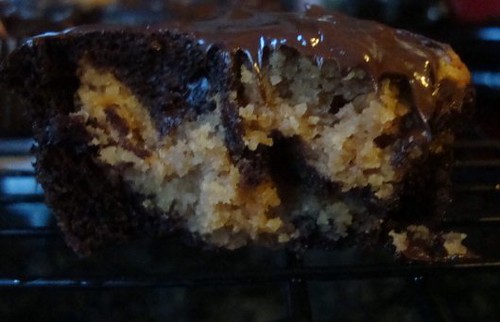
4. Spoon 1 level tablespoon chocolate batter into each cup; evenly spread 1 level tablespoon peanut butter filling on top. Repeat layers. Sprinkle with peanut butter chips and chocolate chips.
5. Bake 25 to 30 minutes or until toothpick inserted in center comes out clean (do not overbake). Cool in pan 15 minutes. Remove from pan to cooling rack; cool 15 minutes. Serve warm or cool.

Recipe says makes 18.

We shared with two neighbors. One was moving and this was my goodie for them in case they got hungry during the move. The remaining ones I left for K-man and I were gone in 3 days!

Easy and so yummy!

Tuesday, September 1, 2009

Little Debbie isn't going to like this...

Hardened Copycat Treats

Can you name one of those Little Debbie Snacks that you get once in a blue moon when your sweet tooth goes bonkers? I know that I am certainly capable of making a sweet treat with real ingredients anytime...but sometimes they call to you...

"JennyMac needs Nutty Bars!"

Peanut Butter and Chocolate rocks. I was thinking about snacking on some chocolate wafers today and all of a sudden it hit me. I just made K-man some copycat Chunky bars...I can copycat Nutty Bars too!

Here's the deal:

Copycat Nutty Bars
from JennyMac's Lipsmack

Package of Chocolate Wafers
1/2 cup peanut butter
2 cups powdered sugar
1/2 stick of butter
1 pound of chocolate
2 Tbsp butter.
1/4 cup chopped nuts

1. Count out your wafers so you have sets of two. Eat any broken or if an odd number is in package.

2. Chop your nuts.

3. Melt your peanut butter and butter in the microwave about 40-60 sec. Mix pb and butter well. Add your powdered sugar and mix until it's smooth soft ball.

4. Line a cookie sheet with parchment paper.

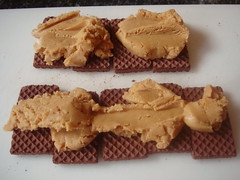
5. Line up your halves of wafers and just glop away your peanut butter. This was just my start, I had added much more. Top them and press lightly so the sides ooze out peanut butter. When you reach about 1/4 inch thickness take you fingers and just rub the peanut butter off, pressing inside a bit if needed to make side solid.


6. Line up all your sandwiches to be ready while you melt your chocolate with 2 Tbsp butter in the microwave. Remember to check after one minute....chocolate does not melt into a puddle as some think it may.

(sorry I don't have pix of the next steps for melted chocolate and cameras don't mix. I was fearful of dropping it into the bowl. LOL)

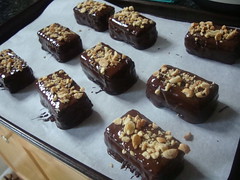
7. When chocolate is ready place bar into chocolate and move it around with a fork to coat. Lift bar out with fork and tap fork on bowl edge for the excess chocolate to run off the bar. You want to see a bit of the 'lattice' design on the bars.

8. Place bars on parchment and top with chopped nuts. Place in fridge to set. Approx 30 minutes.


Copycat Nutty Bar

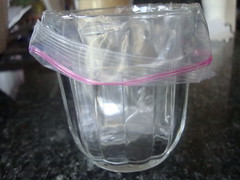
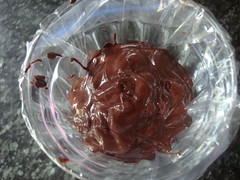
Cook's Note: My package of wafers (from an Amish store) had only 18 per package so I had alot of peanut butter filling and chocolate left. Depending on how many wafers you have, you should have ample PB and Choc. I stored mine in the freezer for another day. Look:

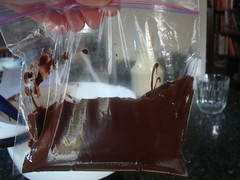
Line a short glass with a ziploc


Scrape in your extra melted chocolate.


Pull off bag from glass.


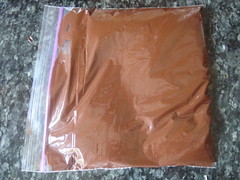
Lay on counter and press out air. Lay on flat surface in freezer. Will break/cut easier when a thin slab, rather a huge hunk of chocolate.


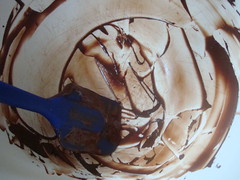
Call the kids to lick the bowl. YOU get the scraper to lick.


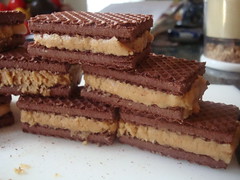
You've been patiently waiting for them to chill....Drum Roll please....

Copycat Nutty Bar inside1

Gawd, I am drooling over my own picture. Excuse me while I go eat one of these treasures! Make these...so easy. Your kids will love you forever and they are so totally better than Little Debbie. Sorry Debbie....I won't be caving in to you anymore. I CAN MAKE MY OWN!

Enjoy!