Showing posts with label side dish. Show all posts

Sunday, October 24, 2010

Goya Product Tastemaker

Would you like some Black Bean and Jalapeno Rice on the side?

Black Bean and Jalapeno Rice

I received from the Foodbuzz Tastemaker Program some FREE Goya products. YUM! Since I live in diverse area some stores here have a pretty large Goya section. They have many interesting products that I have not used before and when I signed up to take part in the Tastemaker they sent me nothing scary to use. I received a can of black beans, garbanzo beans (chick peas), yellow rice, green olives, olive oil and two recipe booklets highlighting Mexican and Carribean recipes. I noticed in the book the also had two booklets on Central and South American recipes. DRAT, I would have liked those books instead for most of my students come from those areas. I guess that is what the Goya site is for!!! LOL There I found the section for Central America and found a recipe for pupusas. This food item is HOT at our school. Parents bring them in for food events, trucks come to sell them on special events and my students bring them for cooking projects. The pupusa is loved by all -especially the 'gringos'. LOL. Great, I've been waiting for a good recipe!

Enough small talk and onto the recipe. For my recipe, I decided to use:

Black Bean and Jalapeno Rice1

There were no recipes for any 'bean' and rice mixture side dishes. I guessing that the Hispanic culture are purists and like their beans separate from the rice (I am guilty of when I go to Mexican places I mix my refried bean and rice sides together). Not me I am a rebel! Instead of jazzing up the beans with spices and making a rice side plain; I added plain beans to the rice that was seasoned already and jazz it up with the last of my jalapenos from my garden!

BEFORE COOKING NOTE:
Two questions need to be answered before you approach this recipe.
How do you want your peppers?
1. Hot and Spicy, Zingy or Mild?
2. Crunchy or Soft?

Cooking Approach to those answers:
1. The heat depends on the chopping process. If you want them HOT. Just chop off the stems and chop. All the heat is in the veins and seeds. But cooking them will also reduce the 'caliente' scale as well.
2. If you want them with some crunch, stir them in at the end before serving. If you want them 'par cooked' stir them in the rice when they are sitting for the 5 minute rest. If you want them soft: Cook the peppers with the rice.

Now proceed....

Black Bean and Jalapeno Yellow Rice
by JennyMac Lipsmack

1 box Goya Yellow Rice
1 Tbsp Goya Olive Oil or butter
1 can Goya Black Beans
half an onion, chopped
jalapenos (you decided how many you can handle)

Read the instructions on how you want to prepare your rice. Stove Top or microwave. I like the microwave option for I don't have to babysit it and can do other things. Plus, I think this rice comes out PERFECT from the microwave.

Chop your onion, big or small chunks, your preference. Stir the onions, oil or butter, and water with the rice and follow your cooking directions. 5 Minutes on High and 20 minutes on 50% power. Devein and/or chop jalapenos (see below)Open black beans, drain and rinse. When rice is ready the last direction asks you to let the rice 'set' to absorb last of moisture. Stir in beans and peppers and cover for five minutes. Serve with chicken and garnish with freshly chopped cilantro.

To remove the heat from jalapenos:
1. Put on gloves. I have not worn gloves and washed hands several times...washed hair the next morning and still found some "heat" under my nails!
2. Slice one side off pepper from stem to tip. This first slice should be shallow enough to cut off the "meat" of the pepper, leaving the vein with the seeds inside. One quarter turn the pepper and repeat the cut. After the third cut you will have all the seeds and most of the veins on the remaining quarter. Remove stem and use gloved finger to scoop out veins and seeds. Either julienne cut your quarters or finely chop.

Again, THANK you Foodbuzz and Goya. Those of you interested in more Latino Flavor to your recipes definitely hit up Goya's site....very user friendly and authentic recipes easy to follow.

Delish!

Saturday, August 7, 2010

Baked Zucchini Chips

Baked Zucchini Chips

We had mini chicken salad sammies for lunch today. Instead of having chips the side (whether they were the evil or BAKED ones) I decided to make a different kinda chip. Here's a fun treat I made. Take advantage of zucchini while it is the summer bounty and make something to eat that you don't have to feel guilty about. Here is the solution. Crunchy outside, soft inside and you can dip it in anything you want! I've included some shortcuts to make it easier.

Baked Zucchini Chips

One large zucchini or two smaller ones
large ziploc bag
approx. 1/3 c. flour
2 eggs
dash hot sauce
seasoned salt (I used Paula Deen's House Seasoning)
pepper to taste
about 2 cups Panko
few shakes of canola or olive oil

Preheat oven to 375 degrees.

Prepare breading station:
1. Put flour in ziploc flour and add a "fingersful" of salt and pepper. Seal and shake.
2. Beat 2 eggs in bowl and mix in few dashes hot sauce.
3. Place panko in something like a pie pan and also season with salt and pepper. Mix
4. Line cookie sheet with nonstick foil.
5. Arrange each in a line in the order as prepared with the cookie sheet last.

Slice zucchini into 'coins' about 1/4 inch thick. Place into flour bag and shake until all coated.

Remember to keep one hand sticky (from flour to the egg) and the other hand dry (panko to cookie sheet)

Take about 2 zucchini from the bag, place them in the egg and keep flipping them over until the egg soaks into the flour. Sticky hand puts zucchini slice on panko....Dry hand grabs more panko from pan and places it on the zucchini coin and press. Dry hand flips over coin and puts on more panko and PRESS. Turn 'coin' on its side so loose panko can fall back into pan. Place on cookie sheet. Season with salt and pepper again.

Repeat until all zucchini is coated and on cookie sheet. Drizzle a little of oil on zucchini and into between 'coins'. Bake until lightly brown (approx 10 min.). Turn over and drizzle a bit of oil again and bake another 10 minutes.

Baked Zucchini Chips1

So delish. I dipped mine in a little bit of green goddess dressing. Great side dish, snack or appetizer. Much easier to eat than a half one baked. WE loved it. Give it a try!

Enjoy!

Thursday, July 22, 2010

Zucchini Pepper Jack Mac

My summer bounty, I average one every other day sometimes two.....


Searching under those large leaves each day is like an Easter Egg Hunt. Constantly I am heard saying "OMG!" Mother Nature amazes me yet I saw this yesterday....

WHUT? Methinks this little zucchini is confused. He thinks that if he poses as a CROOKNECK squash that I won't eat him? Sowwy, little guy...I eat all squash, all colors, all shapes, I do not discriminate! Here is what I made from large zucchini....and so easy.

Zucchini Pepper Jack Mac
created by JennyMac Lipsmack

1 large zucchini, shredded
1/4 onion, grated
2 Tbsp. butter
2 Tbsp. flour
1 cup milk, cream, or even FF evaporated milk if you like
1-1/2 to 2 cups Pepper Jack cheese, shredded (from a block, don't use the bagged stuff)
2 cups cooked pasta (macaroni, egg noodles, penne or whatever you have on hand)
1 cup plain bread crumbs, panko, crushed ritz crackers or potato chips
2 Tbsp. butter, melted

1. Preheat oven to 350 degrees. Mix your crumbs of choice with melted butter, set aside.

2. Shred your cheese, set aside your pile. Shred your zucchini and place in large bowl. Shred the onion and mix into the zucchini.

3. Cook your pasta according to the directions. Drain and mix into zucchini and onion mixture.

4. In the used pot from the pasta, start your white sauce. Melt butter, add flour and cook flour until it smells nutty. About one minute. Slowly whisk in your milk. (It's ok if it's thick for the water from the zucchini, onion and pasta will help thin it out.) Add shredded cheese and mix over low heat until no lumps remain.

5. Add pepper jack cheese sauce to zucchini/pasta mixture. If you think the mixture is not 'loose' enough you can mix a little more milk if so desired.

6. Place cheesy pasta mixture in a greased glass baking dish/casserole, approx 2 quart size. Top with butter and crumb mixture.

7. Bake for 20-30 minutes or until mixture is hot and bubbly and crumbs are light brown.


Great sidedish with your favorite grilled steak or chicken. Nice brunch item as well... creamy, yummy and the shredded zucchini cooks up in a flash this way.

Enjoy!

Sunday, May 9, 2010

MMMmmm....Spinach Brownies

Ha-Ha, made you look!

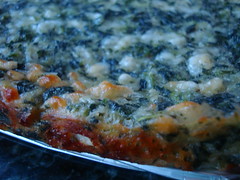
Spinach Squares

My 7th grade students are currently doing a research/presentation on fruits and vegetables. I was sitting with Rosie and helping her catch up from her absence and showing her how to format her slide on her least favorite vegetable task. I asked her for a vegetable that she'd eat....but it wasn't her favorite (she said corn was her fave). Her answer was spinach. OK, good.

Next, I took her to the allrecipes.com site to get some spinach recipes. We typed in 'spinach' in their search window. One of the first hits we got was for "spinach brownies" I said "SPINACH BROWNIES?" kinda loud and many surrounding students went EWWWWWWWWW. We laughed. So I looked at Rosie and said 'let's look'....

I didn't think at all it was a chocolate item but still the name of it made me curious. It looked good....so good I made it two days later. That says something. I am including it for our Mother's Day dinner and saving one to bring to school for Rosie to try. Not sure if Rosie kept this recipe I helped add to her project as a suggestion....but it is sure being added to my recipe collection at home.

Spinach Brownies
adapted from allrecipes.com

2 (10 ounce) package spinach, frozen spinach, thawed and squeezed dry
1 cup all-purpose flour
1 teaspoon salt
1 teaspoon baking powder
2 eggs
1 cup milk
1/2 cup butter, melted
1 cup chopped green onions
1 (8 ounce) package shredded mozzarella cheese
1/2 cup romano cheese, shredded

1. Preheat oven to 375 degrees F (190 degrees C). Lightly grease a 9x13 inch baking dish.

2. Place spinach in a medium bowl and microwave until thawed. Use a clean dishtowel to squeeze dry. Set aside.

3. In a large bowl, mix flour, salt and baking powder. Stir in eggs, milk and butter. Mix in spinach, onion and cheeses.

4. Transfer the mixture to the prepared baking dish. Bake in the preheated oven 30 to 35 minutes, or until a toothpick inserted in the center comes out clean. Cool before serving.

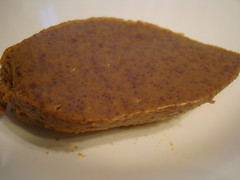
Spinach Square

So THANKS ROSIE, who would have thought a student would be providing recipe idea to her FACS teacher! This is called a happy accident! YUM....best tasting accident evah! I will be touching base later with Rosie's reaction to my sample she tried....

Enjoy!

Wednesday, April 28, 2010

Easy Corn Pudding

I was in the mood for making some corn pudding with dinner. Holy cow, I didn't realize that I had so many corn pudding recipes....

Some with corn kernels, some not. Some with creamed corn only or some with regular corn AND creamed corn.
Some with cornmeal or some with corn muffin mix.
Some with buttermilk or some with sour cream.
ACK!!!!


And the winning corn pudding recipe choice? From She's Becoming Doughmesstic. Susan has such a myriad of recipes....she's fancy one day, down home the next, decorating cakes or catering. Emulating Julia Child....living on 100 bucks for food for the month (with a family of 3) Yep, she's a regular box of chocolates, I tell ya!

I love some recipes on occasion when you open the can/box, mix and bake. Done!

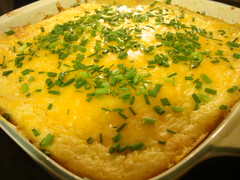
Corn Casserole
found on She's Becoming Doughmesstic....

1 (14 oz) can cream style corn
1 can whole kernel corn (I just filled the 'creamed' corn can with some frozen)
1 (8oz) package Jiffy Corn muffin mix
1 cup sour cream
1 stick butter, melted
1 egg, beaten
1-1 1/2 cups shredded Cheddar

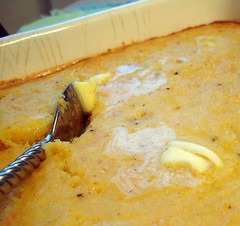
Preheat oven to 350 degrees. In a large bowl, stir together both corns, muffin mix, egg, sour cream and melted butter. Pour into greased 8X8 dish/pan. Bake for 45 minutes, or until golden brown. Remove from oven and top with cheese. Return to oven for 5-10 minute or until cheese is melted. Let stand for at least 5 minutes and then serve warm.


Cooks Notes:
  • I've had many versions and some are on the sweet side and some more savory. Although, this was tasty and moist, I was conflicted since the cornbread part was sweet and the cheese on top was not. I normally enjoy a sweet and salty combo. Since I enjoyed the EASE and how moist and corny this was, I'd just adjust the sweetness by substituting the creamed corn with another whole corn whirred in the food processor. That should cut down on some of the sugar. Texture-wise, LOVED this recipe.
  • OR I can nix the cheese and just enjoy it's sweetness.
  • I emailed Susan from Doughmesstic for her link to the recipe and she TRIED to credit Paula Deen....so I trotted over to the 'butter queen bible' and NOPE Paula didn't use egg or cheese in my cookbook. So, good try Susan....it's a DOUGHMESSTIC recipe....unless Paula is losing her mind and makes 10 different versions....well no WONDER....

Enjoy!

Wednesday, April 21, 2010

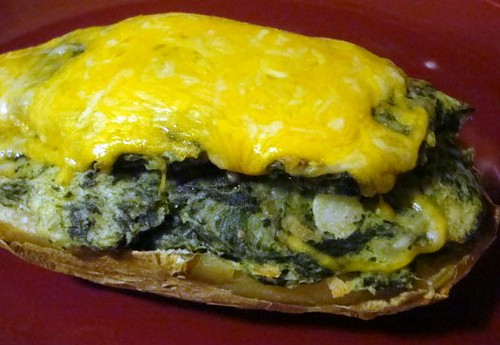
Spinach Stuffed Potatoes

We love twice baked potatoes!

We love spinach!

Who says we can't put the two together?

No one.

This recipe is for two but you can change the amounts to make for your family.

Just keep tasting the mixture before you stuff your potatoes until it is the way you want!


Spinach Two Baked Potatoes
JennyMac's Lipsmack

1 russet potato, cleaned and cooked in microwave until soft
4 oz. reduced fat or Fat Free cream cheese
1 cup frozen chopped spinach, thawed and squeezed dry
1 tsp. dried onions
¼ tsp. garlic powder
1 tsp. salt
1 tsp. pepper
1 c. cheddar cheese, shredded (regular or 2%)
¼ c. milk or cream

1. Preheat oven to 400 degrees.

2. Microwave potatoes until soft. Cut in half and scoop out potatoes leaving 1/4 inch on skin.

3. Place in medium bowl the hot potatoes and mix with cream cheese until combined. Add spinach, onions, garlic powder, salt and pepper and milk/cream. Taste for seasoning to your liking.

4. Add half of the cheese to potato mixture and scoop into potato shells. Bake for 20-25 minutes or until hot. Add remaining cheese on top to melt and serve.

Enjoy!

Thursday, April 1, 2010

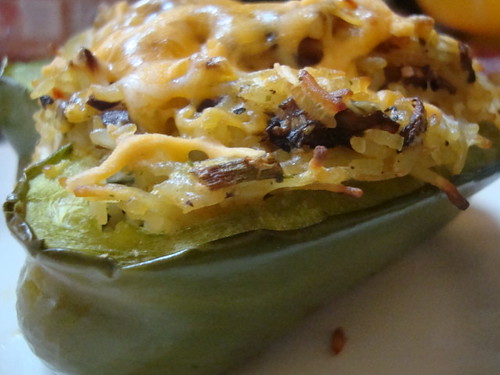
Stuffed Peppers as a sidedish


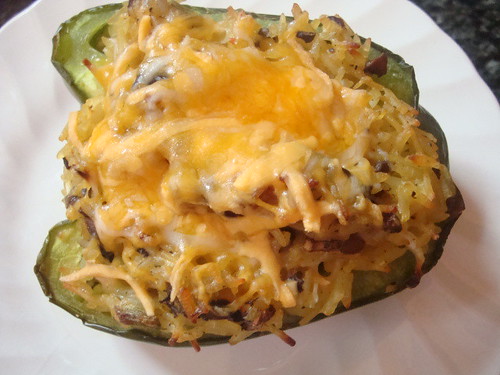
Mushroom and Rice Stuffed Peppers
created by JennyMac

2 green peppers
1 package of favorite flavored rice (I used Uncle Ben's Chicken Rice)
1/2 cup cooked mushrooms, chopped
1/4 cup green onions, chopped
1 cup cheddar cheese, grated (divided 3/4 cup and 1/4 cup)
1 tsp. freshly ground pepper

Preheat oven to 350 degrees.

Slice peppers in half, core, seed and de-vein. Prepare rice according to package directions. Under cook rice by five minutes since you will be baking this in the peppers later. Rice will seem a bit wet, this is okay.

Mix mushrooms, green onion with 3/4 cup cheddar cheese and pepper. Mix in cooked rice and scoop into pepper halves and press gently. Bake for half hour or until peppers are soft or tender crisp. Top with last 1/4 cup of cheese and let melt while you prep the rest of your dinner.

Your double dose of veggies, your starch and some dairy to round out your protein for dinner. This went great with our baked chicken!

Enjoy!

Sunday, January 17, 2010

JennyMac being Cheesy....again and a Giveaway.


Although I like many types of macaroni and cheese, I don't have it so easy. K-man runs very hot and cold about it. My stats run 1-4 on him liking the M&C recipes I've made. He says he can't explain it why Mac and Cheese is just something that he doesn't HATE but just isn't fond of. WHAT? ARE YOU NUTS? Sometimes he likes it, sometimes not. Once I find the recipe he likes I am DONE. No more trying new M&C recipes.

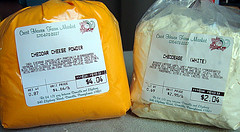
I found a new recipe on Baker's Banter (King Arthur's Flour) for Garlic-Herb Mac and Cheese and wanted to give it a try. They use a powdered white cheese powder which I already had. But I was a little apprehensive since the powder was now a BLOCK.....I had to run a hunk through food pro to measure out a 1/2 cup. Doesn't look promising. I made it and thought I am really not using this perhaps I should just toss it out after this recipe....Stay tuned for what happens after I made this.....

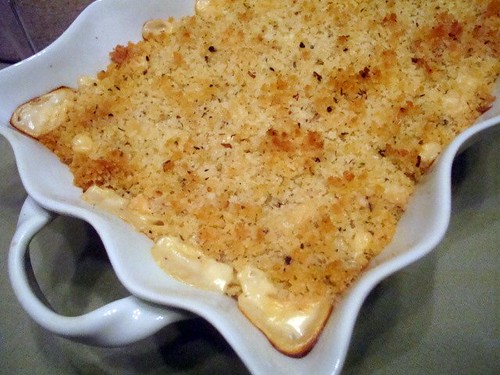
Garlic-Herb Mac and Cheese
adapted from "The Big Cheese-y" by King Arthur's Flour

8 ounces (about 2 cups) uncooked tube-type pasta (you gotta have something to hold the sauce!)
1/4 cup cake flour (they used on of their special mixes, they said you could sub flour)
2 -3/4 cups milk
1/2 cup Vermont cheese powder (see above-you can substitute a packet from any white cheddar mac and cheese box)
2 cups shredded cheddar cheese (I used Cabot's 70% reduced fat white cheddar)
1/2 teaspoon ground black pepper
1/2 teaspoon ground mustard powder
1/4 to 1/2 teaspoon salt, to taste

Topping

4 tablespoons butter
2 teaspoons garlic oil, optional
2 teaspoons Pizza Seasoning or rosemary and thyme
1 -1/2 cups Japanese panko (coarse bread crumbs)

Directions

1) Preheat the oven to 350°F. Grease a 2-quart baking dish.

2) Cook the pasta in boiling salted water until al dente (slightly firmer than you would normally eat it). Drain and rinse with cool water. Set aside.

3) In a large saucepan set over medium heat, whisk together the flour, milk, and cheese powder. Bring to a boil.

4) Remove from the heat and stir in the cheese and seasonings. Stir occasionally, until cheese is completely melted.

5) Stir the pasta into the cheese sauce. Spoon it into the baking dish.

6) Melt the butter and garlic oil together, then stir in the pizza seasoning and panko bread crumbs. Sprinkle a thick layer over the pasta and cheese.

7) Bake the casserole for 25 to 35 minutes, until bubbly and browned. Remove from the oven, and serve hot.

Yield: 5 1/2 cups, about 4 servings.

Notes:
The crumb topping was delicious and crunchy. But, as for the cheesy noodles, I am not sure if my powder had something to do with it, but something about this was off. It was creamy not gritty but I think the powder was past it's prime. I will want to make this again. WHY, you ask?

Because my mom walked in the door for dinner with a bag of 3 NEW bags of white cheese powder. Oh lord. I had a hard enough time using up ONE bag, now I have 3 new ones? GEEZ.

The Giveaway:
So, I will keep one and I want to giveaway the TWO others for those who would like to try out this white cheese powder for themselves. You certainly can just can use it just like your standard mac and cheese directions with 1/4 cup butter and 1/2 cup milk with probably 2-3 Tbsp of the powder with their cooked macaroni OR use it to follow this recipe.

SO, if you have never used cheese powder and want to play around with it or use it to try and make your own copycat cheese nips like I did, drop a comment and I will determine a winner in the next few days.


Post Script NOTE: So I used one of the new bags of Cheese using the same cheese sauce recipe for some broccoli and it ROCKED. Yum! Therefore, I am concluding that the M&C I made and said it was 'off' I was right. It WAS the cheese powder...past it's prime. Those of you hesitant to enter thinking this cheese powder isn't good. Not true!

Cheese and

Sunday, December 27, 2009

Butterscotch or Brown Sugar?

I got a new cookbook for Christmas and as I was looking through it I saw a recipe for carrots that made me change something on our Christmas Dinner menu. I had some butternut squash and still was kinda soft on how I was going to prepare them.

I've seen recipes for brown sugar carrots before....but butterscotch/nut squash seemed tasty with a fun name.

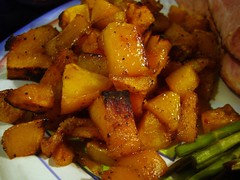
Roasted Butterscotch-Nut Squash

1 butternut squash, peeled, cored and chopped into chunks (our grocery has boxes of these already done for you!)
1/2 stick butter, melted
1/4 cup brown sugar (I used Splenda brown sugar)
1/2 tsp. salt
freshly ground pepper

Preheat oven to 450 degrees or use the broiler if you wish.
Line baking sheet with non-stick foil or spray with non-stick spray. Place squash on baking sheet. Stir in brown sugar and salt into melted butter. Pour over squash and use a rubber scraper to help move the squash to coat. Don't worry too much for the sugar will melt and coat better as you go along.

Cook in oven for about 20-30 minutes (depending on the heat level you used). Keep a watchful eye on your squash and moving them around every so often with rubber scraper. When the sugar has thickened and the squash is soft enough or the sugar has encrusted enough on your squash (you decide how you want it)

Keep in mind you need a high heat to caramelize the sugar and achieve some sugar crunchiness. If you also, over cook it or move it around too much....you may end up with butternut mush. Sprinkle with freshly ground pepper before serving.


This was absolutely DELISH with our Christmas ham dinner. The saltiness of the ham and the sweet cubes of squash....K-man thought these were sweet potatoes! I like the idea of having squash instead of sweet potatoes to cut down on the carbs. Hmmmm, this would be interesting to mix the squash as well as some sweet potatoes and roast them together one night....hmmmmm

Give this a try, it will not disappoint!

Enjoy!

Saturday, December 19, 2009

Whole berry, jellied or homemade?

I've been avoiding cranberry sauce at the holidays due to the fact that K-man doesn't like it and I go along with it only because it's one less leftover I have to deal with despite the fact I love cranberry sauce.

Finally this past T-day after eating the moist turkey I decided something was missing and I realized it was the cranberry sauce! I love a forkful of turkey and cranberry. So I finally came to the conclusion...heck with what I was thinking. I am having MY cranberry sauce despite whether K-man is eating it or not.

Perhaps the gelatinous can shaped red stuff weirded him out. Had he ever TRIED homemade? So, I dug out a family recipe and decided to give it a whirl and see if K-man liked it (I've converted him on some things because my way of cooking something was tastier that somethings he was served as a kid)

Cranberry Sauce
slightly adapted from my cousin Beth

1 bag cranberries
2 apples, quartered, cored and peeled
zest of one large navel orange
insides of said large navel orange
1 cup sugar (I used 1/2 cup splenda)

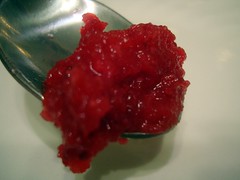
In a food processor put the bag of cranberries, apples, orange zest and sugar. Peel that orange, remove navel and put segments in processor (my cousin throws the WHOLE orange - peel and all, but the pith/peel in my opinion is too bitter). Pulse and blend until the consistency you like. Chill in refrigerator. Best when made a day or two before serving!

This recipe is very 'orangey' as well as tart from the cranberry. I think it is very refreshing and I love the sweetness and tartness of it.

So, does K-man like it?


Enjoy!

Tuesday, December 1, 2009

Who stole my crust?

Pies wouldn't be so evil if it weren't for the flaky buttery, crunchy crust. Sigh. I stalk those people who eat only the pie and leave their crusts. "Are you going to eat that?" I will ask....No?....Nom, nom, nom!

But this year I wanted to enjoy some of the things without all the bad stuff. Crust won't disappear forever....just eating it later on I tell myself.

I found a recipe for pumpkin custard on another food blog and that was my inspiration of pumpkin pie without the crust.

Harmless Crustless Pumpkin Pie
inspired by Lynn's Kitchen Adventures

1 cup of hot water
1 can fat free evaporated milk
1/4 cup splenda
1 1/2 cups egg substitute
1 teaspoon vanilla
1 teaspoon pumpkin pie spice
1 can pumpkin
extra water for water bath

Whisk together ingredients. Take one 9×13 pan and fill with about 1/2 inch of hot water, creating your water bath. This is necessary to get the correct texture of the custard.
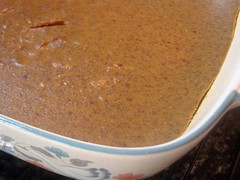
Place 8x8 pan in 9×13 pan filled with water. Pour custard mixture into the 8x8 pan. Bake at 325 for 1 hour. Eat warm or cold.


We ended up serving this as cold side dish with our dinner. Shockingly, we really loved slathering it on our rolls like pumpkin butter!

Pumpkin is still being used for the fall....whether you use Lynn's version or my guilt-free harmless version.....won't you give this a try?

As Lynn noted....don't be afraid of the lackluster picture. It is really tasty!

By the way, how do you turn pumpkin into squash?

Throw it in the air and there you have it.....squash. Hahahahahaahaha

Enjoy!

Monday, November 30, 2009

Pudding or Bread, you decide....

Are you like me during Thanksgiving and HAVE to have something corn? Cornbread stuffing, corn pudding, succotash....something corn. Besides loving the taste of corn, perhaps it's something about the roots of Thanksgiving and the pilgrims learning the use of corn from the natives.....Nahhhhhh, I am not thinking THAT deep on T-day. I just love sweet yet buttery corn.

The springboard recipe I used was from Cooking Light and if you know me....I tweaked it. I am such a rebel.

Corn Pudding
adapted from Cooking Light's Colonial Corn Pudding
  • 3 cups frozen whole-kernel corn kernels, thawed and divided
  • 3/4 cup evaporated fat-free milk, divided
  • 2 tablespoons smart balance
  • 1/2 teaspoon salt
  • 1/8 teaspoon white pepper
  • Dash of freshly ground nutmeg
  • 1/2 egg substitute
  • half a box of jiffy corn muffin mix
  • Cooking spray
  • 1/2 cup (2 ounces) shredded Fat Free cheddar cheese
  • 2 teaspoons butter, melted

1. Preheat oven to 350°.

2. Combine 1 cup corn, 1/4 cup evaporated milk, and smart balance in a blender; process until smooth. Combine remaining 1/2 cup evaporated milk, salt, pepper, nutmeg, eggs in a large bowl. Stir in pureed corn mixture, remaining 2 cups corn, cheese and corn muffin mix.

3. Spoon mixture into an 8-inch square baking dish coated with cooking spray. Bake at 350° for 30 minutes or until golden brown. Serve warm.

So yummy!!! It was nice to have the fat cut significantly in the pudding yet have a bit of butter on top to make the whole thing seem so rich! This is a 'do-again' recipe for sure!


Sunday, November 29, 2009

It's not the holidays without....

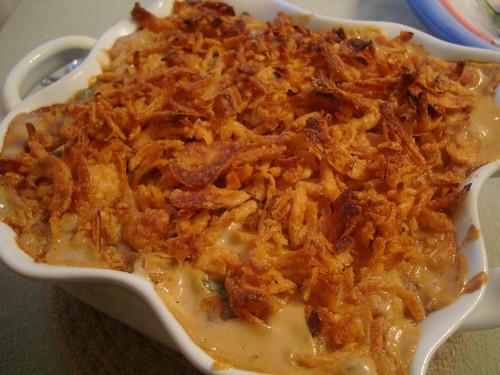
Green Bean Casserole of course!

Some people find this yucky. Some people are tired of it. I never tire of it for I only have it during the holidays. So I look forward to it.

I wanted to have this for dinner, yet cut back some of the fat....yes I know green beans are vegetables and not normally have fat.....but this is another one of those evil side dishes with FAT and sodium.

Our family used cream or half and half and a can or two of the campbells mushroom soup....but the only fat in this beauty is those French's onion rings on top. I didn't bother looking at the content on the can. Somethings are better left alone and besides I wasn't eating the whole casserole, just a spoonful. Maybe next time I will try the recipes original version with sauteed onions and bread crumbs!

Lean Green Bean Casserole
adapted by Low Cal Diner

1 Package (16 OZ) Frozen Green Beans
1 Onion, chopped
1 Garlic Clove, minced
1 Teaspoon Margarine (I used smart balance)
½ Pound Fresh Mushrooms, chopped
1 Can (12 OZ) Fat Free Evaporated Milk
3T Flour
½ can of water (in milk can to thin out white if too thick)
¼ Teaspoon Poultry Seasoning
1/8 Teaspoon Pepper
1/2 tsp. salt

Topping: French's Onions Place beans in a microwavable bowl. Cover and cook on high for 7-9 minutes. Drain. In a skillet add the onions, garlic and margarine. Sauté until tender, 4 minutes. Add the mushrooms and cook until tender. Reduce heat to low, add in and stir until combined. Mix the milk and flour and add to the mushroom mixture. Add the remaining ingredients and cook for 2 minutes or until it thickens. Transfer to a 2-quart baking dish. Stir in the beans. Bake uncovered at 375° for 15 minutes. Add French’s onion rings and sprinkle over the casserole and bake for another 10 minutes.

Enjoy!

Saturday, November 28, 2009

Have a ball during dinner!


Whether you use Stovetop stuffing from a box or make it from scratch, making balls out of it is a great idea for these reasons:

1. Stuffing put in the bird soaks up tremendous amounts of fat, these only have the amount of fat you put in them.
2. Less worry about bacteria when stuffing is cooked separately.
3. You can make these ahead of time and warm them up right before serving.
4. These are already portioned out, one scoop per person (or whatever your count is).
5. Easy to serve/handle.
6. Best of both worlds crunchy on the outside, soft on the inside.
7. Can be made appetizer size or dinner size.
8. Adds visual interest on any plate!

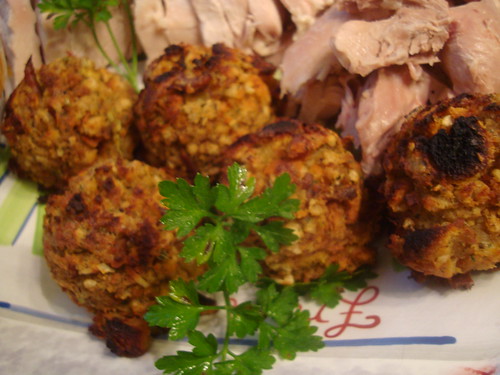
Lisa of The Cutting Edge of Ordinary inspired me to do this and I thought they looked rather cute on the platter with the turkey!

Our stuffing recipe from the family is usually EVIL. So much fat....Cooked sausage....onion and celery sauteed in the pork fat....add a stick of butter then cooked in the turkey..... THUD!
Here's what I did to make them more reasonable fat-wise!

Lower Fat Stuffing Balls

1 turkey neck
3 cups water
scant olive oil
1 onion chopped
2 celery stalks, chopped
1 tsp. poultry seasoning
salt and pepper to taste
3 cups of stale bread cubes (rye is great!)

In a sauce pan, place 3 cups of water and cook the turkey neck until reduced by half. Notice that there is some turkey fat floating around....just what you need. Remove turkey neck and remove as much meat as you can and chop. Add to broth.

In frying pan, one turn of olive oil in pan and saute the onions and celery. Add poultry seasoning and salt/pepper. When onion/celery is soft, turn off heat and add the bread cubes. Stir in broth little by little until absorbed but not mushy.

Line cookie sheet with foil and again another swirl of olive oil in foiled lined pan. Take your ice cream scoop and make portions onto cookie sheet.

Bake in 350 oven for about 10 minutes or until crispy on bottom. I put the 'balls' under the broiler for a minute before serving to get extra brown.

I'd do these again with sausage as an appetizer!

YUMMY!

Wednesday, November 25, 2009

Gobble it up!

Happy Thanksgiving everyone!!! It's nice to have the day before T-day off so I can do some pre-preparations for tomorrow.

So what are you guys making for your big day? Are you having tons of family, going away or having a small dinner at home? Last year K-man and I went to his mom's but this year it's a small quiet dinner for just the two of us. What is on your menu?

As some of you know already, I've been avoiding my blog a bit since I've been on a weight loss plan. Already 15 lbs gone in 3 weeks! YAY! So, not wanting to totally blow it out tomorrow a few things have the fat cut. It's really hard when your diet is NO FAT, NO SUGAR and NO SALT. I feel great but when I find recipes or products there is always something of those three that is present making it difficult to work around recipes or eating. But I think I found a good combo of foods (with K-man's input of what he wanted) to make our dinner a good one.

Here is what is in store for us tomorrow:

Turkey (cooked in a roasting bag)
Mashed Potatoes and gravy
Stuffing Balls
Green Bean Casserole
Corn Pudding
Pumpkin Custard
No Fat Brownie Tart

Stay tuned for the next few days to see how these recipes turned out and what I did to 'tweak' the fat contents. The links above were the spring board for the recipes I used and wanted to give my thanks for their initial recipes that gave me inspiration to have my holiday food and still be 'somewhat' good on my plan without going totally bonkers.


Gobble-gobble!

Tuesday, October 13, 2009

A yummy way to cut some carbs!

I sure do LOOOOOOOOOOVVVEEEEE da mashed potatoes.
The holidays are coming soon and there is going to be a lot of mashed potatoes coming our way!

But I am always looking of ways of cutting the carbs in my diet, not entirely but somewhat along the way (carbs and me, don't get along).

I've also seen how people have made the 'mock mashed potatoes' out of cauliflower. No matter how much butter, sour cream, chives, etc. They still taste like mashed cauliflower (not that I have a problem with that) but more importantly, they have no real body to it.

Are you seeing where I am heading yet? I like mashed potatoes and mashed cauliflower why not cut the carbs a bit and combine the two?


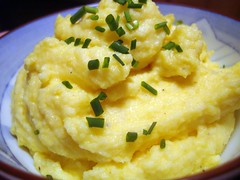
Mashed Potatoflower (K-man's name for it)

one head of the ORANGE cauliflower (my store sells the white, purple, orange and green [aka broccoflower])
1-1/2 lb package of refrigerated mashed potatoes, very warm not piping hot
butter to taste
salt and pepper to taste
chives, chopped

Cook washed, and roughly chopped cauliflower in the microwave. Cook until semi soft (about 5 minutes?) Place chopped cauliflower in the food processor with some pats of butter. Blend until smooth. You may have to stop it to scrape the cauliflower as it may whirl around on the bottom and stay chunky on the surface. When smooth, add your warm mashed potatoes and pulse until blended. Salt and pepper to taste and whirl one last time. Garnish with chives or mix them in.

These were also great as a leftover. I sprayed some Pam in a glass dish and baked it until hot. Edges got a lil crusty....topped it with some French's Fried Onions in the last few minutes until brown.

Not only does K-man love cauliflower and was excited for this new recipe. But he especially when THUD when I served it as a leftover with the fried onion rings on top the next night!

ALSO-----

I received an award from Melissa of Serendity is Sweet. YAY....my first award! SO cool!

As for Melissa's site..... Oh my, she's got several blogs going AND she home schools too! She has lots of resources/links on her site for you to use in regards to home schooling. She also has a ton of pumpkin "things" you can do in your class or at home to extend school learning. Check out her site. I sure did and there was so much to see that I needed to subscribe for I didn't want to miss a thing!


Enjoy!

Tuesday, August 18, 2009

Getting Stewed


Look people, don't put off making something with your tomatoes until the END of the summer. Start now! I decided to make something with my bounty of tomatoes BEFORE it got out of control and I had to make several things at once or give most of them away. Since I still have more tomatoes coming I wanted to get ahead of the game.

My grandmother (Me-mom) always made stewed tomatoes. Her southern way was to cook them forever and she used so much sugar in it that they were DARK red. Almost too dark. They were also so sweet that they were almost like a dessert, you only put a small spoonful on the side of your plate.

Here's to you Me-mom, I love ya but I'd prefer my sugar in my cookies!

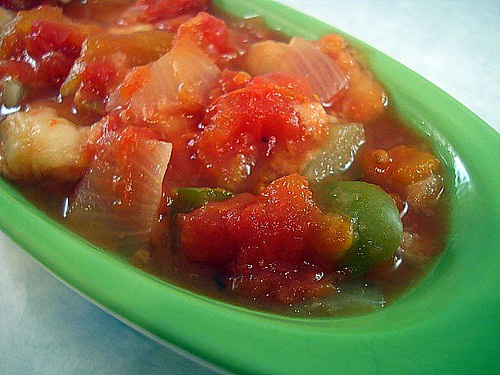
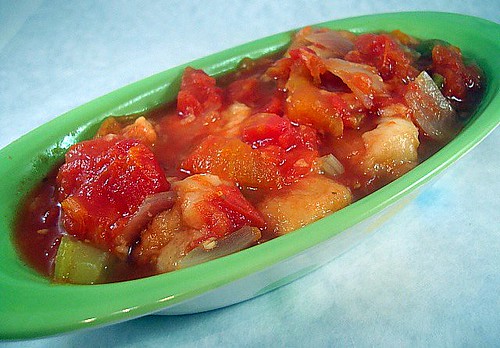
Stewed Tomatoes

24 large tomatoes - peeled, seeded and chopped (you can also use cans of diced tomatoes)
1 cup chopped celery
1/2 cup chopped onion
1/4 cup chopped green bell pepper
1 tablespoon white sugar
salt and pepper to taste
4-6 slices of stale bread

In a crockpot, combine tomatoes, celery, onion, bell pepper, salt/pepper and sugar. Cook on LOW for 6 hours or HIGH for 3 hours or until vegetables are soft. A few minutes before serving cube your bread and stir into tomato mixture. The bread is essential to thicken up your 'stew' so it's not as watery.

Makes about 8-10 cups.

Cooks Notes: Let your stewed tomatoes come to room temperature before you put them into containers to freeze. Be sure to leave room at the top of the container (about an inch). The mixture will expand when frozen.

TUNE in tomorrow to see how I varied the use of my stewed tomatoes!

Stewed Tomatoes on Foodista
Enjoy!