Monday, February 16, 2009

Laborious Recipe? No more!!!

Mmmmmm PIEROGIES!!!!! NO, I am not talking about those sawdust filled raviolis called MRS T'S!!! ugh.

One of my family's polish food favorites is the pierogi. My grandmother always made them for Christmas Eve or New Year's....maybe one other time during the year. But that's it. If you have ever made your own noodle dough by hand, rolled the dough, filled it, sealed them....cooked it ....it is a LOT of work!!! These pierogis were always so cherished by us. Grandmom had to make tons of them too. She had 5 children, those kids had/have some spouses and there were always a handful of grandchildren. So for these family get togethers....grandmom was a peirogi making machine. AND she made three types: Cheese, sauerkraut and blueberry. The peirogies were then boiled, put in a glass baking pan with butter. OMG....these were always so good. As G-mom got older...I realized....no one else was making these wonderful family treasures. Yeah, a few (including me) made Golumpkis (cabbage rolls stuffed with beef), one aunt and I made Polish bread, everyone does the kielbasa...but no one made pierogies. I think when G-mom hit 75, I sat down with her to learn how to do it....OMG....I learned what a saint she was! I never made them again until last year when I owned a home and had the space to do it.....now I feel the pain why G-mom only made these beauties once/twice a year.

Then I called my Mom to tell her about my feat I accomplished by making pierogies for my first time. I whined how laborious it was AND poor grandmom....how she labored so.... Mom tells G-mom over the phone what I made and what does G-mom say?

"You know, you can save time by using won ton wrappers instead of making your own dough?" THUD.

Now she tells me...So here's how you do it.....

Pierogi Filling

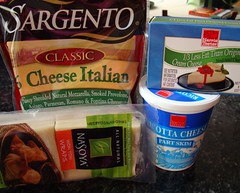
1 lb ricotta cheese (the smaller container)
8-oz. Sargento 6 cheese
4-oz cream cheese (half the box)
salt and pepper to taste
2 T. flour
Won Ton wrappers (usually found in near your tofu)
1 beaten egg


The process:

Step One: Mix your cheeses from the list above. Place in bowl and have teaspoon ready.
Step Two: Line up a few Won Ton wrappers, brush with egg on half of square. Place scant teaspoon in center of square.


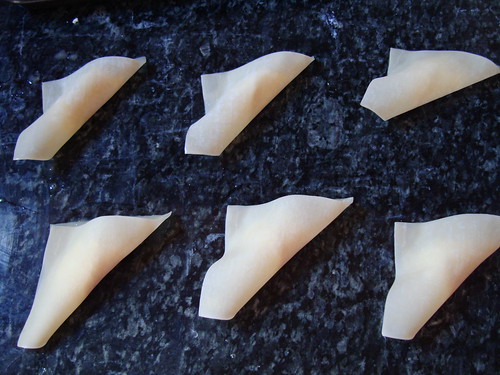
Step Three: Fold over and press. As you pick each up, be careful to NOT squeeze and make cheese ooze out.


Step Four: Be sure to press out air pockets GENTLY as you press your edges together. Having air pockets will make your pierogi expand and pop open with they are being boiled.

Step Five: Space out all your finished pierogi so they won't stick together. Notice I made some triangular and some rectangular. No way I was going to add to the labor by taking scissors and making them half circles like Mrs T's.....LOL

Step Six: Place all on cookie sheet with wax paper between the layers. Flash freeze for about 1 hour.

Step Seven: Place in vacuum sealable ziploc or reynolds bags. Be sure to shake around a little cornstarch before you seal the bag. We don't want them to stick together then....SUCK OUT THAT AIR or they will freeze burn.

TO COOK:

I suggest thawing out your pierogies if they are stuck/frozen together. Then you can gently seperate them before you cook them. Salt your boiling water, gently put your pierogies in the water. They will sink. Cook 2-3 minutes or until pierogies float. Won Ton wrappers will cook quickly and become slightly transluscent. Use a slotted spoon to put them in your serving bowl with melted butter.

Serving Suggestion: While boiling, saute onions and butter, use slotted spoon and toss around pierogies in butter. It's okay to brown them a bit as they cook. These are "off the chain!"

Upcoming Food Holidays!


February 16, 2009 National Almond Day
February 17, 2009 National Indian Pudding Day
February 18, 2009 Crab-Stuffed Flounder and Drink Wine Day
February 19, 2009 National Chocolate Mint Day
February 20, 2009 National Cherry Pie Day
February 21, 2009 National Sticky Bun Day
February 22, 2009 National Cook a Sweet Potato and National Margarita Day

Sunday, February 15, 2009

Wake up Call to parents!


None of us had a cell phone growing up. We didn’t die. I still remained connected to my parents. We had a system: I was instructed to call mom the moment I came home and if I was going to stay after school, I told her the days before I needed to stay after…or if I went to friends house, she talked to the parent herself. They knew where I was at all times. I didn’t need a cell phone.

Now as a teacher, I see in my middle school that practically every child has a cell phone. 75% of my school is on free or reduced lunch; so those parents can’t afford a hot breakfast/lunch everyday, yet they can provide a cell phone to their child? Hmmmmm.

Many parents give their child a phone saying so that they can always keep in touch with their child or their child can call them whenever they needed. Again, my parents knew I was at school and home afterward. Period. I know that kids have so many different activities after school than we did…and there are buses and other parents driving…things happen…Ok, I can understand that….BUT….

Before I tell you what you kids are doing with their cell phones…prepare yourself to wanting to change to a LIMITED plan afterward. Many parents think an unlimited plan is better for it’s cheaper….true- but UNDERSTAND THIS…. An unlimited plan can mean UNLIMITED inappropriate use of it during the school day!

Here is what I’ve seen kids doing with their cell phones during the school day:

a. Kids are asking to the bathroom more now….not to use it like we DID but to text their friends. Asking them to skip class, provide answers on a test they just took or pass on gossip about heard about another person.

b. They are taking pictures of all their friends doing nothing! Granted we developed those ‘nothing’ pictures when we were kids and the pix of kids today can be easily deleted…but occasionally I have been given a cell phone by a student to view the pictures they take….butts, cleavage…ugly faces…many middle fingers, gang signs AND who decided that bending over and sticking out your butt to the camera was a ‘sexy’ pose for the camera? Yeah, that is artistic expression worth viewing!

c. Kids take their earplugs and run them up their sleeves past their shoulder and into their ear (maybe under their long hair) and they THINK, we can’t see they are listening to music. That is because parents get the combo phones where tons of music can be downloaded onto it. I find it funny that they don't realize, in using their iPod earplugs, those WHITE cords are highly visible near the head. LOL.

d. If they a need for a calculator in class…they will pass on the class-issued calculator if we run short. This comes off as being generous, for they will use the calculator on their cell phone. HA, not in my class. I don’t care if I am short on calculators. You will wait to take a turn or share a calculator!

e. As many of you have seen on the news, they use their cell phone to video fights and/or people using drugs (you never know when you need the money from blackmail!) and some times go as far as publish awful acts on Youtube. Kids will anonymously get other kids to send a provocative picture of themself, then blackmail them with it.

f. Remember how we thought we were bad and took a book and hid it under the table to read instead of paying attention to the teacher? Well, replace that book with a cell phone now. The books ON the table provide ' a screen' from the teacher seeing them texting during silent reading periods. They are texting at any free moment they can get away with.

g. Are you buying those hoodie sweatshirts that are so popular for kids to wear? Did you know it’s for them to put their cell in their front pocket and text their friends DURING class time? Yes, your kids are very skilled. My cousin (who is now in college) demonstrated to me how she could text back and forth without looking at the keyboard. The phone is on vibrate and when teacher looks away briefly, they pull it out to glance at their friends message then put it back in their pocket and furiously key a message back – all the while a pencil in their hand while they are looking at you like they are LISTENING.

h. Cell phones are NOT supposed to ON or visible during school…OOPS, a phone rings…kid is busted…sometimes it’s the parent calling! WTH? Your child is busy learning!!! Nothing is THAT important to be calling during the school day. YES, emergencies do arise but you do what OUR PARENTS DID and you call the main office where WE will handle getting your child ready to go in a heartbeat if need be!!!! I DON'T CARE - their forgotten lunch, project or homework will be immediately delivered to them from the office!!!

i. Bullies are not like the days of yore when they were in your face and pushed you around. Now, they call you with a blocked number and call and hang up over and over. They text you evil messages how you are ugly and no one likes you. Why? Because this girl probably talked to the wrong boy. Teenage suicide is on the increase due to cyber bullying. It can be anonymous and drive a student to take their own lives over nasty emails and texts. Think twice about the info you provide for your school’s phone directory. I think it’s a waste of paper and dangerous access to information.

j. Even sexual harassment has gone HIGH TECH now. You may worry about a male saying inappropriate things to your daughter….on the cell he doesn’t need to be courageous or even have an IDENTITY anymore. He can just text your daughter (blocking his number of course) and say sexual things or NOW.... the new term is…SEXTING, where he will photograph his body parts and send them to a girl and watch her reaction from afar. We caught a kid once using his cell during an assembly and took it away…the teacher opened the phone to see what he was doing and found sexual comments written to girl student. Get this, the parents persued this as an issue of their son's privacy being invaded....seemingly no concern or adversion over what their son was saying sexually in 8th grade to another girl. Nice.

SO, the days of stranger danger on the street and your child’s safety alone on the computer isn’t so prevalent as it used to be…the dangers your children are being exposed to are from the privileges given by the parents and following them everywhere they go in their pockets everyday!

I am not saying your child will engage in any of the aforementioned activities…but my concern is the victimization of your children BY these kids who are NOT monitored by their parents. So moms and dads out there….cells phones are only effective with strict use rules, limited plans and unlimited spot checks by parents. Better yet provide an opportunity of learning about budgeting when their allowance goes to paying their cell phone bill. When they realize every call (and incoming call), text, costs money….they will turn it off and use it only emergencies. If that doesn’t work then get one of those phones that only call the numbers parents program into it.

This public service message was provided by a teacher who WITNESSES your child using the cell phones you give them….everyday, all day.

P.S. I find it curious that I NEVER had student who has to use my phone for their phone isn’t charged. Students sure do make sure every night that their phones are charged for the next…but the same diligence doesn’t go to getting their homework done! They remember to take their cell phone to school but OOPS, I forgot my homework! Hmmmm.

P.P.S If your child is being harassed by other student via cell phone....I guarantee you...they won't tell you. They fear you will take their phone away. I know you aren't punishing them by doing this but they will think it's punishment.....but they will endure all sorts of nasty stuff just to continue having a cell phone. Cool kids have cell phones, losers do not....(that is) in the eyes of a teen.

Saturday, February 14, 2009

A Mother's Love...


I know you all have at least ONE casserole that your Mom used to make....that you love so much.... now you make it all the time. Not too many ingredients....pretty much staple pantry or freezer items....This is my 'go-to' dinner when I don't have the energy for something new and creative...


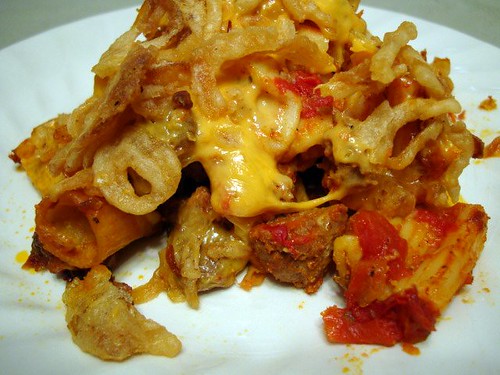
Mom's Sausage Rigatoni Casserole
Make about 6-8 servings (depending how hefty they are!)

1 lb bulk sausage (I always get the hot italian-me likes it spicy!)
1 large onion, chopped
1 box rigatoni (you can substitute any pasta you like but I prefer rigatoni for this casserole)
1- 29oz. can of whole peeled tomatoes
1- 8 oz package of cheddar cheese (I used fat free cheese)
1 large can of Durkee Onion Rings

1. Boil pasta for only half of the time. This is to get it started with softening. Don't worry, the pasta will continue to cook in the baking and absorb the tomato juices. Drain and set aside.
2. Use a large pot that you can not only cook the sausage but then use it to bake the whole thing in the oven. Brown the sausage with the onions. (I've been using turkey sausage lately and it's great). Drain off any fat if you have any.
3. Pour your tomato juice from can into pot with sausage. Take your kitchen shears and chop up your tomatoes coarsely in the can. (This is just to break them up...from not being whole or little explosive tomato juice balloons!). Add chopped tomatoes to pot.
4. Season with salt and pepper, tasting your tomato juice. Then add your pasta. Mix.
5. Mix 3/4 of package of cheese throughout your casserole. Cover and Bake @ 350 degrees for 30 minutes.
6. Casserole should be pretty hot all the way through....add remaining cheese to top. Cover with Durkee Onion Rings. Place pot back in hot oven without cover to melt cheese and toast onion rings.

Serve with crusty garlic bread and side salad....

Now that is some lovin' from the oven!!!
AND....you know how most tomato and pasta dishes seem to be better the day after...

What is the favorite casserole that your Mom made for you that you continue to make for your family?

Friday, February 13, 2009

The way to their heart is through their stomach!

This is the heart they want....and make it into a sandwich please!!!

See this bread? Hard to tell in the picture but it's the same width as your 9 inch cake pan. But the yeast dough has risen much higher than your regular cake. The only specialty pan I have in my house (other than a bundt or springform) is this heart cake pan. Someone left it behind after a potluck...their loss is my gain!!!

K-man isn't into the fancy gifts (shirts, cologne, jewelry, etc). He is just happy with a card. When I've gotten him gifts in the past..."it's too much....I don't need anything...don't spend money on me"...etc. But more importantly....K-man always loves is my cooking and is most appreciative. So I thought....this year how about a food gift? He loves the simple stuff....the man food things. I stumbled upon a xeroxed recipe for a sandwich made from a bread loaf baked in one of those animated cake pans and assembled into a huge sandwich for a party....then I remembered my heart pan...hmmmmm. I know what to do for K-man.

Step One: Get a heart cake pan...or any cake pan pertinent. A football, a dog, cookie monster, whatever.
Step Two: Go to the grocery and get from the freezer section a package of frozen bread loaf dough. Get all or any of the other things that go into your sweethearts favorite sandwich.
Step Three: Bake your bread. I cut the dough in half lengthwise and place on heart halves (you can see the crease in the middle from that) you need to do this in order for it to rise evenly.
Step Four: After risen, brush with beaten egg. Cover with sesame seeds, poppy seeds, etc. I used Crazy Jane's mixed up salt. Bake @ 350 degrees for 30 minutes or until bread sounds hollow when tapped. Let Cool.
Step Five: Slice bread in half so you have now two hearts. A top and a bottom to your heart sandwich.
Step Six: Slather on your mayo or mustard and fill with all your sweetheart's favorite meat and cheeses.
Step Seven: Serve his favorite soda/beer and watch his light up when you offer him the platter with his GIANT heart sandwich as you say "HAPPY VALENTINES DAY!"


What did I end up making?

Although K-man loves everything I cook. Sometimes he misses the simplicity of his bachelor food or SAYS he wants the simple stuff for he doesn't want me to "work so hard in the kitchen". He has a hard time understanding that I LOVE cooking!!!


He said one day, "you know hunny, you don't have to always make such fancy stuff....I'd be happy with just a grilled cheese sandwich."

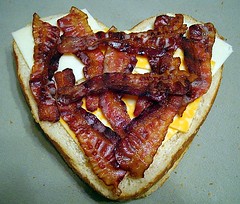
*Slice off the rounded top and crusty bottom to have two large heart shaped bread slices.


*Layer your sliced cheese.


*Then layer of bacon and another layer of cheese.


So here you go sweetheart...your grilled cheese sandwich. A special request fulfilled for my love who fulfills my life by making me feel special!!!

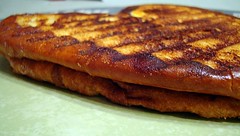
Luckily for me...this bread fits perfectly in my George Forman 360 grill!!


And if you are lucky...he will share with you....and K-man did.


Thursday, February 12, 2009

Unexpected Combination

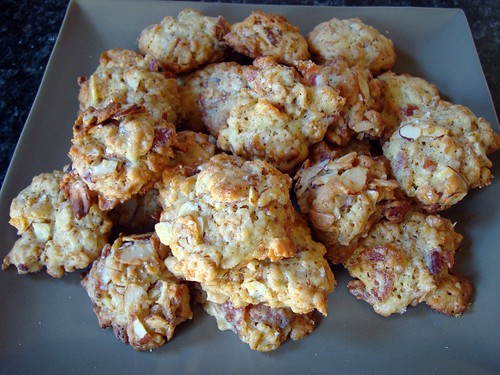
Other than some almonds, can you see the bacon or corn flakes? Would you expect bacon in a cookie? I didn't when I saw this recipe awhile back. I stumbled upon it in my recipe box and thought it would be perfect for here!


Bacon Breakfast Cookies


1/2 lb bacon
1/2 c. butter (I used one of those 50/50 blends)
3/4 c. sugar (I used 1/4 c. sugar and 1/4 cup splenda since 1/4= 1/2 cup)
1 egg
1 c. flour
1/4 tsp. baking soda
2 c. corn flakes or multi-grain
1/2 c. raisins (I did not use any at this time for I didn't have any in my pantry)

Preheat oven to 350 degrees. Cook bacon until very crisp, drain well and break into 1/2 inch pieces. Beat together butter and sugar until light and fluffy. Beat in egg. Combine flour and soda, stir into butter mixture. Stir bacon, flakes and raisins.

Drop by rounded teaspoonfuls onto ungreased cookie sheet. Space 2 inches apart. Bake for 12 minutes(the original recipe called for 15-18 minutes but mine were cooked after 12-remember all ovens vary). Remove from oven cool on sheet- about 2 minutes, then remove to rack to finish cooling.


I expected more of a sweet and salty (like a good CC cookie) with the sweetness of the dough and saltiness of the bacon...but these cookies were really sweet. The second batch I tossed in some sliced almonds and then salted the tops of the cookies to add more saltiness. This made a huge difference. I've noticed that the cookies develop more bacon flavor over time. Next time I will have to try them with raisins.


K-man said these would be perfect for him to stick in his back shirt pockets when he is doing his biking!!

Wednesday, February 11, 2009

Easy Peasy Apple Pie

applecrostada

NO, I am not talking about the ones from the bakery at your grocery store or even Mrs. Smiths. This is easy, yet you can take all the CREDIT cuz you MADE it with your own two little hands and SLAVED all day making it....(heh, heh, heh....that is what you want THEM to think!)

I've heard this called Crostada or Gallette. Whatever.
It's freakin' ___(enter name of filling here)____ Pie LOL. I first came to know this as a Crostada when I saw Ina Garten prepare it. So there, Apple Crostada.

I am not going to use any recipe here just a process cuz it's so freakin easy!!!

EASY PEASY PIE


Pre-made Pie Crust
Whatever fruit you have in your fruit bowl that you need to get rid of NOW. (I used my two partly shrivelled Gala apples)
Lemon juice (to prevent browning)
Cinnamon
Sugar
Some instant Tapioca
Nuts of choice or not
1 beaten egg

Bring pie dough to room temperature. Roll it out a little more onto your parchment paper, silpat or the non stick foil is what I used. Preheat your oven to 350 degrees.

Prepare your filling of the chopped fresh fruit you have on hand. I usually use like 4 apples but today I had only two little sad apples and it was just fine. Mix in your lemon juice, your sugar, cinnamon and tapioca (my box of instant tapioca called for only 2 Tbsp for apples -more for blueberries cuz they juicier!). Either mix your nuts (if you are nutty people like us) or put them on top.

Place mixture in center of dough, leaving 1-1/2 inches around edge. Whether it is a flat pile or a huge mound, does not matter. Fold up sides all around to 'hug' the fruit mixture. Brush folded edge with egg.

Slide pie/crostada onto your baking sheet. Place in oven and bake for 30 minutes or until crust is browned.

Makes depending on how you cut it into 6 slices or 8. We were having a hankering and since the apples were on the thin side....we opted for the 1/4 pie pieces. GREAT with ice cream or fresh whipped cream!

So there you go....pie in a FLASH. NO making of a crust, no rolling dough into a perfect circle, NO easing it into the pie pan without stretching, NO cutting the excess off the edges. NO crimping, NO venting of dough top.

Just roll out premade dough, fill, fold and bake. BAM-PIE! Once you make this...you will find it hard to back to the old way....I've made this with apple and blueberries, peaches and almonds, apples and pears with pecans, apple and raisins. The possibilities are endlessly easy!

Tuesday, February 10, 2009

Unlike anything I've tried....

ALERT: BUY IMMEDIATELY FOR VALENTINES DAY...GO NOW TO STORE AND PURCHASE...YOUR CHOCOLATE LOVING SPOUSE WILL THANK YOU FOR IT....later.

As adults....(if you are a candy eater...) we've tried alot of candy by now. I am a confessed chocoholic (eaten lots of brands/types) and rarely at this point in my life has something I've tried brings me to talk it up to people: "Have you tried these, OMG...you better, they are heavenly."


I received this candy as a gift this Christmas, we chuckled for a bit that the package said "Made in Poland." The gifter being from Romania and me the giftee...we've had a few conversations about the similiar European foods we've grown up eating (1/2 my roots being Polish). She saw them, noticed where they were made....was testing me to see if I caught it. Sure DID!!


I also noticed that these candies were made by the same company Ferrero Rocher. You know, the little balls of chocolate hugging a crispy shell containing a toasted hazelnut epicenter that is enrobed by a soft rich truffle-like chocolate? Remember now? I know you've seen millions of these especially around Christmas with their copious amounts of combo gift packages! Now they are back for Valentine's Day!


So I went home and tried one of these:

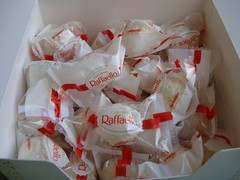
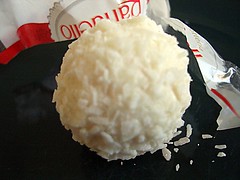
Rolled in Coconut. Be careful...more coconut will fall on your lap from inside the package. Looks like the Ferrero Rocher chocolate ones. But these aren't chocolate. Cuz you know white chocolate really isn't chocolate at all (only the cocoa butter from the cocoa beans). But these don't have cocoa butter in them. Perhaps I shouldn't tell you....otherwise you healthy/diet conscious folk may not want to eat them...But a splurge every so often is ok...everything in moderation right?

I could smell the almond as soon as I open the package. Coconut, almond....I love almond joys, oh man, I am in trouble here!. I bit into it (you can't be a glutton and pop it all in...you have to explore first what you are about to discover!

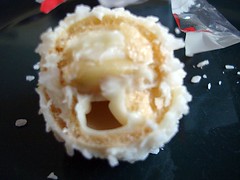
My teeth hit that same crispy shell and soft almond filling hits my lips. Coconut falling all over my shirt now...I pull away and see this. I haven't even hit the little toasted almond in the center yet. Of course, all the crunchiness, creamy, chewy goodness is flooding my senses...NOW...the impulse to throw it ALL in my mouth. So smooth, little chewy coconut. It's all coconut and almond! Have you ever hummed a little song to yourself and popped your shoulders up and down while you chewed it was so good? It's THAT Yummy.

In the package of 15 I originally got...I was miserly passing one to K-man, one to my mom, one to grandmom,etc....they were Mmmm'ing in unison...hopefully they wouldn't see that I snatched the box back and closed it....hoarding the rest for me.

So here's the problem....I NEVER saw these in the STORES!!!! Now I've seen their combo gift packages....I've only bought the one type with the Hazelnuts. I didn't know if those other wrappers were just colored to be different colors or if they had different flavors inside. Yet these wrappers were white and red plastic, not the foil wrappers. I didn't have time to go around and mess with this....I WANTED MORE BEFORE THEY RAN OUT!....JennyMac goes online...finds it on Amazon and Candyshoponline. Now it's a matter of which is the better price. Amazon wins of course...and they were ordering it from Candyshoponline anyway LOL....too funny.

So I ordered two boxes. One for Mom and Grandmom and the other for the house for guests (afterall, I was being so miserly at first) and I knew Mom and G-mom would appreciate that they were made in Poland...the boxes come in and I look at my new boxes: WTH?

wrapper

GEEZ!!!! Of course I know that chocolate is made all over the world and many companies have several locations to manufacture their chocolate. No, the Polish ones don't taste any different than the Belgium ones...if you are wondering. Sniff, sniff....But they just don't seem so special to me now.

Maybe if I ate another one....I'd feel better....

Monday, February 9, 2009

It's not all about stitchin' and stewin', ya know!

Your honor, exhibit A, proves that Family and Consumer Science classes reinforce what students learn in Math classes. This class is NOT "Housewifery 101" as many like to think...

Yes, FACS classes can crunch numbers. Barely, but I get them to try. I tell my students when they ask "why does Math matter? We aren't going to use it anymore after we graduate".....Here is my proof. (hey if they think they aren't going to use Math anymore....they might as well hand over all their money to me now....)

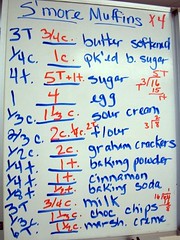
My 8th grade classes were learning to measure in class and before I started the recipe, I realized that the recipe made only 6 muffins. Well, we can't have that when 17 kids will be expecting a muffin afterward. Even if we doubled the recipe that was 12 and half a muffin still wouldn't be enough. So Ms MacK made a lesson out of it and let's quadruple it!!!

As an introduction before the demonstration, the blue writing was the original measurements. I made the students multiply everything by 4 and STILL I had to convert things like teaspoons into tablespoons and tablespoons into cups....What an undertaking!!! You have no idea how difficult this was! Basic addition or multiplication is one thing....OMG, fractions....they would just guess, they didn't care. (get cooking lady, they were thinking)

Anyhow.....So we got the measurements for 24 muffins. CHECK. The ingredients. CHECK. Oven preheated. CHECK. All the equipment out. CHECK. Audience ready to listen. CHECK.

I show them the four basic measuring tools, dry measuring cups, liquid measuring cups, measuring spoons and the spatula. I HAVE to do this demonstration, for all my students watch their parents 'eyeball method'....shaking the measuring cups....using their fingers to level....the food network has pre-measured prep bowls of food they dump in. Rachael Ray using her palm method....all these examples are too confusing. I have to show proper OLD SCHOOL methods....then explain....as they get older....they can measure with their palms (or sneakers for all I care) when are experienced cooks...LOL


I Want S'more Muffins
from Taste of Home

* 3 tablespoons butter, softened
* 1/4 cup packed brown sugar
* 4 teaspoons sugar
* 1 egg
* 1/3 cup sour cream
* 2/3 cup all-purpose flour
* 1/2 cup graham cracker crumbs (I did not buy the premade stuff, I mashed my own and left it real chunky too)
* 1/4 teaspoon salt (it got left out inadvertently, we didn't miss it since it had plenty sodium from the leavenings)
* 1/4 teaspoon baking powder
* 1/4 teaspoon ground cinnamon
* 1/8 teaspoon baking soda
* 3 tablespoons 2% milk
* 1/3 cup milk chocolate chips (we used regular semi-sweet)
* 6 tablespoons marshmallow creme

DIRECTIONS

In a small bowl, cream butter and sugars until light and fluffy. Beat in egg. Stir in sour cream. Combine the flour, graham cracker crumbs, salt, baking powder, cinnamon and baking soda; add to creamed mixture alternately with milk just until moistened. Fold in chocolate chips.
Coat six muffin cups with cooking spray; fill one-fourth full with batter. Spoon 1 tablespoon marshmallow creme into each muffin cup. Top with remaining batter.
Bake at 400° for 14-16 minutes or until a toothpick comes out clean. Cool for 5 minutes before removing from pan to a wire rack. Serve warm (a MUST).

Yield: 6 muffins

Teacher's Notes:
  • I can't tell from their pictures if they are using the Texas Sized Muffins to be making only six, but after quadrupling....we made 24 perfectly
  • Can I just say....these were AWESOME. Keep this recipe!!!
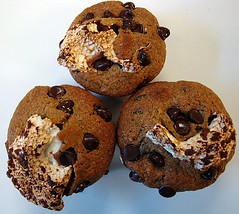
  • The muffins came out just like theirs did in the picture!!! I was sure that their marshmallows on top were some type of food styling trick so I got mini marshmallows to decorate the tops in case....NOPE, never used them. The marshmallow fluff burst out just like their pictures.
  • The marshmallows were slightly crunchy on top just like a roasted marshmallow....OH HAPPY DAY.
  • I can see why the recipe only makes 6 now. When they are hot out of the oven the warm creaminess of the chips, the gooey marshmallow with a crunchy top (just the right amount of 'burnt taste' to it....but after you put them cooled in your sealed container for later....the next day....it's just not the same! Good but not GREAT like they were yesterday. Just a warning.


As you can see, lip smacking good!!


BTW: I also make my students Read in classes too. I know, I know....how mean of me!

Sunday, February 8, 2009

Tweaking Again


Here I go again.....I've always wanted to try Spicy Chocolate Cookies. I've had a few recipes, nothing really got me going to making them. Then I saw (Homesteading Housewife) Dana's recipe for Fudge Crinkles. Oh Easy Peasy!!!! So, I put the recipe off to use one day....then it occurred to me....just add cinnamon and cayenne and POOF!.....Mexican Chocolate Cookies Crinkle Style....Mmmmmmmm


Mexican Chocolate Cookies
adapted from Homesteading Housewife

1 (18 1/4 ounce) box devil's food cake mix
1-1/2 tsp. cinnamon
1/4-1/2 tsp. cayenne
1/2 cup vegetable oil
2 eggs
confectioners' sugar for rolling

1. Preheat oven to 350°
2. Stir dry cake mix, cinnamon, cayenne, oil and eggs in a large bowl until dough forms. (you may want to taste the dough to ensure you can taste your cinnamon and it's spicy enough for you or not too spicy...LOL)
3. Dust hands with confectioners' sugar and shape dough into 1" balls.
4. Roll balls in confectioners' sugar and place 2 inches apart on ungreased cookie sheets.
5. Bake for 8-10 minutes or until center is JUST SET. (anything over 9 minutes will only make your cookie drier and crunchy...you want it moist and chewy....trust me....I didn't hear the timer with the second pan...so I got a few crunchy ones!)
6. Remove from pans after a minute or so and cool on wire racks.
7. Enjoy!!

When I was sitting there at the table (about 2 feet away) from the cookie plate...I could smell these yummies. They were driving me crazy to eat one they smelled so good. So tender too. High FIVE to Dana!


Kitty says "yummy in my tummy!"


Your Food Holidays.....Coming up this Week:

February 9, 2009 National Bagels and Lox Day AND Pizza Pie Day
February 10, 2009 National Cream Cheese Brownie Day
February 11, 2009 National Peppermint Patty Day
February 12, 2009 National Plum Pudding Day
February 13, 2009 National Tortellini Day
February 14, 2009 Valentine's Day /National Cream-Filled Chocolates Day
February 15, 2009 National Gumdrop Day

Saturday, February 7, 2009

Traditional versus Easy

We've all made some recipe the hard way and then stumbled upon a much easier recipe with some short cuts that was just as good.

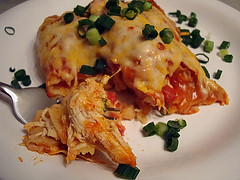
I've done both for enchiladas. It depends what I have on hand and/or how much work I am willing to do. Today I will give you both versions.

Traditional Enchiladas

3 boneless chicken breasts, poached and shredded.
Your favorite beans (optional) I used cannelini here
Rotel tomatoes (mild or hot, your choice)
Plenty of cheese!!! (I prefer the milder colby than the cheddar)
Corn Tortillas
Large Can of Enchilada Sauce
Oil for frying
Green Onions for garnish.

The beauty of the enchilada...you can put whatever you want in them. Shredded chicken. Beef and onion, spinach and cheese, pico de gallo and shredded pork, peanut butter and jelly (um, not really. Just seeing if you are paying attention! LOL)

So my list above doesn't really matter, you just need a meat of choice, cheese, tortillas and enchilada sauce. Everything thing else is MUCHO BUENO!

1. Prepare the filling you want inside. I boiled my chicken breasts with some bay leaf, garlic powder, mexican oregano. Took them out when they were cooked after 10 minutes or so and shredded them in a bowl. Let cool.
2. Decide if you want your filling to be just meat or with other things. Remember you can't make a burrito sized enchilada here! But you definitely need some cheese inside as your glue.
3. After your filling is decided upon. Set aside. Grease your baking dish and get ready to prep the tortillas.
4. In a shallow pan place about 1/2 inch oil and heat. Once the oil is hot you have to work fast. Get a plate ready with some paper towels and the tongs. Put in your tortilla, it will start to sizzle and then turn it over. Take it out. Literally like 30 seconds total. If you keep them in too long they will start to fall apart and if you keep them in even LONGER, they will get crispy. So there is a fine line. You CANNOT skip this step (I've learned this) for if you don't fry them first....the tortilla will crack and break. This step keeps them pliable. Cook tortillas one by one and stack them on your paper towel lined plate.
5. Got your tortillas all ready? Alrighty. Time to set up your assembly line. In this order:
Tortillas, pie pan with enchilada sauce in it (about 1 cup), filling and greased baking pan.
6. Take tortilla and place it in enchilada sauce and turn it over. Place saucy tortilla in hand and place about 1/4 cup of filling in it. Tri-fold the enchilada and place edge side down. Repeat over and over until you run out of space or enchiladas.
7. Put any leftover sauce from plate on the enchiladas and pour the remaining sauce all over the enchiladas. Bake for 25 minutes @ 350 degrees.
8. Remove from oven and sprinkle on cheese generously. Bake for another 5 minutes or until all melted and bubbly.
9. Chop your green onions or cilantro (whatever you want for extra flavor and garnish....just make it green).

K-man actually growls when he smells and sees this for dinner. He LOVES these.

NOW.....for the EASY PEASY version:

FAKE OUT ENCHILADAS

1 box of taquitos, thawed or frozen (your choice of flavor)
1 large can enchilada sauce
Large bag of cheese
Green Onions
Sour cream

(Now I am laughing) See those above steps 1-6? Gone, eliminated.
  1. Preheat oven to 350 degrees.
  2. Put enchilada sauce in bowl wide enough to fit taquito in. Grease baking pan.
  3. Dip each taquito in enchilada sauce and place in baking pan. Repeat until pan is full. Pour all the rest of the sauce in the pan. If it looks like too much sauce, it's okay the taquitos were fried and hard. They need to absorb the sauce somewhat.
  4. Bake for 30-45 minutes. I give such a large time range for it depends if you used thawed or frozen taquitos. You just need to check to when the taquitos are soft. If you used thawed taquitos then 30 minutes may be just right. But if you used frozen ones....they may take a bit longer.
  5. When soft....pile on that CHEESE! Put bake in oven to melt.
  6. Chop your green onions and this I suggest to use for you will get more flavor like a traditional enchilada.
  7. After cheese melted. Put on green onions and let it set for 5-10 minutes. Plate your 'fake out' enchiladas on a plate - three are good and pile on the sour cream either one fat dallop in the middle or a line that goes across the 3 enchiladas.
The beauty of this fake out version....it tastes great. Of course your traditional ones are very meaty...but these will work if you are looking for tasty in less time. Try it....I think you will like it!!!

Friday, February 6, 2009

Tried and True

Props to Cathy from Noble Pig!!! I saw these on her site and I wanted to give them a try for they looked so yummy. Munchies for the weekend, wheeeeeee!!!!


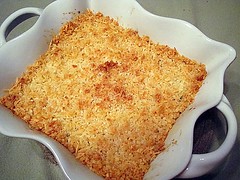
Jalapeno Popper Dip
(I only made 1/2 recipe for we didn't need so much dip)
as seen on Noble Pig but entered for Super Bowl Contest from Big Red Kitchen


2 - 8 ounce packages cream cheese, room temperature
1 cup mayonnaise
1 cup shredded Mexican blend cheese
1 - 4 ounce can chopped green chilis (do not drain)
1 - 4 ounce can sliced jalapenos (do not drain) - double if you like heat (I roasted one poblano pepper and chopped instead)
1 cup panko bread crumbs
1 cup Parmesan cheese, divided
1/4 cup butter, melted

In a food processor add cream cheese, mayonnaise, Mexican cheese, green chilis, jalapenos and 1/2 cup of the Parmesan cheese. Spread the dip into a greased (I used butter) 2-quart casserole dish.

In a bowl mix bread crumbs and the remaining 1/2 cup Parmesan cheese. Pour melted butter over the crumb mixture and mix well.

Sprinkle crumb mixture evenly over the dip and bake at 375 degrees for about 20 minutes. The top should be browned and the dip bubbling on the edges. Do not over heat or the mayonnaise will separate and a grease puddle will form in the middle of your dip. Serve with buttery crackers, French baguette or chips. Serves 8-10.

This absolutely tasted like the poppers. There wasn't much left!!! I wondered why it wasn't spicy from the pepper I selected....it occurred to me the cream cheese/dairy is what counter acts with the chemical that sets your mouth afire!!! So next time you eat fiery foods....have sour cream/salad dressing or milk on the side to put out the fire!!!
_____________________________________

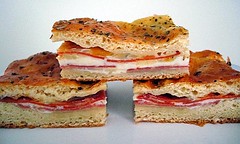
Antipasto Squares
From Noble Pig, recipe by Cutting Edge of Ordinary

2 large packages Pillsbury Crescent Big & Buttery Rolls (10 ounces each)
1/4 lb ham, thinly sliced
1/4 lb Provolone cheese, thinly sliced
1/4 pound Genoa salami, thinly sliced
1/4 pound, Swiss cheese, thinly sliced
1/4 pound pepperoni, thinly sliced
3 large eggs, lightly beaten
3 Tablespoons grated cheese (I used Colby mix)
Dash pepper (I also added a bit of Italian Seasoning)

Lightly spray a 9 x 13 pan with cooking spray. Open one package of crescent rolls, unrolling in one piece and press it into the bottom of the pan. Make sure you push together all the little perforations. Layer meat and cheese in the order listed above. The 1/4 pound is an estimate. Just keep layering until it covers the pan. Do not overlap the pieces. One note - try to use baked ham instead of cooked ham. Cooked ham can sometimes be too watery. If you do use cooked ham, microwave it on paper towels for a few seconds to get some of the wetness out of the meat.

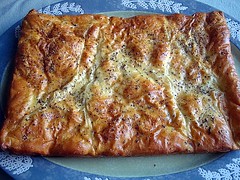
In a medium bowl add eggs, cheese, pepper and seasoning. Pour most of the egg mixture on top of the meat and cheese, reserving a small amount. Top with second package of crescent rolls and brush and brush with remaining egg mixture. Bake 25 minutes at 350 degrees or until top is golden brown. Let cool a bit before cutting into squares so the cheese does not ooze out the sides. Serve warm or room temperature.

These were fabulous. I thought the egg added would make the bread soggy kinda like french toast. NOPE. This recipe is a KEEPER!!! Great for weekend brunches, snacks for the kids or leftover for lunch!

Cathy, the Queen of Noble Pig....your game day picks obviously influenced me. I've made 3 things from your game day post and they were KILLA! You DONE good!

Thursday, February 5, 2009

Cookie Club!!


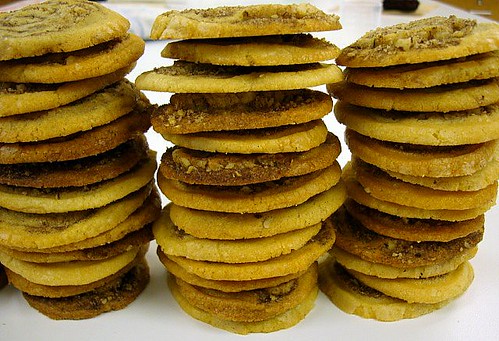
Crispy, Chewy, Round, Yummy, Sugary, Gooey, Crunchy, Buttery, Square, Thursdays, 3 for $1, How many would you like?

One of the things I haven't told you about what we do after school is called Cookie Club. In a nutshell it's where the kids who can't be in my classes can still get some experiences in the kitchen. Many students are naive and think all we do is make cookies and stuff our faces afterward (insert Game Show Buzz here)....the kids learn about being professional and selling them as a bakery would. Since I don't want the club to be a drain on my monies that is alloted for my classes, the money we bring in from sales goes back into buying more supplies for the next week.

We do this all year, every Thursday, trying different flavors, making classics and then in March we just make lots of dough and freeze it until our big event called "Celebrate Gunston." We bake them fresh on the premises and sell them 3 for $1.00 to the huge crowd who come to visit. BUT this year we are going to try something different and bake them ahead of time, bake less and sell them in the cafeteria instead of my room. We are always trapped in my room, we can't mill around taking in all the fun, we are hidden from those unfamiliar with my location and often are overlooked from the huge Hall of Nations going on outside my door. So this year....we will see how the new approach goes...but for now, the cookie we sold today was:

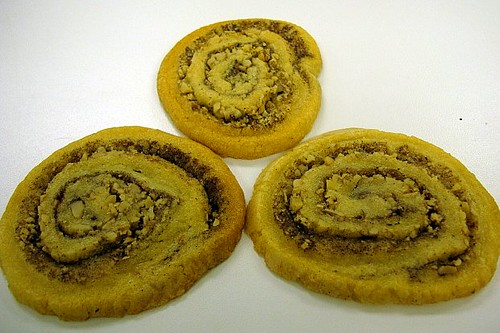
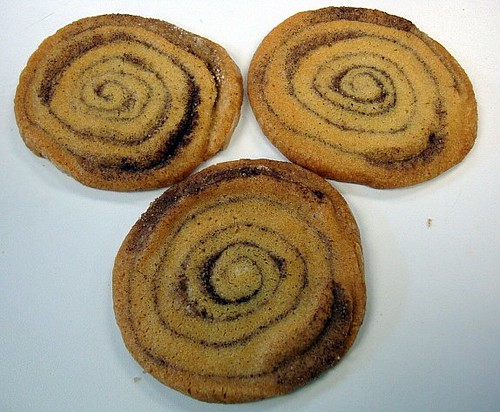
Cinnamon Bun Cookies !


I found three versions of this recipe. My being a rookie blogger and seeing so many of my fellow bloggers recipes, I was 'copy and paste happy' at first and I failed to add the site or author to this recipe. This one appealed to me and thought would work best. SO....my fellow foodies, if think this is your recipe...please comment below and/or give me the link of where I could possibly have found our recipe. I will make sure to give you the props you deserve!!!


Cinnamon Bun Cookies

1 1/4 cups sugar
3/4 cup unsalted butter at room temperature
1 egg
1 tsp vanilla
1 3/4 cups all purpose flour
1 tsp baking soda
1/4 tsp salt

Filling

4 tbsp sugar
2 tbsp chopped pecans
2 tsp cinnamon

Beat the sugar and butter until creamy with an electric mixer. Add the egg and vanilla. In a separate bowl combine the flour baking soda and salt. Gradually add the flour mixture to the butter mixture. Form into a ball, cover with plastic wrap and refrigerate for an hour.

Mix the filling ingredients in a small bowl.

Since the original recipe said that the dough would spread out too much when baking and the cinnamon roll spiral would be ‘en mass,’ after the dough was chilled, we rolled out the dough into a rectangle about 18X10.

Sprinkle the cinnamon mixture (with or without nuts) over the dough and press into the dough. Roll beginning with the long side. Roll tightly. Place the seam side down on plastic wrap, cover and refrigerate over night.

The next day cut into 1/2 inch slices and cook in a 350 degree oven for 9 minutes. Let them sit a minute on the hot pan before transferring to a wire rack to cool.

BTW: We made a quadruple batch....four logs to slice up....two with walnuts....two without....3 for $1.00.....


Cuz sometimes you feel like a nut.....

Sometimes you don't....

These were good but they taste just like our Snickerdoodles. Considering the labor intensity, the two days of refrigeration...I will stick to the snickdoodles....they are softer and chewier.


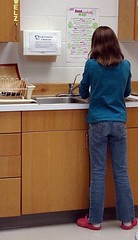
Gotta love it when the students call out "I wanna wash!"


cookieeyes
What is funnier than this picture? It was hilarious when she took away the cookies and her long eyelashes were full of cookies crumbs!!! LOL
(no student was harmed in this stunt)

FREE Candy: Enter here for a chance of getting free 5lb bag of candy!!!

Wednesday, February 4, 2009

Ah -HA moment

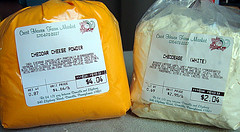
Those of you who may frequent the Amish Markets in your area, you may see this on their shelves:

Mmmm powdered cheese. Hahaha, I've seen it for years, kinda went 'ick' and passed it by. Then I had my mom get some for me when I thought of using it to make my own cheddar chex mix. (that won't happen until we finish our bag of actual cheddar chex mix....)

As I was going through my school web site for ideas...I came upon the copycat recipe of Cheese Nips then came the AH-HA. I can use those bags of cheese powder AND make my own white cheddar ones too. COOL!!!!


I made these for Super Bowl snackies, I didn't include it on my SB post. I felt they deserved their own posting!


Copycat Cheese-Its/Nips

adapted from Top Secret Recipes

1 cup sifted all-purpose flour (plus 1/2 cup
divided and reserved for kneading and rolling)
1 teaspoon baking soda
1/4 teaspoon baking powder
1/2 cup Cheese powder (or 2 packages dry cheese powder from 2 boxes macaroni & cheese)
3 tablespoons shortening
1/3 cup buttermilk
1/2 teaspoon salt (for tops, I accidently left the salt off one batch and it definitely needs salt on top.)

1. Blend together 1-cup flour, baking soda, baking powder, and cheese powder in food processor.
2. Blend in the shortening with dry mix in processor. Mixture will still be very dry.
3. Add buttermilk until dough becomes very moist and sticky.
4. Sprinkle a couple tablespoons of the reserved flour over the dough and work it in until the dough can be handled without sticking, then turn it out onto a floured board, being sure to keep 1/4 cup of the reserve flour for later. Knead the dough well for 60 to 90 seconds, until the flour is well incorporated. Wrap the dough in plastic wrap and chill for at least one hour.
5. Preheat oven to 325 degrees. Spray a light coating of cooking spray on a baking sheet.

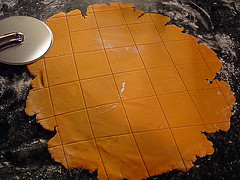
6. Remove the dough from the refrigerator and use the remaining reserve flour to dust a rolling surface. Roll about one-third of the dough to just less than 1/16th of inch thick. Trim the edges square (a pizza cutter or wheel works great for this), and then transfer the dough to a lightly greased baking sheet. Use the rolling pin to transfer the dough. Simply pick up one end of the dough onto a rolling pin, and roll the dough around the rolling pin. Reverse the process onto the baking sheet to transfer the dough.
(I found this impossible to do, the dough was just too delicate. I suggest using a pastry cloth or plastic wrap. I just cut them on the counter and used a spatula to transfer the little squares)


7. Use a pizza cutter to cut across and down the dough, creating 1-inch square pieces. Use the blunt end of a skewer or broken toothpick to poke a hole in the center of each piece. (I used a chop stick)


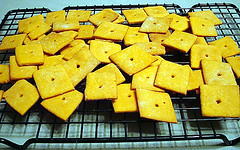
8. Sprinkle a very light coating of salt over the top of the crackers (crackers will already be quite salty from cheese mix) and bake for 8 to 10 minutes (check after 8 minutes for the bottoms were quite brown for me) mix the crackers around (so those on the edge don’t burn) and bake for another 3 to 5 minutes (I turned them over and did only 2 extra minutes) or until some are just barely turning a light brown. Repeat the rolling and baking process with the remaining dough.

*Makes approximately 300 crackers. (UM, I don't think so. I didn't count them. But this became so laborious my squares were getting bigger to save time. Just like the bigger squares, cheez-its. I was fine with having about 60 crackers)


*K-man thought these tasted just like the real ones. I didn't think they were as cheesy as the real ones. All in all, when they say "get your own box"....save yourself the effort...buy them. Don't make them. Your kids may think this would be fun. One of my students did this as a cooking project. His were kinda thick...LOL. There are certain foods/recipes that you just leave up to the professionals.


If have made the following recipe. It was really cheesy tasting, perhaps it was due to it using REAL CHEESE (not powder). Try these out:

Cheese Pennies
Yield: 3 dozen

* 1/2 cup butter or margarine, at room temperature
* 1/2 pound grated sharp cheddar cheese, at room temperature
* 1 cup all-purpose flour (baking mix can be used too)
* 1/4 teaspoon salt
* cayenne pepper
* pecan halves optional

Combine butter and cheese and mix well. Add rest of ingredients, except pepper and pecans. Add a few grains of cayenne pepper. Mix thoroughly. Divide into 4 pieces. Roll each into a cylinder (silver dollar size), wrap in foil and freeze. To serve, partially defrost roll, cut slices 1/4 inch thick, top with pecan halves if desired and bake on a greased cookie sheet at 400 degrees F for 8 to 10 minutes. Remove from pan while warm to prevent breaking.

These I've made and they were not only yummy but not as much effort has to go into making a good cheese cracker!!!