Saturday, November 28, 2009

Have a ball during dinner!


Whether you use Stovetop stuffing from a box or make it from scratch, making balls out of it is a great idea for these reasons:

1. Stuffing put in the bird soaks up tremendous amounts of fat, these only have the amount of fat you put in them.
2. Less worry about bacteria when stuffing is cooked separately.
3. You can make these ahead of time and warm them up right before serving.
4. These are already portioned out, one scoop per person (or whatever your count is).
5. Easy to serve/handle.
6. Best of both worlds crunchy on the outside, soft on the inside.
7. Can be made appetizer size or dinner size.
8. Adds visual interest on any plate!
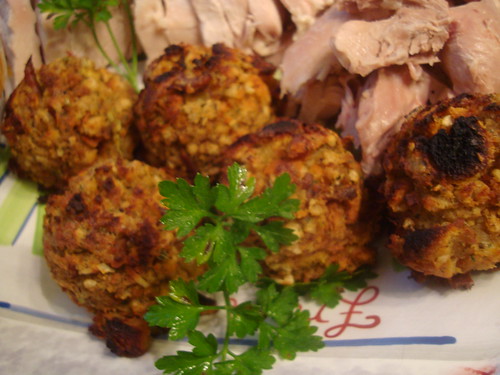
Lisa of The Cutting Edge of Ordinary inspired me to do this and I thought they looked rather cute on the platter with the turkey!

Our stuffing recipe from the family is usually EVIL. So much fat....Cooked sausage....onion and celery sauteed in the pork fat....add a stick of butter then cooked in the turkey..... THUD!
Here's what I did to make them more reasonable fat-wise!

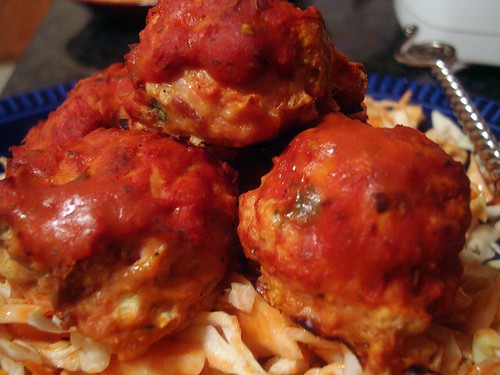
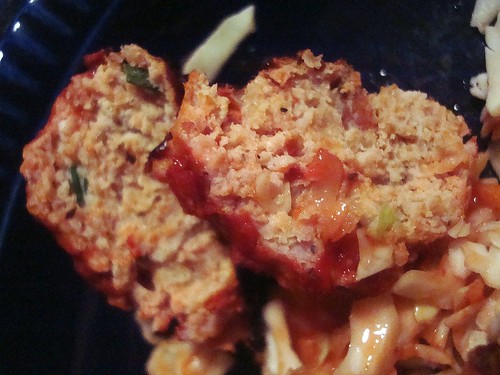
Lower Fat Stuffing Balls

1 turkey neck
3 cups water
scant olive oil
1 onion chopped
2 celery stalks, chopped
1 tsp. poultry seasoning
salt and pepper to taste
3 cups of stale bread cubes (rye is great!)

In a sauce pan, place 3 cups of water and cook the turkey neck until reduced by half. Notice that there is some turkey fat floating around....just what you need. Remove turkey neck and remove as much meat as you can and chop. Add to broth.

In frying pan, one turn of olive oil in pan and saute the onions and celery. Add poultry seasoning and salt/pepper. When onion/celery is soft, turn off heat and add the bread cubes. Stir in broth little by little until absorbed but not mushy.

Line cookie sheet with foil and again another swirl of olive oil in foiled lined pan. Take your ice cream scoop and make portions onto cookie sheet.

Bake in 350 oven for about 10 minutes or until crispy on bottom. I put the 'balls' under the broiler for a minute before serving to get extra brown.

I'd do these again with sausage as an appetizer!

YUMMY!

Friday, November 27, 2009

Use it or Lose it?


How did you roast your Turkey this year? Did you stuff it? Brine it? Cook on high heat then reduce to a lower heat? Deep Fat Fry it? Massage it with butter and stuff with herbs? Baste it every 1/2 hour? I have done all of those (well, I've not fried a turkey for it's just to scary a task for me!)


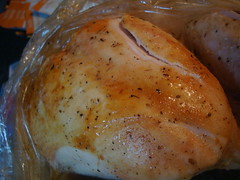
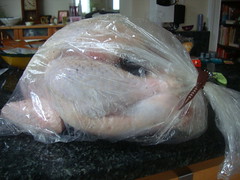
I cooked the turkey this year was with a roasting bag. It's self basting and browns the turkey pretty well. Those roasting bags are pretty mainstream now....they are pretty much in all the stores (those slow cooker liners are not easy to find though).

If you haven't used a roasting bag....please do. They are great. Not only can I massage the oil/butter with the bag instead of my hands but lifting the turkey to put in the roasting pan is no fuss-no muss.


Simple instructions, preheat oven @ 350 degrees. Follow the chart for the time per pound. Season and oil your bird. I put tons of fresh herbs in the cavity. Rub down with oil, salt and pepper and a Tablespoon of flour or two down in the bag under the turkey. Seal bag with tie provided. Cut a few slits on top and shove that gobbler in the oven. About halfway I did use a temperature probe for I wanted to make sure the leg temperature was 180 degrees( I was NOT going to use that stupid 'pop up' thing to tell me if/when my turkey was done!


When I carve, I like to cut behind the breast meat (knife along the breast bone) and all the way down. Removing the WHOLE breast and then slice as shown. So much easier. My dad always used one of those electric knives and the meat just seemed to shred. This way 'fans' on the platter nicely.


Here you go, meat and stuffing balls with gravy ready for the table! It was so moist!


So my advice? USE IT, this post may have come after T-day....but now you are ready to go for Christmas. Better yet, you can use these roasting bags for chicken and pot roast too anytime during the year!

Tune in next time for the stuffing balls!

Gobble-gobble,

Wednesday, November 25, 2009

Gobble it up!

Happy Thanksgiving everyone!!! It's nice to have the day before T-day off so I can do some pre-preparations for tomorrow.

So what are you guys making for your big day? Are you having tons of family, going away or having a small dinner at home? Last year K-man and I went to his mom's but this year it's a small quiet dinner for just the two of us. What is on your menu?

As some of you know already, I've been avoiding my blog a bit since I've been on a weight loss plan. Already 15 lbs gone in 3 weeks! YAY! So, not wanting to totally blow it out tomorrow a few things have the fat cut. It's really hard when your diet is NO FAT, NO SUGAR and NO SALT. I feel great but when I find recipes or products there is always something of those three that is present making it difficult to work around recipes or eating. But I think I found a good combo of foods (with K-man's input of what he wanted) to make our dinner a good one.

Here is what is in store for us tomorrow:

Turkey (cooked in a roasting bag)
Mashed Potatoes and gravy
Stuffing Balls
Green Bean Casserole
Corn Pudding
Pumpkin Custard
No Fat Brownie Tart

Stay tuned for the next few days to see how these recipes turned out and what I did to 'tweak' the fat contents. The links above were the spring board for the recipes I used and wanted to give my thanks for their initial recipes that gave me inspiration to have my holiday food and still be 'somewhat' good on my plan without going totally bonkers.


Gobble-gobble!

Tuesday, November 17, 2009

Guilt Free Meatballs

Who doesn't love a meatball? I know I certainly do! Here's what I did to keep out the fat of my meatballs and yet add flavor and keep the moisture!

Guilt Free Chicken Meatballs

1 serving of Fat Free Bagel Chips (look to your package what that is)
Fat Free PLAIN coffee creamer
2 slices of cooked turkey bacon, finely chopped
3 green onions, finely chopped
2 garlic cloves, pressed through garlic press
1 tsp. freshly ground pepper
salt to taste
1/4 cup egg substitute
1 lb ground chicken
2 Tbsp tomato paste, divided
1 Tbsp calorie free, sugar free ketchup (Walden Farms makes this)
1 Tbsp Italian Seasoning

Preheat oven to 400 degrees. Crumble up bagel chips and cover with creamer in bowl. Stir and coat and break up with spoon until softened.

Chop up turkey bacon finely and green onions and put in bowl with softened bagel chips. Press garlic and add. Mix. Add salt, pepper, tomato paste, egg substitute and mix again. Add ground chicken.

Mix until incorporated with fork. Use small scooper (the one I use for cookies) to make meatballs onto nonstick foiled cookie sheet. Bake for 10 minutes. In a small custard cup, mix ketchup, tomato paste and Italian Seasoning.

After ten minutes, brush ketchup mixture onto meatballs and bake for another ten minutes.

Absolutely moist and very tasty! Great on spaghetti squash!

Enjoy!

Sunday, November 15, 2009

Orange these yummy!!!


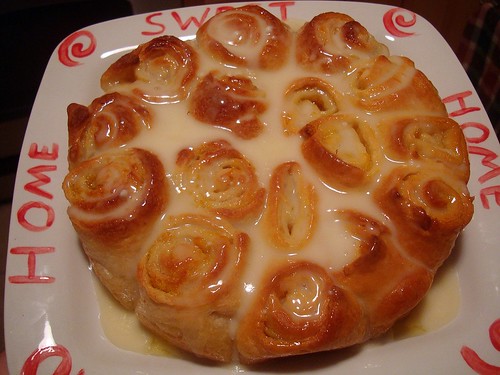
K-man loves those orange rolls made by Pillsbury in a can from the refrigerated section in the grocery. Every so often he requests them for breakfast as a treat. But I am not buying them anymore because I found some recipes. Pioneer Woman's site Tasty Kitchen is where many of her fans can submit recipes. Two inspired me.

Orange Rolls
(from mamabunny) and also Orange Marmalade Rolls (the site author Ree Drummond, also can be found in her new cookbook). I wasn't in the mood to make dough from scratch so here's what I did....

Orange Sweet Rolls

2 cans of refrigerated pizza dough or 2 can of crescent dough (they make them without perforations now)
1/4 cup melted butter
1/2 cup sugar
1 orange zested

Glaze:
2 T melted butter
1/2 tsp. vanilla
2 cups powdered sugar
juice from that zested orange

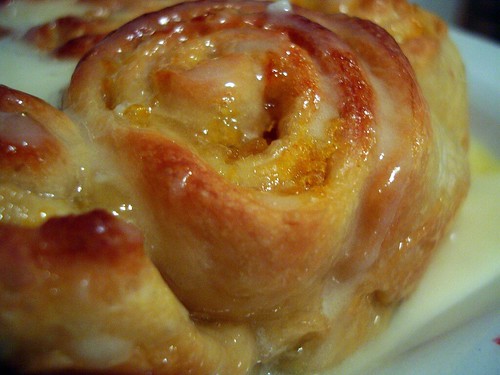
Roll out dough. Brush with melted butter and sprinkle with mixture of sugar and orange zest. Roll up from the long side. Cut each roll into 8(making 16 rolls- and I used dental floss as well). Place in greased cake pan either 10 inch or 13X9 pan. Bake at 350 degrees for 15-20 or until lightly browned on top.

For the glaze, in a bowl add the powdered sugar, melted butter and vanilla. GRADUALLY add the orange juice until you get the desired spreadable frosting/glaze you want. Spread over rolls while hot.

K-man really loved these he loved "the little bit of sweet and little bit of the tang" The house smells incredible right now too!

Enjoy!

Friday, November 13, 2009

Schweeetttttt!


We just finished studying Soul Food in my eighth grade classes. For each cuisine they learn about; they do one lab experience (cornbread) and after their mini quiz on Friday they get one more demonstration of another food for them to see the preparation of it and to sample it. I've done grits, hoppin' john, jambalaya, fritters, hoe cakes and I wanted to try something new. I wanted to make sweet potato pie.

Here's the problem I can't make a pie, bake it, chill it and have them eat it all before they leave in 45 minutes. I had to do the TV magic thing and make one before to pull out when I put it in the oven. Then I thought of another thing...ugh...the slicing....the need for forks and plates and cutting one pie into 12 slices, etc. So I thought....why can't I make them into mini sweet potato pies?


And I did....

Here was my recipe adapted from allrecipes.com

Mini Sweet Potato Pies

Vanilla Wafers
1 (16 ounce) can mashed sweet potatoes
3/4 cup evaporated milk
3/4 cup packed brown sugar
1/2 cup light corn syrup
2 eggs
1 tablespoon butter, melted
1/2 teaspoon salt
1/2 teaspoon ground cinnamon
1 pinch ground nutmeg
Marshmallow Fluff

Preheat oven to 400 degrees.

Line each a 2 muffin tins with 18 muffin papers. Spray lightly with non stick spray. Put a vanilla wafer in each cup.

In a mixing bowl blend sweet potatoes, milk, sugar, corn syrup, eggs, butter, cinnamon, salt and nutmeg and beat with a electric hand mixer until smooth. Scoop filling into muffin cups with an ice cream scoop. Bake for 20 minutes or until set.

While pies are still hot place a dollop of fluff on each pie to melt. Place in refrigerator to chill.


The kids RAVED over these. I didn't like the fact that these looked more like pumpkin pie (being brown) and not orange from the sweet potatoes. When I do these again, I am going to use real sweet potatoes and not the canned ones which tend to be a dark brownish orange. The fluff was a bit sticky to peel off the paper....but most remained on the mini pie. Sadly, I wasn't able to taste them since my "plan" doesn't allow this kinda stuff....but if the kids were happy and begging for more, it worked for me.

Try your own favorite pie recipe filling as a mini version for the holidays!

Enjoy!

Wednesday, November 11, 2009

Kickin' Chicken


I love chicken and how there is a million ways to prepare them. Here is number 609. Or #608 or #610. Whichever. LOL

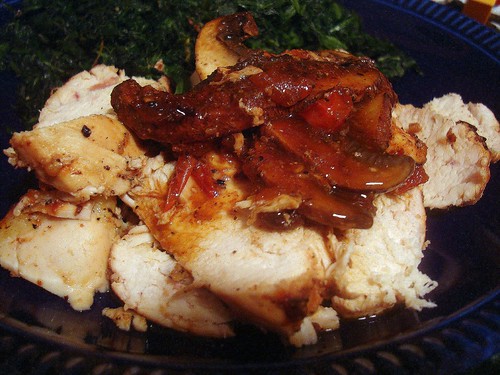
Spicy Sun Dried Tomato Chicken

1/2 cup of sun dried tomatoes (dried not the ones in oil if you want a FF version), softened in hot water
1/4 cup Chili pepper vinegar
salt and pepper to taste
one portobello mushroom, sliced thinly
1-2 Tbsp finely chopped onion
1 clove of garlic, minced
4 boneless chicken breasts
1 cup low sodium chicken stock

Grind up tomatoes, onions, garlic and vinegar in a food chopper.

Spray oven proof pan with non stick spray and on medium high heat, cook salted and peppered chicken on both sides until browned. When chicken is browned in pan pour tomato mixture onto chicken and all around. Use chicken broth in chopper container to 'swirl' out the mixture that is stuck inside....so you don't have to use a scraper!

Bake @ 350 degrees for 20 minutes or until chicken is 160 degrees or juiced run clear.

Slice chicken and top with mushrooms from pan, drizzle with sauce on top.

Post Script: Well the good news is that the 'plan' that I've chosen is clearly a good one for I lost 10 lbs last week. Very happy. (yes, yes people, I know that you should only lose 2lbs a week, no lectures plz) LOL. What is most important is that I am not hungry at all during the day (which is frustrating while dieting) and I am really looking forward to my meal at dinner by this time.

I will try to 'pepper' my posts with some things we are making at school amidst these 'healthy' posts. Stay tuned for my new dessert creation I made for the 8th grade this week.


Enjoy!

Friday, November 6, 2009

And the challenge begins....

No beef, no bread....lots of protein and only about 10 veggies are unlimited. This will be a challenge. If anyone finds what I created somewhat interesting or tasty....I will be stunned. LOL

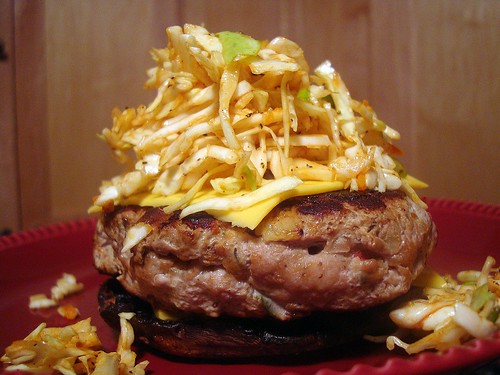
My GINORMOUS turkey burger would have had a top 'bun' of portabello but I felt this was going to be too much as it was....so I shared with K-man.

As you know ground turkey can be very dry and tasteless. I used many herbs and about a 1/2 cup of minced veggies to help moisten it and it WORKED!

Topless Turkey or Faux Turkey Burger

1 lb. ground turkey (I used the 93%- mostly white meat)
1/4 small onion
1/4 cup pepper medley (you know the frozen pepper strips)
1 tsp. garlic powder
2 Tbsp. Italian seasoning
Portabello Mushrooms (either one per burger for 'topless' or two for a 'faux' burger)
Cheese Slices (of course, fat free)
bagged cabbage mix
Salad dressing of choice

Put ground turkey in a bowl and add seasonings. Grind up onion and peppers in a mini chopper if you have one or a knife will do. Add finely minced onion and peppers to turkey and mix well. Shape into burgers. Cook burgers on griddle or grill with portabello mushrooms. Burgers are done when thermometer reaches 180 degrees.

Put cabbage mix in a bowl and add your salad dressing of choice until coated. I used a dressing mix included in my plan called 'carribean splash'....it was slightly sweet, chili sauced. Definitely needed salt....but sigh...
Lay mushroom on plate place cheese slice and then burger. Add another cheese slice and pile on cabbage mix and add a mushroom topper or eat topless with a fork and knife. This was pretty hearty and flavorful...I was pleasantly surprised. I couldn't finish it all.

K-man had a regular double burger with real cheese on a bun. He added his mayo and ketchup. He also had a side of sweet potato fries and his cabbage had ranch dressing.

By the way...I got the idea for making a burger with portabello 'buns' from a recent Biggest Loser episode. I may be checking out their site for other recipes.

Enjoy!

Thursday, November 5, 2009

Which do you want first?

The good news or the bad news?

Well, I've noticed that some/many of us food bloggers have cut down on the number of our posts. All for very legitimate reasons. Even the illegitimate reasons are okay with me....who am I to judge? LOL

Well the bad news is this food blogging new to me as fun as it's been has had it cost. Weight gain. Ugh. I've read other bloggers complain about this....so I knew it was to come. I certainly don't blame my blog....but it's certainly has contributed for I've been trying so many new and fun foods I see on the other blogs....I wanted to cook them. I wanted to cook lots of my favorites so I'd have things to share on my blog. My blog (or anyone else's blog) did NOT force me to eat all those foods I posted about....Yes, I shared with neighbors, friends, family, took some to work, etc.....but clearly I didn't SHARE ENOUGH! Did K-man gain weight too? NOOOOOOOOOO, he bikes like banshee, so he didn't put on a ounce! If anything, he's LOST weight and gotten trimmer (grrrrrr).

Anyhow, being back to school, getting adjusted, being bummed....figuring out what to do to get the pounds back off...has kept me away for a bit. *Hanging head* Sowwy.

The last part of the bad news is my choice plan for weight reduction is pretty severe in comparison to how I've been cooking. No fat, salt, sugar. YIKES!! So the dinners I eat are pretty boring, none exciting and a bit to get used to with the lack of oil, salt and sugars. K-man even has been looking at bit sad and NOT really interested in eating what I am eating. His response was "I can eat a sandwich and some soup for dinner." LOL

Now, the good news.....I can do this! I've done recipes on here before where I've tweaked the recipe to be more healthful. The "healthier" recipes of my past posts weren't totally salt, sugar or butter free.... but I certainly can do recipes where you choose. Either try my 'restrictive' version or add the salt, sugar or oil where you see fit to make it taste better.

For more good news....I will still continue to make stuff for K-man on occasion so he won't be so sad....after he rants and raves and "mmmmmmm's" himself to death because of the food I make. I would be sad to not hear or see all that happiness. And from time to time I will also post about foods were are making at school. The holidays are coming after all.

The last bit of good news....these 'restrictive' diets aren't forever. They can't be...oh I'd kill myself! Just awhile to get what I want off and ease my way back into eating like NORMAL people with more exercise, small amounts and MORE SHARING! LOL. I've done it before, it will be done again.

So bear with me my friends...I love blogging, I love a challenge and I am creative. I can do this.

Tune in next time for my first installment of the "Food Blogger's Nightmare...."

Hanging in there,

Wednesday, November 4, 2009

Since when does a cake observe a religion?

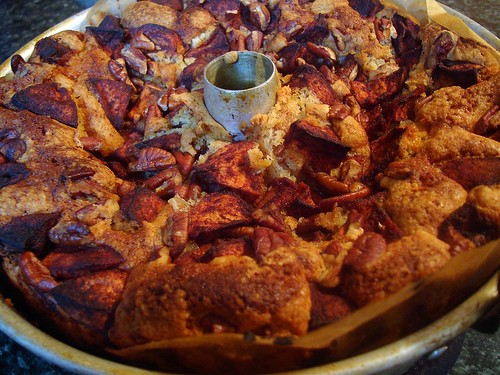
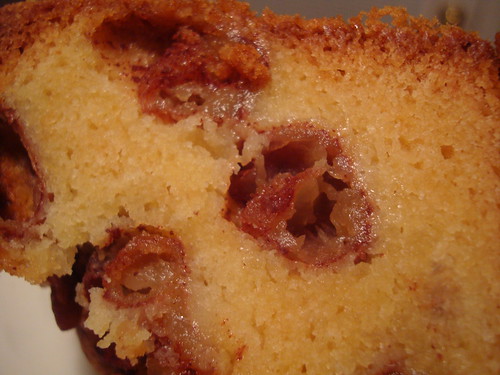
I acquired this recipe from my grandmother and although I ate her cake hundreds of times never did I ask her why this was named "Jewish Apple Cake" or if she got the recipe from someone who was Jewish. Regardless, it's an incredibly dense, moist and flavorful cake. Tons of apples and cinnamon and a crusty sugary outside.

I had forgotten about this recipe until someone sent me a link to a great site (I had bookmarked and used some of the recipes in the past) called Mrs. Claus' Cookbook. Tons of recipe and fun kid stuff to do as well. So as I was going through the list of cakes again...and I saw it. Jewish Apple Cake. Wow, so my grandmother didn't make this name up....and it was pretty much the same recipe (less O.J and added water).


Here is my Me-mom's version:

Jewish Apple Cake

4 large apples, peeled and cut into thick chunks or slices (coat with 1 T. of cinnamon and 5 T. of sugar)
3 cups flour
1/2 t. salt
2 -1/2 cups sugar
1 T. baking powder
4 eggs
1 cup vegetable oil
2-1/2 tsp. vanilla
1/3 cup orange juice
a few pecans on top for garnish -optional

Preheat oven to 350 degrees. Grease and flour a angel food cake pan and line bottom with parchment paper.

In an electric mixer, put flour, salt, sugar and baking powder. Start slowly to mix dry ingredients and one at a time add your 4 eggs. Pour in oil, then OJ and lastly the vanilla. The batter will be super thick.

In the greased pan* put half of batter, layer with half of cinnamon/sugar coated apples. Put remaining batter on apples and finish with remaining apples on top.

Bake @ 350 for 1-1/2 hours. Check for doneness with a toothpick. This cake is a heavy one! Let stand in pan until warm to touch before removing. Sprinkle with powdered sugar when serving.

*after I greased the pan, I lined it with coffee filters. One (with a hole cut) for the bottom of the angel food pan and several half circles around the sides.

This is great warm from the oven with ice cream or a dollop of whipped cream. Store in refrigerator if you don't think you can eat it all within a day or two. We also ate some slices for breakfast as well!

Enjoy!

Sunday, October 18, 2009

Nothing squeaked in the making of this recipe!

"Bubble and Squeak" now there is a fun name for a recipe.


A name kids could really get into as well. I've seen many recipes for B.A.S., none were the same so I never tried it since I didn't know what the original is really supposed to be short of taking a trip to Great Britain to do so.
So when I made corned beef I was debating the usual....carrots and potatoes? mashed only? So when the beef was was done I decided to make my own version of Bubble and Squeak.

B.A.S. typically uses brussell sprouts (aka mini cabbages) and it's considered a leftover dish of potatoes (either chunk or mashed), onions, beef, ham or bacon being used. I wasn't in the mood for a pile of mush but since we'd been having a COLD rain for the past 3 days....I was in the mood for something like a stew or soup and following the ingredients somewhat.

Lipsmacking Bubble and Squeak Stew

1 corned beef in store package with seasonings
Half package of baby carrots
1/2 cup onions chopped
2 cups of brussel sprouts
1 cup barley (uncooked)
Chicken broth (if you need to thin out your stew)

Cover your corned beef with water and the included seasoning packet in your crock pot. About 3 hours on high or boiling in a pot on your stove.

Remove corned beef and with a fine screen mesh strainer remove the 'seeds' from the seasonings or just use an immersion blender to break them up. Keep the corned beef water in crock pot and put your 1 cup of barley in the water. Cook on high about 30 minutes or until soft.

Use a slotted spoon and remove about half of the barley (about 1 -1/2 cups) and put aside in a small bowl. Use an immersion blender to blend up the barley until smooth. Mixture will be thick. Put in your carrots and brussell sprouts. Cook until vegetables are soft. Put the cooked barley in small bowl back into the crock pot and stir. My stew was very thick and could use a little thinning so I used some chicken broth (I used about 1 cup)

You can decide if you want to cut up your corned beef into the Bubble and Squeak stew or just slices on top of your stew.

This was absolutely delicious and was exactly what we needed after three freezing cold rainy days. I served some crusty buttered bread with this. K-man ate TWO big bowls!

Enjoy!

Thursday, October 15, 2009

This recipe takes the cake alright!

I've seen this cake around on the blogs. I printed it out probably in the spring. We love cake and blueberries! I didn't make it at all this summer (when the blueberries are at their peak) for the primary reason that not only does baking/using the oven make my kitchen hot but that same heat goes right upstairs. So now with it getting cool/cold out.....it was time. Oh my....


I can totally see why the funny name as 'boy bait'....this cake rocks! It was light and buttery. K-man's was on high alert for dessert when he was just smelling it baking (and I didn't even tell him I was making something!) Once he ate his serving ('mmmmm-ing' all the while) He even 'mmm-mmm'ed' as he passed the pan on our way up to bed. Clearly SOMEONE was smitten. LOL. Duly noted!

Blueberry Boy Bait
Adapted from Cook’s Country
Serves 12, generously

2 cups plus 1-teaspoon all-purpose flour
1-tablespoon baking powder
1-teaspoon table salt
16 tablespoons unsalted butter (2 sticks), softened
3/4 cup packed light brown sugar
1/2 cup granulated sugar
3 large eggs
1 tsp. vanilla
1-cup whole milk or buttermilk would work too (I used evaporated)
1/2-cup blueberries, fresh or frozen
Topping
1/2-cup blueberries, fresh or frozen (do not defrost)
1/4 cup granulated sugar
1/2-teaspoon ground cinnamon

Preheat to 350 degrees. Grease and flour 13 X 9 pan.

Whisk two cups flour, baking powder, and salt together in medium bowl. With electric mixer, beat butter and sugars on medium-high speed until fluffy, about two minutes. Add eggs, one at a time, beating until just incorporated and scraping down bowl. Add the vanilla and mix until incorporated. Reduce speed to medium and beat in one-third of flour mixture until incorporated; beat in half of milk. Beat in half of remaining flour mixture, then remaining milk, and finally remaining flour mixture. Toss blueberries with remaining one-teaspoon flour. Using rubber spatula, gently fold in blueberries. Spread batter into prepared pan.

For the topping:
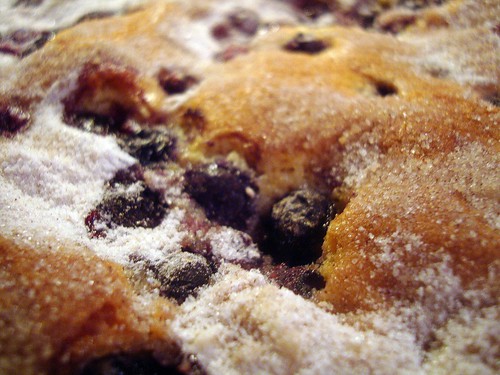
Scatter blueberries over top of batter. Stir sugar and cinnamon together in small bowl and sprinkle over batter. Bake until toothpick inserted in center of cake comes out clean, 45 to 50 minutes. Cool in pan 20 minutes, then turn out and place on serving platter (topping side up). Serve warm or at room temperature. (Cake can be stored in airtight container at room temperature up to 3 days.)

Great for breakfast with your coffee too. Make this for your hubby NOW....the holidays are coming....LOL

Enjoy!

Tuesday, October 13, 2009

A yummy way to cut some carbs!

I sure do LOOOOOOOOOOVVVEEEEE da mashed potatoes.
The holidays are coming soon and there is going to be a lot of mashed potatoes coming our way!

But I am always looking of ways of cutting the carbs in my diet, not entirely but somewhat along the way (carbs and me, don't get along).

I've also seen how people have made the 'mock mashed potatoes' out of cauliflower. No matter how much butter, sour cream, chives, etc. They still taste like mashed cauliflower (not that I have a problem with that) but more importantly, they have no real body to it.

Are you seeing where I am heading yet? I like mashed potatoes and mashed cauliflower why not cut the carbs a bit and combine the two?


Mashed Potatoflower (K-man's name for it)

one head of the ORANGE cauliflower (my store sells the white, purple, orange and green [aka broccoflower])
1-1/2 lb package of refrigerated mashed potatoes, very warm not piping hot
butter to taste
salt and pepper to taste
chives, chopped

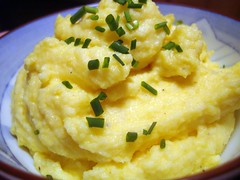
Cook washed, and roughly chopped cauliflower in the microwave. Cook until semi soft (about 5 minutes?) Place chopped cauliflower in the food processor with some pats of butter. Blend until smooth. You may have to stop it to scrape the cauliflower as it may whirl around on the bottom and stay chunky on the surface. When smooth, add your warm mashed potatoes and pulse until blended. Salt and pepper to taste and whirl one last time. Garnish with chives or mix them in.

These were also great as a leftover. I sprayed some Pam in a glass dish and baked it until hot. Edges got a lil crusty....topped it with some French's Fried Onions in the last few minutes until brown.

Not only does K-man love cauliflower and was excited for this new recipe. But he especially when THUD when I served it as a leftover with the fried onion rings on top the next night!

ALSO-----

I received an award from Melissa of Serendity is Sweet. YAY....my first award! SO cool!

As for Melissa's site..... Oh my, she's got several blogs going AND she home schools too! She has lots of resources/links on her site for you to use in regards to home schooling. She also has a ton of pumpkin "things" you can do in your class or at home to extend school learning. Check out her site. I sure did and there was so much to see that I needed to subscribe for I didn't want to miss a thing!


Enjoy!

Monday, October 12, 2009

Two favorites combined

Fall is here and apples are everywhere. My latest favorite is the Honeycrisp.

I love apple pie and I love apple crisp. Why not combine the two? I am going to be honest with you here. I've stopped using my pie pan after I discovered how nicely the crostada way works. Although you may want a deeper filling but I was getting annoyed over how each time I took out a slice parts of the crust was on the bottom. But every slice I do crostada style, no fuss, no muss!

Here's what you need and how you do it:

Apple Crisp Crostada

1 pie crust (either your favorite recipe or a pre-prepared one)
5 apples, peeled, cored and chopped in chunks
juice of one lemon
2 Tbsp instant tapioca
1 Tbsp cinnamon
2 dashes nutmeg
1/4 cup sugar (maybe even less since these apples are so sweet)
dash salt
Topping:
1/2 cup brown sugar
1/2 cup flour
1/4 cup butter, ice cold, cut into chunks
1/2 cup toasted walnuts, chopped

Preheat oven to 375 degrees.
In a small bowl, prepare the topping. Using a pastry blender, cut the butter chunks into the brown sugar and flour. Keep cutting the butter until the pieces are as small as the walnuts you chopped. Add walnuts and lightly toss into the butter and sugar mixture. Set aside.

In a large bowl, peel and chop apples and add lemon juice, tapioca (these apples were juicy and needed some thickener), cinnamon, nutmeg, sugar and salt. Mix well.

On parchment paper, roll out pie crust as large as it can go without getting 'see thru' thin. Take parchment paper and put on a cookie sheet (I used my pizza peel and baked this on my pizza stone). Sprinkle a handful of the topping in the center of the pie crust. Pile all the apples in the center, leaving about 1 -1/2 inch around the edge. This will be a pretty big mound. Use your fingers and hands to lightly press if you need to keep the apples from 'rolling down'. Sprinkle your topping over the mound and also the sides of the mound (this will be tricky). I started to curl up the pie crust edges up while I did the topping to help keep it ON. Take all the edges and fold them up and press gently into the apples.

Bake for one hour or until the juices are bubbly and is 'pooling' level to the crust edge. Cool on parchment until ready to eat.

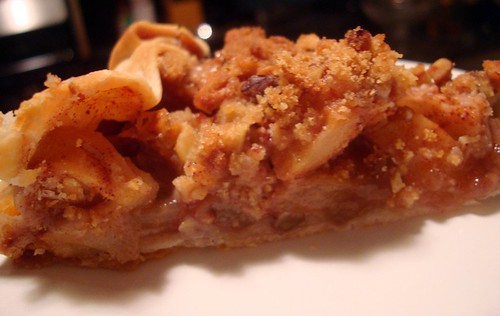
Nice and crunchy nutty topping on those apples.

I can't get over how level this is when the mound was HUGE. I wish now I had taken a picture of the mound and put them side by side. Although the honeycrisp apples are still firm I guess the smaller chunks did cook down more. I am also glad that the whole lemon gave a some tartness to cut the sweetness of the apple.

This was REALLY good. No ice cream or whipped topping was used in the eating of this pie. It didn't need it. When you are ready to make your apple pies this season....don't use both crusts at once. Make a crostada, it's easier and you'll get more pie this way!

Enjoy!

Monday, October 5, 2009

I found the perfect CCC, I think.

My quest is over. I have tasted and baked many a chocolate chip cookie. Since they are my overall favorite, I am picky about them now.

I want a crispy edge yet thick and chewy on the inside.
Ok, I had found that in the past but only on the first and perhaps the second day and then the cookies would change over the next few days. They'd lose their chewiness for for being dried and out and harder. (yes, I stored them properly) I needed a CCC to last over the few days that it took for us to eat them and I didn't want a gadzillion of them either. Sometimes recipes aren't the same when you either double or half a recipe.


The Chewy CCC
(chocolate chip cookie)

adapted from the food network

Ingredients:
2 sticks unsalted butter
2 1/4 cups bread flour
1 teaspoon kosher salt
1 teaspoon baking soda
1/4 cup sugar
1 1/4 cups brown sugar (I used light for it's what I had on hand)
1 egg
1 egg yolk
2 tablespoons milk
1 1/2 teaspoons vanilla extract
2 cups semisweet chocolate chips (I used dark chips)
I added a cup of toasted walnuts
some mini or regular chips to decorate the tops

Hardware:
Ice cream scooper (#20 disher, to be exact)
Parchment paper Baking sheets
Mixer

Directions:
Heat oven to 375 degrees F. Melt the butter in a heavy-bottom medium saucepan over low heat. Sift together the flour, salt, and baking soda and set aside. Pour the melted butter in the mixer's work bowl. Add the sugar and brown sugar. Cream the butter and sugars on medium speed. Add the egg, yolk, 2 tablespoons milk and vanilla extract and mix until well combined. Slowly incorporate the flour mixture until thoroughly combined. Stir in the chocolate chips. Chill the dough, then scoop onto parchment-lined baking sheets, 6 cookies per sheet. Bake for 14 minutes or until golden brown, checking the cookies after 5 minutes. Rotate the baking sheet for even browning. Cool completely and store in an airtight container.

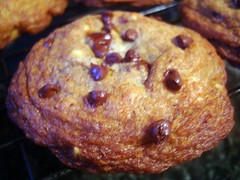
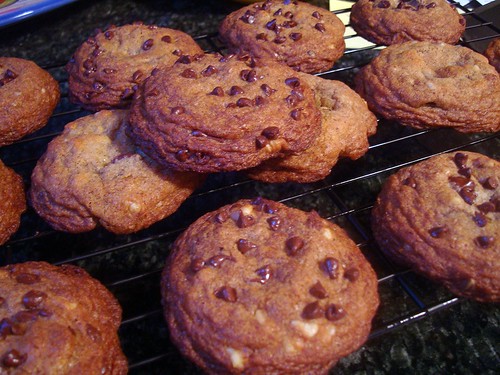
Some I left 'as is' when I scooped them. Others I dipped in a pile of mini chips to enhance their top. K-man and I really loved these. I think you should try them and see if I am right in thinking they are the BEST!

Enjoy!

Countdown until Halloween part 1


Time is ticking many of you are looking for cool Halloween ideas....

I've been known to be the Queen of Halloween at my school....that is until we stopped having Halloween dances and my stint of doing the food for many years ceased forever. Yes, our principal thinks that Halloween is culturally insensitive. It is sad to see a kid tradition is removed because of the ignorance of what it really is. Confused with All Saints Day, All Hallow's Eve or even Los Dias de los muertos....let's be for real here.....it's a day when the kids get candy. They live for this stuff. So did we.

Regardless, we are a culture of many countries of origin and many of us wear green on St. Patrick's Day even though we aren't Irish. We may go out for some enchiladas and down a beer on Cinco de Mayo. Or not. It's our choice to participate in whatever cultural celebration comes our way. Funny thing....as a school we do not dress for Halloween, nor have a Halloween due to possibly offending those who do not 'participate' in Halloween but I was told I could do my Halloween foods in my classes if I so desired. What the heck?

Anyway, off my soap box and onto some fun stuff for you to peruse.....

Since I have many Halloween recipes and pictures of the stuff I've made in the past on my school site, I am not going to reinvent the wheel and just give you a link to one page of my site every couple of days. Please keep in mind some of these creations were 'kid made' as opposed to 'teacher made.'

Page One of Halloween Recipes

Page Two of Halloween Recipes

More pages of Halloween ideas are to come, if you don't cheat and go through my web page on my school site. LOL. When we make some new stuff in my classes I will add those later!

Enjoy!