Sunday, January 3, 2010

Hermits are not always all alone....

These apple hermits are going to be in our tummies very soon!

I remembered my mom loving hermit bar cookies when I was young. I always turned up a nose to them. Gimme a chocolate chip cookie instead....ugh.

Now that I am older and wiser, my taste palate is more mature (cough, cough....er...developed). I am an equal opportunity cookie eater now! Well, only homemade ones.

I had a bunch of apples I needed to get rid of and wanted a new way to use them. Although, the hermit bars my mom always ate were strictly made with raisins, I liked the fact that the apples would not only keep these naturally moist longer but bump up the nutrition too. With the concern with the use of trans fat these days....kinda bothers me how man-made food can stay so moist so long from their additives when a homemade cookie will only stay moist a few days if you are lucky. Nowadays, I am sticking to the baked things I make rather the store bought just because of my concern for 'mystery additives.'

I am a huge fan of allrecipes.com where I found this recipe. I love the fact that all their recipes are tried and true and the creators think they are good enough to share. After you prepare the recipe it's just a matter of taste. Did this recipe tickle your fancy or not? Was it perfect as is or did it need a tweak from you to suit your tastes?

Instead of me typing the recipe up I will provide you the link and then some tips that I have used in making this recipe.

Apple Hermits
from allrecipes.com

Since I have made these a few times, here are some suggestions:

1. The picture/directions in the allrecipes.com version is done as a drop cookie. Been there, done that. I wanted some thing easy to drop ONCE and cook all together. BESIDES, a traditional hermit is a BAR cookie not a dropped one.

2. If you want the ease of doing a bar cookie, increase the cooking temperature to 20 minutes. I used parchment paper on a 10X15 cookie sheet (the smaller one). If you use the next larger cookie sheet your cookies will be thinner and you will need to reduce the cooking time. I have not tried making these any thinner for I enjoy them exactly how they are.

3. I have made these with regular apples and with dried apples in a pinch. They were wonderfully moist with regular apples but using dried apples means drier cookies. UNLESS you soak them in hot water. When I tried this....I thought...what the heck, soak the raisins in the hot water TOO! Of course, you will need to squeeze out the moisture before you put them into your batter. I starting soaking these at the start of the recipe and they were perfect and ready by it's time to add them into the mixture.

4. Shhhhhhhhhhh, I substituted the brown sugar blend Splenda in this recipe and K-man has no idea! Worked like a charm. They called for 1-1/2 cups of brown sugar and you use 3/4 cup Splenda brown sugar. Hee-heee.

5. I toasted the walnuts before I put them into the mixture. Toasted nuts taste sooooooo much better when put in the oven for a bit to bring out their flavors. It's easy to do. While you are preheating the oven. Place your nut of choice on the cookie sheet and place in the oven. When you are preparing the recipe and you start to smell the nutty goodness. Check on them. Rearrange them a bit if you need to and toast them about 2 minutes more. Let cool before you add them to your batter/mixture.

6. I've made these with and without the glaze. Depends on my mood really. Both are good. These pictured, I put the powdered sugar in a ziploc (about a cup) and added a Tbsp of milk and used spiced rum* to even out the consistency. I closed the bag and massaged out all the lumps. I kept adding a few drops of the rum until it was thin/thick enough to be drizzled. Just snip the corner and drizzle away. Let the drizzles dry before storing bars in a air tight container.

*Don't be concerned about the rum. Whether you use real rum or rum extract.....it's all the same, alcohol will evaporate. You can use vanilla extract and....I have homemade vanilla extract being brewed as we speak with 10 vanilla beans soaking in a liter of vodka. So it's all the same, no difference.

Please give the hermits a try. We love them. Although K-man can't seem to get used to the name "hermits" since it is foreign to him. He refers to them as those "spice cake cookies". I have reminded him many times of it's name and he still continues with the spice cake name. I think now he's just trying to be funny. Funny or not....he loves them. So will you.

Enjoy!

Saturday, January 2, 2010

Got salsa leftovers from your New Years Party?

What do you do with your leftover salsa?

I found this at Chile Pepper Magazine where they are inundated with salsas. They try them all. This generally results in an abundance of half-used salsa jars in their fridge. With all this excess salsa, they’ve come up with a few creative ways to use it over the years. I thought I'd give you some of their suggestions below (with a few of mine) next time there’s a salsa jar lurking in your fridge or you have some leftover from a party. Do YOU have a creative way to use salsa that we can add to the list?

1. Mix with ketchup; use as a dip for French fries. Mix with mayo and use as a dip for tortilla chips.

2. Combine with softened butter and refrigerate for a salsa compound butter; add thin slices to a grilled steak.

3. Stir into scrambled eggs or add to omelets and frittatas.

4. Spoon into cooked grits; add bacon and cheese.

5. Add to burger meat mixtures or slather on top of burgers (or both!).

6. Add lime juice and canola oil to a thin, puréed salsa and marinate meat.

7. Replace tomato sauce for a chunky tomato salsa on a homemade pizza.

8. Make a béchamel sauce, add salsa and toss with pasta.

9. Stir into cooked rice; add olives and cheddar cheese.

10. Layer onto a grilled cheese sandwich.

11. Use a puréed, chile-intense salsa an enchilada sauce.

12. Add salsa as your secret ingredient to soups, stews or chilis.

13. Take a fruit salsa and use as a chutney substitute with roasted pork loin.

14. Kick up some mac and cheese with a dollop of salsa.

15. Use in place of cocktail sauce for shrimp.

16. Add to deviled eggs for a pop of fire.

17. Combine with cheese for jalapeño popper filling.

18. Top off tacos, burritos, or huevos rancheros.

19. Glaze a sweet, fruit-filled salsa over pound cake or drizzle over ice cream.

20. Add breadcrumbs and feta cheese to salsa; stuff into eggplant, pepper or zucchini halves.

21. Use a chunky salsa as an easy start to bruschetta.

22. Mix with goat cheese and use as a dip for veggies or serve with crackers.

23. For a quick Mediterranean spin, top fish or chicken with an olive-filled salsa and bake.

24. Add cucumbers, jalapeños, tomatoes and vegetable stock to salsa. Purée into gazpacho.

25. Mix equal parts with yogurt or sour cream; slather on a baked potato or combine with mashed potatoes.

26. Add to meatloaf to give it a Mexican flair.

27. Stir into chicken salad, tuna salad or potato salad.

28. Mix with lemon or lime juice and use as a ceviche marinade.

29. Use a thin salsa, like as a base for salad dressing.

30. Mix chunky salsa with ranch dressing to dip your chicken nuggets/strips in.


Don't forget to enter my Cookbook Giveaway, you still have time to enter a comment and get that cookbook Santa didn't bring you!

Enjoy!

Friday, January 1, 2010

Not your typical Ham and Cheese....

Who doesn't love ham and cheese sandwiches? Who doesn't love to eat foods in a mini version?

I found these cuties on Beantown Baker site. What appealed to me what that they weren't just ham and cheese slapped between some bread. It had a very interesting marinade and her family and friends have been raving over them so I wanted to give them a 'whirl' for New Year's.


Mini Ham and Cheese Sandwiches

from Beantown Baker

1 c (2 sticks) butter
1 1/2 Tbsp poppy seeds
1 1/2 Tbsp grated dried onions
1 1/2 Tbsp Worcestershire sauce
2 Tbsp honey mustard
2 (12 ounce) packages Hawaiian rolls - or any small rolls like parkerhouse or potato
1 pound cooked ham slices
12 ounces sliced swiss cheese

In saucepan, mix butter, poppy seeds, onion, Worcestershire sauce & mustard, stir until blended and melted. Pour 1/2 of mixture into bottom of baking dish.

Assemble sandwiches with ham and cheese slices. Arrange rolls in single layer in baking dish, spreading them around to soak up sauce in pan. Pour rest of sauce over tops of sandwiches, cover dish and refrigerate up to 24 hours for suce to soak in.

Preheat oven in 350 degrees, bake rolls for 10-12 minutes until rolls are lightly browned and cheese is melted.

These were awesomely YUMMY. I see now why they were raved about. I would definitely make these again for super bowl!

Cook's Notes:


1. I found the Hawaiian Rolls without a problem but keep in mind that they are on the sweet side. My store had only packages of four and I had purchased 3 of them @ 4 oz each. Meaning I had 12 rolls or only HALF of what the recipe required. You would need to get 24 rolls. Keep this in mind when making the recipe.

2. Use butter only. Do not use things like Smart Balance or margarine (they have water whipped in) and these products will make your bottom bun half soggy. Next time I will stick to butter instead of trying to cut the fat...sometimes you just HAVE to stay true with no substitutions.

3. Be sure to use the thinly sliced DELI ham in you get in packages. We had leftover spiral sliced ham from the holidays and it had too much 'texture' when you bit into it. Granted I only used two slices cut to size figuring the thickness of the bread could handle it...but your teeth sometimes couldn't cut through with ease.

4. As K-man and I were discussing the pros and cons of this recipe (don't get me wrong, these had wonderful flavor, the marinade rocked!) We decided to try this recipe again using corned beef, with same amount of rolls using parkerhouse (less sweet) and HALF of the recipe marinade (we don't need to eat 24 rolls!)


Giveaway update: Don't forget to enter your comment for my cookbook giveaway! Your comments about my blog have been so very wonderful. I am glad that I am making some people happy out there!
Make sure you tell me what book you want BUT the books I listed are just some of my faves. If there is some other book you've been drooling over....ask for it. I just may have to purchase two...one for you and ME!

Enjoy!

Thursday, December 31, 2009

Did you forget something?

No, I didn't get a new haircut. No, this is not a new recipe post. No, the trash doesn't need taking out....

It's my blogversary! I guess you don't scroll waayyyyyyyyyy down on the right margin of my blog to read my blogversary countdown badge. LOL. It's ok, if you have one, I wouldn't know where to find yours either.

Hard to believe that on New Year's Eve I made a such big decision and it STUCK. Think of all those diets, exercise routines, fads, promises that we've never stuck to or lost interest in....

My blog was a great decision. I love it. Wow, the time FLEW by and over the past 365 days I've posted over 250 times. I think if I was ever asked by a boss or professor to write that much due to THEIR request/demand in one year....I would have passed out or quit. I guess when you truly love doing something...it comes easy and it hits all my creative buttons.

Well since I don't have any food companies banging my door down (I don't know how some of you bloggers get so many of these companies to send you free stuff!) so I will go out on my own and have a giveaway that I will purchase with my own hard earned teacher's salary.

Knowing this blogversary was coming up I've been thinking long and hard to what I wanted to GIVEAWAY......hmmmmm. I thought since many of the blogs I've been reading was what influenced me to start a food blog. THAT would be my giveaway. Whatever blogger's cookbook you'd like...I'd send you. I have many bloggers cookbooks but NOT all of them. There are some other books that have stories with recipes that I also like perhaps you'd like to try one of them....

Here's the gist of my GIVEAWAY:

Write a comment and tell me which of the books that I suggested down below that YOU WOULD WANT for your collection. If you'd like to suggest a new book that YOU have and think I should get to add to my collection do comment about it.... and then add to your commentWHAT BOOK you WOULD like that Santa didn't bring you this year!

Here's my list of goodies I think everyone should get:

One of the first food blogs my cousin Sue referred to me was Orangette. I became a fan and soon enough during my first year of blogging Molly Wizenburg published her first cookbook. Her book is based on her food influences that turned her gift of writing into a passion of writing about food. She is currently crazy busy running a newly opened restaurant with her husband. Things are settling down and she is slowly returning to blogging more. Would you like her book? Here is one of my posts about one of her recipes.


Now, this author is NOT a food blogger but I've been a fan of two Culinary Murder Mystery writers. This is Joann's Fluke's most recent book. She has 12 total, a new one arriving in Feb 2010. I have used many of her recipes and I am very excited about her new cookbook that encompasses ALL her recipes from her books being published in Oct 2011. Here is one of my posts using one of her recipes.


The other Culinary Mystery Writer who was my first is Diane Mott Davidson. Here is my post about her books. Her latest came out this summer called Fatally Flaky. DO know that her books ARE a series.


Dorie Greenspan's book was probably one of my second blogger books. Her blog is about a group of food bloggers who pick a recipe to cook each week and blog about it. A very tough group to join but personally when it was open to me....I decided I couldn't handle that type of pressure to produce. Kudos to many of my friends who do follow the Tuesday with Dorie clan plan. Here is my post of the first recipe I made when I needed to 'break in' my new birthday KA mixer!


I have all these books by David Zinczenko. After I pour through them....I mainly use them in my classroom with my students. Some scary food truths in them. Here is my post about this book. Cook this, Not that is now HOT out in the stores on 12/29. What is cool about this new book is that recipes are included now. Finally. I can see some future posts in it already. Shall I pick you up a copy?


I found this book cross referenced through Amazon.com since they keep track of the many things you order and make suggestions. Baking Boot Camp is writer being assigned to attend the CIA for their baking training and write about it. Of course many recipes are included and they are top culinary school level!


Of course I like the baking boot camp book so much that I went and got the culinary school boot camp one as well. This book was written first and done by a different author both were interesting, especially if you think you'd like to enroll to in any of these CIA classes. I did....notice the past tense.


I love this book! Jeff Hertzbery (one of the authors) even commented on my post from recipe I made from this book. He must have one of those 'robo-search tools' that finds sites who cross reference his book. Ironically, I was also having my first giveaway of ANOTHER book, not his. I know stupid rookie blogger move. But I won't go into the stupid food porn picture site reasons why I wasn't thinking straight. Live and learn. Anyhow, I've made a few recipes and LOVE how easy the dough is to use. Here is my post about the sticky buns I made!

Jeff, if you are reading again. I'd love to try your Healthy Breads in 5 five minutes cookbooks to review and another of for future giveaway! Sorry about my food blogger faux pas! I've learned.


Confections of a Closet Master Baker
I saw reviewed on another blog.
Honestly when I found out it was written by Sandra Bullock's sister (former resident of Arlington VA, like me) I was curious. Since it was a memoir and had recipes in it, I got it. It was a fun read. Sorry no post yet.


Not sure how I got into Ruth's books. I guess since I love reading biographies/memoirs, when I found out these were the memoirs of a food critic and recipes my curiousity was piqued. I tested out her first one Tender to the Bone to see how I liked it. Really wondering how she became fell upon such a prized job as a food critic. OMG. You GOT to read these....you will be amazed over the stories about her mother's horrible cooking and wonder how she developed such a fine palate. The second book is Comfort me with Apples and Garlic and Sapphires is the last. Wonderful memoirs! Here is my post from the G & S book.


Too many Cooks was one of the those books I grabbed to take on vacation with me. When I was going through the shelves the looking for more reading material....it caught my interest....again I love the storytelling fused recipes thing. This is a story about a stay at home mom who has 4 kids and how she struggles to expose her kids to food preparation and a variety of foods. Sorry no post from her book yet.


Oh Hungry Girl cookbooks are so fun! I subscribe to her site to my email where I get sent very informative things about lower calories foods and how to tweak recipes to make them less evil. I am working through her cookbook like a mad woman. Like here and here and here. Love HER!


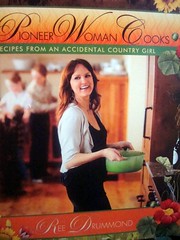
Speaking of Love, I also LOVE PW. Pioneer Woman Cooks food blog came into my life shortly after I found Orangette. Ree Drumond is soooooo funny and a hellacious great cook. No way she has the figure she does and eats the amazingly evil food she cooks too! She must eat only like ONE spoonful and then eat a salad! Sheesh I've posted so many of her stuff....like this. She also now has an AMAZING recipe sharing site called Tasty Kitchen. Sorry you are going to have to go around and find more of the stuff I've posted of her because at this point in this post...I am wiped. All these reviews are making me tired and hungry for dinner.


So there you have it! My suggestions. I know that there are many other wonderful and fun books that I do not have. I haven't had the chance to peruse through Steamy Kitchen yet. I have the new Cake Wrecks book but she isn't about recipes just funny pictures yet I adore her site.

OK my friends and FANS....comment and tell me what BOOK YOU'D LIKE to win for my BLOGVERSARY GIVEAWAY! YOU PICK AND I WILL SEND YOU THE BOOK YOUR HEART DESIRES....sorry, I was screaming I get excited like that sometimes....

THIS GIVEAWAY IS NOW CLOSED....CONGRATS TO NORAOLSON
Tick Tock!

Tuesday, December 29, 2009

An popular favorite made with a twist!


If you have kids.....ooh if you only had a dollar for each rice krispie treat you've made.... or eaten. LOL. I played around with the recipe a bit to make it a bit more interesting and a little healthier.


The interesting part is that I used Toasted coconut marshmallows instead of your standard ones.


The healthier part is that I used smart balance instead of butter and:


A combination of puffed wheat and puffed rice. Notice the puffed rice on the right is not dry (meaning they don't explode into a pulverized dust when pinched between your fingers) and overly air bubbled like certain name brands....*ahem.* These good old store brands I think are better.


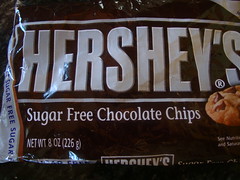
And that little drizzle of chocolate on top? Did you know Hershey's made these? I didn't until I happened to spot them at my usual grocery baking aisle. *snatch!*


Ok, enough with the background pictures...on with the recipe!


Chocolate Topped Coconut Crispy Treat

6 cups puffed rice and puffed wheat (3 each)
1-10 oz bag of toasted coconut marshmallows
4 Tbsp. Smart Balance butter blend
1/4-1/2 cup sugar free chocolate chips (depending how much drizzle you need)

Line a 9X13 pan with non stick foil or spray foil lightly with non stick spray. Put aside to have ready.

In a small bowl, measure out your 'puffs' to have ready to put in the marshmallow.

Melt marshmallows and butter in a metal bowl over a pot of boiling water. I think the marshmallow melt better this way as opposed to the microwave or directly in a pot. I find they melt so quickly that they get to stringy and sticky before I can get them mixed thoroughly. A 'double boiler' method is kinder and gentler for me.

When the last of the mallows are just small lumps, go ahead and put in your cereal. Mix well with a rubber scraper. Pour into prepared pan and press down with wet hands. Some people think you should butter your hands. But I find that the crispies still stick when the butter melts away. I find a quick wet under the faucet, wipe hands together and press down....nothing will stick.

Melt chocolate in small ziploc bag for about a minute. Clip a small hole in corner and drizzle on tops. I drizzled only on about half of them. I also made sure I sort of "dragged the tip" of the bag while I drizzled for I wanted to ensure the chocolate would adhere better. Sometimes if you drizzle from above the chocolate just 'lays' on top and will crack and fall off when you bite into it.


Cook's Notes:
  • I like how the Smart Balance works with these crispies. Have you noticed that after about a day the usual krispy treats are dry and hard and hurt your gums behind your teeth when you bite into them? These keep chewy and the puffs don't get super dry or hurt your gums. The last time I made these....the treats were just as soft and chewy as the first day by day five.
  • You would think with all the coconut on the marshmallows that these would be overly 'coconut-y'. Since they are toasted and ground finely....it's a subtle coconut flavor yet nutty. No big pieces of coconut that you keep chewing on. If you want to crank up the coconut add a some coconut extract to the melted mixture before you add the cereal.
  • I like that I could make a few changes to help the calorie/health level of these treats. More importantly I really think the change of type of fat source really keeps these from drying out so soon.
Enjoy!
Monday, December 28, 2009

I am not ready to leave yet...


Traditionally, we see and eat a lot of gingerbread during the holidays. But I am just not ready to give them up even though the holidays are finishing up. To wean myself off I found this recipe for soft molasses cookies. I can't keep K-man's hands off of them! That is fine....they will never get stale this way....

Soft and Chewy Molasses Cookies

3/4 cup butter
1 cup brown sugar, packed (I used 1/2 cup Splenda's brown sugar blend)
1 large egg
1/2 cup molasses
2-1/2 cup flour
1/2 tsp. salt
2 tsp. baking soda
1 tsp. cinnamon
1-1/2 tsp. ginger
1 tsp. allspice
1 tsp. nutmeg
quick dash of ground cloves
coarse decorating sugar

Preheat oven to 350 degrees.

Cream together butter and sugar. Add egg and molasses and mix well. Stir in dry ingredients. Cover and chill for about an hour to give batter time to firm up. Take a small ice cream/cookie scoop to portion out dough into balls and keeping the amounts the same.

Dip cookie dough balls in some kind of decorating sugar. The coarse kind looks great on these.

Place cookie on parchment/silpat lined cookie sheet. Bake @ 350 for 10 minutes. Let cookies remain on cookie sheet for a minute or two before cooling on a rack.

Nice chewy cookie, very moist. Love THEM! I had made some gingersnaps that were getting hard almost the next day. These are still soft on day three.

Yummy with some milk....make some NOW!

K-man is only eating these despite the macaroons, dark chocolate cookies and some oatmeal raisin cookies still here in the house. I think his choice for 'dessert' says a lot!
Enjoy!

Sunday, December 27, 2009

Butterscotch or Brown Sugar?

I got a new cookbook for Christmas and as I was looking through it I saw a recipe for carrots that made me change something on our Christmas Dinner menu. I had some butternut squash and still was kinda soft on how I was going to prepare them.

I've seen recipes for brown sugar carrots before....but butterscotch/nut squash seemed tasty with a fun name.

Roasted Butterscotch-Nut Squash

1 butternut squash, peeled, cored and chopped into chunks (our grocery has boxes of these already done for you!)
1/2 stick butter, melted
1/4 cup brown sugar (I used Splenda brown sugar)
1/2 tsp. salt
freshly ground pepper

Preheat oven to 450 degrees or use the broiler if you wish.
Line baking sheet with non-stick foil or spray with non-stick spray. Place squash on baking sheet. Stir in brown sugar and salt into melted butter. Pour over squash and use a rubber scraper to help move the squash to coat. Don't worry too much for the sugar will melt and coat better as you go along.

Cook in oven for about 20-30 minutes (depending on the heat level you used). Keep a watchful eye on your squash and moving them around every so often with rubber scraper. When the sugar has thickened and the squash is soft enough or the sugar has encrusted enough on your squash (you decide how you want it)

Keep in mind you need a high heat to caramelize the sugar and achieve some sugar crunchiness. If you also, over cook it or move it around too much....you may end up with butternut mush. Sprinkle with freshly ground pepper before serving.


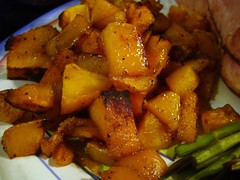
This was absolutely DELISH with our Christmas ham dinner. The saltiness of the ham and the sweet cubes of squash....K-man thought these were sweet potatoes! I like the idea of having squash instead of sweet potatoes to cut down on the carbs. Hmmmm, this would be interesting to mix the squash as well as some sweet potatoes and roast them together one night....hmmmmm

Give this a try, it will not disappoint!

Enjoy!

Saturday, December 26, 2009

Quick Fix!

Of course, all my biscotti has been put into gift bags and long been given away. Despite us wanting a little chocolate cookie fix, I also wanted to have 'something' in case I needed some quick Christmas Cheer. My remedy is the cake mix cookie for mixing up a batch PDQ (pretty darn quick).

Dark Chocolate Craving Killers

1 (18 1/4 ounce) box devil's food cake mix
1/4 c Hershey's Special Dark cocoa powder
1/2 cup vegetable oil
2 eggs
1/2 c. chocolate chips (I used Hershey's sugar free choc. chips )

1. Preheat oven to 350°
2. Stir dry cake mix, cocoa powder,oil and eggs in a large bowl until dough forms.
3. Add chips and mix. Shape dough into 1" balls.
4. Place 2 inches apart on ungreased cookie sheets.
5. Bake for 8-10 minutes or until center is JUST SET.
6. Remove from pans after a minute or so and cool on wire racks.
7. Enjoy!!


These were just awesome. Of course, during the holidays you have people drop by every so often and it was nice to have these hanging around to serve with coffee. Hot coffee and a moist fudgy dark chocolate cookie= perfection.


Enjoy,

Thursday, December 24, 2009

Happy Holidays!

My fellow food lovers....my best wishes for a warm, happy, healthy holiday to you. Whether you celebrate Christmas, Kwanzaa or Hanukkah it's all about family, love, blessings, thinking of others, children and most of all FOOD!

It's almost been a year for me as a food blogger and I've really enjoyed all the new friends, followers, fans and opportunities that have come my way. You are the best gift I can possibly have closing out my newbie/rookie year as a food blogger.

May bigger and better things all come our way in the new year of 2010!

Always play with your food,

Monday, December 21, 2009

Guilt free appetizer= Having dessert

Another guilt free goodie from Hungry Girl...God Bless her....and her recipes are so fun too!

If you are putting out a holiday spread for a party and you would like something you can nibble on that you don't have to worry about ruining your waistline and can still feel you are allowed some dessert....try these:

Hot Boneless Buffalo Wings
Hungry Girl 200 under 200

8 ounces raw boneless chicken breast, cut into 10 nuggets
1/4 cup Fiber One cereal (original)
1 ounce (about 14 crisps) Pringles Light Fat Free Barbeque Potato Chips (or any other FF BBQ version)
3 Tbsp. Frank's Redhot Cayenne Pepper sauce
Dash onion powder
Dash garlic powder
Dash cayenne pepper
Dash salt
Dash pepper

Preheat oven to 375 degrees.

In a blender or food processor, grind Fiber One to a bread crumb-like consistency.

Crush potato chips completely. In a small dish, mix crushed chips with cereal crumbs. Add onion, garlic powders, cayenne, pepper and salt. Mix well.

Place chicken pieces in a separate dish. Cover with Frank's sauce and toss to coat.

Line cookie sheet with non stick foil. Give each chicken piece a 'shake' so it's not dripping with sauce, then coat evenly with crumb mixture. Lay crumb mixture covered nuggets on the baking sheet.

Bake in oven for 10 minutes.

Flip over nuggets and bake for another 10 more minutes, or until outsides are crispy and chicken is cooked throughout. When I flipped the nuggets over they were a bit soggy and I did a quick pass over with some non stick spray to help them crisp up. Worked great.

Garnish with celery sticks and serve a low fat Blue Cheese dressing on the side. Serves 2.

These were awesome. Fun snack too! Save this recipe for Super Bowl Sunday!

Enjoy!

Sunday, December 20, 2009

I am all for EASY at this time of year!

Here's an easy one dish meal for you before all your intense holiday cooking...

I found this in my Hungry Girl 200 under 200 Cookbook. It's fabulous!

EZ Tomato Basil Chicken
adapted from Hungry Girl

1 lb. raw boneless chicken breast tenders (you could also cube/strip up 1 lb. worth of regular chicken breasts
1-1/2 cups (half a 20 oz can) crushed tomatoes with basil
1-1/2 cups thinly sliced onions
1 Tbsp Italian seasoning
1 tsp. pepper
salt to taste


Preheat oven to 350 degrees.

Bring a pan sprayed with non stick spray to high heat on the stove. Add onion and cook just until they begin to brown, about 3 minutes.

Pour half the tomatoes (one fourth of the can) in a medium baking pan. Lay chicken in the pan and top with onions.

Pour the rest of the tomatoes (another 1/4 of can) evenly over chicken and onion. Bake in the oven for about 30 minutes, until chicken is cooked through.

Allow chicken to cool and sauce to thicken slightly before serving.

Make 4 servings

Simply delicious. Plain buttered pasta with garlic bread on the side. Or a salad...very moist and flavorful. And exactly as she says...EZ!

Enjoy!