Showing posts with label cake. Show all posts

Monday, November 3, 2014

Golden Apple Raisin Squares

Halloween is over. Sniff sniff. We are now enduring the "otherwise known as sugar high or sugar crash time." It's a roller coaster ride for the next week. 

As a teacher, the day after Halloween is the WORST, luckily we had the weekend to buffer  all the candy intake however they were still 'hummin' on today.  So the kids are buzzing on sugar and crashing....up and down, up and down- all week.  I am finding candy wrappers everywhere. 

Here is some 'eye candy for you' of our All Hallow's Eve.... Above, is one picture from our yard, we are leaning to a skeleton/graveyard theme more and more it seems.
We love Halloween here not for the candy....but the added bonus it brings....


We are cool cuz we pass out the regular sized candy, I hot glued some roaches on each one.  All 60 of them. We like to think that somewhere in our town, teens are screaming thinking they have a roach in their bag.  Mwhahahahahahha. We give less terror inducing fruit snacks to the little ones....in case you think we are absolutely horrible.  Hey, we notice the kids who pass on by our house, no biggie. 


Witchy-poo, was what they saw first when I opened the door.  So I don't jump and scream at the kids.  I let the visuals do the work.  We also can't understand what she says other than "beware"....


Breakfast anyone? It was time for some spider eggs (doughnut holes) when I served my TA on Halloween morning.  I can't believe those 8th graders really asked if they were spider eggs.  REALLY? Is gullible still NOT in the dictionary?


Mr Skelton and his hot Skelly wife.  Yes, we are crazy like this....


Next up, is a little video Mr Skelly took of our new bay window dressing....


Ok, now that you are up to date on things....

Let's get down to business...I had an assignment to make something from Mott's the month of November. The Allrecipes Allstar Ambassadors teamed up with Mott's to use their applesauce in some of their suggested recipes.
 
I had K-man choose the recipe since he would be eating it (JennyMac being on Nutri System can only have a bite). Look to the bottom of the recipe for my little tweaks! 
 
Golden Apple Raisin Squares

Ingredients:
1 (3.9 ounce) container Mott's® Healthy Harvest Blueberry Delight Applesauce
1/2 cup all-purpose flour
1/2 cup whole wheat flour
1 teaspoon baking powder
1/2 teaspoon baking soda
1/2 teaspoon ground cinnamon
1/4 teaspoon salt
1/8 teaspoon ground cloves
2 large eggs, beaten
3/4 cup granulated sugar
1/3 cup canola oil
1 Golden Delicious apple, peeled and cut into 1/4-inch dice
1/3 cup golden raisins
 
Directions:

1.
Preheat the oven to 350 degrees F. Lightly oil or coat an 8x8-inch baking dish with nonstick cooking spray and set aside. Whisk together the all-purpose flour, whole wheat flour, baking powder, baking soda, cinnamon, salt, and cloves in a large bowl.
2.
Combine the eggs, applesauce, sugar, oil, and apple in a separate bowl, and whisk until well blended. Pour the liquid ingredients over the dry ingredients and stir until just moistened. Stir in the raisins. Pour the batter into the prepared baking dish. Smooth with a rubber scraper.
3.
Bake 30 to 35 minutes, or until the top is golden and a toothpick inserted in the center comes out clean.

#AllstarsMotts

Baker's Notes :

1. The store I went to didn't have the Harvest Blueberry, I used a kid's Mott's Mixed Berry instead.
2.  I don't understand the use of oil, when I have other recipes that use no oil and only applesauce as an oil replacement.  Is that why this recipe is overly wet?
3.  I double the recipe and cooked it in a 9X13 pan with no problem.  I checked it at 25 minutes and the toothpick test came out clean.
4.  I used Honeycrisp apple (my fave), I think Golden apples can get mushy.  Would a tart Granny Smith do well here, I think it could!
5. These were extremely moist, maybe too moist, almost wet and they tasted heavenly.  An apple spice cake thing but they put raisins in the title and it uses golden raisins hence why you can't see them.  These squares will serve well for K-man for dessert and breakfast this week because I doubled the batch!

 Bring on the Fall Harvest!

Thursday, February 7, 2013

Flourless Almond Cake (Gluten Free!)

The holidays killed me and it's been a struggle to get back to my Paleo lifestyle.  But I swear that bread and sugar is like a crack to me....lol....Anyhow, I saw this cake recipe and had to try it.  I tweaked it a bit and it really turned out awesome.

Flourless Almond Cake
adapted by Jenny Mac's Lipsmack

1 1/2 cups whole almonds, toasted
5 large eggs, at room temperature, separated 1/2 cup honey
2 teaspoons vanilla extract
1/2 teaspoon baking soda
1/2 teaspoon salt

Topping: 
Peach Preserves
1/4 cup almonds, toasted (they used sliced, I had only slivered ones to use up.)

1.  Preheat oven to 350°F. Coat a 9-inch cake pan with cooking spray. Line the bottom with parchment paper and spray the paper. (they suggested a springform, I used a regular cake pan with the parchment  and it popped right out).
2.  Beat 5 egg whites in large bowl with the electric hand mixer on medium speed until very foamy, white and doubled in volume, but not stiff enough to hold peaks, 1 to 2 minutes (they said to not over whip which will cause it to sink).
3.  Process whole almonds in a food processor or blender until finely ground. Beat 5 egg yolks, 1/2 cup honey, vanilla, baking soda and salt in a large mixing bowl with an hand mixer. Add the ground almonds and beat on low until combined.
4.  Using a rubber spatula, gently fold the egg whites into the nut mixture until just combined. Scrape the batter into the prepared pan.
5.  Bake the cake until golden brown and a skewer inserted into the center comes out clean, about 28 minutes. Let cool in the pan for 10 minutes. Cake should pull from the sides and be easy to pop out of pan.
6.  To serve, glaze the top of the cake with peach preserves (or whatever you have available or more honey) and sprinkle with toasted almonds.

Cook's Notes:

1. I loved how lightly sweet this was.  Not a sickening sweet like some Paleo stuff can be.  When you think about the 1/2 cup honey and how the cake sliced into 6 pieces...that is Tbsp and 1/2 of honey.  The topping is ridiculously thin (just to make the almonds on top stick really.).

2.  I've noticed something....I read alot about food 'stuff'.  I've been a Diet Coke drinker my WHOLE life.  Never a regular soda has touched my lips (unless by a careless server mixed up my drink order with my husband).  They say...Sugar Free drinks are just as bad....for it still makes your body crave sugar.  At work, I drink nothing but seltzer water.  I have no cravings and will make cookies with the club after school, no desire to eat them.  However when I go home I will allow myself a diet coke (trying to taper off) and will notice I am hunting around after dinner for something sweet....I really think there is something to this theory.  I am beginning to see this....OH HOW CAN I GIVE UP my FRESCA, DIET COKE and CRYSTAL LIGHT??  The TORTURE!!!

3.  Very light and spongy.  Great for breakfast too.  I passed some out to my Paleo Pals at work....still waiting on their opinion!

Enjoy!

Friday, December 28, 2012

Hmmm, is it worth it?

I know when you are hungry or having a craving for something you see on a blog, TV or Pinterest- not all that you want is right down the street.  Heck, I have Georgetown Cupcakes right across the river and even though I watch every episode and own both of their books....I still have not ventured.  I really avoid driving in DC at all costs.  I know I could take the metro but have you seen their long lines in front?....Anyhow....(paleo posting pals- stop reading now)
I decided to splurge and see was ordering from Carlo's Bakery worth it?  Like DC cupcakes, I watch all Buddy's shows, I own all of his DVD's (my students love them) and I have all his books.  UM, not taking a special vacation to HOBOKEN for some baked goods.  They have talked about going 'global' on the show and now with a large factory in Lackawanna, they finally started their delivery of their baked goods (some goods, not all). 
They are offering cookie trays, biscotti, rugelach and crumb cake.  All of which can withstand TRAVEL.  I can't see their flaky 'lobster tails' or cannoli being thrown in a Fed Ex truck.  I wasn't interested in the cookies (hello, we just finished the holidays) or the biscotti.  It was either the rugelach or crumb cake.  I like both but which.  I remembered printing off many a crumb cake recipe for it was not being published in his books.  I ordered the crumb cake, not thinking it was right before the holidays.  I realize that cake delivery was risky.  OMG all those crumbs....they are gonna be a hot mess.  It's going to be expensive.  Any cake delivered days after it's baking can't be as good as picking it up right from the store.  Online it said it would be made Monday or Christmas Eve but not sent until the day after Christmas.  Okay....perhaps I should wait....but what if I have 'drop-in' guests?.....It came today.
I immediately thought about the CRUMBS....eww would these be a HOT mess?  I opened the box and found the LARGE BUBBLE wrap.  Their was no room for the cake to bounce around in its box.  After I lifted the bubble wrap. I see the whole cake is sealed in plastic.  No one GOLF BALL sized CRUMB was out of place!


I closed up the box.  I'll try it for breakfast with an awesome cup of coffee.  I think I made it for an hour and said "What the hell?"  I cut into it.  If you are anything like me...when you cut into something baked you HOPE for stuff to fall.  Ohhh taste test!  I put it on a plate and took a forkful...um, ok.  I thought buying an Entennmann's crumb cake from the grocery would be softer.  The receipt tells you to go to their website for 'care instructions'.....This is essential.  I did not go but I did what my instincts told me.  All things taste better warm.  I nuked it for 30 seconds in the microwave. WOW....Huge difference!...Now I was singing and wiggling in my chair as I ate this.  It cost 29.99 online and with 2 day Fed Ex delivery it came to 41.99 (2 day delivery is your only option smack in the middle of a holiday, normally it's overnight, they provide you a schedule)


Here my picture of my slice made on Monday, sent on Wednesday, arrived on Friday.


This is a picture of Buddy's crumb cake from his webpage. I am SURE is it was freshly baked and the picture taken shortly afterward.  It looks all soft and fluffy.  You can tell that a cake that has been traveling sure does 'settle'.  This is what is written about the CARE Instructions:
"When you receive your crumb cake it is wrapped to maintain freshness and can be enjoyed immediately.
Store crumb cake at room temperature in covered container
Crumb cake should last about 5 days if covered properly
Freezing
Place crumb cake in freezer with plastic wrapper on.
When defrosting remove plastic wrapper, defrost until crumbs on top are soft (about 1 hour at room temperature)
Reheating
To reheat remove outer plastic wrapper and place into a preheated 350 degree oven for 5 minutes or 30 seconds on high in a microwave oven (exactly what I did!)
NOTE: Crumb cake can be reheated in paper tray

Buddy recommends reheating....as there is nothing like a warm crumb cake!" (this is HUGE!)

So, you have a decision to make.  Is it worth it to YOU?  To me....40 bucks can be the going rate for any upscale cake in our area.  Was it worth it to me?  Hell yeah, I love Buddy....this is the closest of a 'piece' of him I probably will ever get. LOOLOLOLOLOLL.  Would I buy it again?  Yes....but now I'd like to try the rugelach for I KNOW they have tons more moisture due to the preserves rolled in the dough.  I am excited to try it again.  So if you love crumb cake and don't have a problem forking out 40 bucks for a quality Crumb Cake, get one.  If anything, if you have Cake Boss fans in the family...it would make for fun conversation during a gathering!  I say go for it!


Who wants to eat CAKE?

Sunday, June 3, 2012

Paleo Chocolate Cupcakes!!!
 I've made a few treats from some Paleo recipes.  Two different brownie recipes and although they were OK....they were too dense, not fudgy and way too greasy.  I never bothered to post them.  Last night, when I was craving some chocolate I found a cake recipe wonder if these too would be too dense and greasy as well....SCORE.  They were NOT!
I've made enough Paleo stuff now that I realize that I can go lighter on the oils to change the grease factor.  Knowing that egg proteins expand in the heat...perhaps an extra egg would give it some umph!!! So, in JennyMac fashion, I found some a cake and frosting recipe, tweaked them baked trumphantly!

Paleo Chocolate Cupcakes
created by JennyMac's Lipsmack

1 cup almond flour
1 cup cocoa powder
1 tsp. baking soda
1/4 tsp. sea salt
1/2 cup coconut oil, melted (this would be fine with grapeseed as well I am sure)
5 eggs
1 tsp. vanilla
1/2 cup honey

Preheat oven to 350 degrees.  Line muffin tin with 12 papers.  Combine dry ingredients in medium bowl and set aside.  Whisk eggs, oil, vanilla and honey then pour into dry ingredients.  Use a electric hand mixer to combine, breaking up lumps and will help emulsify the eggs.  Use a ice cream scooper to put into muffin cups.  Cook for about 25 minutes or until toothpick comes out clean.  Cool on cooking rack.  Makes 12.  See frosting recipe below.

Vegan Chocolate Frosting

1/2 cup dairy-free dark chocolate chips
1/4 cup grapeseed oil
1 Tbsp. honey
1 Tbsp. vanilla
pinch sea salt

Melt the chips with the oil in the microwave for 1 minute.  Stir until smooth.  Stir in honey, vanilla and salt.  Frosting will be very loose.  Dip each cupcake top into the glaze.  I noticed as I was dipping the frosting was getting thicker as I could double-dip some of the cupcakes again makes a thicker fudgy top.

These were light, fluffy and decadently scrumptious!


Mummmffftttt,

Saturday, November 6, 2010

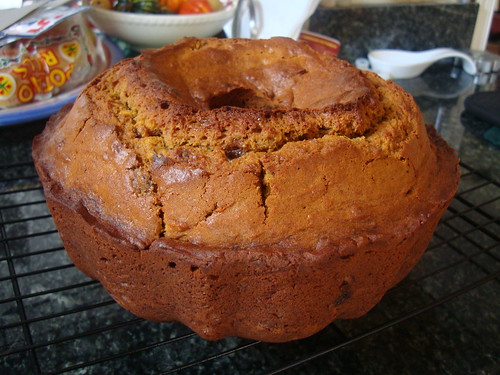
Pumpkin-Apple Gingerbread

Pumpkin Apple Gingerbread Cake

It's Fall, y'all. Have you recovered from Halloween yet? I love this time of the year for pumpkin isn't over and done with as soon as Halloween is gone. It's one of those dual holiday foods. When I was poking around the Pillsbury site I found this recipe that combines the pumpkin and gingerbread....the apple was definitely a bonus but shredded into it into of obnoxious chunks to tear up the cake.

Pumpkin-Apple Gingerbread
adapted from Pillsbury.com

4 cups all-purpose flour
3 teaspoons baking powder
2 1/2 teaspoons ground ginger
1/2 teaspoon baking soda
1/2 teaspoon salt
1/2 teaspoon pumpkin pie spice
1 cup butter or margarine, softened
1 cup granulated sugar
1/2 cup packed brown sugar
4 eggs
1 can (15 oz) pumpkin (not pumpkin pie mix)
1 large green apple, peeled, shredded (1 cup)
1/2 cup molasses
Powdered sugar, if desired

1. Heat oven to 350°F. Grease 12-cup fluted tube cake pan with shortening (do not use cooking spray); coat with flour. In medium bowl, mix flour, baking powder, ground ginger, baking soda, salt and pumpkin pie spice; set aside.
2 In large bowl, beat butter, granulated sugar and brown sugar with electric mixer on medium speed until creamy. Add eggs 2 at a time, beating well after each addition. Beat in pumpkin, apple and molasses. Gradually beat in flour mixture. Spoon into pan.
3 Bake 1 hour to 1 hour 10 minutes or until toothpick inserted in center of cake comes out clean. Cool in pan on cooling rack 15 minutes. Place cooling rack upside down on pan; turn rack and pan over. Remove pan. Cool completely, about 2 hours. Sprinkle with powdered sugar. Serve each slice on serving plate topped with about 2 tablespoons whipped cream if desired.

Cook's Notes:
1. I did not have use the whole can of pumpkin puree. I had some left in a bag in the freezer. It was slightly under. I know that the pumpkin and apple were all about giving this cake the moisture it needed. I added a few tablespoons of apple butter to the puree to make up the 15 oz. to ensure I did not upset the moisture balance. Since there is cinnamon and apple in the cake...I knew it would not change it flavor-wise.
2. My oven temperature gauge did say 350 degrees. Yet I try to always check cakes before the called time (I have a pizza stone and it tends to make the oven hotter). My cake rose GREAT yet was ready shortly after 1 hour. Test your earlier too.
3. This was an awesome cake. Kirk was sad I didn't add raisins...but I am not a fan of raisins like he is and I didn't want it to tear up the cake when I cut it.


Enjoy!

Wednesday, August 11, 2010

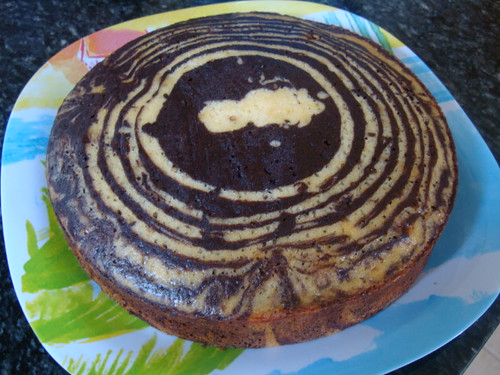
Zebra Cake

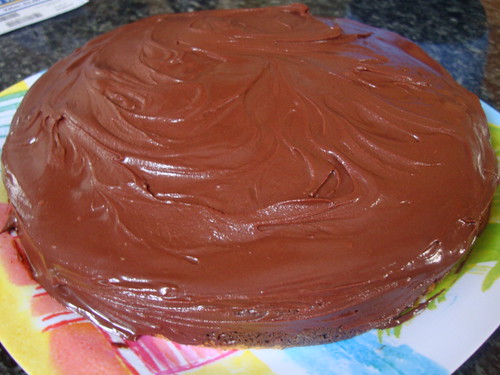
Zebra Cake with Ganache

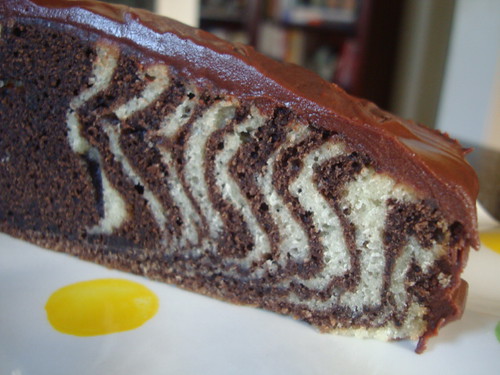
I bet you are dying to see what lurks under this yummy chocolate ganache. What does a Zebra Cake look like? Before I give you the recipe I wanted to ask you something. Have you tried any baking using the WEIGHT method versus VOLUME (using measuring cups)? Baking is definitely a science that can be unforgiving if your measuring is off. Get a little heavy handed with the flour or scoop it wrong and it won't rise alot or it's too dry/dense. I will tell you get a little scale from Bed Bath and Beyond (about 20-30 bucks) and use it. I've done it a few times and wished all my recipes were in weight form....so much easier. Give it a try?

Zebra Cake
from King Arthur Flour/Baker's Banter

1 cup granulated sugar
4 large eggs
1 cup milk (whole, 2% or 1%)
1 cup vegetable oil
1 teaspoon vanilla
2 cups King Arthur Unbleached All Purpose Flour
2 teaspoons baking powder
1/4 teaspoon salt
3 tablespoons Double Dutch Dark Cocoa

or if you'd like to weigh it out.....

7 ounces granulated sugar
4 large eggs
8 ounces milk (whole, 2% or 1%)
7 ounces vegetable oil
1 teaspoon vanilla
8 1/2 ounces King Arthur Unbleached All Purpose Flour
2 teaspoons baking powder
1/4 teaspoon salt
3 tablespoons Double Dutch Dark Cocoa

Directions

1) Preheat the oven to 350°F. Lightly spray a 9" x 2" round baking pan with cooking spray. Line the bottom of the pan with a circle of parchment, and spritz again. Set the pan aside.

2) In the bowl of your mixer, blend the sugar and eggs until lightened, about 2 minutes. On low speed blend in the oil, milk and vanilla until well combined and smooth.

3) In a separate bowl, combine the flour, baking powder and salt. Whisk to remove any lumps. Add the dry mixture to the wet ingredients. Combine on medium speed 1-2 minutes or until the batter is smooth and lump free. Be sure to scrape down the bowl halfway through mixing.

4) Remove 2 cups of the vanilla batter and place it in the measure you used for the liquid ingredients. Sift the cocoa over this batter, and stir well to combine. Be sure to use a sifter to avoid cocoa lumps in the batter.

5) Now for the stripes. Spoon about 3 tablespoons of vanilla batter into the center of the cake pan. Next, spoon 3 tablespoons of the chocolate batter into the center of the vanilla batter. This causes the vanilla batter to spread out. Continue to alternate batters, in bulls-eye fashion until all batter is used. You will now have thin rings of each batter on the outer edges of the pan, thicker rings towards the center.

6) Bake the cake in the center of the preheated oven for 40-45 minutes, or until the cake is lightly browned and a toothpick inserted into the center comes out clean. Cool the cake in the pan for 10 minutes, and then turn out onto a wire rack to finish cooling. Frost as desired.

Zebra Cake

Chocolate Ganache
from allrecipes.com
  • 1 cup semisweet chocolate chips
  • 2/3 cup heavy whipping cream
  1. In a heavy saucepan, melt chocolate chips with cream over low heat. Remove from the heat. Refrigerate, stirring occasionally.
  2. For a pourable ganache, cool until mixture reaches 85 degrees F-90 degrees F and is slightly thickened, about 40 minutes. Pour over cake, allowing some to flow down the edges to completely coat. Spread ganache with a spatula if necessary to evenly coat, working quickly before it thickens. Chill until set.
  3. For spreadable ganache, chill until mixture reaches a spreadable consistency. Spread over cake. Chill until set.


    Zebra Cake with Ganache
Keep the amounts of each chocolate and vanilla mixture as exact as you can. For you can see that I had more chocolate mixture left and it upset the 'balance' of the stripes. I guess I could have just stopped and didn't put the extra in. But I figured K-man will be so wowed over the stripes (so would your cake eating guests) that it probably wouldn't be noticed. Very fun....easy to do in one pan....Yummy too! The ganache was perfect!

Enjoy!

Monday, May 10, 2010

Doughnut Cake Pan- A review

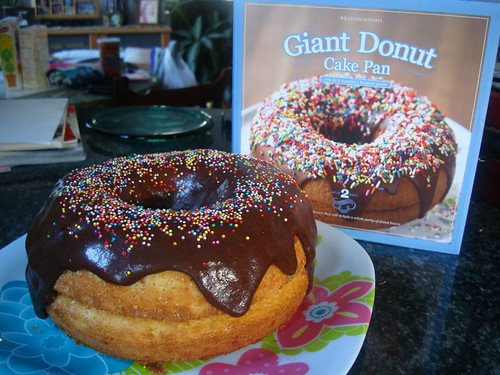
Donut Pan

Nuff said...pretty good likeness. Unlike my review of the cookie cake pan with not so good results.

I made this for dessert for our Mother's Day dinner. The family joke is about my grandmother's love for doughnuts. No matter the brunch spread...she will gravitate to the doughnuts. We have gotten her shirts as gifts about liking doughnuts. One year someone gave her some doughnut cologne. Another year during the holidays a family member bought a ginormous boston cream doughnut. It was about the size of a large pizza. It was only fitting that when I saw this pan from Williams Sonoma that I get it to make for grandmom's birthday. Well, since her b-day is in August....and it was Mother's Day....the cake came early!

Honestly, I didn't bother with the recipe on the box for time was lacking. I doctored up a cake mix and had some leftover frosting from another cake in the freezer. I also scooped up some cake to make holes to add some dulce de leche pudding in the middle for a cream filling doughnut affect.

I didn't think this cake pan wouldn't have problem due to the lack of 'detailing' on the cake pan. I will try the cake again using the recipe for I think any cake recipe or mix would work without a problem and so far even a cake mix was just fine. One day I will surprise my homeroom with a 'doughnut' for breakfast. I sure will be a hit for any food or sugar makes them happy always!

So if doughnuts are popular in your family this would be perfect to make with the kids and it will give you huge brownie.... err....doughnut points if you made this.

Enjoy!

Tuesday, May 4, 2010

Cookie Cake Pan Review

Hey there Kids!

Lookee, what I got.

I saw this pan months ago on Baking Bites (I searched her page forever under "Gear and Gadgets" and couldn't find the post but she has posted about other Williams Sonoma cake pans.) Of course, being the Cookie Club Sponsor at my school; I had to get it.

And it sat. Why you ask? Because I read W.S. site's mixed reviews about it. Hmmmm. How to accomplish this cake task without wasting my time and ingredients?

Step One: Purchased Wilton's Cake Release - many complained about the cake sticking. Well look at all that detail...of course you can expect sticking. Some said to use the recipe on the back of the box....others said 'don't use THAT recipe on the box...use a brownie mix....ugh!

Step Two: Williams Sonoma produced their own cake mix to use with the pan. Ok, will try it...but I really hate box mixes they all have the same chemical under-taste to me

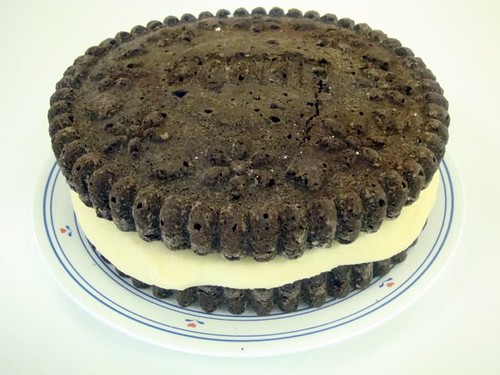
Step Three: Bake the cake box mix according to their directions and it should look like this:

Not this:

Cookie Cake made from mix1

Cookie Cake made from mix

And if you bake their recipe on the BACK of the box that the pan came in it should look like this:


NOT this:

Cookie Cake made with recipe from box


Cookie Cake made with recipe from box1

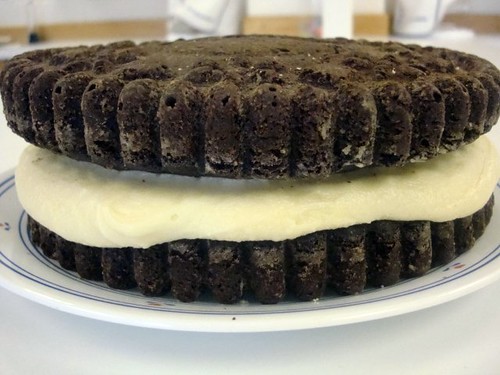
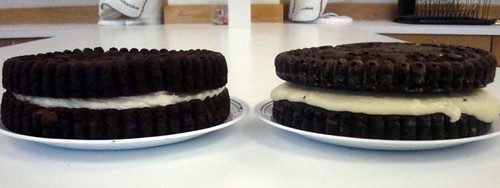
A comparison....

Which Cookie Cake is better?

Here are my observations:

1. The box mix tells you to FLOUR the greased pan....ewwwww look at the 'ashy' residue to the cake on the right (above) yet the recipe on the box tells you to dust the greased pan with unsweetened cocoa (that looks better).

2. The box mix raised much like a cake (I should have leveled off the tops like you do when you make a layer cake....my sixth graders were too impatient for that step plus I forgot.

3. The homemade recipe off the box baked much like a brownie with a shiny, flat and crackly top.

4. The box mix came out of the pans with no problem at all....too bad they looked so ugly. Actually they looked worse but I dusted them with some cocoa with a basting brush and they still came out like above.

5. The homemade recipe took some 'banging' to get it out. The first pan came out eventually. The second one- half fell out, half remained in the pan. I had to do 'surgery' to get it out. All I can say is....thank god it was able to be hidden underneath the frosting as the bottom layer.

6. A LOT of butter was used to make both of these cakes. I'd say roughly a POUND of butter each. Two stick for the cake...and two sticks for the frosting. Speaking of which....the homemade frosting....no brainer....anything with two sticks of butter with powdered sugar...YUM. Yet the frosting from the box. It was vanilla flavored powdered sugar. For it called for the same amount of butter and milk added to the FAKE smelling vanilla powdered sugar. ACK....hated the taste.

7. Perhaps the frosting could have used less milk...although it was soft for both....as soon as you put the top 'cookie' on the frosting....the oozing started. QUICK....start cutting!!!!

8. Oh yeah THAT, the cutting. What a hot mess. The picture seen here was NOT how my cake sliced. If you remember one of the pictures above....I had 4 cracks working on one. And I took the picture pretty much after I placed it on top. All I can say is that thank gawd I wasn't serving this to impress a party....I would have been embarrassed. The sixth graders didn't care. They were drooling over the sugar fix they were about to satisfy at 8:30am....BREAKFAST of CHAMPIONS! Two got a piece of each to try for comparison sake.

9. The kids picked the homemade recipe from the box as a better tasting one! Phew!

10. Clean up with the pans....the cake mix stuck very little and clean up wasn't so bad with hot water, soap and good sponge. The homemade recipe...OMG...I soaked and scrubbed and soaked and scrubbed. I finally had to resort to a toothbrush for all those nooks and crannies.

It amazes me over the range of reviews from "horrible-the pans are going back" to "looks better than the picture" They all ranged from using the mix to a store box cake mix. ALL over the board. So what do I tell you? Buy it or not?

Well, I won't be making this anytime soon...I am still exhausted over it. 3 days of demonstration to my students. But since I see that there are people out there who are making this 'nicely' I feel challenged to get it right. I am hopeful to find the right combination. So if you are up to a challenge and looking for a fun thing to make with your kids get the pans....not the mix. Start with the recipe on the box and try other recipes....unless you are a box cake fan...ick. Not me.

Purebred Cookies Rock!

Tuesday, March 30, 2010

German Devil's Food Cake?

Or should it be Devil's Food German Cake?

Regardless, it was K-man's birthday and it was time to make some YUMMY chocolate cake. (BTW, I love having a workplace with 4 kitchens and TONS of space where I can make stuff during my planning time and then take it home after work.)


So made in usual JennyMac style, I could not follow any traditional recipe and had to tweak and create my own.

German Chocolate Cake has a lighter, gentler chocolate flavored cake with the trademark coconut and pecan frosting.

Devil's Food, dark, rich and moist cake with fudgy frosting.

Let's PUT the TWO together!!!!

Devil's Food German Chocolate Cake
an original by JennyMac

CAKE:
one box devils food cake
one package instant coconut pudding (you can substitute instant chocolate pudding if you like)
eggs, oil and water (as directed by the package)
1 cup chocolate chips

FILLING:
1/2 stick butter, melted
1/3 cup brown sugar
1/2 cup coconut, toasted
1/2 cup pecans, toasted and chopped
1/2 tsp. vanilla
1/4 cup milk

GANACHE FROSTING:
2 cups heavy cream
1/2 cup powdered sugar
1/8 tsp. salt
1 lb. bittersweet chocolate, roughly chopped

Preheat your oven to the temperature as directed on the box. Place cake mix in your bowl and add pudding mix. Add eggs, oil and water as directed on the box. Fold in chocolate chips. Pour mixture in two 8 inch greased and floured pans. Bake 35 minutes or until toothpick comes out clean. Cool on wire racks.

In a large saucepan, bring cream, sugar and salt to a boil. Remove from heat; add chocolate and let stand, without stirring for 1 minute. Whisk just until combined. Refrigerate, stirring occasionally, until spreadable, about 1 hour.

Combine all the ingredients from the filling list. Mix well.

Plate your bottom layer of cake on the desired serving plate, rounded top up. Be sure to use a knife or cake leveler to even out to the top of the cake. Put coconut filling on bottom layer. Level out top layer and turn upside down so that the bottom of the cake is the top surface. Frost the top and sides of the cake with the prepared chocolate ganache.

Top with any leftover toasted coconut if desired.

This was so moist with little fudgy bit of chocolate. The coconut pudding in the cake was not overpowering in the least. The coconut and pecan filling is a nice surprise when cut. The ganache frosting I could not keep my fingers out of to lick off. Scrumptious!!!

K-man loved this cake so much that he ate TWO pieces for dessert!

Enjoy!

Wednesday, March 17, 2010

It's crummy, I know....

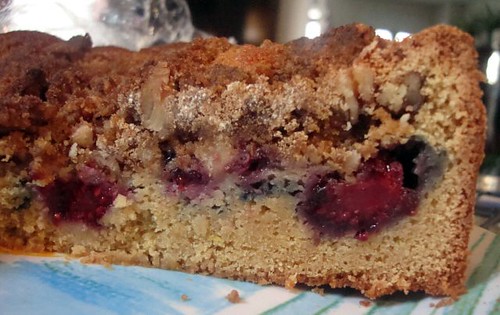
It all started when I was watching Cake Boss. He showed how he made (roughly-no recipe is provided by TLC) his crumb cake. A special order was sold by accident and he had to 'whip' one up. How he made those crumbs on his cake HUGE.....they looked so good....so I've stalking the internet for crumb cake recipes. Buddy from Cake Boss said his dad got his 'secret crumb cake' when he first bought the bakery. How lucky is that....no only buying a bakery space but getting their recipes too? Apparently New York Crumb Cake is famous...here is my first attempt with a crumb cake. I found on Vanilla Sugar. She made it with Raspberry with lemon crumbles. I made it with Blackberries and I did not like the lemon crumbles. I don't know why....but I normally LOVE lemon.

I made it again with Blueberries with no lemon....much better.

Berry Buttermilk Crumb Cake
adapted from vanilla sugar

cake:
2 cups all purpose flour
1 ts baking powder
1 ts baking soda
½ tsp salt
1 stick unsalted butter, softened
1- ¼ cup granulated sugar
2 Tbsp. orange or lemon zest
1 large egg & 1 egg yolk
1 cup buttermilk
1 cup fresh raspberries, blueberries, strawberries or blackberries

crumb topping:

1 cup all purpose flour
1 cup packed light brown sugar
½ tsp. salt
1 stick unsalted butter, melted & cooled

Preheat oven to 350°F
Make crumb topping by melting the butter, letting it cool. In a bowl mix the flour, brown sugar, salt and add the cooled butter to it and stir well. Set aside till ready. Butter and flour a 10" round springform pan.

In small bowl, sift together the flour, baking powder, baking soda, and salt. Set aside.
Cream (with mixer or by hand) the butter, sugar until pale yellow and fluffy; add the zest, eggs, and beat well for an additional 2-3 minutes.
In batches, add the flour, alternating with the buttermilk until all is combined.

Pour 1/2 the batter into the baking pan and use a spatula to smooth. Top batter with 1/2 the berries. Top with remaining batter and rest of berries. Push the berries only half way into batter.

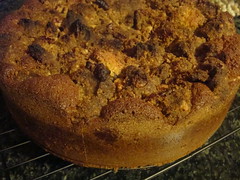
Using your hands, grab and squeeze crumb mixture putting large chunks on top of batter. Make smaller clumps of crumb mixture and filling between the large clumps. Sprinkle the remaining crumb mixture evenly into between the large and medium 'crumbs'.

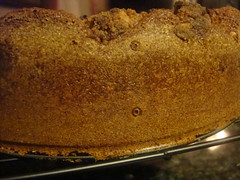
Bake for approximately 30 - 35 minutes, or until a cake tester inserted into the middle comes out clean and the top is golden brown. (I suggest using foil to cover your crumb cake to keep it from over browning like my first attempt did.)


Remove from oven and let cool in pan for 10-15 minutes, before releasing the sides of the spring form and sliding off bottom to transfer to a cooling rack (with the berry/sugar side up).
Let cool completely before serving.


These crumbs were great. I've had some crummy crumb cake where the crumb topping just melted all over the top. These crumbs were big and they kept their shape.


I have another crumb cake recipe that I found and I will do a compare and contrast soon. Perhaps no berries, just plain this time.

Got milk?

Sunday, February 14, 2010

Heart Shaped Fun

Happy Valentines Day (blowing kisses all around)

I don't know if you remember last year but I made a GIANT heart shaped grilled cheese and bacon sandwich for K-man. He was THRILLED.

Where does one buy a heart shaped loaf of bread?

You don't buy it, you have to make your own....


Seriously people, you need to get a heart shaped pan.


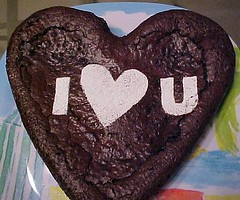
For dessert you can make a flourless chocolate cake....


Well almost flourless, it does have 1 Tbsp of flour.

But how cute is that? Verybestbaking.com has the free stencils but you will have to register to the nestle site. No biggie...just name, email, password...nothing major.


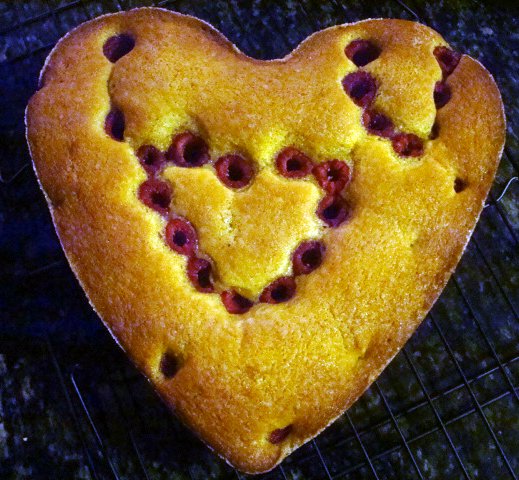
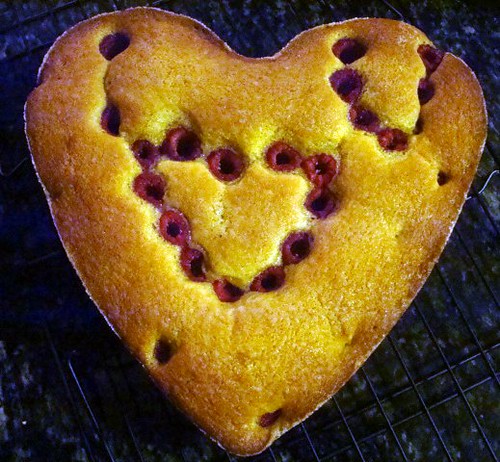
So for breakfast this morning K-man will be getting a Raspberry Buttermilk Cake with his coffee....


Can you read my message? I had no idea that if you place the raspberries with the hole up they won't sink! Well one did, on the "I" but he may have smaller than the rest. I found this from being a fan of Simply Delicious Recipe Swap on Facebook. Add it, if you do the FB thing.

Raspberry Buttermilk Cake
from Simply Delicious Recipe Swap on Facebook

Ingredients:
1 cup all purpose flour
1/2 teaspoon baking powder
1/2 teaspoon baking soda
1/4 teaspoon salt
1/2 stick unsalted butter
2/3 cup plus 1 1/2 tablespoons sugar, divided
1/2 teaspoon pure vanilla extract
1 large egg
1/2 cup well-shaken buttermilk
1 cup fresh raspberries (about 5 oz)


Directions:

Preheat oven to 400 degrees F. Sift together flour, baking powder, baking soda, and salt. Set aside.

Beat butter and 2/3 cup sugar with an electric mixer on medium-high until pale and fluffy, about 2 minutes. Beat in vanilla. Add egg and beat well. On low speed, mix in flour mixture in 3 batches, alternating with buttermilk, beginning and ending with flour, mixing until just combined. Pour batter into greased pan, tapping bottom of pan on hard surface to level batter.

Scatter raspberries evenly over top with the 'hole' side of the raspberries facing up (they stay afloat this way). Sprinkle with 1 1/2 tablespoon of sugar. Bake for 20-25 minutes or until skewer inserted into center comes out clean. Cool in pan for 10 minutes, then invert onto a plate to cool completely.

I did not take a picture of how to put the berries in but if you go to the FB page they have a picture of it with the recipe.

I forgot to add the extra sugar on top but I did sugar the greased pan. I don't know about you....but buttermilk just is awesome in cake!


Stay tuned for the next thing I made into a heart shape for dessert later on....

I will give you a hint if you check out Cutting Edge of Ordinary. When you see Lisa's recipe....maybe you can figure it out....but I don't think you will get it TOTALLY correct!

Enjoy!