Showing posts with label fruit. Show all posts

Monday, November 3, 2014

Golden Apple Raisin Squares

Halloween is over. Sniff sniff. We are now enduring the "otherwise known as sugar high or sugar crash time." It's a roller coaster ride for the next week. 

As a teacher, the day after Halloween is the WORST, luckily we had the weekend to buffer  all the candy intake however they were still 'hummin' on today.  So the kids are buzzing on sugar and crashing....up and down, up and down- all week.  I am finding candy wrappers everywhere. 

Here is some 'eye candy for you' of our All Hallow's Eve.... Above, is one picture from our yard, we are leaning to a skeleton/graveyard theme more and more it seems.
We love Halloween here not for the candy....but the added bonus it brings....


We are cool cuz we pass out the regular sized candy, I hot glued some roaches on each one.  All 60 of them. We like to think that somewhere in our town, teens are screaming thinking they have a roach in their bag.  Mwhahahahahahha. We give less terror inducing fruit snacks to the little ones....in case you think we are absolutely horrible.  Hey, we notice the kids who pass on by our house, no biggie. 


Witchy-poo, was what they saw first when I opened the door.  So I don't jump and scream at the kids.  I let the visuals do the work.  We also can't understand what she says other than "beware"....


Breakfast anyone? It was time for some spider eggs (doughnut holes) when I served my TA on Halloween morning.  I can't believe those 8th graders really asked if they were spider eggs.  REALLY? Is gullible still NOT in the dictionary?


Mr Skelton and his hot Skelly wife.  Yes, we are crazy like this....


Next up, is a little video Mr Skelly took of our new bay window dressing....


Ok, now that you are up to date on things....

Let's get down to business...I had an assignment to make something from Mott's the month of November. The Allrecipes Allstar Ambassadors teamed up with Mott's to use their applesauce in some of their suggested recipes.
 
I had K-man choose the recipe since he would be eating it (JennyMac being on Nutri System can only have a bite). Look to the bottom of the recipe for my little tweaks! 
 
Golden Apple Raisin Squares

Ingredients:
1 (3.9 ounce) container Mott's® Healthy Harvest Blueberry Delight Applesauce
1/2 cup all-purpose flour
1/2 cup whole wheat flour
1 teaspoon baking powder
1/2 teaspoon baking soda
1/2 teaspoon ground cinnamon
1/4 teaspoon salt
1/8 teaspoon ground cloves
2 large eggs, beaten
3/4 cup granulated sugar
1/3 cup canola oil
1 Golden Delicious apple, peeled and cut into 1/4-inch dice
1/3 cup golden raisins
 
Directions:

1.
Preheat the oven to 350 degrees F. Lightly oil or coat an 8x8-inch baking dish with nonstick cooking spray and set aside. Whisk together the all-purpose flour, whole wheat flour, baking powder, baking soda, cinnamon, salt, and cloves in a large bowl.
2.
Combine the eggs, applesauce, sugar, oil, and apple in a separate bowl, and whisk until well blended. Pour the liquid ingredients over the dry ingredients and stir until just moistened. Stir in the raisins. Pour the batter into the prepared baking dish. Smooth with a rubber scraper.
3.
Bake 30 to 35 minutes, or until the top is golden and a toothpick inserted in the center comes out clean.

#AllstarsMotts

Baker's Notes :

1. The store I went to didn't have the Harvest Blueberry, I used a kid's Mott's Mixed Berry instead.
2.  I don't understand the use of oil, when I have other recipes that use no oil and only applesauce as an oil replacement.  Is that why this recipe is overly wet?
3.  I double the recipe and cooked it in a 9X13 pan with no problem.  I checked it at 25 minutes and the toothpick test came out clean.
4.  I used Honeycrisp apple (my fave), I think Golden apples can get mushy.  Would a tart Granny Smith do well here, I think it could!
5. These were extremely moist, maybe too moist, almost wet and they tasted heavenly.  An apple spice cake thing but they put raisins in the title and it uses golden raisins hence why you can't see them.  These squares will serve well for K-man for dessert and breakfast this week because I doubled the batch!

 Bring on the Fall Harvest!

Tuesday, March 11, 2014

Kick'N Chicken with Mango Salsa

Ooooohhhh, you're gonna like today's post.

Our second recipe to make this month for Allrecipes.com Allstars was Sweet and Spicy Salmon with Grapefruit Salsa. Unfortunately since that recipe was not possible I opted for another recipe from Mazola® Corn Oil.  Aside from chicken being one of our favorite proteins but I really enjoy the "sweet and savory" combination.  This recipe rings some bells.

This recipe came at a good time.  Remember the big rain Los Angeles was having before the Oscars?  That same Monster storm swept across the US and pounded our eastern area with SNOW.  One the day it was supposed to hit...it started to drizzle and I cranked up the grill before the snow developed from the rain.  Best snow day ever GRILLIN'!

Kick'N Chicken with Mango Salsa 
from Allrecipes and Mazola®

4 (4 ounce) boneless, skinless chicken breasts
2 tablespoons chicken seasoning
1/4 cup Mazola® Corn Oil
3 tablespoons fresh lemon or lime juice
Mango Pepper Salsa:

2 cups diced fresh mango
1 cup diced red bell pepper
3 tablespoons minced red onion
1 tablespoon fresh lemon or lime juice
2 tablespoons minced fresh cilantro
Salt and pepper to taste

1. Preheat grill to medium heat, or between 350 degrees to 450 degrees F.
2. Trim excess fat from chicken, rinse and pat dry. If necessary, pound chicken to 1/2-inch thickness. Place chicken into a 1-gallon size resealable plastic bag. Add seasoning, oil and lemon juice to the bag. Seal bag and turn to thoroughly coat chicken.
3. Grill chicken over direct high heat for 6 to 8 minutes. Turn chicken and continue to cook for 6 to 8 minutes until cooked through. Transfer to a serving plate.
4. Combine salsa ingredients in a bowl; stir and season to taste with salt and pepper. (Can be made up to 8 hours ahead and refrigerated until ready to serve.)
5. Top grilled chicken with mango salsa and serve immediately.


Cook's Notes:
1. I bought two regular organic breasts.  They were almost about 8 oz. apiece.  I sliced them in half horizontally. If you buy the breasts that are already sliced thinly keep in mind...they will cook QUICKLY.
2.  My husband prefers thighs and I cooked four breasts and several thighs.  I didn't follow the amount of the chicken seasoning because I spread out all the chicken and just seasoned away my favorite Mrs. Dash Southwest Chipotle Seasoning.
3.  I used 3 mangoes, half red pepper and two thick slices of red onion, chopped.  I don't chop and measure things like fruit and veggies.  I don't want a 1/4 cup of anything leftover until I have a use for it.  This salsa provided enough for two dinners for two.

I am an Allrecipes Allstar brand ambassador (a voluntary position) and I'm not compensated for my work with Allrecipes.com.  Products received from the advertiser are only used for experienced-based reviews on Jenny Mac's LipSmack.  The reviews, content, and opinions expressed in this blog are purely the sole opinions of JennyMac.  To learn more about the Allrecipes Allstars program visit, Allrecipes Allstars.

#AllstarsMazola®

LipSmack this,

Friday, February 25, 2011

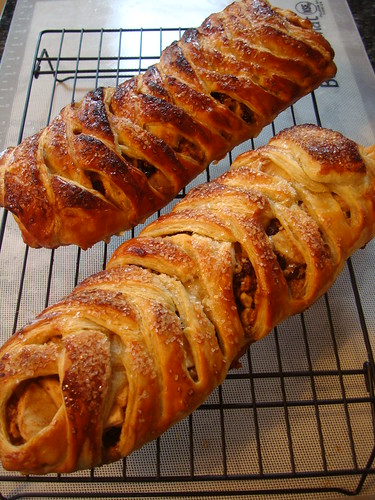
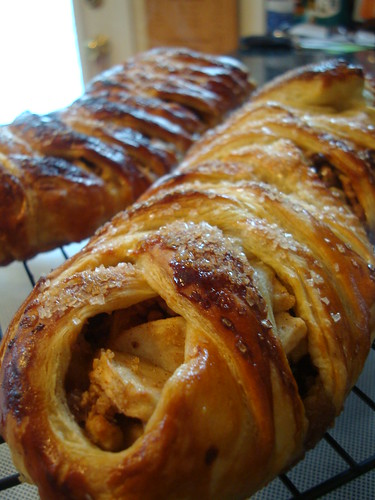
Easy Apple Strudel

This was K-man's request for a dessert. I asked him what he wanted for dessert...."something crunchy, appley, cinnamony, and raisiny"....I went 'trolling around' allrecipes.com to see what I could find under EASY. Always trolling for 'easy'. lol

Easy Apple Strudel2

I took a few ideas from this recipe, and from that recipe.

1. Puff pastry a must....very easy and flaky just like a strudel.
2. Recipes using panko crumbs....hmm good idea...helps absorb the juices so it's not all runny.
3. Plain apple filling or apple cinnamon...K-man likes apples and cinnamon so it won't be authentic strudel....who cares?

So my taking a bit of this and that....this is what I came up with.....

Easy-Peasey Apple Strudel
JennyMac Lipsmack Creation

1 Granny Smith apple - peeled, cored and coarsely shredded
3 Granny Smith apples - peeled, cored and sliced
1 Tbsp. cinnamon
1 cup brown sugar
1 cup raisins
3/4 cup panko bread crumbs
2 sheets frozen puff pastry, thawed
1 egg
1/4 cup milk
sugar for sprinkling

Directions

1. Preheat oven to 400 degrees F (200 degrees C). Line a baking sheet with parchment paper.
2. Place apples in a large bowl. Stir in cinnamon, brown sugar, raisins and bread crumbs; set aside. Place puff pastry on baking sheet. Roll lightly with a rolling pin. Arrange apple filling down the middle of the pastry lengthwise (taking up 1/3) . Snip with kitchen shears, one inch strips on either side of filling. Fold the pastry lengthwise around the mixture, alternating strips. Left, then right. Repeat. Whisk egg and milk together, and brush onto top of pastry. Sprinkle with sugar.
3. Bake in preheated oven for 35 to 40 minutes, or until golden brown.

Cook's Notes:
1. These had to be made on two separate cookie sheets. Make sure you alternate the sheets midway through cooking time. Clearly I got a bit distracted and one was a lil darker than the other.
2. The panko was SPOT ON.....it absorbs the juices so it was not wet and drippy in the least....very moist, held together.
3. Used the large decorator's sugar for the "sparkly effect." Very pretty. K-man gave "three thumbs up" he said. LOL
4. Use whatever apple you prefer....we like the tart to offset the sweetness. Just recommend a firm apple so it doesn't go 'mushy' on you.

Easy Apple Strudel

Yumminess!

Thursday, February 3, 2011

I have this problem....

I am either a rebel and can't follow the rules OR way too creative to respect a recipe 'as is'.

Hello, I am JennyMac and I am a rebel....

Perhaps my rebelliousness is due to the fact when I have it in my head, "I am going to make this recipe" I go to the kitchen I and I don't have EXACTLY everything the recipe calls for. The rebel in me says something like "I don't need no stinkin' 3 bananas....I can manage with only 2"

Banana Bread

I have made and eaten lots of banana bread. I don't like making banana bread for it always comes out very flat. Although it tastes great....looks aren't it's biggest appeal.

Found on Cutting Edge of Ordinary, I am dovetailing on Lisa's revelation of a 'secret technique' for banana bread and my rebellious change of her recipe. She used dates....I used apples. Ehhh. Dates, Shmates. Apple, Smapples. It's fruit. lol Regardless of the extra fruit....make this recipe for the SECRET TECHNIQUE....it's works!

Lisa said she found in an old Yankee Magazine back from the turn of the century. Lucky, Yankee Magazine has all their old recipe online now. Lisa gets props for bringing this to my attention. This is the original recipe from Yankee.

Banana Bread

3 large bananas
1/2 cup butter
1 cup sugar
2 eggs
1 tsp. vanilla (sorry, I had add this - I make my own vanilla, I like to use it, so kill me)
2 cups flour
1 teaspoon soda
1/4 cups nuts if desired (also chopped dates- I used chopped dried apples)

Preheat the oven to 325 degrees F.

Crush bananas and whip until very light. Cream butter and sugar. Add eggs, then flour, soda, and nuts. Add bananas last. Turn into well-greased bread pan. Bake slowly about 1 hour.

Banana Bread2

SECRET TECHNIQUE: The bananas end up liquefied, which may be why this bread does indeed have a very delicate texture.

My REBELLION: I had only 2 bananas in my freezer....dangit...I wanted banana bread now. OH well, time to be creative then....moist fruit.....I took a handful of dried apple rings....soaked them 1/4 cup spiced rum. Pureed them in the mini chopper (with the rum) and added them to the bananas and whipped some more.

Cook's Notes:
1. Toast your nuts- always! Flavors are best this way.
2. Sprinkle top of loaf with sugar....makes it "sparkly" and a nice crunchy sweetness on top when bitten.

Be a Rebel- Go Bananas!

Sunday, August 29, 2010

Blueberries and Cream Cookie and Ponderings

Ok, so it's been awhile since I've posted....I am really taking my summer off seriously. A vacation from everything? Including my lil blog?....apparently so. Don't worry, back to work on Monday and School after labor day and back to blogging.

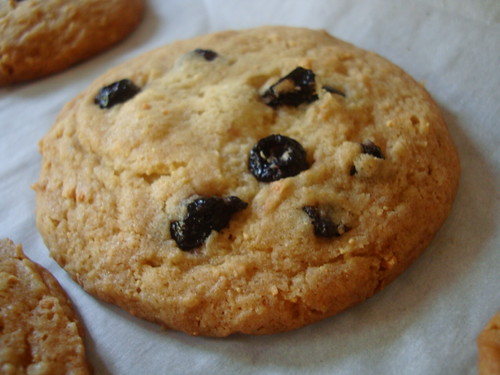
Blueberry and Cream Cookie

So I get the new Bon Appetit magazine this month. I see that some of the most popular recipes from Momofuku Milk Bar are being included. I can't rip through the mag fast enough....is it in here?...really?....drat no. I was looking for the coveted Compost Cookies everyone tries to copycat but what I did find is Christina Tosi's of Milk Bar popular Blueberry and Cream Cookies. I am open to a fruit cookie now and then...it helps balance out all the chocolate ones I seem to make most often.

I'd also seen this recipe from on my 'cookie of the day' email from Martha Stewart and had contemplated it (K-man loves blueberries!). But here is the pondering...

Are you like me and when you see a recipe that has a lot of steps... OR seems too complicated OR takes too long (overnight) - you lose interest in it? I am not the total 'easy breezy' cook here now. "Gimme a can of soup and cook five minutes....Bang -I am there".....NO, not quite. I like the happy medium recipes. But if it doesn't have a final picture to suck my interest in....and a long list of ingredients, too many steps I find that I put it off 'for some day' and I never come back to it. Does that ring any bells for you too?

So, it's my last hurrah for the summer. My time will be tight again. The lady of leisure's last laborious recipe for the summer. Yes, I know baking cookies in the summer does not seem appealing but we've been blessed with my last week of leisure with days in the 80's so I jumped on the opportunity...(next week will be back in the 90's when I am in an overly a/c'ed school all day)

The low down here is; the creator Christina Tosi was an odd duck growing up. She ate lima beans with ranch dressing. Doritos with miracle whip. Kraft's Mac and Cheese mixed with spaghetti-O's. Yes, the very one who created the compost cookie with pretzels, potato chips, coffee grounds and a other wacky things. Although her taste as a child was somewhat gross she developed into an risk taking/avant garde type of baker, that clearly WORKS.

I've included the original recipe as supplied by Bon Appetit, followed by Martha's recipe although it is 'tweaked' it is HALF of the recipe shown here. After the recipes is my review and more pix.

Blueberry and Cream Cookies
from Bon Appetit Magazine by Christina Tosi/Momofuku Milk Bar/NYC

2 cups (4 sticks) unsalted butter, room temperature
1 1/2 cups sugar
1 1/2 cups plus 2 tablespoons (packed) golden brown sugar
1/2 cup plus 2 tablespoons light corn syrup
2 large eggs
5 1/4 cups all purpose flour
2 teaspoons baking powder
1 teaspoon baking soda
1 teaspoon coarse kosher salt
1 1/2 cups Milk Crumbs (see below)
1 1/2 cups dried blueberries

Preparation

Combine butter, both sugars, and corn syrup in large bowl of stand mixer fitted with paddle attachment. Beat on medium-high speed until fluffy and pale, occasionally scraping down sides of bowl, about 3 minutes. Add eggs; beat on medium-high speed until mixture is very pale and sugar is completely dissolved, about 10 minutes. Add flour, baking powder, baking soda, and salt; beat on low speed just until blended, occasionally scraping down sides of bowl. Add Milk Crumbs; mix on low speed just until incorporated. Remove bowl from mixer. Stir in blueberries just until evenly distributed (dough will be very sticky).

Using 1/4-cup ice cream scoop for each cookie, drop dough onto 2 large rimmed baking sheets. Cover with plastic wrap and refrigerate at least 24 hours. DO AHEAD Can be made 2 days ahead. Keep chilled until baking time.

Position 1 rack in top third and 1 rack in bottom third of oven and preheat to 375°F. Line 2 large (18x12-inch) rimmed baking sheets with parchment. Transfer 6 chilled dough scoops to each sheet, spacing at least 4 inches apart (cookies will spread). Bake cookies, 2 sheets at a time, until golden, reversing sheets halfway through baking, 20 to 22 minutes total. Repeat with remaining chilled dough, cooling and relining sheets between batches. Transfer cookies to racks; cool completely. DO AHEAD Can be made 3 days ahead. Store in airtight containers at room temperature.

Milk Crumbs

3/4 cup nonfat dry milk powder
1/2 cup all purpose flour
3 tablespoons sugar
2 tablespoons cornstarch
3/4 teaspoon coarse kosher salt
6 tablespoons (3/4 stick) unsalted butter, melted

Preparation of Crumbs

Preheat oven to 275°F. Line large rimmed baking sheet with parchment. Combine milk powder, flour, sugar, cornstarch, and coarse salt in medium bowl; toss to mix evenly. Add butter; stir with fork until clusters form. Spread mixture evenly on prepared sheet. Bake until crumbs are dry and crumbly but still pale, about 10 minutes. Cool Milk Crumbs completely on sheet. DO AHEAD Can be made 1 week ahead. Store in airtight container at room temperature.

~~~~~~~~~~~~~~~~~~~~~~~~~

Blueberry and Cream Cookies
inspired by Christina Tosi of Momofuku Milk bar but recreated by MarthaStewart.com

2 1/2 cups all-purpose flour
1/4 teaspoon baking powder
1/8 teaspoon baking soda
2 teaspoons salt
1 cup (8 ounces) Plugra European-style unsalted butter (please! regular will work here....sheesh)
1/2 cup plus 2 tablespoons granulated sugar
1/2 cup plus 2 tablespoons light-brown sugar
1/4 cup glucose (duh-corn syrup, why does MS gotta be all extra fancy?)
1 large egg
3/4 cup dried blueberries
1/2 cup plus 1/3 cup Milk Crumbs

Directions

1. Line two baking sheets with parchment paper; set aside.
2. In a large bowl, mix together flour, baking powder, baking soda, and salt; set aside. In the bowl of an electric mixer fitted with the paddle attachment mix together butter, sugars, and glucose until well combined. Add egg and mix until well combined.
3. Add flour mixture and mix until well combined. Add blueberries and milk crumbs and mix until well combined. Using an ice cream scoop about 2 1/8 inches in diameter, scoop dough into balls and place about 2 inches apart on prepared baking sheets.
4. Preheat oven to 375 degrees. Transfer baking sheets to refrigerator until dough is chilled, about 15 minutes. Transfer baking sheets to oven and bake, rotating pans halfway through baking, until cookies are golden brown and tops begin to crackle, about 15 minutes. Transfer cookies to a wire rack to cool.

Milk Crumbs

1/4 cup plus 1 tablespoon nonfat milk powder
2 tablespoons all-purpose flour
1 tablespoon cornstarch
1 1/2 teaspoons sugar
1/8 teaspoon salt
1 1/2 tablespoons unsalted butter, melted
1/4 cup white chocolate, melted

Crummy (lol) Directions

1. Preheat oven to 225 degrees. Line a baking sheet with parchment paper; set aside.
2. In a medium bowl, whisk together 2 tablespoons plus 1 1/2 teaspoons milk powder, flour, cornstarch, sugar, and salt. Stir in melted butter until well combined. Spread mixture on prepared baking sheet and transfer to oven. Bake until dried and crumbly, 8 to 10 minutes. Remove milk crumble from oven and let cool completely.
3. Transfer milk crumble to a large bowl and fold in remaining 2 tablespoons plus 1 1/2 teaspoons milk powder and white chocolate. Use immediately or transfer to an airtight container and keep refrigerated until ready to use.


Cook's Notes:
1. Very surprised and happy with the results. I am glad I exerted the effort.
2. Crunchy edge....soft and chewy center. Those dried berries were working hard in that fridge by soaking up some of the moisture and were plumper and juicier than the ones I was snacking on while making the dough!
3. Recipe says makes 35...I got 37. I am sure it's because I added more blueberries near the end when I noticed less blueberries in the dough.
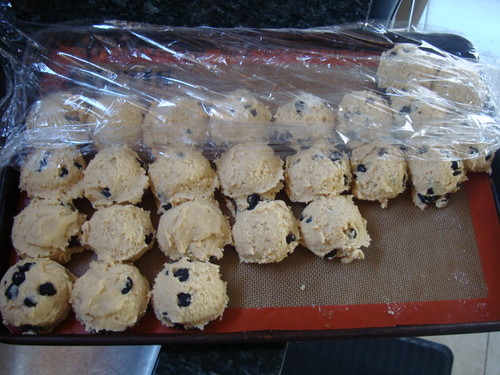
Blueberry and Cream cookie dough

4. Really watch when you are baking the crumbs...keep them light...keep mixing them to brown evenly. Stay by that OVEN!
5. If you don't have a oven thermometer, get one, you really need to make sure your oven is 375 degrees, no more, no less. Just two minutes extra (by accident) and I felt the cookies were overly brown.
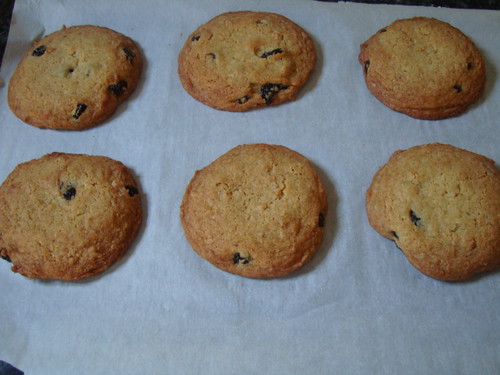
Blueberry and Cream Cookies
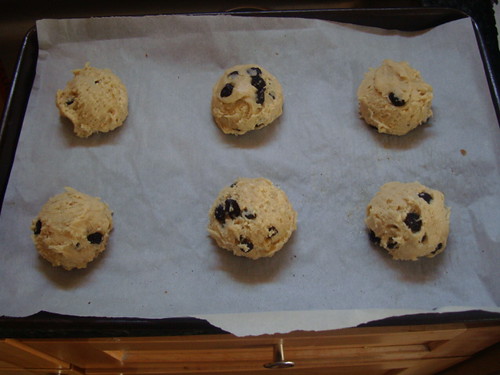
6. As you can see, don't squeeze any more than six. The recipe says 1/4 cup ice cream scoop (your standard one probably in your drawer).
7. Bon Appetit says from Christina to sit in fridge for 24 hours yet Martha's says 15 minutes chilled. I made some later that evening and this morning. It rendered the same result. I am not sure if 15 minutes would be enough. But one trial cookie being baked wouldn't hurt.
Blueberry and Cream cookie dough2
8. I included Martha's recipe only because I thought her 'tweak' using white chocolate in the crumbs was worth trying the recipe again. Good that her recipe is HALF the amount. I baked half of these cookies and put the other half in the freezer. These are THICK, chewy and hearty cookies. One will suffice unless you are REALLY starving. I like cookies that satisfy with eating ONE.
9. Very milky, creamy, buttery really. With two sticks in the recipe of course it's buttery. A nice change from what we normally have for cookies here. I felt it was worth the effort and time. Yummy cookie, give it a try for yourself.

Enjoy!

Thursday, April 22, 2010

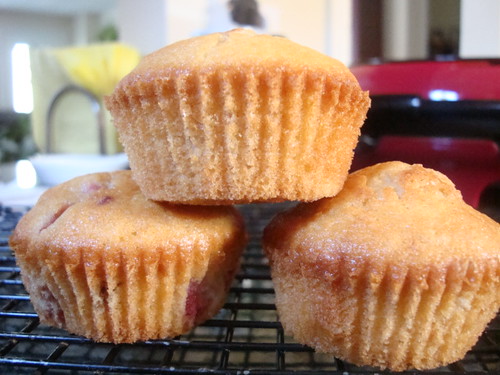
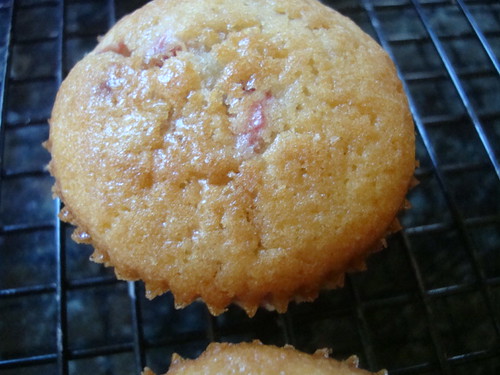
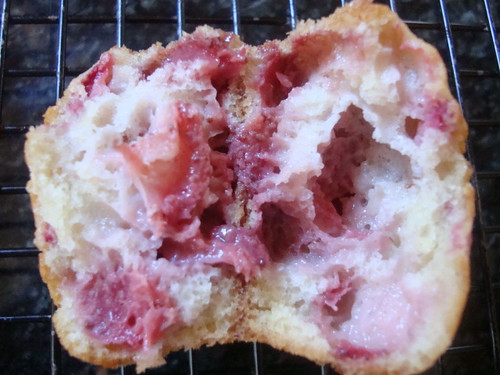
Strawberry Muffins


Strawberry Muffins

2 cups all-purpose flour
3/4 cup sugar
2 1/2 teaspoons baking powder
1/4 teaspoon baking soda
1/4 teaspoon salt
1 cup milk
1/2 cup vegetable oil
2 large eggs
1 1/3 cups chopped strawberries 0r any other berry or combination.
sugar for sprinkling on top

Directions:

Position a rack in the center of the oven and preheat to 400°F. Lightly butter twelve 2 1/2-inch muffin cups or place paper muffin cups in the muffin tin.

In a medium bowl, whisk the flour, sugar, baking powder, baking soda and salt to combine and make a well in the center. In another medium bowl, whisk the milk, oil and eggs. Mix well and pour into the well. Stir just until blended. Fold in the berries. Spoon equal amounts of the batter into the muffin cups, filling them about three-fourths full. Sprinkle some sugar on top.

Bake until a toothpick inserted into the center of a muffin comes out clean, 15 to 20 minutes. Cool in the pan for 5 minutes. Remove the muffins and serve warm or cool on a wire rack.


Very moist!

Very Berry!

Great for snacking or for a quick breakfast!

Wednesday, March 17, 2010

It's crummy, I know....

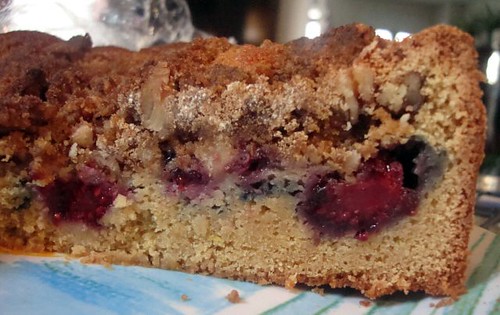
It all started when I was watching Cake Boss. He showed how he made (roughly-no recipe is provided by TLC) his crumb cake. A special order was sold by accident and he had to 'whip' one up. How he made those crumbs on his cake HUGE.....they looked so good....so I've stalking the internet for crumb cake recipes. Buddy from Cake Boss said his dad got his 'secret crumb cake' when he first bought the bakery. How lucky is that....no only buying a bakery space but getting their recipes too? Apparently New York Crumb Cake is famous...here is my first attempt with a crumb cake. I found on Vanilla Sugar. She made it with Raspberry with lemon crumbles. I made it with Blackberries and I did not like the lemon crumbles. I don't know why....but I normally LOVE lemon.

I made it again with Blueberries with no lemon....much better.

Berry Buttermilk Crumb Cake
adapted from vanilla sugar

cake:
2 cups all purpose flour
1 ts baking powder
1 ts baking soda
½ tsp salt
1 stick unsalted butter, softened
1- ¼ cup granulated sugar
2 Tbsp. orange or lemon zest
1 large egg & 1 egg yolk
1 cup buttermilk
1 cup fresh raspberries, blueberries, strawberries or blackberries

crumb topping:

1 cup all purpose flour
1 cup packed light brown sugar
½ tsp. salt
1 stick unsalted butter, melted & cooled

Preheat oven to 350°F
Make crumb topping by melting the butter, letting it cool. In a bowl mix the flour, brown sugar, salt and add the cooled butter to it and stir well. Set aside till ready. Butter and flour a 10" round springform pan.

In small bowl, sift together the flour, baking powder, baking soda, and salt. Set aside.
Cream (with mixer or by hand) the butter, sugar until pale yellow and fluffy; add the zest, eggs, and beat well for an additional 2-3 minutes.
In batches, add the flour, alternating with the buttermilk until all is combined.

Pour 1/2 the batter into the baking pan and use a spatula to smooth. Top batter with 1/2 the berries. Top with remaining batter and rest of berries. Push the berries only half way into batter.

Using your hands, grab and squeeze crumb mixture putting large chunks on top of batter. Make smaller clumps of crumb mixture and filling between the large clumps. Sprinkle the remaining crumb mixture evenly into between the large and medium 'crumbs'.

Bake for approximately 30 - 35 minutes, or until a cake tester inserted into the middle comes out clean and the top is golden brown. (I suggest using foil to cover your crumb cake to keep it from over browning like my first attempt did.)


Remove from oven and let cool in pan for 10-15 minutes, before releasing the sides of the spring form and sliding off bottom to transfer to a cooling rack (with the berry/sugar side up).
Let cool completely before serving.


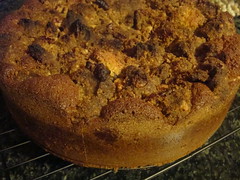
These crumbs were great. I've had some crummy crumb cake where the crumb topping just melted all over the top. These crumbs were big and they kept their shape.


I have another crumb cake recipe that I found and I will do a compare and contrast soon. Perhaps no berries, just plain this time.

Got milk?

Sunday, February 14, 2010

Heart Shaped Fun

Happy Valentines Day (blowing kisses all around)

I don't know if you remember last year but I made a GIANT heart shaped grilled cheese and bacon sandwich for K-man. He was THRILLED.

Where does one buy a heart shaped loaf of bread?

You don't buy it, you have to make your own....


Seriously people, you need to get a heart shaped pan.


For dessert you can make a flourless chocolate cake....


Well almost flourless, it does have 1 Tbsp of flour.

But how cute is that? Verybestbaking.com has the free stencils but you will have to register to the nestle site. No biggie...just name, email, password...nothing major.


So for breakfast this morning K-man will be getting a Raspberry Buttermilk Cake with his coffee....


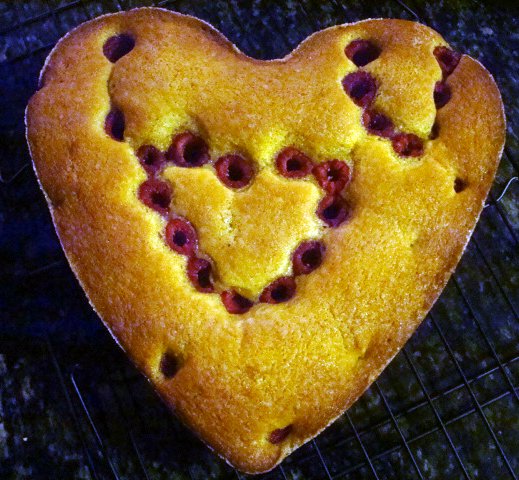
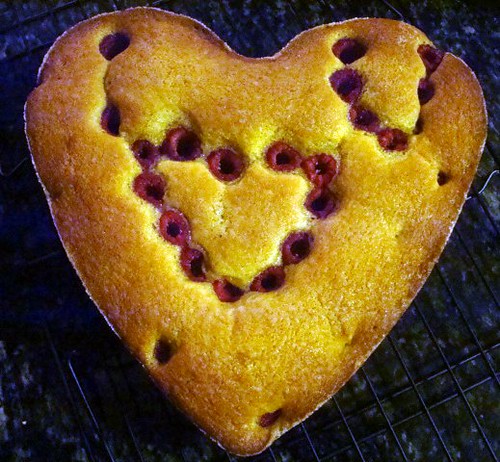
Can you read my message? I had no idea that if you place the raspberries with the hole up they won't sink! Well one did, on the "I" but he may have smaller than the rest. I found this from being a fan of Simply Delicious Recipe Swap on Facebook. Add it, if you do the FB thing.

Raspberry Buttermilk Cake
from Simply Delicious Recipe Swap on Facebook

Ingredients:
1 cup all purpose flour
1/2 teaspoon baking powder
1/2 teaspoon baking soda
1/4 teaspoon salt
1/2 stick unsalted butter
2/3 cup plus 1 1/2 tablespoons sugar, divided
1/2 teaspoon pure vanilla extract
1 large egg
1/2 cup well-shaken buttermilk
1 cup fresh raspberries (about 5 oz)


Directions:

Preheat oven to 400 degrees F. Sift together flour, baking powder, baking soda, and salt. Set aside.

Beat butter and 2/3 cup sugar with an electric mixer on medium-high until pale and fluffy, about 2 minutes. Beat in vanilla. Add egg and beat well. On low speed, mix in flour mixture in 3 batches, alternating with buttermilk, beginning and ending with flour, mixing until just combined. Pour batter into greased pan, tapping bottom of pan on hard surface to level batter.

Scatter raspberries evenly over top with the 'hole' side of the raspberries facing up (they stay afloat this way). Sprinkle with 1 1/2 tablespoon of sugar. Bake for 20-25 minutes or until skewer inserted into center comes out clean. Cool in pan for 10 minutes, then invert onto a plate to cool completely.

I did not take a picture of how to put the berries in but if you go to the FB page they have a picture of it with the recipe.

I forgot to add the extra sugar on top but I did sugar the greased pan. I don't know about you....but buttermilk just is awesome in cake!


Stay tuned for the next thing I made into a heart shape for dessert later on....

I will give you a hint if you check out Cutting Edge of Ordinary. When you see Lisa's recipe....maybe you can figure it out....but I don't think you will get it TOTALLY correct!

Enjoy!

Saturday, December 19, 2009

Whole berry, jellied or homemade?

I've been avoiding cranberry sauce at the holidays due to the fact that K-man doesn't like it and I go along with it only because it's one less leftover I have to deal with despite the fact I love cranberry sauce.

Finally this past T-day after eating the moist turkey I decided something was missing and I realized it was the cranberry sauce! I love a forkful of turkey and cranberry. So I finally came to the conclusion...heck with what I was thinking. I am having MY cranberry sauce despite whether K-man is eating it or not.

Perhaps the gelatinous can shaped red stuff weirded him out. Had he ever TRIED homemade? So, I dug out a family recipe and decided to give it a whirl and see if K-man liked it (I've converted him on some things because my way of cooking something was tastier that somethings he was served as a kid)

Cranberry Sauce
slightly adapted from my cousin Beth

1 bag cranberries
2 apples, quartered, cored and peeled
zest of one large navel orange
insides of said large navel orange
1 cup sugar (I used 1/2 cup splenda)

In a food processor put the bag of cranberries, apples, orange zest and sugar. Peel that orange, remove navel and put segments in processor (my cousin throws the WHOLE orange - peel and all, but the pith/peel in my opinion is too bitter). Pulse and blend until the consistency you like. Chill in refrigerator. Best when made a day or two before serving!

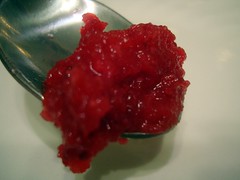
This recipe is very 'orangey' as well as tart from the cranberry. I think it is very refreshing and I love the sweetness and tartness of it.

So, does K-man like it?


Enjoy!

Wednesday, November 4, 2009

Since when does a cake observe a religion?

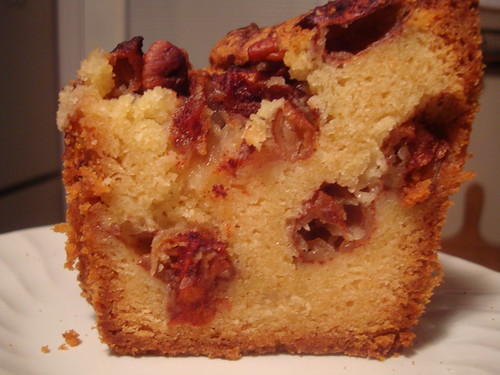
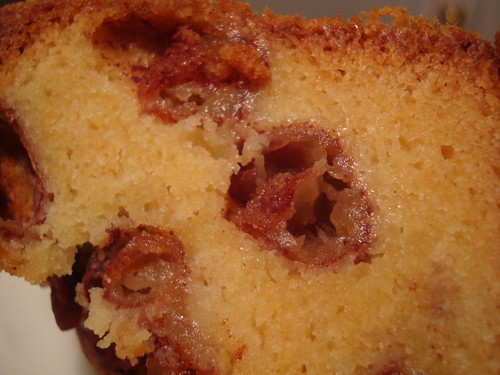
I acquired this recipe from my grandmother and although I ate her cake hundreds of times never did I ask her why this was named "Jewish Apple Cake" or if she got the recipe from someone who was Jewish. Regardless, it's an incredibly dense, moist and flavorful cake. Tons of apples and cinnamon and a crusty sugary outside.

I had forgotten about this recipe until someone sent me a link to a great site (I had bookmarked and used some of the recipes in the past) called Mrs. Claus' Cookbook. Tons of recipe and fun kid stuff to do as well. So as I was going through the list of cakes again...and I saw it. Jewish Apple Cake. Wow, so my grandmother didn't make this name up....and it was pretty much the same recipe (less O.J and added water).


Here is my Me-mom's version:

Jewish Apple Cake

4 large apples, peeled and cut into thick chunks or slices (coat with 1 T. of cinnamon and 5 T. of sugar)
3 cups flour
1/2 t. salt
2 -1/2 cups sugar
1 T. baking powder
4 eggs
1 cup vegetable oil
2-1/2 tsp. vanilla
1/3 cup orange juice
a few pecans on top for garnish -optional

Preheat oven to 350 degrees. Grease and flour a angel food cake pan and line bottom with parchment paper.

In an electric mixer, put flour, salt, sugar and baking powder. Start slowly to mix dry ingredients and one at a time add your 4 eggs. Pour in oil, then OJ and lastly the vanilla. The batter will be super thick.

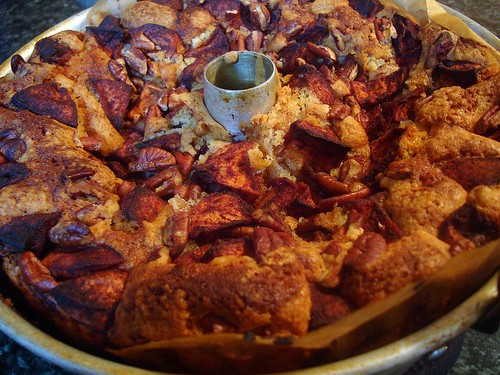
In the greased pan* put half of batter, layer with half of cinnamon/sugar coated apples. Put remaining batter on apples and finish with remaining apples on top.

Bake @ 350 for 1-1/2 hours. Check for doneness with a toothpick. This cake is a heavy one! Let stand in pan until warm to touch before removing. Sprinkle with powdered sugar when serving.

*after I greased the pan, I lined it with coffee filters. One (with a hole cut) for the bottom of the angel food pan and several half circles around the sides.

This is great warm from the oven with ice cream or a dollop of whipped cream. Store in refrigerator if you don't think you can eat it all within a day or two. We also ate some slices for breakfast as well!

Enjoy!

Thursday, October 15, 2009

This recipe takes the cake alright!

I've seen this cake around on the blogs. I printed it out probably in the spring. We love cake and blueberries! I didn't make it at all this summer (when the blueberries are at their peak) for the primary reason that not only does baking/using the oven make my kitchen hot but that same heat goes right upstairs. So now with it getting cool/cold out.....it was time. Oh my....


I can totally see why the funny name as 'boy bait'....this cake rocks! It was light and buttery. K-man's was on high alert for dessert when he was just smelling it baking (and I didn't even tell him I was making something!) Once he ate his serving ('mmmmm-ing' all the while) He even 'mmm-mmm'ed' as he passed the pan on our way up to bed. Clearly SOMEONE was smitten. LOL. Duly noted!

Blueberry Boy Bait
Adapted from Cook’s Country
Serves 12, generously

2 cups plus 1-teaspoon all-purpose flour
1-tablespoon baking powder
1-teaspoon table salt
16 tablespoons unsalted butter (2 sticks), softened
3/4 cup packed light brown sugar
1/2 cup granulated sugar
3 large eggs
1 tsp. vanilla
1-cup whole milk or buttermilk would work too (I used evaporated)
1/2-cup blueberries, fresh or frozen
Topping
1/2-cup blueberries, fresh or frozen (do not defrost)
1/4 cup granulated sugar
1/2-teaspoon ground cinnamon

Preheat to 350 degrees. Grease and flour 13 X 9 pan.

Whisk two cups flour, baking powder, and salt together in medium bowl. With electric mixer, beat butter and sugars on medium-high speed until fluffy, about two minutes. Add eggs, one at a time, beating until just incorporated and scraping down bowl. Add the vanilla and mix until incorporated. Reduce speed to medium and beat in one-third of flour mixture until incorporated; beat in half of milk. Beat in half of remaining flour mixture, then remaining milk, and finally remaining flour mixture. Toss blueberries with remaining one-teaspoon flour. Using rubber spatula, gently fold in blueberries. Spread batter into prepared pan.

For the topping:
Scatter blueberries over top of batter. Stir sugar and cinnamon together in small bowl and sprinkle over batter. Bake until toothpick inserted in center of cake comes out clean, 45 to 50 minutes. Cool in pan 20 minutes, then turn out and place on serving platter (topping side up). Serve warm or at room temperature. (Cake can be stored in airtight container at room temperature up to 3 days.)

Great for breakfast with your coffee too. Make this for your hubby NOW....the holidays are coming....LOL

Enjoy!

Monday, October 12, 2009

Two favorites combined

Fall is here and apples are everywhere. My latest favorite is the Honeycrisp.

I love apple pie and I love apple crisp. Why not combine the two? I am going to be honest with you here. I've stopped using my pie pan after I discovered how nicely the crostada way works. Although you may want a deeper filling but I was getting annoyed over how each time I took out a slice parts of the crust was on the bottom. But every slice I do crostada style, no fuss, no muss!

Here's what you need and how you do it:

Apple Crisp Crostada

1 pie crust (either your favorite recipe or a pre-prepared one)
5 apples, peeled, cored and chopped in chunks
juice of one lemon
2 Tbsp instant tapioca
1 Tbsp cinnamon
2 dashes nutmeg
1/4 cup sugar (maybe even less since these apples are so sweet)
dash salt
Topping:
1/2 cup brown sugar
1/2 cup flour
1/4 cup butter, ice cold, cut into chunks
1/2 cup toasted walnuts, chopped

Preheat oven to 375 degrees.
In a small bowl, prepare the topping. Using a pastry blender, cut the butter chunks into the brown sugar and flour. Keep cutting the butter until the pieces are as small as the walnuts you chopped. Add walnuts and lightly toss into the butter and sugar mixture. Set aside.

In a large bowl, peel and chop apples and add lemon juice, tapioca (these apples were juicy and needed some thickener), cinnamon, nutmeg, sugar and salt. Mix well.

On parchment paper, roll out pie crust as large as it can go without getting 'see thru' thin. Take parchment paper and put on a cookie sheet (I used my pizza peel and baked this on my pizza stone). Sprinkle a handful of the topping in the center of the pie crust. Pile all the apples in the center, leaving about 1 -1/2 inch around the edge. This will be a pretty big mound. Use your fingers and hands to lightly press if you need to keep the apples from 'rolling down'. Sprinkle your topping over the mound and also the sides of the mound (this will be tricky). I started to curl up the pie crust edges up while I did the topping to help keep it ON. Take all the edges and fold them up and press gently into the apples.

Bake for one hour or until the juices are bubbly and is 'pooling' level to the crust edge. Cool on parchment until ready to eat.

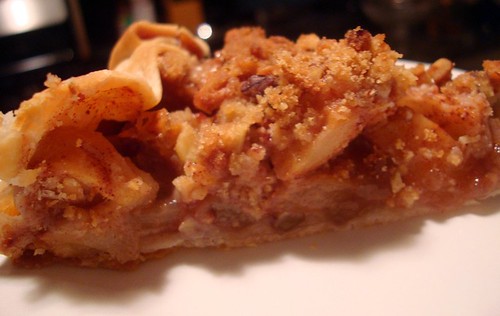
Nice and crunchy nutty topping on those apples.

I can't get over how level this is when the mound was HUGE. I wish now I had taken a picture of the mound and put them side by side. Although the honeycrisp apples are still firm I guess the smaller chunks did cook down more. I am also glad that the whole lemon gave a some tartness to cut the sweetness of the apple.

This was REALLY good. No ice cream or whipped topping was used in the eating of this pie. It didn't need it. When you are ready to make your apple pies this season....don't use both crusts at once. Make a crostada, it's easier and you'll get more pie this way!

Enjoy!