Showing posts with label casserole. Show all posts

Monday, October 6, 2014

Cheesy Beef Lasagna

Hi Everyone!
Clearly, I have been spending WAAAYYY too much time with my new breakfast sandwich maker.   It is the bomb but I need to get back to some blogging, right?  Well, if I can be honest I stopped blogging mainly because I was doing (still am) Nutri System.  Kinda difficult to be making all these luscious recipes AND trying to lose weight.  So far lost 45 pounds, yet it is still is a struggle only because my husband is NOT needing to lose weight that I have to prepare dinner for him and/or us. It's very complicated...regardless onto what I made this weekend.

For this month of October, I tried a recipe provided by Allrecipes.com sponsored by PAM®.  I was glad to take this on because I use PAM® A LOT.  When you are on a diet plan that wants you to eat virtually no FAT, then I use PAM® every time I cook.  I always used it whether on a diet or not. The Allrecipe Ambassador Allstars had a nice long list of recipes to choose from and since I had many of the ingredients for Lasagna and the weather is starting to turn cold, this was an ideal choice.

Lasagna recipes are funny....some people have the only ONE family recipe they use and none other and others try different ones all the time.  Other than a white lasagna or veggie one.  Are they really THAT different?  Phhffftt.... I think that a basic meat lasagna and it's prep is pretty standard.

HOWEVER-

This one was particularly attractive because you DON'T BOIL THE NOODLES!  Yay!!!!  Just so you know....whether you use the regular noodle to boil or the special noodles that say NO BOIL....it's all the same.  You never have to boil them.  I find a lot of people don't know this.

Use what you got, it doesn't matter.  However fresh pasta (if you can find lasagna noodles in your freezer section of the grocery) are THE BOMB!  The following is the recipe I used and for your entertainment at the bottom of the recipe I will add all the little tips and tricks I do to make my lasagna making easier (I am a Family and Consumer Science teacher in case you forgot, so I have a plethora of fun tips and tricks!)

Cheesy Beef Lasagna
-recipe from Allrecipes.com
JennyMac's Lipsmack adapted changes below

PAM® Original No-Stick Cooking Spray
1 1/2 cups part-skim ricotta cheese
1/3 cup water, divided
3 tablespoons chopped fresh Italian (flat-leaf) parsley
1/2 teaspoon ground black pepper, divided
1 1/2 pounds ground chuck beef (80% lean)
3/4 cup chopped yellow onion
1 teaspoon dried Italian seasoning
1/4 teaspoon salt
2 tablespoons finely chopped garlic
2 (14.5 ounce) cans Hunt's® Petite Diced Tomatoes, undrained
2 1/2 cups Hunt's® Tomato Sauce
2 teaspoons balsamic vinegar
1/4 teaspoon crushed red pepper flakes
9 dry lasagna noodles, uncooked
2 1/2 cups shredded part-skim mozzarella cheese
1 cup Kraft® Grated Parmesan Cheese

 1. Preheat oven to 350 degrees F. Spray 13x9-inch glass baking dish with PAM® cooking spray. Combine ricotta cheese, 2 tablespoons water, parsley and 1/4 teaspoon black pepper in small bowl; set aside.

 2. Heat large skillet over medium-high heat. Add beef and onion; sprinkle with Italian seasoning, salt and remaining 1/4 teaspoon black pepper. Cook 7 minutes or until beef is crumbled and no longer pink, stirring occasionally. Add garlic; cook 1 minute more or until fragrant. Drain. Add undrained tomatoes, tomato sauce, remaining water, vinegar and red pepper flakes to skillet. Reduce heat and simmer 10 minutes, stirring occasionally.

 3. Assemble lasagna by spreading about 1 cup meat sauce over bottom of dish. Place 3 dry noodles over sauce, top with 2 cups meat sauce, half of ricotta mixture, 1 cup mozzarella cheese and 1/3 cup Parmesan cheese. Repeat layers, ending with a layer of noodles topped with remaining sauce and remaining mozzarella and Parmesan cheeses.

 4. Spray underside of aluminum foil with PAM® cooking spray; cover dish tightly with foil. Bake 45 minutes. Remove foil and bake 15 minutes more or until cheese melts and sauce is bubbly. Let stand 15 minutes before serving.

Cook's Notes:
1. First, are you going to eat this today, tomorrow or next month.  Crucial information.  Making today, spray your favorite (suggested deep dish) 9X13 pan.  Making tomorrow, spray.  BUT, if you are making for later to FREEZE, then line your favorite pan with foil, then spray with PAM.  Make your lasagna and FREEZE.  After two days of it finally being rock hard remove the lasagna from the pan with the foil so you can reuse your favorite 9X13 pan.  Why would you hold a pan hostage in the freezer like that?  Use foil and pop it out when it's frozen. Easy peasy!

2.  Ricotta cheese- 3 types, Nonfat, part skim and whole fat.  Use what you need.  If on a dietary restriction or trying to cut the fat in your diet....do whatever you NEED, don't be a slave to what a recipe dictates!  Make it so it works for YOU!  I choose part skim and I didn't use water because I used a beaten egg to help firm it up a bit.  I used a 1/4 cup liquid egg stuff it has no fat to help on the calorie content as well. As for parsley, use what you have...either dried or fresh.  I still had some from the garden this summer but use dried if that is all you have got.

3.  Beef and onion.  I used 1 pound 95% fat beef and 3 hot italian sausages and one whole onion.  GEEZ, it's a one pan meal here!  I am gonna use one whole onion....I don't have to time to peel, chop and MEASURE out 3/4 cup of onion.  I felt crazy enough to throw in the last poblano pepper from our garden too.  No crime in adding more veggies!  What is your SPICE/HEAT capacity?  As for the 3 hot italian sausages, one poblano that 1/4 tsp. hot pepper flakes did not ZING up the lasagna enough for my husband.  His only complaint was that this needed more ZIP.  I am the one with the higher tolerance for spicy foods so coming from HIM that means something.  So add more hot pepper flakes if you need to...I was trying to keep it calm for K-man and he said it was lacking so punch it up if you want.  Just taste it...you will know.

4.  Assembling the lasagna- I felt weird putting 1 cup of sauce down first but it needs it....you are using DRY noodles....so do it.  Those DRY puppies need something to slurp up and make them soft, so don't be stingy. However I did not put 3 noodles but 4!!!  It was too much exposed lasagna layers to do it that way even though I know they will expand...but they won't expand straight across perfectly separating my layers!!!  So I had plenty to spare so I went rogue and did 4 per layer.  I also wet them.  Start the absorption please!  As for the cheese I used 3 cheeses.  The recipe said CHEESY Beef Lasagna.  Two cheeses weren't cheesy enough for me.  I like the meltability of Monterey Jack cheese as opposed to the stringy-ness of the Mozzarella and the potent tang of the Parmesan.  I wanted to make my own blend.  I added an additional cup of Monterey Jack to the Mozzarella and parmesan.

5.  I sprayed the foil and covered and put it in the fridge for the next day.  I never make a lasagna and eat it the same day.  I think my lasagna tastes better this way.  Of course the cooking time will be twice as long heating it up stone cold as opposed to warm from the preparation.  All the seasonings, and herbs and garlic all just co-mingle and be better the first day....rather as leftovers when everything had time to 'sit'.  The next day, preheat your oven bake for 1 and 1/2 until bubble with foil and NO CHEESE.  Remove foil and add remaining cheese.  Bake for 15 minutes until all melted and bubbly.  Put in your garlic bread to toast.....and let it stand for another 15 minutes (this is a must!) I don't care how hungry you are and if the kids are chanting and banging their forks on the table.  The lasagna needs to set or you will not get a piece like this...

See?  No sauce running all over or cheese oozing out.  It's a must!  Just a simple spinach salad on the side.  And look at how swollen these noodles get?!

The noodle were swelling practically over the handle on the glass dish.  SO use a deep dish pan if you have one.  If not....put a cookie sheet under the dish just in case.  We will have it again tonight for dinner then the rest must go wrapped up as individual servings in the freezer.  Yes, the husband K-man has a two day limit to all leftovers.  Back when I was single, this was my lunch and dinner for a WEEK!
#AllstarsPAM

Enjoy, we did!
Wednesday, November 9, 2011

Sausage, Egg and Biscuit Casserole...

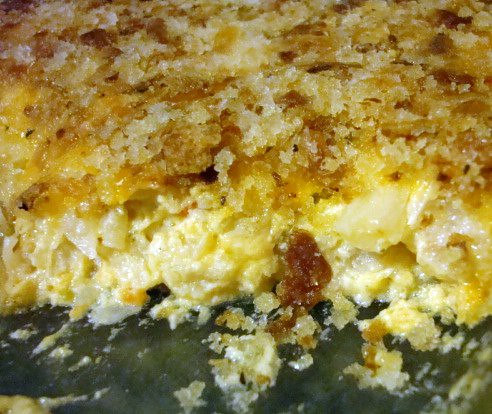
For Dinner? Yes!!!! Why do we feel the societal conformity that eggs, sausage/bacon and biscuits must be eaten for breakfast only and if we eat them for dinner that somehow it is weird or breaking some rule? Is the 'breakfast police' gonna break your door down saying "I'm sorry ma'am you are violating the law by eating waffles, pancakes or eggs for dinner!" LOL. Even though I had eggs for dinner growing up we still regard eggs for dinner as some guilty pleasure. Like eating cookies would spoil our appetite before a meal. So silly, isn't it?

I found this recipe in Cuisine Magazine . It's a magazine solely of recipes with no ads.
I tweaked a wonderfully sinful sausage and egg casserole I think you'd love.


Sausage, Egg and Biscuit Casserole

adapted from Cuisine Magazine by JennyMac Lipsmack

1 lb. sausage or bacon
7 eggs
1 cup milk
1 cup heavy cream
1 tsp. pepper
1/2 tsp. salt
8 biscuits (canned, leftover homemade ones that are a bit stale, frozen, bakery, what you like best)
1-1/2 cups shredded cheese

Preheat oven to 375 degrees. Coat a 7X11 baking dish with nonstick spray. Brown sausage or cook bacon until brown/crispy. Transfer to paper towel to absorb excess grease.

In a bowl, whisk eggs, milk, cream, salt and pepper.

Split biscuits in half and layer bottoms in greased dish. Sprinkle sausage/bacon over biscuits and top with 3/4 cup of cheese. Cover with biscuits tops and pour egg mixture over top.

TIME to make a decision.... EAT this NOW or tomorrow morning?

Eating now.....Bake for 30 minutes or until eggs are set (165 degrees) and no longer jiggly. Cover with cheese and cook for another 10 minutes. Let casserole stand for 10 minutes.

Eating tomorrow.....Cover with foil. Place and bake in preheated oven for 60 minutes until eggs are set. Uncover and place on 3/4 cup of cheese or until melted.

DELISH!!!!

Cook's Notes:
This dish also came with a sage gravy recipe. Any white sauce is butter, flour and milk or cream (depending how rich you want it) but I really felt this recipe was PLENTY rich and didn't really need it.
I was right, plenty moist, rich custardy eggs with cheese....a rich white sauce just made my arteries feel threatened to close.
K-man was OVER the moon with this tasty dish. I felt so guilty from eating it that I felt we should be eating some salad or fruit with it. K-man shook his head and said "just gimme TWO!"

Monday, July 5, 2010

Got Leftover Grilled Veggies?

As I was looking at my kitchen counter this morning....I noticed that we are being taken over by the tomatoes and zucchini here (no complaints, really) AND the fact that we have leftovers of summer grilling in the fridge as well.

I used this recipe before with great success. So whether you use fresh veggies, leftover grilled ones or a combo of each (as I did), this is a great brunch, lunch, snack or side dish. Give it a try?

(Leftover?) Garden Veggie Bake
adapted from bettycrocker.com

1 cup grated FRESH Parmesan or Romano cheese
1 cup chopped zucchini (either leftover grilled or parcooked)* see note
1/2 cup corn kernels(mine was leftover roasted with onion from the grill)
1 medium tomato, chopped (1 or 1/2 cup)
1/2 cup sauteed mushrooms, chopped
1 medium onion, chopped (1/2 cup) (omitted since onions were in the mushrooms and corn)
3/4 cup Bisquick Heart Smart® mix
1 cup fat-free (skim) milk (I used FF evaporated milk)
1/2 cup fat-free egg product or 4 egg whites
1/2 teaspoon salt (I used Paula Deen's House seasoning, love it!)
1/4 teaspoon pepper

1. Heat oven to 375°F. Spray 8-inch square (2-quart) glass baking dish with cooking spray. Sprinkle 1/4 cup of the cheese in baking dish. Top with zucchini, corn, tomato, mushrooms and onion. I sprinkled more 1/2 cup more cheese in between the veggie layers as well.
2. In small bowl, the baking mix, milk, eggs and seasonings until blended. Pour over vegetables and top with remaining 1/4 cup cheese over vegetables.
3. Bake uncovered 32 to 35 minutes or until knife inserted in center comes out clean. Let stand 5 minutes before cutting.


Cook's Notes:
  • The corn, mushrooms and tomatoes were great! Even though the zucchini was cut in small pieces, they still were a bit 'firm'. If you look at the pic above, notice the one cube on the left side and you can SEE the line of cooked versus 'less cooked'. Don't get me wrong, the zucchini wasn't CRUNCHY or hard. But if you like your zucchini tender crisp then follow the recipe as listed. I know that when I reheat this, it will be perfect.
  • I think fresh, raw onion would be not only crunchy but heavy in onion taste, if you are into it.
  • Mellowing out or making the zucchini and/or onion softer could be done easily in the microwave cooking it for a minute or two until both are 'not so raw'.
STILL TIME LEFT! ENTER MY GOOD EARTH GIVEAWAY!

Enjoy!

Wednesday, April 28, 2010

Easy Corn Pudding

I was in the mood for making some corn pudding with dinner. Holy cow, I didn't realize that I had so many corn pudding recipes....

Some with corn kernels, some not. Some with creamed corn only or some with regular corn AND creamed corn.
Some with cornmeal or some with corn muffin mix.
Some with buttermilk or some with sour cream.
ACK!!!!


And the winning corn pudding recipe choice? From She's Becoming Doughmesstic. Susan has such a myriad of recipes....she's fancy one day, down home the next, decorating cakes or catering. Emulating Julia Child....living on 100 bucks for food for the month (with a family of 3) Yep, she's a regular box of chocolates, I tell ya!

I love some recipes on occasion when you open the can/box, mix and bake. Done!

Corn Casserole
found on She's Becoming Doughmesstic....

1 (14 oz) can cream style corn
1 can whole kernel corn (I just filled the 'creamed' corn can with some frozen)
1 (8oz) package Jiffy Corn muffin mix
1 cup sour cream
1 stick butter, melted
1 egg, beaten
1-1 1/2 cups shredded Cheddar

Preheat oven to 350 degrees. In a large bowl, stir together both corns, muffin mix, egg, sour cream and melted butter. Pour into greased 8X8 dish/pan. Bake for 45 minutes, or until golden brown. Remove from oven and top with cheese. Return to oven for 5-10 minute or until cheese is melted. Let stand for at least 5 minutes and then serve warm.


Cooks Notes:
  • I've had many versions and some are on the sweet side and some more savory. Although, this was tasty and moist, I was conflicted since the cornbread part was sweet and the cheese on top was not. I normally enjoy a sweet and salty combo. Since I enjoyed the EASE and how moist and corny this was, I'd just adjust the sweetness by substituting the creamed corn with another whole corn whirred in the food processor. That should cut down on some of the sugar. Texture-wise, LOVED this recipe.
  • OR I can nix the cheese and just enjoy it's sweetness.
  • I emailed Susan from Doughmesstic for her link to the recipe and she TRIED to credit Paula Deen....so I trotted over to the 'butter queen bible' and NOPE Paula didn't use egg or cheese in my cookbook. So, good try Susan....it's a DOUGHMESSTIC recipe....unless Paula is losing her mind and makes 10 different versions....well no WONDER....

Enjoy!

Monday, April 19, 2010

Mac and Cheese?

Is it or isn't it?

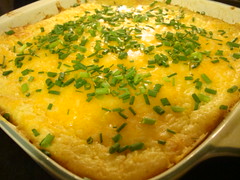
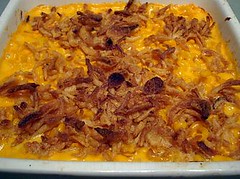
Looks are deceiving for sure. This is my FAUX Mac and Cheese made with cauliflower!

Faux Mac and Cheese
JennyMac's Lipsmack

1 bag (14 oz) frozen cauliflower
2 cups cheese, shredded (I used half sharp and half 2%)
½ c. egg substitute
1/4 cup milk/cream or Fat Free evaporated milk
1/2 tsp. salt
1/2 tsp. white pepper

TOPPING:
1 c. bread crumbs
1/2c. French’s onion rings, crushed
½ tsp. garlic powder
½ tsp. salt
½ tsp. pepper
1 Tbsp. butter

Preheat oven to 350 degrees.

Place bag of cauliflower in microwave and cook at 1 minute intervals until hot (rotating and turning over with each-took me about 4 intervals) Drain in colander and cool slightly.

In medium mixing bowl, add cheese(s) egg substitute, milk and seasoning. Mix well.

In a small bowl, mix ingredients for topping. Mix well.

Chop cauliflower into pieces that would resemble the size of elbow macaroni (I used a pair of kitchen shears in bowl). Add to egg cheese mixture and mix well.

Place cauliflower mixture into greased 1 quart casserole and top with bread crumb mixture.

Bake for 30 minutes until firm and bread crumbs are browned.

Lipsmacking Notes:
  • Very yummy! If you are going for the lower carbs, omit the crumbs. K-man loved it and he's the picky one about his Mac and Cheese!
Enjoy!

Monday, February 8, 2010

The Incredible Edible....

Egg! Have you sat down and thought about how amazing the egg is? I mean seriously! Normally people think of eggs for breakfast first. Whether alone, between two slices of bread or on top of foods....they are so yummy. I think what makes the egg so incredible is how we depend on them to bind things together. It's in our cookies and cakes. Quiches and casseroles. Salads and sandwiches. Possibilities are endless.

As a part of the Foodbuzz Tastemaker Program, I received Eggland's Best Eggs. I will NOT only show you what I made but give you the links to all my former egg posts. I just love eggs!

I saw a post from Mommy I'm Hungry for a Cheesy Ham and Hash Brown Casserole and I printed it out for future use....

After it was ready from the oven, K-man wasn't quite ready to eat due to our excessive snow shoveling. Then I got a last minute idea....let's make this casserole a little more 'brunchy'...

Look what I did....

Eggs on Cheesy Ham and Hash Browns
adapted from Mommy I'm Hungry

1 -30 oz. bag frozen, shredded hash brown potatoes
8 oz sour cream
1 can cream of chicken soup
1 small onion, diced fine
2 cups cubed ham
2 cup shredded cheddar cheese, set aside 1 cup of cheese
3-6 eggs (depending on the size of the casserole you make-see note*)

Stir all the ingredients together*.

Place into a lightly greased casserole dish (9 x 13 in). Sprinkle top with 1 C cheese. Bake at 350 degrees for 45 min - 1 hour. Let cool a bit and serve.

*Now, we didn't have a need for full amount of this casserole. Sure, most cooks would HALF the recipe. That WAS my intent. I put half the amount of the hash browns in a bowl, something distracted me and before I knew it was dumping in the WHOLE can of soup and I woke up as I was pouring in the full amount of sour cream when I said aloud "CRAP!"

Has this happened to you?

I knew that if I left the soup and sour cream as is....it was going to be too soupy yet what was I going to do with a half can of soup tainted with sour cream....UGH. Back to the freezer for the remainder of the hash browns to make the full recipe. I portioned out half in the greased casserole as I was intending to make with half the recipe. I took out a square pan, lined it with foil to put in the freezer. The next day you take the frozen casserole out of the pan and seal it all up. Take the pan and put it back into your cupboard. When you are ready to bake the casserole....unwrap and place it back into the pan with the foil you froze it in! Problem solved.

Now I have an emergency breakfast/brunch to pull out of the freezer when I need it!

Are you wondering how does the egg come into play here? I told you K-man was still shoveling when the Ham and Hash Browns were ready. I took a spoon and made 3 divots on top and cracked 3 eggs into them. I turned off the oven and slid the casserole back in for the eggs to set about 20 minutes.

We invited my neighbor over to eat with us and we cleaned it all up! Scrumptious! So hot and creamy....perfect after a snowy morning!

Thank you Foodbuzz and Thank you Eggland's Best!

Try out of some these other tasty tried and true egg dishes I've made....

Spinach and Cheese Squares
Pepperoni Pizza Quiche
Egg Bowls
Poached Eggs and Easy Hollandaise
Egg, Sausage and Cheese Biscuit Sandwiches
Easy Garden Egg Bake
Spinach Quiche
Deviled Eggs
Bacon and Egg Cups

Eggs-cellent Recipes!

Sunday, January 17, 2010

JennyMac being Cheesy....again and a Giveaway.


Although I like many types of macaroni and cheese, I don't have it so easy. K-man runs very hot and cold about it. My stats run 1-4 on him liking the M&C recipes I've made. He says he can't explain it why Mac and Cheese is just something that he doesn't HATE but just isn't fond of. WHAT? ARE YOU NUTS? Sometimes he likes it, sometimes not. Once I find the recipe he likes I am DONE. No more trying new M&C recipes.

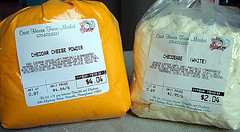
I found a new recipe on Baker's Banter (King Arthur's Flour) for Garlic-Herb Mac and Cheese and wanted to give it a try. They use a powdered white cheese powder which I already had. But I was a little apprehensive since the powder was now a BLOCK.....I had to run a hunk through food pro to measure out a 1/2 cup. Doesn't look promising. I made it and thought I am really not using this perhaps I should just toss it out after this recipe....Stay tuned for what happens after I made this.....

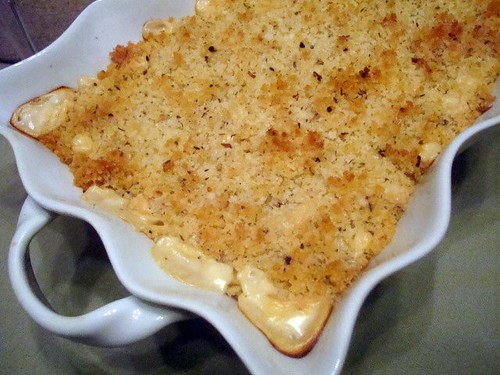
Garlic-Herb Mac and Cheese
adapted from "The Big Cheese-y" by King Arthur's Flour

8 ounces (about 2 cups) uncooked tube-type pasta (you gotta have something to hold the sauce!)
1/4 cup cake flour (they used on of their special mixes, they said you could sub flour)
2 -3/4 cups milk
1/2 cup Vermont cheese powder (see above-you can substitute a packet from any white cheddar mac and cheese box)
2 cups shredded cheddar cheese (I used Cabot's 70% reduced fat white cheddar)
1/2 teaspoon ground black pepper
1/2 teaspoon ground mustard powder
1/4 to 1/2 teaspoon salt, to taste

Topping

4 tablespoons butter
2 teaspoons garlic oil, optional
2 teaspoons Pizza Seasoning or rosemary and thyme
1 -1/2 cups Japanese panko (coarse bread crumbs)

Directions

1) Preheat the oven to 350°F. Grease a 2-quart baking dish.

2) Cook the pasta in boiling salted water until al dente (slightly firmer than you would normally eat it). Drain and rinse with cool water. Set aside.

3) In a large saucepan set over medium heat, whisk together the flour, milk, and cheese powder. Bring to a boil.

4) Remove from the heat and stir in the cheese and seasonings. Stir occasionally, until cheese is completely melted.

5) Stir the pasta into the cheese sauce. Spoon it into the baking dish.

6) Melt the butter and garlic oil together, then stir in the pizza seasoning and panko bread crumbs. Sprinkle a thick layer over the pasta and cheese.

7) Bake the casserole for 25 to 35 minutes, until bubbly and browned. Remove from the oven, and serve hot.

Yield: 5 1/2 cups, about 4 servings.

Notes:
The crumb topping was delicious and crunchy. But, as for the cheesy noodles, I am not sure if my powder had something to do with it, but something about this was off. It was creamy not gritty but I think the powder was past it's prime. I will want to make this again. WHY, you ask?

Because my mom walked in the door for dinner with a bag of 3 NEW bags of white cheese powder. Oh lord. I had a hard enough time using up ONE bag, now I have 3 new ones? GEEZ.

The Giveaway:
So, I will keep one and I want to giveaway the TWO others for those who would like to try out this white cheese powder for themselves. You certainly can just can use it just like your standard mac and cheese directions with 1/4 cup butter and 1/2 cup milk with probably 2-3 Tbsp of the powder with their cooked macaroni OR use it to follow this recipe.

SO, if you have never used cheese powder and want to play around with it or use it to try and make your own copycat cheese nips like I did, drop a comment and I will determine a winner in the next few days.


Post Script NOTE: So I used one of the new bags of Cheese using the same cheese sauce recipe for some broccoli and it ROCKED. Yum! Therefore, I am concluding that the M&C I made and said it was 'off' I was right. It WAS the cheese powder...past it's prime. Those of you hesitant to enter thinking this cheese powder isn't good. Not true!

Cheese and

Monday, November 30, 2009

Pudding or Bread, you decide....

Are you like me during Thanksgiving and HAVE to have something corn? Cornbread stuffing, corn pudding, succotash....something corn. Besides loving the taste of corn, perhaps it's something about the roots of Thanksgiving and the pilgrims learning the use of corn from the natives.....Nahhhhhh, I am not thinking THAT deep on T-day. I just love sweet yet buttery corn.

The springboard recipe I used was from Cooking Light and if you know me....I tweaked it. I am such a rebel.

Corn Pudding
adapted from Cooking Light's Colonial Corn Pudding
  • 3 cups frozen whole-kernel corn kernels, thawed and divided
  • 3/4 cup evaporated fat-free milk, divided
  • 2 tablespoons smart balance
  • 1/2 teaspoon salt
  • 1/8 teaspoon white pepper
  • Dash of freshly ground nutmeg
  • 1/2 egg substitute
  • half a box of jiffy corn muffin mix
  • Cooking spray
  • 1/2 cup (2 ounces) shredded Fat Free cheddar cheese
  • 2 teaspoons butter, melted

1. Preheat oven to 350°.

2. Combine 1 cup corn, 1/4 cup evaporated milk, and smart balance in a blender; process until smooth. Combine remaining 1/2 cup evaporated milk, salt, pepper, nutmeg, eggs in a large bowl. Stir in pureed corn mixture, remaining 2 cups corn, cheese and corn muffin mix.

3. Spoon mixture into an 8-inch square baking dish coated with cooking spray. Bake at 350° for 30 minutes or until golden brown. Serve warm.

So yummy!!! It was nice to have the fat cut significantly in the pudding yet have a bit of butter on top to make the whole thing seem so rich! This is a 'do-again' recipe for sure!


Sunday, November 29, 2009

It's not the holidays without....

Green Bean Casserole of course!

Some people find this yucky. Some people are tired of it. I never tire of it for I only have it during the holidays. So I look forward to it.

I wanted to have this for dinner, yet cut back some of the fat....yes I know green beans are vegetables and not normally have fat.....but this is another one of those evil side dishes with FAT and sodium.

Our family used cream or half and half and a can or two of the campbells mushroom soup....but the only fat in this beauty is those French's onion rings on top. I didn't bother looking at the content on the can. Somethings are better left alone and besides I wasn't eating the whole casserole, just a spoonful. Maybe next time I will try the recipes original version with sauteed onions and bread crumbs!

Lean Green Bean Casserole
adapted by Low Cal Diner

1 Package (16 OZ) Frozen Green Beans
1 Onion, chopped
1 Garlic Clove, minced
1 Teaspoon Margarine (I used smart balance)
½ Pound Fresh Mushrooms, chopped
1 Can (12 OZ) Fat Free Evaporated Milk
3T Flour
½ can of water (in milk can to thin out white if too thick)
¼ Teaspoon Poultry Seasoning
1/8 Teaspoon Pepper
1/2 tsp. salt

Topping: French's Onions Place beans in a microwavable bowl. Cover and cook on high for 7-9 minutes. Drain. In a skillet add the onions, garlic and margarine. Sauté until tender, 4 minutes. Add the mushrooms and cook until tender. Reduce heat to low, add in and stir until combined. Mix the milk and flour and add to the mushroom mixture. Add the remaining ingredients and cook for 2 minutes or until it thickens. Transfer to a 2-quart baking dish. Stir in the beans. Bake uncovered at 375° for 15 minutes. Add French’s onion rings and sprinkle over the casserole and bake for another 10 minutes.

Enjoy!

Friday, August 21, 2009

When you are feeling lazy...casserole it!


One of our favorite dinners is enchiladas. I could make them everyday and K-man would be dancing like Gene Kelly around here. Even when I tell him what's for dinner during the week, it's the day that enchiladas are made that he tells me that he was thinking about them all day at work. I guess I am doing something right!?

But let's be honest here, there are some family favorites that are a bit messy and/or time consuming. Enchiladas are one of those dinners I am talking about.

Here's how I cut some time:

1. Roasted Chickens on sale each Sunday at Harris Teeter for 4.99 = already cooked, just de-bone and shred.

2. I didn't have fresh corn tortillas around but I did have leftover tostadas to use up. It is essential to have CORN flavor. Even if you have to use leftover tortilla chips!

3. In order to soften the crunchy tostadas, you must have lots of salsa....THE GOOD STUFF, buy fresh not the jarred, room temperature, cooked junk. This cuts down from all the chopping of fresh veggies you want in your enchiladas. Find it in the refrigerated section of your grocery!

4. Make sure you have plenty of enchilada sauce for the tostadas to soak up!

5. Lots of your favorite shredded cheese!


Let's go shopping:

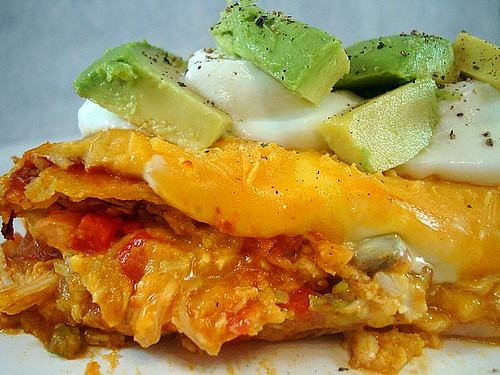
Chicken Enchilada Casserole

2 cups pre-made roasted chicken, de-boned, skinned and shredded (use whole chicken if using 13X9)
16 oz container of FRESH salsa
CORN! (either corn tortillas, tortilla chips or tostadas - not FLOUR, you need the 'corny' taste, people)
2 cups shredded cheese (I've been using Fat Free to make it healthier for us), divide into 3 piles.
15 oz. (29 oz if you are making a 13X9 sized pan) Enchilada Sauce
1 cup sour cream (we use the light version)
Chopped avocados

Preheat your oven to 350 degrees.

1. Spray your pan with non cooking spray. The casserole dish I used was 1 qt or 6X9 (don't ask me....I acquired it from mom probably circa 1970) you can double this for a 13X9 size if you like.

2. Pour about 1/4 of the can of enchilada sauce on the bottom. Just enough to cover the bottom.

3. Layer your CORN choice on the sauce. If one layer of corn tortillas, cut them in half if you need to get them to fit better. If doing chips/tostadas: cover the bottom as best as you can....don't worry about how high and uneven the chips are (we'll take care of that later).

4. Place half of the container of salsa on the layer of chips....spread gently as you can without making holes among the chips. Sprinkle 1/3 of the cheese on the salsa, then all of your 2 cups of chicken.

5. Now, take your hands and gently press down to hear a lovely CRUNCH. This way all the chips are coming in contact with the wet sauce and salsa.

6. Sprinkle with another 1/3 of the cheese then the remaining salsa. Top with the last layer of tortillas (if using the dry ones...lay palms on it and crunch gently.

7. Pour all the remaining sauce on top and around the edges. Cover with foil or if your casserole has a glass top. Bake for 30-35 minutes or until hot and bubbly. Turn off oven and place last 1/3 of cheese and put back into the oven to melt the cheese only and remove to set while you get your plates ready. You know, getting out the sour cream, chopping the avocados.

Cut slightly cooled casserole into portions and top with dollop of sour cream and avocados. Include a sprig of cilantro if you wish.


BTW- THIS IS GREAT TO MAKE THE DAY BEFORE AND KEEP IN THE FRIDGE FOR THE NEXT DAY- IT WILL ACTUALLY TASTES BETTER (like lasagna, CAPECHE)!

For those of you who may have had a 'naked' preview of this post yesterday with no pix or recipe...sorry about that. Clearly I was 'out to lunch'!

Enjoy!

Saturday, May 23, 2009

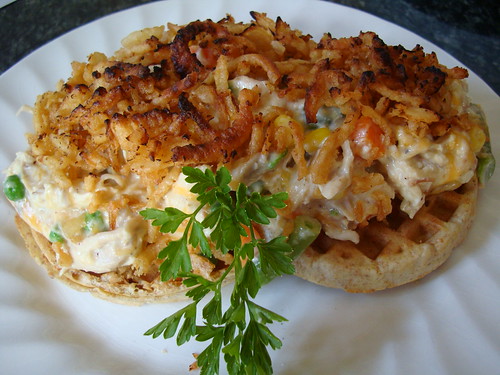
Chicken and Waffles?

Or hot chicken salad? Hard to decide...


I love buying the rotisserie chicken and shredding it up (@ 4.99 on sundays) and making fun stuff with it (enchiladas, pot pie, white lasagna). But as much as we love chicken salad...my creativity wants to kick in. I heard of Hot Chicken Salad casserole and as I searched around on allrecipes for some ideas one thing stood out....I like celery but I am not a fan of it hot and mushy. I enjoy the crunchiness of it but I guess having it in stuffing is the only way I do like it hot....

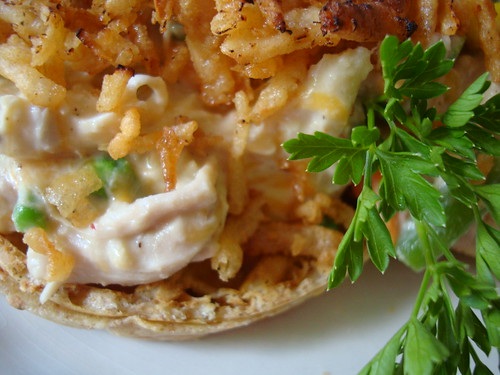
Easy Hot Chicken Salad and Waffles

2-3 cups chicken, cooked and shredded
1 can cream of chicken soup
1 cup mixed vegetables, cooked
1/4 cup mayonaisse
1 cup cheddar cheese, shredded
French's onion rings
waffles

Using your leftover waffles from breakfast or the premade toaster variety will work here, get them heated and ready to go.

In a small dish, cook your mixed veggies in the microwave (these take a little longer to cook, hence why they are not included in the next step). In a medium bowl, put your shredded chicken, soup and mayo in a bowl to mix. Nuke this creamy mixture to get it warmed through. When the veggies are cooked enough....add them to the creamy chicken mixture. Continue micrwaving the mixtures until hot. Add cheese and stir through. Heat for another minute until cheese melted.
Arrange your waffles and pile on your creamy chicken mixture and top with onion rings. Place under broiled until browned (I cheated here and used the kitchen "blow torch") lol

Friday, May 8, 2009

Quién cuida lo que se llama, él delicioso!


You gringos need a translation? LOL. "Who cares what it's called, it's delicious!" Before you comment to me in Spanish...I am not hugely bilingual....Sé un poco....I teach at a Spanish Immersion school so I've picked up alot....but who doesn't have a translator on their computer? LOL

Anyway....to the food! I have seen this dish called Chilaquiles (not sure which Latin country of origin), Mexican Lasagna (clearly an American label!) SO, if any of you were drinking too much during Cinco de Mayo to remember what you ate that night....make this...Es fantástico!

Chilaquiles
Adapted from Juan Carlos Cruz of Food Network (Calorie Commando)

I've made these for gatherings like potlucks, baby showers and everyone always asks for the recipe!!!

Yield: 8 servings

1 tablespoon canola oil
1 pound lean ground turkey
2 red onions, chopped
4 cloves garlic, smashed and chopped
1 1/2 teaspoons chili powder
1/4 teaspoon cumin powder
1 (4-ounce) can diced green chiles, not drained
1 (15-ounce) can Ro-tel tomatoes with green chiles, not drained
Salt
1 teaspoon freshly ground pepper
2 cups shredded low-fat Cheddar (I used Fat Free)
1 pint light cream cheese (I used 8oz 1/3 fat/light cream cheese)
1 cup light sour cream
8 (6-inch) corn tortillas
1 bunch green onions, sliced
1/4 cup shredded low-fat mozzarella cheese

Preheat oven to 350 degrees F.

Heat a large non-stick skillet over medium-high heat. Add 1 tablespoon canola oil to coat the bottom of the pot. Start to brown the ground turkey, then add the onions and the garlic to soften as well as infusing their flavors into the turkey. Breaking up the turkey as it cooks. When turkey is no longer pink, stir in the chili powder and cumin. Add the chiles and the tomatoes and their juices. Stir until combined. Season with salt, to taste, and pepper. Don't overcook the turkey mixture, you want it to be juicy.

In a medium bowl, combine Cheddar and cream cheese; set aside. Spray your casserole dish with non stick cooking spray (unless you use the non stick glass- AWESOME!) Line the casserole dish with half the tortillas and ladle half of the meat mixture over. Cover with half of the cheese mixture. Top with half of the green onions. Repeat layers 1 more time. Bake for 45 minutes or until bubbling. Let stand for 5 minutes before serving.

Before Baking....all layered and ready to cook....

Smells awesome, huge flavor, so moist unlike some casseroles!

Monday, April 20, 2009

Two Classics merged into one!

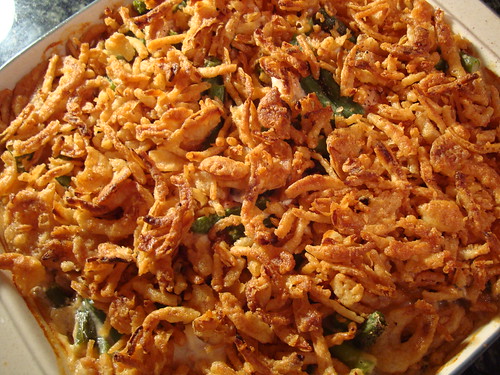
So can you tell what classic casserole this is?

Figured it out yet?

Looks like your typical green bean casserole right? Well, you are close....

I won't torture you anymore....Yes, parts of this casserole is the classic green bean and mushroom soup casserole. You probably eat this at least once a year at Thanksgiving time. Me too. Another casserole I grew up eating that my mom made was chicken and rice with mushroom soup on top...So I began to think "One casserole is missing vegetables and the other casserole is missing some protein, why can't I combine these two favorites of mine?"

And I did....

Twisted Chicken Mushroom and Green Bean Casserole*

3/4 cup rice
8oz/1 cup sliced mushrooms
1 can cream of mushroom soup
1/2 cup slivered almonds, toasted
1 cup evaporated milk
1 cup chicken broth
2 boneless chicken breasts
salt and pepper to taste
8 oz/1 cup FROZEN green beans, regardless of style -bite size pieces
1 can French's Onion Rings

Preheat your oven to 375 degrees. Grease a 9 inch glass casserole dish. Sprinkle half of the rice into the casserole dish. Place the sliced mushrooms on the rice and sprinkle the remaining rice onto the sliced mushrooms. When the mushrooms cook, they will render water which will be needed to cook the rice. In a large bowl put the can of mushroom soup and mix in evaporated milk, chicken broth, cut green beans and almonds. Cut chicken into bite sized pieces and season with salt and pepper. Add the chicken to the soup mixture and stir until combined. Put chicken and soup mixture on the rice/mushroom layer. Bake for 40 minutes (or until you test the rice to be cooked to your liking). Slide out oven rack and put on the onion rings on top. Press slightly and bake for another 5 minutes or until onion rings are browned.

*This is typically a family sized type of dinner, you can double this and put it in a 9X13 casserole. But K-man and I don't want to be eating this for over a week....


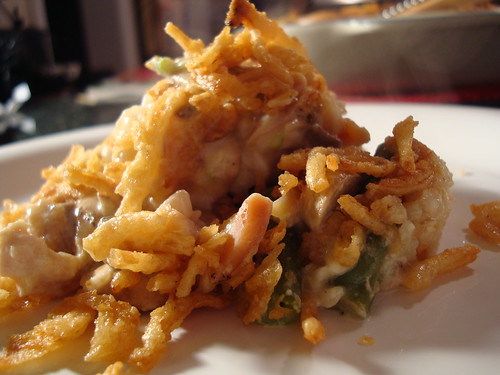
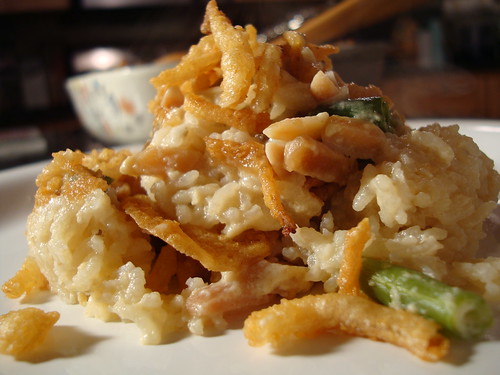
Crunchy, crispy, creamy, tender chicken and mushroomy goodness!

Friday, April 10, 2009

Comfy Companion!

As promised....we had mac and cheese with our BBQ meatballs...


OH if I had a dollar for all the different macaroni and cheese recipes out there....I'd be a millionaire! Alas, since I do not have copyrights on any of them...here I sit blogging in my middle income home instead of my personal assistant blogging for me on a beach in FIJI! Sigh.

But I did make a lower fat mac and cheese...here's how I did it:

Lower Fat Macaroni and Cheese

2 Tbsp 50/50 smart balance butter
1/4 cup flour
2-1/2 cups of lowfat milk or FF evaporated milk
1 cup 2% milkfat cheddar cheese
1/2 package Fat Free Cheese slices
1 box pasta
French's Onion Rings


Melt your smart balance and add flour to form a roux....wait until you smell the nuttiness of the flour before you add the milk. Stir until thickened.


Add cheeses. Stir until melted. Add pasta.


OMG...I just wanted to take a fork and dig in right then....

Put into casserole dish coated with nonstick spray and bake @ 375 for 20 or until bubbly.

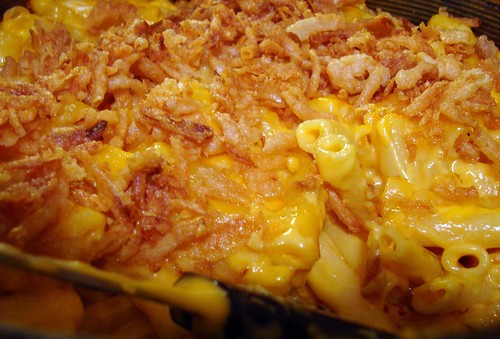
Take out of oven and add onion rings....until browned....


You will eat this and can't get over the fact it's figure friendly!

Wednesday, January 28, 2009

Comfort Food

Everyone has one type of food that comforts them. Many may say Macaroni and Cheese is their comfort food yet there are so many different recipes. I cringe when I hear someone say they only eat the brand in the blue box....(yuck- I guess I O.D.ed on them while in college). I have tried many recipes of Mac and Cheese. Some schools of thought say....add cheese to a white sauce, mix pasta and bake. Others don't use a roux-based sauce but just eggs, shredded cheese, evaporated milk and pasta. I guess it's the North vs the South. I grew up eating southern foods but I prefer the creamy versions not the congealed ones.

SO, not only do I love Mac and Cheese but I also love the store inside the restaurant Cracker Barrel. The food there is southern based (ham, biscuits and gravy, mashed taters etc.) It's pretty good when you are traveling along the highway and are starving!! So when I found this recipe on Recipezaar, thought it be fun to try their copycat. Click on the link if you'd like the recipe.

There are many things I don't use a recipe for....I know the framework of certain recipes and use recipes like these for my 'tweaking'. Of course I tweaked it along the way.
I did my roux of butter and flour. The cut the fat I used my favorite chicken base in a 1-1/2 of skim milk rather the broth and cream. I added a 1/4 tsp dry mustard. Lastly, again to cut the fat I used 3/4 cup regular cheddar cheese and 3/4 fat free cheddar cheese. Of course....I gotta have my Durkee Onions on top!!!

I give this recipe a B- because I've realized that since I used cheddar cheese....I really don't like it this way. K-man said it rocked but I don't think the cheese melts as well and that TANG. I should have used the colby...(but it's what I had in stock) The recipe my 8th graders use is:

Macaroni and Cheese Lab
(from my school website)

NOODLES
1. Bring 3 cups of water to boil. Add a drop of oil. (I only use salt when I cook pasta now)
2. When water is boiling add 1 cup of macaroni and cook for 7 minutes.
3. Drain noodles in a colander.
4. Add macaroni to cheese saucer when it is ready.

CHEESE

1. Over medium heat, melt 2 Tbsp. of butter/margarine.
2. Remove pan from heat:


Stir in: 2 Tbsp. flour
1/2 tsp. dry mustard
1/2 tsp. salt
dash pepper

3. Turn on heat. Gradually add 1 c. of milk. (warming it in the microwave is much better)
4. Bring to a boil, THEN REMOVE FROM HEAT.
5. Stir in 3/4 c. cheese and add cooked pasta.
6. Pour into shallow casserole dish (we always use the disposable 8X8 pan from the grocery) and sprinkle with remaining 1/4 c. cheese.

*Bake @ 375 degrees for 10-15 minutes or until slightly brown and crusty around edges. YUMMY!!

*Keep in mind for class use, we have to prepare the recipe, cover it and store it in the fridge. Two days later, I put them in the oven before class starts, they set their tables and eat their hard work. I find their projects having been in the fridge for 1-2 days produce better product (that whole marrying of flavors thing!)

NOW SPEAKING OF THE SUBJECTS OF CHEESE AND CRACKER BARREL RESTAURANT...

This other copycat from Cracker Barrel, I have made before and I DON'T tweak it cuz it ROCKS as is!

Cracker Barrel Copycat Hash Browns Casserole (also from Recipezaar)

* 1 (2 lb) package frozen hash browns
* 16 ounces sour cream
* 1 (10 3/4 ounce) can cream of chicken soup
* 1/2 cup butter
* 1/2 cup chopped onion
* 2 cups shredded sharp cheddar cheese

1. Preheat oven to 350 degrees.
2. Place potatoes in a greased 9x13 baking dish.
3. Season with salt and pepper.
4. Melt butter.
5. In a bowl stir together soup, butter, sour cream, and onion.
6. Pour soup mixture evenly over hashbrowns.
7. Sprinkle with cheese.
8. Bake in 350 degree preheated oven for about 45 minutes.

There are some recipes.... you just don't mess with perfection....